2015 JEEP RENEGADE USB
[x] Cancel search: USBPage 106 of 220

TIP:Press the Browse button on the touchscreen to see all of the music on your
iPod®or USB device. Your Voice Command must matchexactlyhow the artist,
album, song and genre information is displayed.
Uconnect®offers connections via USB, SD, Bluetooth®and auxiliary ports (If
Equipped). Voice operation is only available for connected USB and iPod®devices.
(Remote CD player optional and not available on all vehicles.)
Phone
Making and answering hands-free phone calls is easy with Uconnect®. When the
Phonebook button is illuminated on your touchscreen, your system is ready.
U.S./Canadian residents can visit
• UconnectPhone.com to check mobile device and feature compatibility and to find
phone pairing instructions.
Push the Phone button. After the beep, say one of the following commands…
•CallJohn Smith
•Dial123-456-7890 and follow the system prompts
•Redial(call previous outgoing phone number)
•Call back(call previous incoming phone number)
Uconnect® 5.0 Media
ELECTRONICS
104
Page 113 of 220

• SiriusXM services require subscriptions, sold separately after the 12-month trial
included with the new vehicle purchase.If you decide to continue your service at the
end of your trial subscription, the plan you choose will automatically renew and bill at
then-current rates until you call SiriusXM at 1-866-635-2349 for U.S. residents and
1-888-539-7474 for Canadian residents to cancel. See SiriusXM Customer Agreement
for complete terms at www.siriusxm.com for U.S. residents and www.siriusxm.ca for
Canadian residents.All fees and programming subject to change. Our satellite
service is available only to those at least 18 and older in the 48 contiguous USA
and D.C. Our Sirius satellite service is also available in PR (with coverage
limitations). Our Internet radio service is available throughout our satellite service
area and in AK and HI. © 2014 Sirius XM Radio Inc. Sirius, XM and all related
marks and logos are trademarks of Sirius XM Radio Inc.
MEDIA HUB – PLAYING iPod®/USB/MP3 DEVICES
There are many ways to play music from iPod®/MP3 players or USB devices through
your vehicle's sound system.
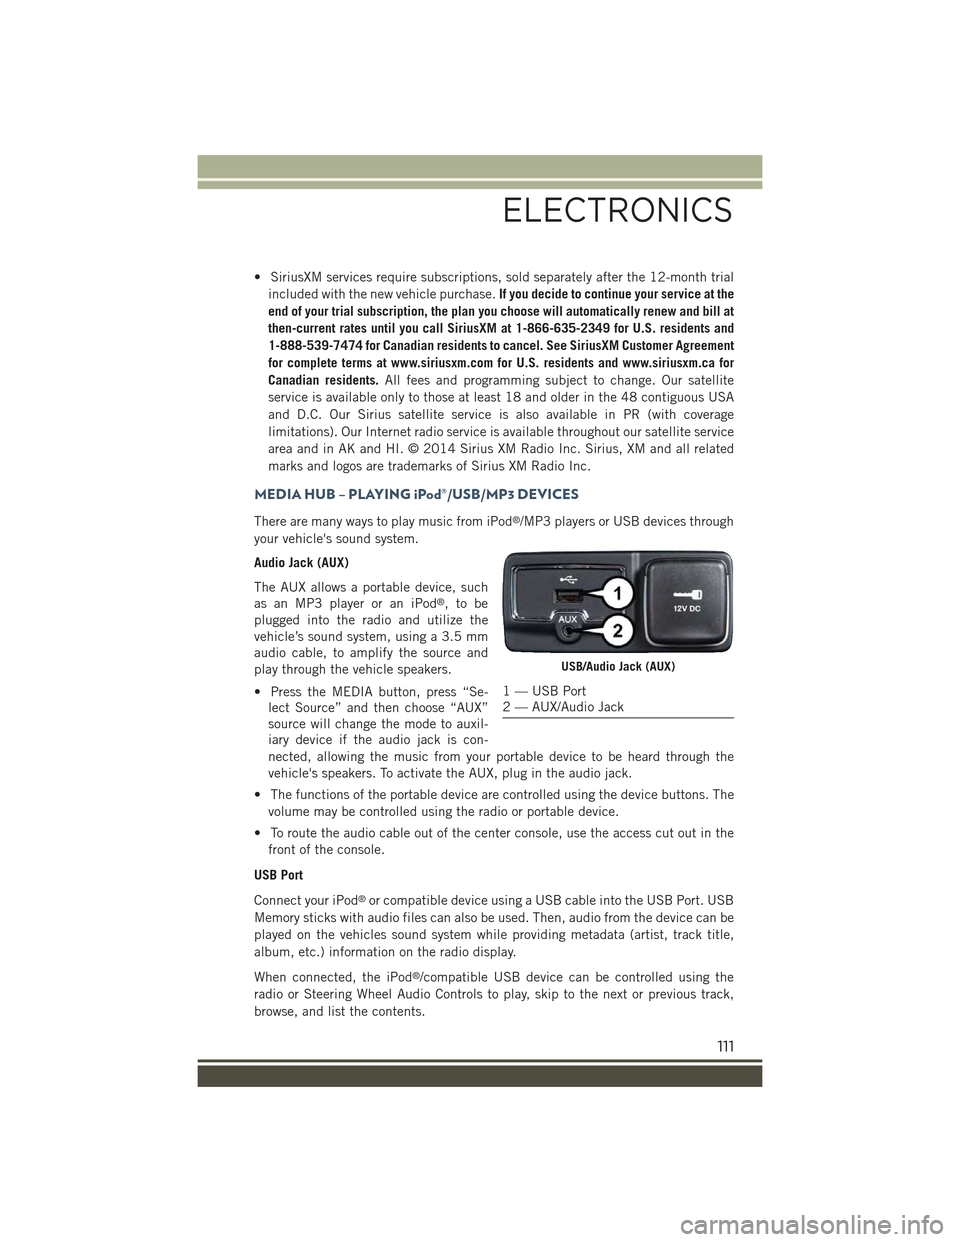
Audio Jack (AUX)
The AUX allows a portable device, such
as an MP3 player or an iPod®,tobe
plugged into the radio and utilize the
vehicle’s sound system, using a 3.5 mm
audio cable, to amplify the source and
play through the vehicle speakers.
• Press the MEDIA button, press “Se-
lect Source” and then choose “AUX”
source will change the mode to auxil-
iary device if the audio jack is con-
nected, allowing the music from your portable device to be heard through the
vehicle's speakers. To activate the AUX, plug in the audio jack.
• The functions of the portable device are controlled using the device buttons. The
volume may be controlled using the radio or portable device.
• To route the audio cable out of the center console, use the access cut out in the
front of the console.
USB Port
Connect your iPod®or compatible device using a USB cable into the USB Port. USB
Memory sticks with audio files can also be used. Then, audio from the device can be
played on the vehicles sound system while providing metadata (artist, track title,
album, etc.) information on the radio display.
When connected, the iPod®/compatible USB device can be controlled using the
radio or Steering Wheel Audio Controls to play, skip to the next or previous track,
browse, and list the contents.
USB/Audio Jack (AUX)
1 — USB Port2 — AUX/Audio Jack
ELECTRONICS
111
Page 114 of 220

The USB device battery charges when plugged into the USB port (if supported by the
specific device).
• To route the USB/iPod®cable out of the center console, use the access cut out.
NOTE:
• When connecting your iPod®device for the first time, the system may take several
minutes to read your music, depending on the number of files. For example, the
system will take approximately five minutes for every 1,000 songs loaded on the
device. Also during the reading process, the Shuffle and Browse functions will be
disabled. This process ensures the full use of your iPod®features and only
happens the first time it is connected. After the first time, the reading process of
your iPod®will take considerably less time unless changes are made or new songs
are added to the play list.
• The USB port supports certain Mini, Classic, Nano, Touch, and iPhone®devices.
The USB port also supports playing music from compatible external USB Mass
Storage Class memory devices. Some iPod®software versions may not fully
support the USB port features. Please visit Apple’s website for iPod®software
updates.
Bluetooth® Streaming Audio
If equipped with Uconnect®Voice Command, your Bluetooth®-equipped iPod®
devices, cell phones or other media players, may also be able to stream music to your
vehicle's sound system. Your connected device must be Bluetooth®-compatible, and
paired with your system (see Uconnect®Phone for pairing instructions). You can
access the music from your connected Bluetooth®device by pressing the
“Bluetooth®” button on the touchscreen while in Media mode.
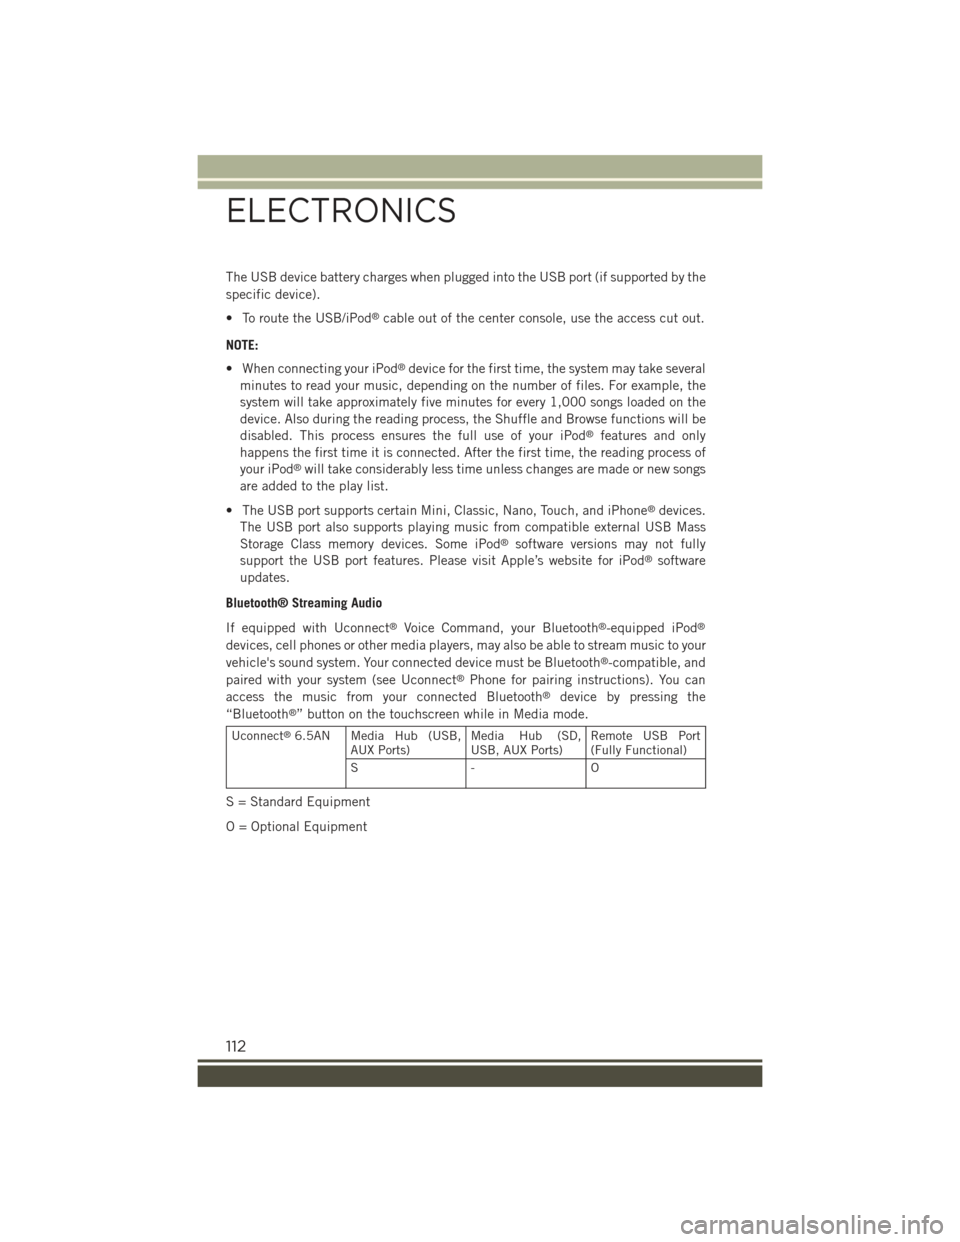
Uconnect®6.5AN Media Hub (USB,AUX Ports)Media Hub (SD,USB, AUX Ports)Remote USB Port(Fully Functional)
S- O
S = Standard Equipment
O = Optional Equipment
ELECTRONICS
112
Page 123 of 220

Media
Uconnect®offers connections via USB, Bluetooth®and auxiliary ports (if equipped).
Voice operation is only available for connected USB and iPod®devices. (CD player
optional and not available on all vehicles.)
Push the VR button. After the beep, say one of the following commands and
follow the prompts to switch your media source or choose an artist.
•Change sourceto Bluetooth®
•Change sourceto iPod®
•Change sourceto USB
•Play artistBeethoven;Play albumGreatest Hits;Play songMoonlight Sonata;Play
genreClassical
TIP:Press the Browse button on the touchscreen to see all of the music on youriPod®or USB device. Your Voice Command must matchexactlyhow the artist,
album, song and genre information is displayed.
Uconnect® 6.5A/6.5AN Media
ELECTRONICS
121
Page 140 of 220

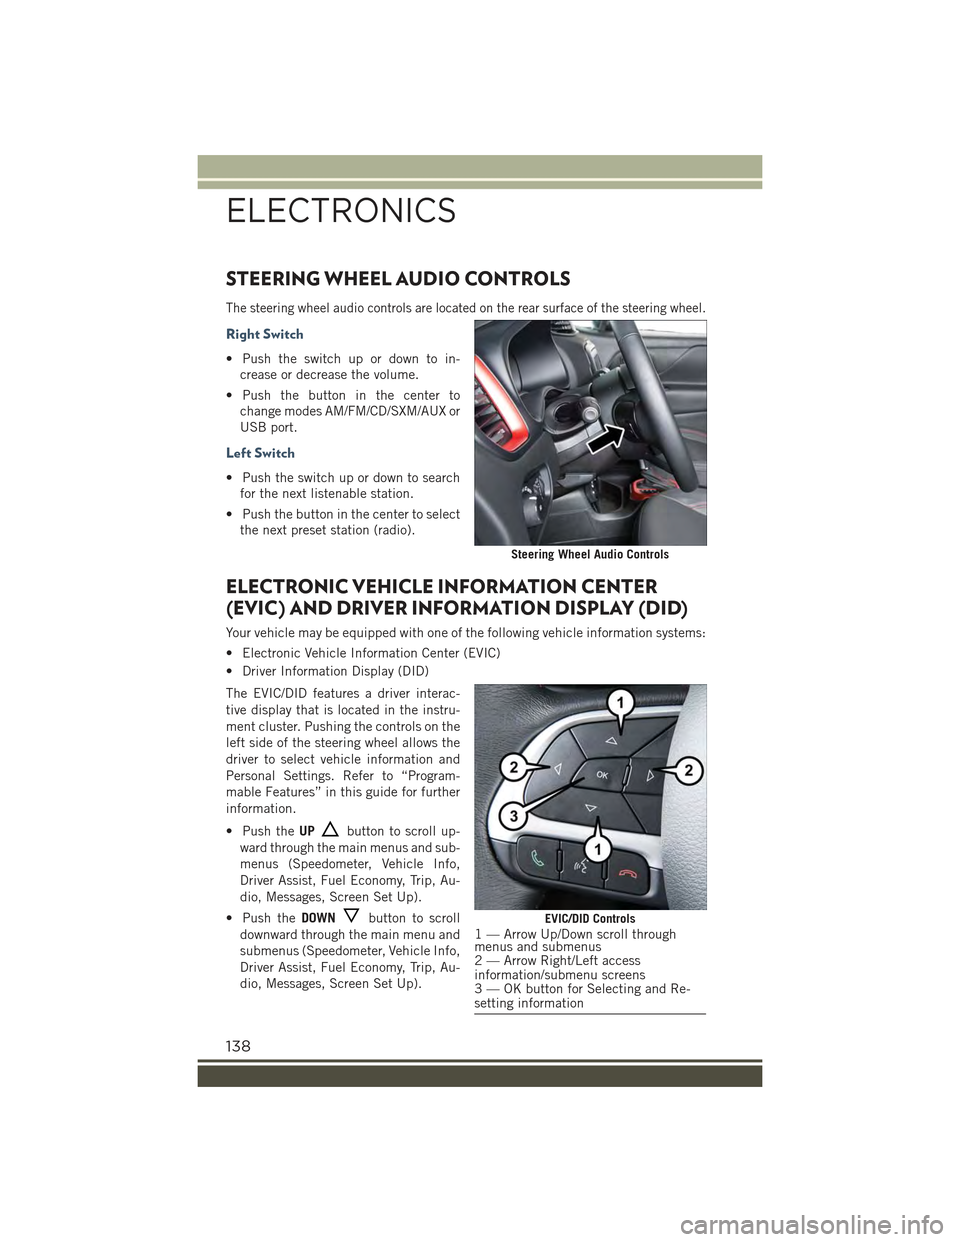
STEERING WHEEL AUDIO CONTROLS
The steering wheel audio controls are located on the rear surface of the steering wheel.
Right Switch
• Push the switch up or down to in-
crease or decrease the volume.
• Push the button in the center to
change modes AM/FM/CD/SXM/AUX or
USB port.
Left Switch
• Push the switch up or down to search
for the next listenable station.
• Push the button in the center to select
the next preset station (radio).
ELECTRONIC VEHICLE INFORMATION CENTER
(EVIC) AND DRIVER INFORMATION DISPLAY (DID)
Your vehicle may be equipped with one of the following vehicle information systems:
• Electronic Vehicle Information Center (EVIC)
• Driver Information Display (DID)
The EVIC/DID features a driver interac-
tive display that is located in the instru-
ment cluster. Pushing the controls on the
left side of the steering wheel allows the
driver to select vehicle information and
Personal Settings. Refer to “Program-
mable Features” in this guide for further
information.
• Push theUPbutton to scroll up-
ward through the main menus and sub-
menus (Speedometer, Vehicle Info,
Driver Assist, Fuel Economy, Trip, Au-
dio, Messages, Screen Set Up).
• Push theDOWNbutton to scroll
downward through the main menu and
submenus (Speedometer, Vehicle Info,
Driver Assist, Fuel Economy, Trip, Au-
dio, Messages, Screen Set Up).
Steering Wheel Audio Controls
EVIC/DID Controls1 — Arrow Up/Down scroll throughmenus and submenus2 — Arrow Right/Left accessinformation/submenu screens3 — OK button for Selecting and Re-setting information
ELECTRONICS
138
Page 143 of 220

Average Consumption
• (MPG, or l/ 100km or km/l)
Travel Time
• (Hour/Minute)
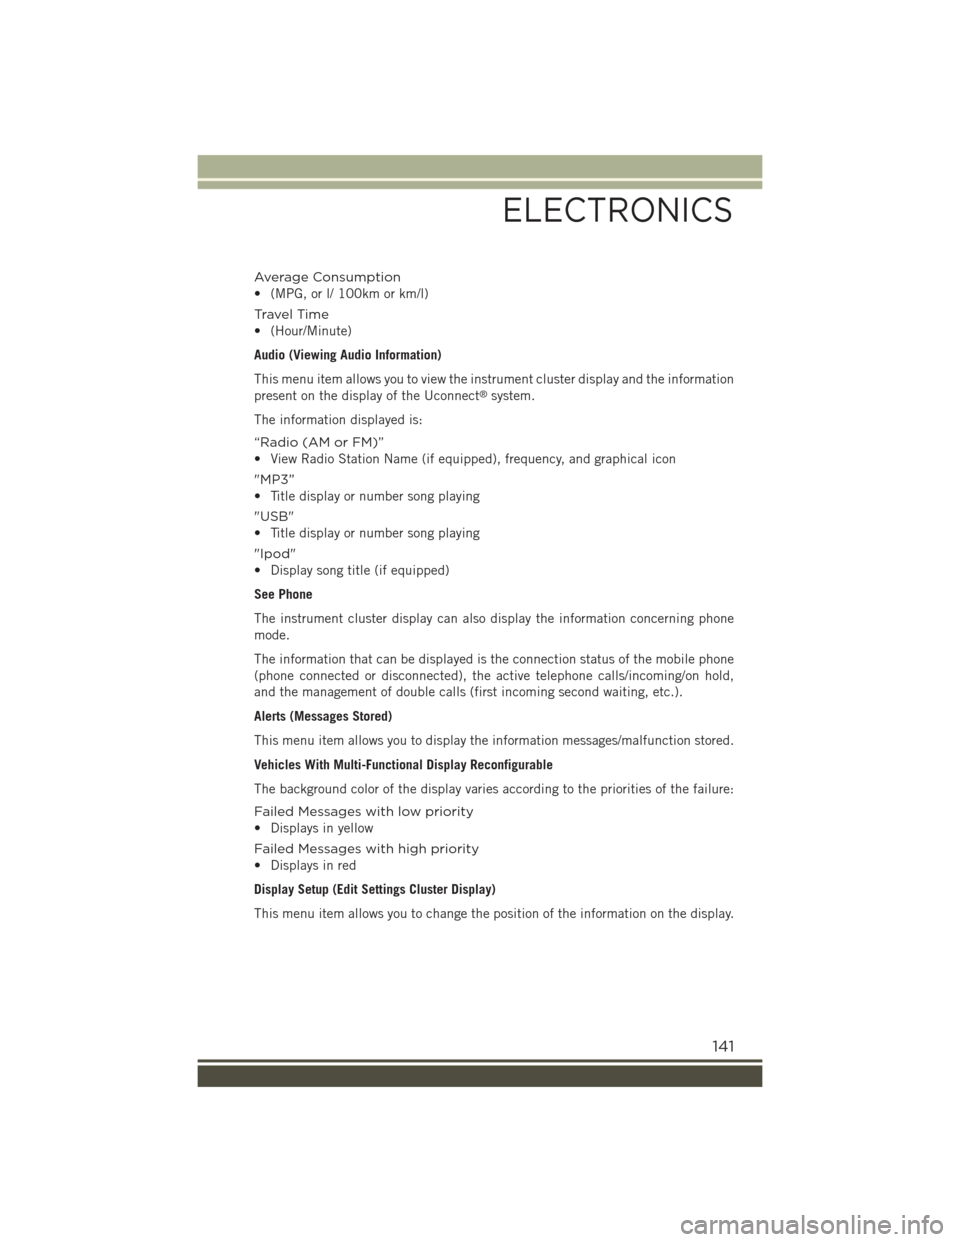
Audio (Viewing Audio Information)
This menu item allows you to view the instrument cluster display and the information
present on the display of the Uconnect®system.
The information displayed is:
“Radio (AM or FM)”
• View Radio Station Name (if equipped), frequency, and graphical icon
"MP3”
• Title display or number song playing
"USB"
• Title display or number song playing
"Ipod"
• Display song title (if equipped)
See Phone
The instrument cluster display can also display the information concerning phone
mode.
The information that can be displayed is the connection status of the mobile phone
(phone connected or disconnected), the active telephone calls/incoming/on hold,
and the management of double calls (first incoming second waiting, etc.).
Alerts (Messages Stored)
This menu item allows you to display the information messages/malfunction stored.
Vehicles With Multi-Functional Display Reconfigurable
The background color of the display varies according to the priorities of the failure:
Failed Messages with low priority
• Displays in yellow
Failed Messages with high priority
• Displays in red
Display Setup (Edit Settings Cluster Display)
This menu item allows you to change the position of the information on the display.
ELECTRONICS
141
Page 199 of 220

Body Computer Fuse Center
The controller is located at the left side of the steering column at the bottom of the
instrument panel.
For the fuse replacement see your authorized dealer.
CavityMini FuseDescription
F317.5 Amp Brown Flashes/Electrical MovementFront Seats/Fan Air Condi-tioning
F3325 Amp Clear Power Window Front (driverside)
F3425 Amp Clear Power Window Front (passen-ger side)
F3620 Amp Yellow Supply Uconnect®System,Air Conditioning, Alarm,Power Folding Outside Mir-rors, USB Port
F3710 Amp Red System Power Forward Colli-sion Warning Plus, All WheelDrive (AWD), IPC
F3820 Amp Yellow Central Locking
F427.5 Amp Brown Power Under Lock and Key
F4320 Amp Yellow Bi-directional Pump Washer
F4725 Amp Clear Power Rear Window (driverside)
F4825 Amp Clear Power Rear Window (passen-ger side)
F497.5 Amp Brown Supply ParkSense, SpotLights Front Dome, Mirror,Electric Motor RetractableRoof, Heated Front Seats,Stabilizer Battery, ESC Sys-tem, ESL
F507.5 Amp Brown Supply Air Bag
F517.5 Amp Brown Alarm Power, Front CourtesyLight, Air Conditioning Com-pressor, Brake Pedal Switch(NC), Plaque AutomaticTransmission, Compass, RearCamera, Leveling Headlights,Air Conditioning
F537.5 Amp Brown Supply IPC/Starter Device/System Keyless Enter-N-Go™
F9415 Amp Blue Power Socket
MAINTAINING YOUR VEHICLE
197
Page 212 of 220

Cleaning.............187
Delay . . . . . . . . . . . . . . . .36
High Beam/Low Beam Select
Switch...............36
Lights On Reminder . . . . . . . .35
Passing...............36
Switch...............34
Time Delay.............36
Head Restraints............25
Head Rests . . . . . . . . . . . . . . .25Heated Mirrors...........43,45High Beam Indicator.........162High Beam/Low Beam Select (Dimmer)Switch................36Hood Prop . . . . . . . . . . . . . . .181Hood Release.............181
Identifying Your Radio.........74Instrument Cluster............8
Instrument Cluster Warning Lights..161Instrument Panel Cover.......187Instrument Panel Lens Cleaning . .187Interior and Instrument Lights.....7Interior Appearance Care.......187Intermittent Wipers (Delay Wipers) . .37Introduction...............2In Vehicle FeaturesUconnect®Access . . . . . . . . .82Inverter Outlet (115V)........146Inverter, Power............146iPod®/USB/MP3 ControlBluetooth®Streaming Audio . .128
Jacking Instructions.........170Jack Location.............168Jack Operation.........168, 170Jump Starting.............174
Key Fob . . . . . . . . . . . . . . . . .10Arm The Alarm...........13Disarm The Alarm.........13Keyless Enter-N-GoLock/Unlock . . . . . . .14, 15, 16Keyless Enter-N-Go™.........14Key Fob . . . . . . . . . . . . . . .14Passive Entry............14Remote Control...........14
Lane Change and Turn Signals . . . .37
LaneSense . . . . . . . . . . . . . . .55
Lap/Shoulder Belts...........17
Liftgate Window Wiper/Washer....38
Lights
Automatic Headlights.......35
Daytime Running.........35
Dimmer Switch, Headlight....36
Engine Temperature Warning . .159
Fog . . . . . . . . . . . . . .35, 162Headlights.............34Headlights On Reminder.....35Headlight Switch.........34High Beam . . . . . . . . . . . . .36High Beam Indicator......162High Beam/Low Beam Select . .36
Hill Descent Control Indicator..162Instrument Cluster........34Lights On Reminder........35Low Fuel . . . . . . . . . . . . .156Passing...............36Security Alarm..........162Tu r n S i g n a l . . . . . . . . . . . . . 3 7Lubrication, Body...........187
Maintenance Free Battery......187Maintenance, General........187Maintenance Procedures.......187Maintenance Record.........193Maintenance Schedule........187Malfunction Indicator Light (CheckEngine) . . . . . . . . . . . . . . .161Master Cylinder (Brakes).......187MirrorsHeated.............43,45MOPAR®Accessories.........206
Navigation...............114New Vehicle Break-In Period.....34
Octane Rating, Gasoline (Fuel) . . .186Oil Change Indicator.........163Oil, Engine . . . . . . . . . . .186, 187Capacity..............186Change Interval.........187Checking.............187Disposal..............187Filter............186, 187
INDEX
210