Page 80 of 653
2-63
Safety system of your vehicle
2
Air bag collision sensors
(1) SRS control module/Rollover sensor
(2) Front impact sensor (3) Side impact sensor (4) Side impact sensor
OLMB033106/OLMB033066/OLMB033085/OLM039043/OLM039044
To reduce the risk of an air bag
deploying unexpectedly and
causing serious injury or death:
Do not hit or allow any objects to impact the locations where
air bags or sensors areinstalled.
Do not perform maintenance
on or around the air bag sen-
sors. If the location or angle of
the sensors is altered, the air
bags may deploy when they
should not or may not deploy
when they should.
Do not install bumper guards
or replace the bumper with a
non-genuine HYUNDAI parts.
This may adversely affect the
collision and air bag deploy-
ment performance.
Place the ignition switch in the
LOCK/OFF or ACC position
when the vehicle is being
towed to prevent inadvertent
air bag deployment.
Have all repairs conducted by
an authorized HYUNDAI dealer.
WARNING
Page 95 of 653
3-9
Convenient features of your vehicle
3
Start-up
You can start the engine without
inserting the key. For detailed infor-
mation refer to the Engine Start/Stop
button in chapter 5.
Mechanical key
If the Smart Key does not operate
normally, you can lock or unlock the
door by using the mechanical key.
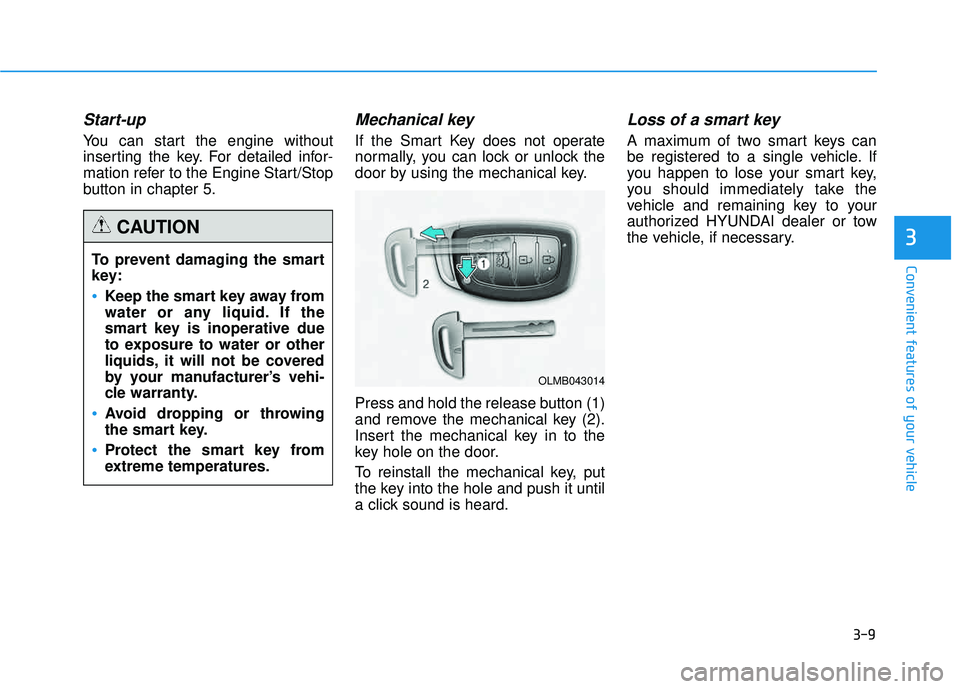
Press and hold the release button (1)
and remove the mechanical key (2).
Insert the mechanical key in to the
key hole on the door.
To reinstall the mechanical key, put
the key into the hole and push it until
a click sound is heard.
Loss of a smart key
A maximum of two smart keys can
be registered to a single vehicle. If
you happen to lose your smart key,
you should immediately take the
vehicle and remaining key to your
authorized HYUNDAI dealer or tow
the vehicle, if necessary.
To prevent damaging the smart
key:
Keep the smart key away from
water or any liquid. If the
smart key is inoperative due
to exposure to water or other
liquids, it will not be covered
by your manufacturer’s vehi-
cle warranty.
Avoid dropping or throwing
the smart key.
Protect the smart key from
extreme temperatures.
CAUTION
OLMB043014
Page 99 of 653
3-13
Convenient features of your vehicle
Operating door locks from
outside the vehicle
Mechanical key
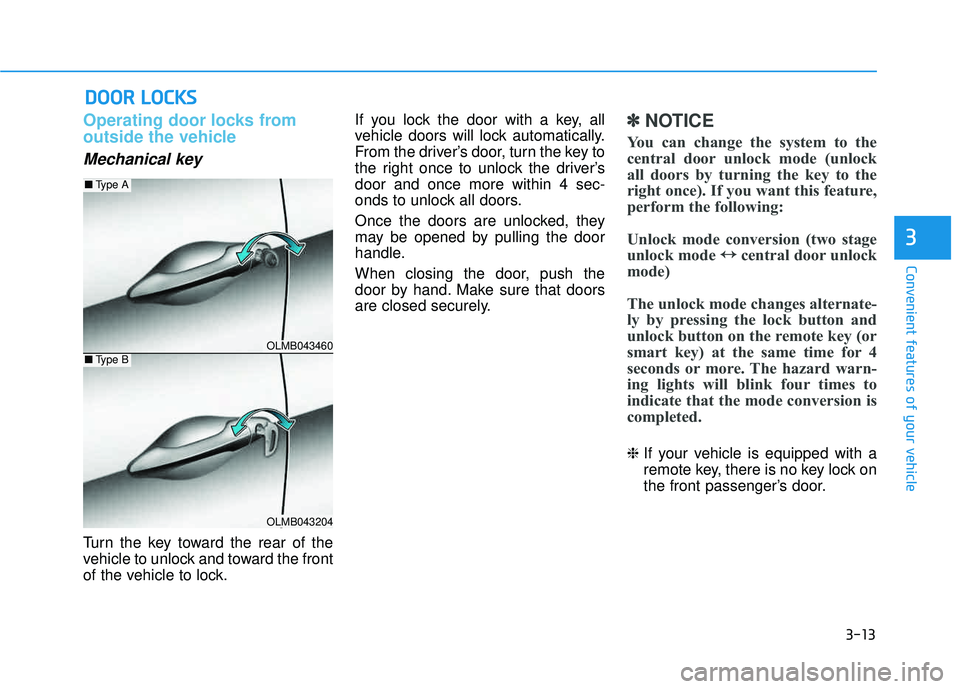
Turn the key toward the rear of the
vehicle to unlock and toward the front
of the vehicle to lock.If you lock the door with a key, all
vehicle doors will lock automatically.
From the driver’s door, turn the key to
the right once to unlock the driver’sdoor and once more within 4 sec-
onds to unlock all doors.
Once the doors are unlocked, they
may be opened by pulling the door
handle.
When closing the door, push the
door by hand. Make sure that doors
are closed securely.
✽✽
NOTICE
You can change the system to the
central door unlock mode (unlock
all doors by turning the key to the
right once). If you want this feature,
perform the following:
Unlock mode conversion (two stage
unlock mode ↔
↔
central door unlock
mode)
The unlock mode changes alternate-
ly by pressing the lock button and
unlock button on the remote key (or
smart key) at the same time for 4
seconds or more. The hazard warn-
ing lights will blink four times to
indicate that the mode conversion is
completed.
❈ If your vehicle is equipped with a
remote key, there is no key lock on
the front passenger’s door.
DDOO OORR LL OO CCKK SS
3
OLMB043460
OLMB043204
■ Type A
■Type B
Page 108 of 653
3-22
Convenient features of your vehicle
Tachometer
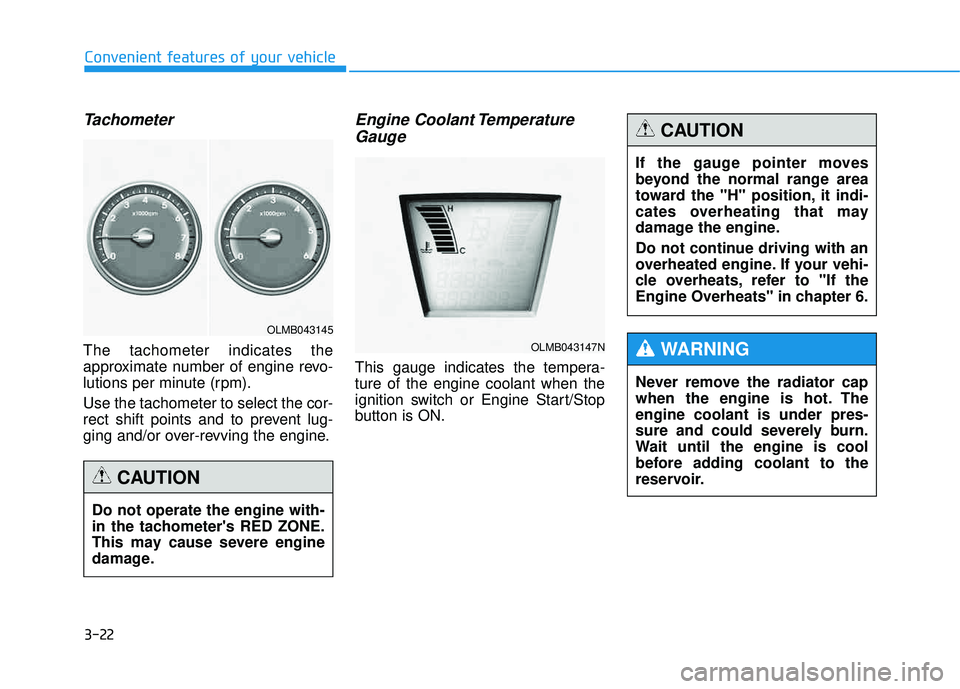
The tachometer indicates the
approximate number of engine revo-
lutions per minute (rpm). Use the tachometer to select the cor-
rect shift points and to prevent lug-
ging and/or over-revving the engine.
Engine Coolant TemperatureGauge
This gauge indicates the tempera-ture of the engine coolant when the
ignition switch or Engine Start/Stop
button is ON.
Do not operate the engine with-
in the tachometer's RED ZONE.
This may cause severe engine
damage.
CAUTION
OLMB043145
OLMB043147N
If the gauge pointer moves
beyond the normal range area
toward the "H" position, it indi-
cates overheating that may
damage the engine.
Do not continue driving with an
overheated engine. If your vehi-
cle overheats, refer to "If the
Engine Overheats" in chapter 6.
CAUTION
Never remove the radiator cap
when the engine is hot. Theengine coolant is under pres-
sure and could severely burn.
Wait until the engine is cool
before adding coolant to the
reservoir.
WARNING
Page 116 of 653
3-30
Convenient features of your vehicle
Parking brake & brakefluid warning light
Parking brake warning
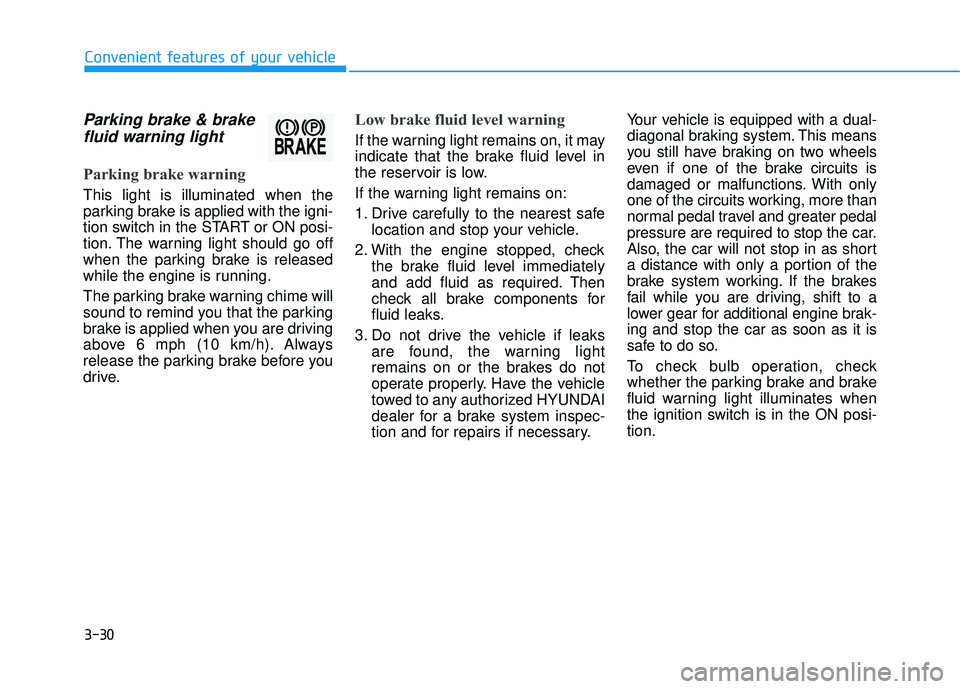
This light is illuminated when the
parking brake is applied with the igni-
tion switch in the START or ON posi-
tion. The warning light should go off
when the parking brake is released
while the engine is running.
The parking brake warning chime will
sound to remind you that the parking
brake is applied when you are driving
above 6 mph (10 km/h). Always
release the parking brake before you
drive.
Low brake fluid level warning
If the warning light remains on, it may
indicate that the brake fluid level in
the reservoir is low.
If the warning light remains on:
1. Drive carefully to the nearest safe location and stop your vehicle.
2. With the engine stopped, check the brake fluid level immediately
and add fluid as required. Then
check all brake components for
fluid leaks.
3. Do not drive the vehicle if leaks are found, the warning light
remains on or the brakes do not
operate properly. Have the vehicle
towed to any authorized HYUNDAI
dealer for a brake system inspec-
tion and for repairs if necessary. Your vehicle is equipped with a dual-
diagonal braking system. This means
you still have braking on two wheels
even if one of the brake circuits is
damaged or malfunctions. With only
one of the circuits working, more than
normal pedal travel and greater pedal
pressure are required to stop the car.
Also, the car will not stop in as short
a distance with only a portion of the
brake system working. If the brakes
fail while you are driving, shift to a
lower gear for additional engine brak- ing and stop the car as soon as it is
safe to do so.
To check bulb operation, check
whether the parking brake and brake
fluid warning light illuminates when
the ignition switch is in the ON posi-tion.
Page 128 of 653
3-42
Electric Power Steering (EPS)
This system assists you with steering
the vehicle.
If the engine is turned off or if the
EPS becomes inoperative, you may
still steer the vehicle, but it will
require increased steering effort.
Should you notice any change in the
effort required to steer during normal
vehicle operation, have the EPS
checked by an authorized HYUNDAI
dealer.
✽✽NOTICE
The steering effort may be high immediately after placing the igni-
tion switch in the ON position.
This happens as the system per-
forms the EPS system diagnostics.
When the diagnostics is complet-
ed, the steering wheel will return
to its normal condition.
A click noise may be heard from the EPS relay after the ignition
switch is placed in the ON or
LOCK/OFF position.
A motor noise may be heard when the vehicle is at a stop or at a low
driving speed.
When you operate the steering wheel in low temperature, abnor-
mal noise may occur. If tempera-
ture rises, the noise will disappear.
This is a normal condition.Tilt steering/Telescope steering
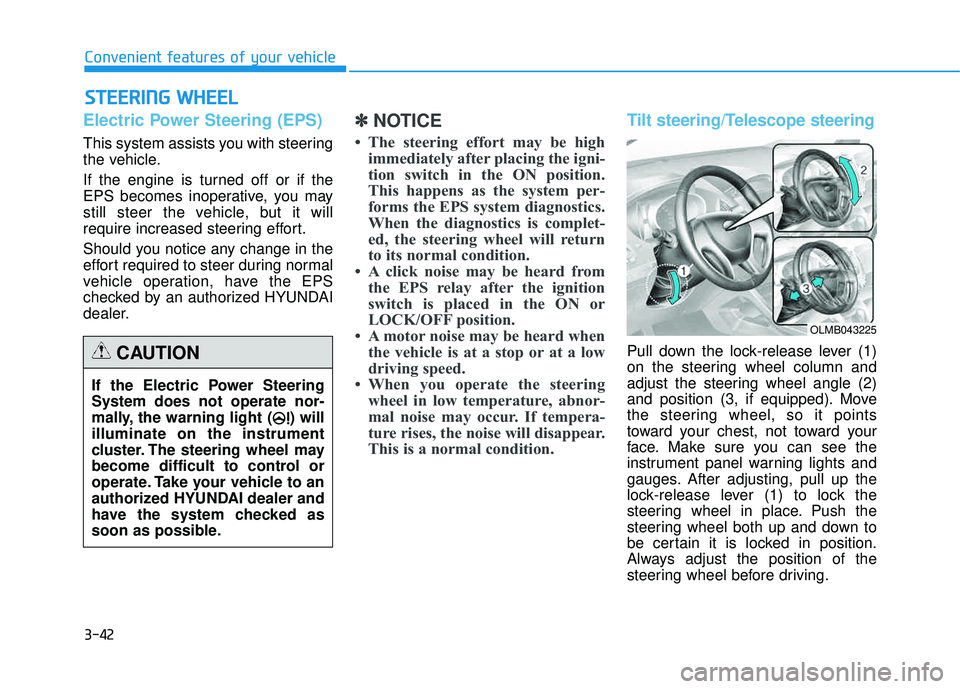
Pull down the lock-release lever (1)
on the steering wheel column and
adjust the steering wheel angle (2)
and position (3, if equipped). Move
the steering wheel, so it points
toward your chest, not toward your
face. Make sure you can see the
instrument panel warning lights and
gauges. After adjusting, pull up the
lock-release lever (1) to lock the
steering wheel in place. Push the
steering wheel both up and down to
be certain it is locked in position.
Always adjust the position of the
steering wheel before driving.
SSTT EEEERR IINN GG WW HHEEEELL
Convenient features of your vehicle
If the Electric Power Steering System does not operate nor-
mally, the warning light ( ) willilluminate on the instrument
cluster. The steering wheel may
become difficult to control or
operate. Take your vehicle to an
authorized HYUNDAI dealer and
have the system checked as
soon as possible.
CAUTION
OLMB043225
Page 130 of 653
3-44
Convenient features of your vehicle
Interior rearview mirrors
Before you start driving, adjust the
rearview mirror to the center on the
view through the rear window.
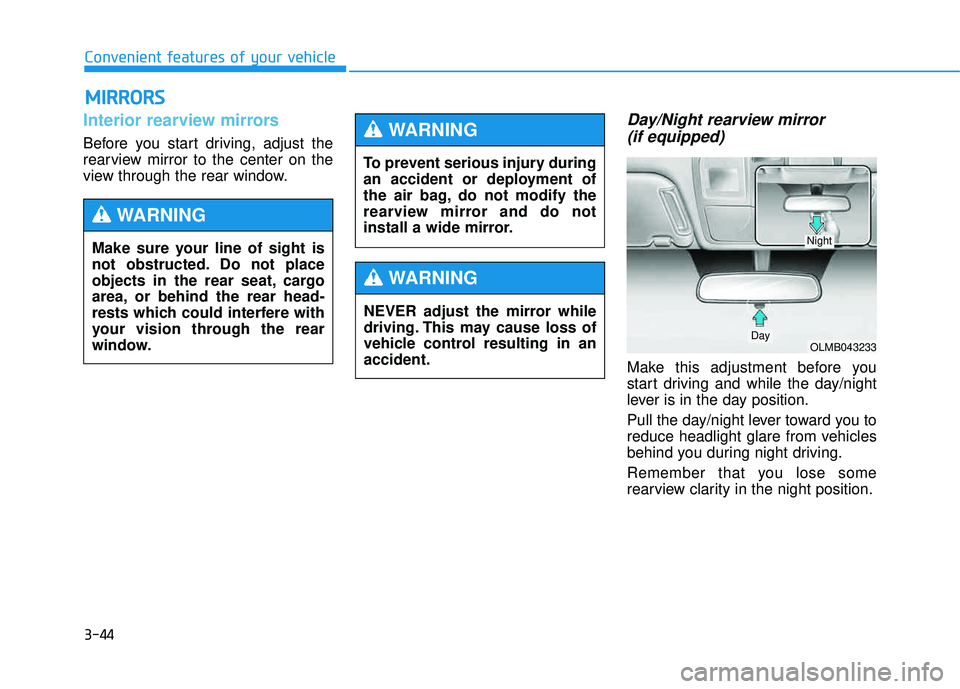
Day/Night rearview mirror (if equipped)
Make this adjustment before you
start driving and while the day/night
lever is in the day position.
Pull the day/night lever toward you to
reduce headlight glare from vehicles
behind you during night driving.
Remember that you lose some
rearview clarity in the night position.
MM IIRR RROO RRSS
Make sure your line of sight is
not obstructed. Do not place
objects in the rear seat, cargo
area, or behind the rear head-
rests which could interfere with
your vision through the rear
window.
WARNING
To prevent serious injury during
an accident or deployment of
the air bag, do not modify the
rearview mirror and do not
install a wide mirror.
WARNING
NEVER adjust the mirror while
driving. This may cause loss of
vehicle control resulting in anaccident.
WARNING
OLMB043233Day
Night
Page 131 of 653
3-45
Convenient features of your vehicle
3
Electric chromic mirror (ECM) (if equipped)
The electric rearview mirror automati- cally controls the glare from the head-
lights of the car behind you in night-
time or low light driving conditions.
When the engine is running, the
glare is automatically controlled by
the sensor mounted in the rearview
mirror. The sensor detects the light
level around the vehicle, and auto-matically adjusts to control the head-
light glare from vehicles behind you.
Whenever the shift lever is placed in
R (Reverse), the mirror will automat-
ically go to the brightest setting to
improve the driver’s view behind the
vehicle.
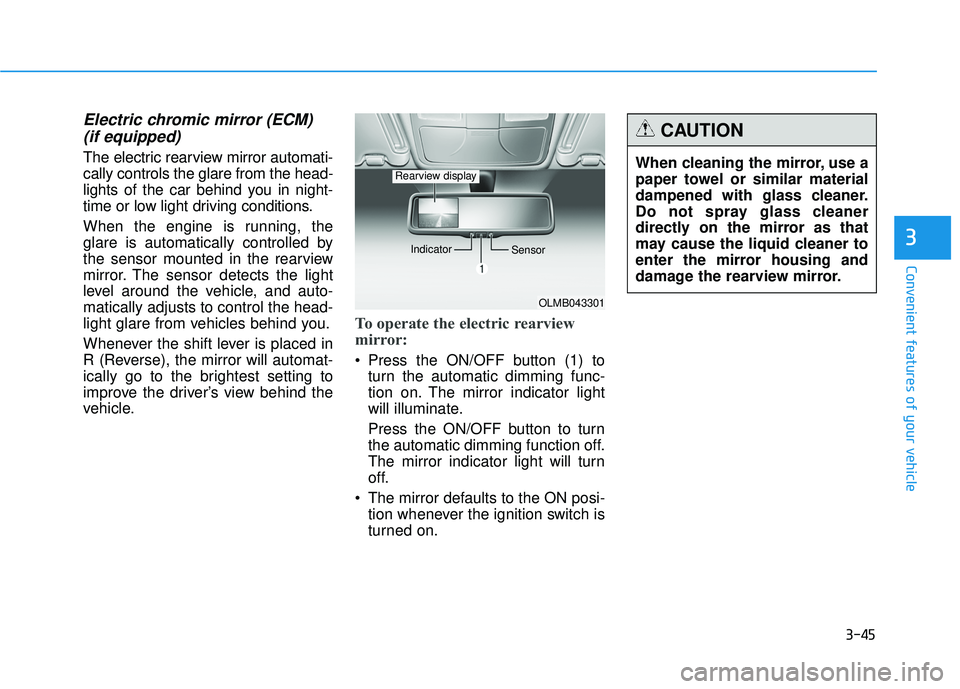
To operate the electric rearview
mirror:
Press the ON/OFF button (1) to turn the automatic dimming func-
tion on. The mirror indicator light
will illuminate.
Press the ON/OFF button to turn
the automatic dimming function off.
The mirror indicator light will turn
off.
The mirror defaults to the ON posi- tion whenever the ignition switch is
turned on.
OLMB043301
Indicator
Sensor
Rearview displayWhen cleaning the mirror, use a
paper towel or similar material
dampened with glass cleaner.
Do not spray glass cleaner
directly on the mirror as that
may cause the liquid cleaner to
enter the mirror housing and
damage the rearview mirror.
CAUTION