2015 HYUNDAI TUCSON check oil
[x] Cancel search: check oilPage 562 of 653
7-21
7
Maintenance
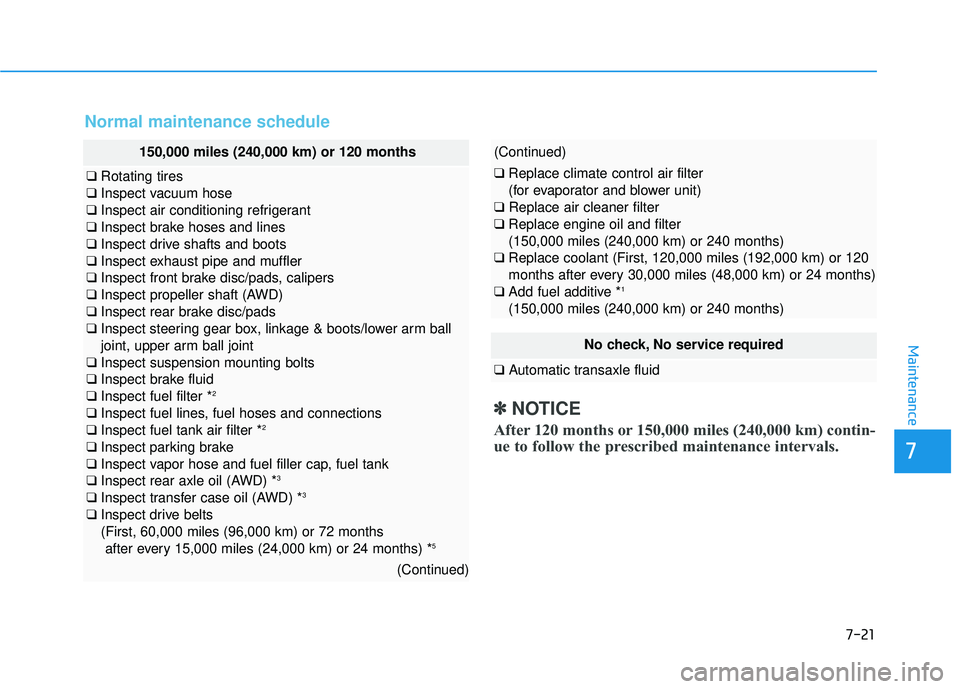
Normal maintenance schedule
No check, No service required
❑Automatic transaxle fluid
150,000 miles (240,000 km) or 120 months
❑Rotating tires
❑ Inspect vacuum hose
❑ Inspect air conditioning refrigerant
❑ Inspect brake hoses and lines
❑ Inspect drive shafts and boots
❑ Inspect exhaust pipe and muffler
❑ Inspect front brake disc/pads, calipers
❑ Inspect propeller shaft (AWD)
❑ Inspect rear brake disc/pads
❑ Inspect steering gear box, linkage & boots/lower arm ball
joint, upper arm ball joint
❑ Inspect suspension mounting bolts
❑ Inspect brake fluid
❑ Inspect fuel filter * 2
❑ Inspect fuel lines, fuel hoses and connections
❑ Inspect fuel tank air filter * 2
❑ Inspect parking brake
❑ Inspect vapor hose and fuel filler cap, fuel tank
❑ Inspect rear axle oil (AWD) * 3
❑ Inspect transfer case oil (AWD) * 3
❑ Inspect drive belts(First, 60,000 miles (96,000 km) or 72 months
after every 15,000 miles (24,000 km) or 24 months) * 5
(Continued)
(Continued)
❑
Replace climate control air filter
(for evaporator and blower unit)
❑ Replace air cleaner filter
❑ Replace engine oil and filter (150,000 miles (240,000 km) or 240 months)
❑ Replace coolant (First, 120,000 miles (192,000 km) or 120
months after every 30,000 miles (48,000 km) or 24 months)
❑ Add fuel additive * 1
(150,000 miles (240,000 km) or 240 months)
✽✽ NOTICE
After 120 months or 150,000 miles (240,000 km) contin-
ue to follow the prescribed maintenance intervals.
Page 565 of 653
7-24
Maintenance
EEXX PPLLAA NN AATTIIOO NN OO FF SS CC HH EEDD UU LLEE DD MM AAIINN TTEENN AANN CCEE IITT EEMM SS
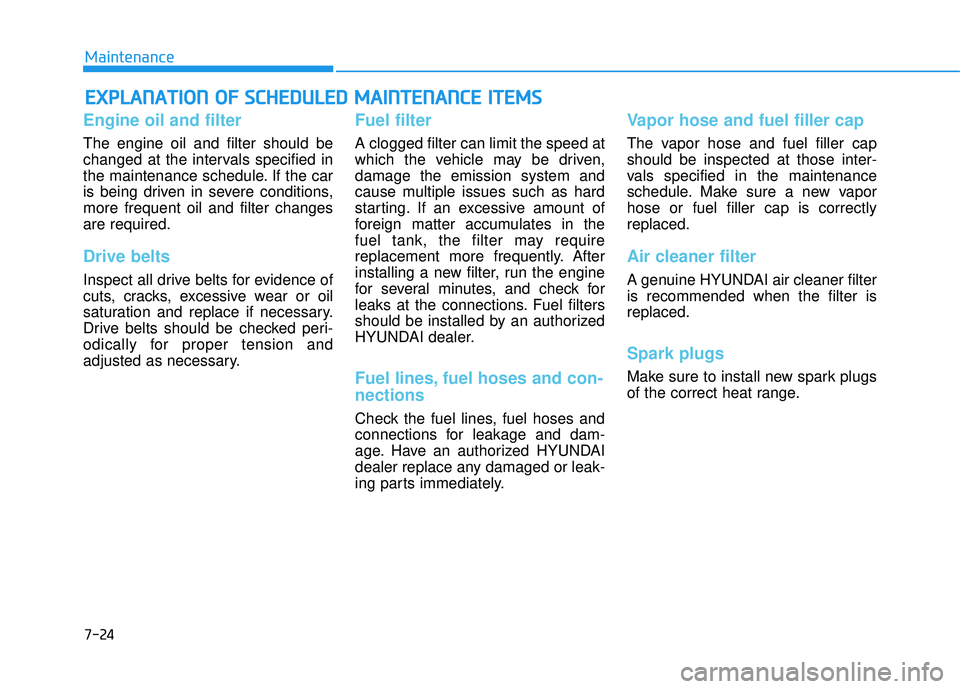
Engine oil and filter
The engine oil and filter should be
changed at the intervals specified in
the maintenance schedule. If the car
is being driven in severe conditions,more frequent oil and filter changesare required.
Drive belts
Inspect all drive belts for evidence of
cuts, cracks, excessive wear or oil
saturation and replace if necessary.
Drive belts should be checked peri-
odically for proper tension and
adjusted as necessary.
Fuel filter
A clogged filter can limit the speed at
which the vehicle may be driven,damage the emission system and
cause multiple issues such as hard
starting. If an excessive amount of
foreign matter accumulates in the
fuel tank, the filter may require
replacement more frequently. After
installing a new filter, run the engine
for several minutes, and check for
leaks at the connections. Fuel filters
should be installed by an authorized
HYUNDAI dealer.
Fuel lines, fuel hoses and con- nections
Check the fuel lines, fuel hoses and
connections for leakage and dam-
age. Have an authorized HYUNDAI
dealer replace any damaged or leak-
ing parts immediately.
Vapor hose and fuel filler cap
The vapor hose and fuel filler cap should be inspected at those inter-
vals specified in the maintenance
schedule. Make sure a new vaporhose or fuel filler cap is correctlyreplaced.
Air cleaner filter
A genuine HYUNDAI air cleaner filter is recommended when the filter isreplaced.
Spark plugs
Make sure to install new spark plugs
of the correct heat range.
Page 568 of 653
7-27
7
Maintenance
EENN GGIINN EE OO IILL
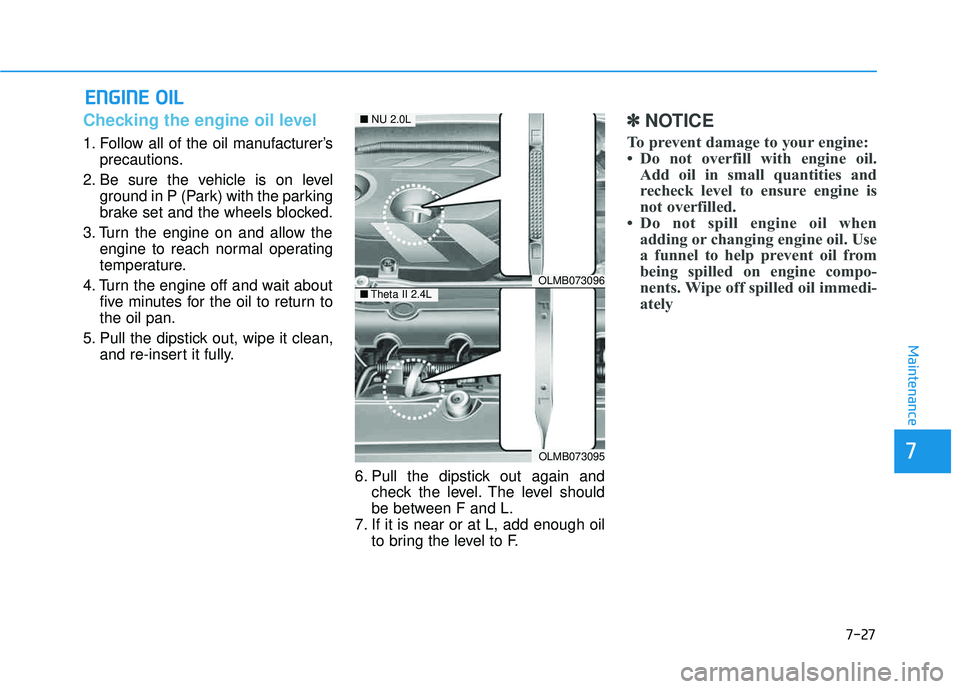
Checking the engine oil level
1. Follow all of the oil manufacturer’s
precautions.
2. Be sure the vehicle is on level ground in P (Park) with the parking
brake set and the wheels blocked.
3. Turn the engine on and allow the engine to reach normal operating
temperature.
4. Turn the engine off and wait about five minutes for the oil to return tothe oil pan.
5. Pull the dipstick out, wipe it clean, and re-insert it fully.
6. Pull the dipstick out again andcheck the level. The level should
be between F and L.
7. If it is near or at L, add enough oil to bring the level to F.
✽✽ NOTICE
To prevent damage to your engine:
Do not overfill with engine oil. Add oil in small quantities and
recheck level to ensure engine is
not overfilled.
Do not spill engine oil when adding or changing engine oil. Use
a funnel to help prevent oil from
being spilled on engine compo-
nents. Wipe off spilled oil immedi-
ately
OLMB073096
OLMB073095
■NU 2.0L
■Theta II 2.4L
Page 569 of 653
7-28
Maintenance
✽✽NOTICE
Use only the specified engine oil
(refer to “Recommended Lubricants
and Capacities” in chapter 8).
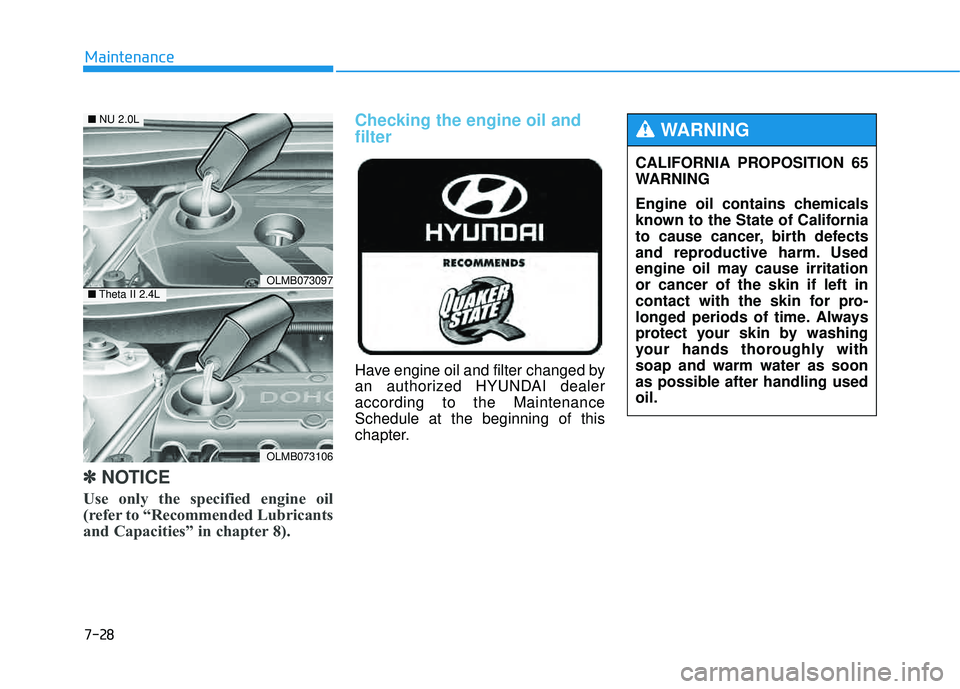
Checking the engine oil and filter
Have engine oil and filter changed by
an authorized HYUNDAI dealeraccording to the MaintenanceSchedule at the beginning of this
chapter.
OLMB073097
OLMB073106
■ NU 2.0L
■Theta II 2.4L
CALIFORNIA PROPOSITION 65
WARNING
Engine oil contains chemicals
known to the State of California
to cause cancer, birth defects
and reproductive harm. Used
engine oil may cause irritationor cancer of the skin if left in
contact with the skin for pro-
longed periods of time. Always
protect your skin by washing
your hands thoroughly withsoap and warm water as soon
as possible after handling usedoil.
WARNING
Page 586 of 653
7-45
7
Maintenance
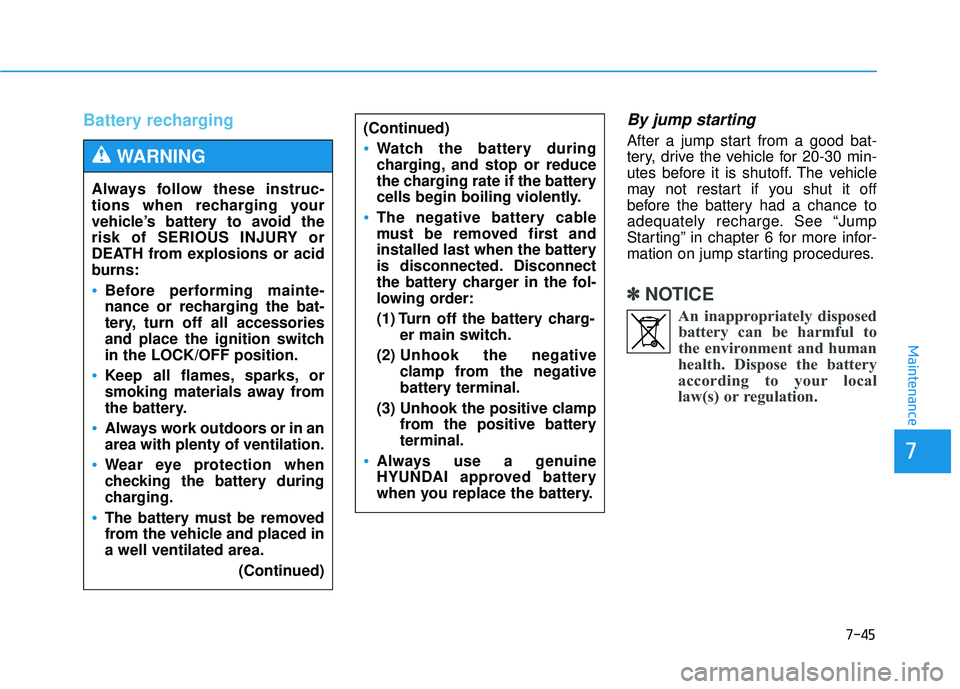
Battery rechargingBy jump starting
After a jump start from a good bat-
tery, drive the vehicle for 20-30 min-
utes before it is shutoff. The vehicle
may not restart if you shut it off
before the battery had a chance to
adequately recharge. See “Jump
Starting” in chapter 6 for more infor-
mation on jump starting procedures.
✽✽NOTICE
An inappropriately disposedbattery can be harmful to
the environment and human
health. Dispose the battery
according to your local
law(s) or regulation.
Always follow these instruc-
tions when recharging your
vehicle’s battery to avoid the
risk of SERIOUS INJURY or
DEATH from explosions or acid
burns:
Before performing mainte-
nance or recharging the bat-
tery, turn off all accessories
and place the ignition switchin the LOCK/OFF position.
Keep all flames, sparks, or
smoking materials away from
the battery.
Always work outdoors or in an area with plenty of ventilation.
Wear eye protection when
checking the battery during
charging.
The battery must be removed
from the vehicle and placed ina well ventilated area.
(Continued)
WARNING
(Continued)
Watch the battery during
charging, and stop or reduce
the charging rate if the battery
cells begin boiling violently.
The negative battery cable
must be removed first and
installed last when the battery
is disconnected. Disconnect
the battery charger in the fol-
lowing order:
(1) Turn off the battery charg-er main switch.
(2) Unhook the negative
clamp from the negative
battery terminal.
(3) Unhook the positive clamp from the positive batteryterminal.
Always use a genuine
HYUNDAI approved battery
when you replace the battery.
Page 604 of 653
7-63
7
Maintenance
FFUU SSEE SS
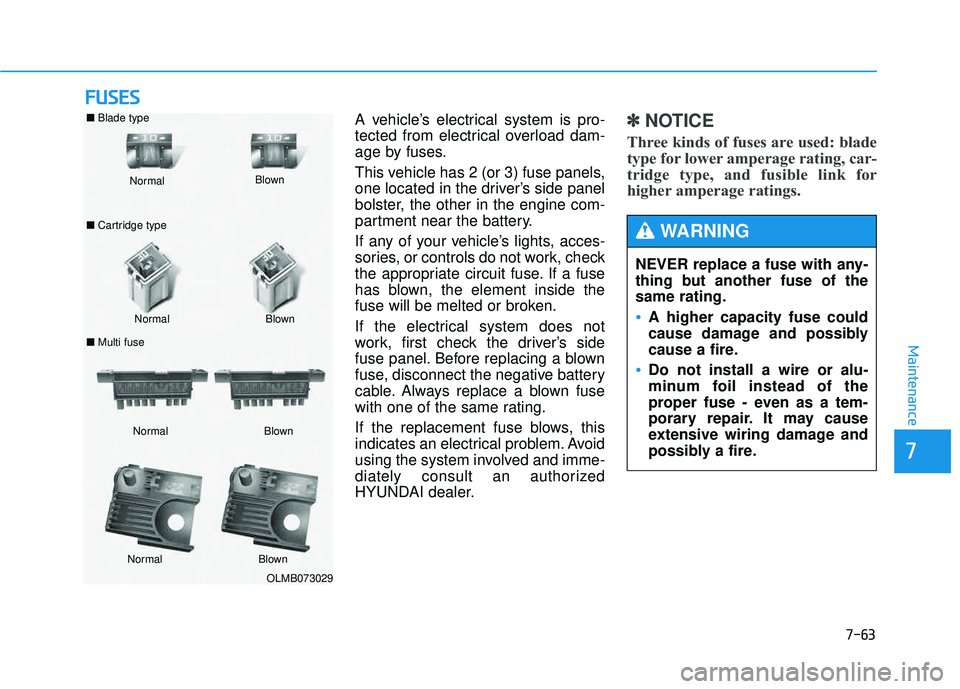
A vehicle’s electrical system is pro-
tected from electrical overload dam-
age by fuses.
This vehicle has 2 (or 3) fuse panels,
one located in the driver’s side panel
bolster, the other in the engine com-
partment near the battery.
If any of your vehicle’s lights, acces-
sories, or controls do not work, check
the appropriate circuit fuse. If a fuse
has blown, the element inside the
fuse will be melted or broken.
If the electrical system does not
work, first check the driver’s side
fuse panel. Before replacing a blown
fuse, disconnect the negative battery
cable. Always replace a blown fuse
with one of the same rating.
If the replacement fuse blows, this
indicates an electrical problem. Avoid
using the system involved and imme-
diately consult an authorized
HYUNDAI dealer.✽✽
NOTICE
Three kinds of fuses are used: blade
type for lower amperage rating, car-
tridge type, and fusible link for
higher amperage ratings.
NEVER replace a fuse with any-
thing but another fuse of thesame rating.
A higher capacity fuse could
cause damage and possibly
cause a fire.
Do not install a wire or alu-
minum foil instead of the
proper fuse - even as a tem-
porary repair. It may cause
extensive wiring damage and
possibly a fire.
WARNING
OLMB073029
Normal
Normal
■
Blade type
■ Cartridge type
■ Multi fuse Blown
Blown
Normal Blown
Normal Blown
Page 640 of 653
Recommended SAE viscosity
number
8-5
88
Specifications, Consumer information and Reporting safety defects
Always be sure to clean the area
around any filler plug, drain
plug, or dipstick before check-
ing or draining any lubricant.
This is especially important in
dusty or sandy areas and when
the vehicle is used on unpaved
roads. Cleaning the plug and
dipstick areas will prevent dirt
and grit from entering the
engine and other mechanisms
that could be damaged.
CAUTION
Temperature Range for SAE Viscosity Numbers
Temperature
Gasoline
Engine Oil * 1
°C
°F
-30 -20 -10 0 10 20 30 40 50
-10 0 20 40 60 80 100 120
10W-30
5W-20, 5W-30
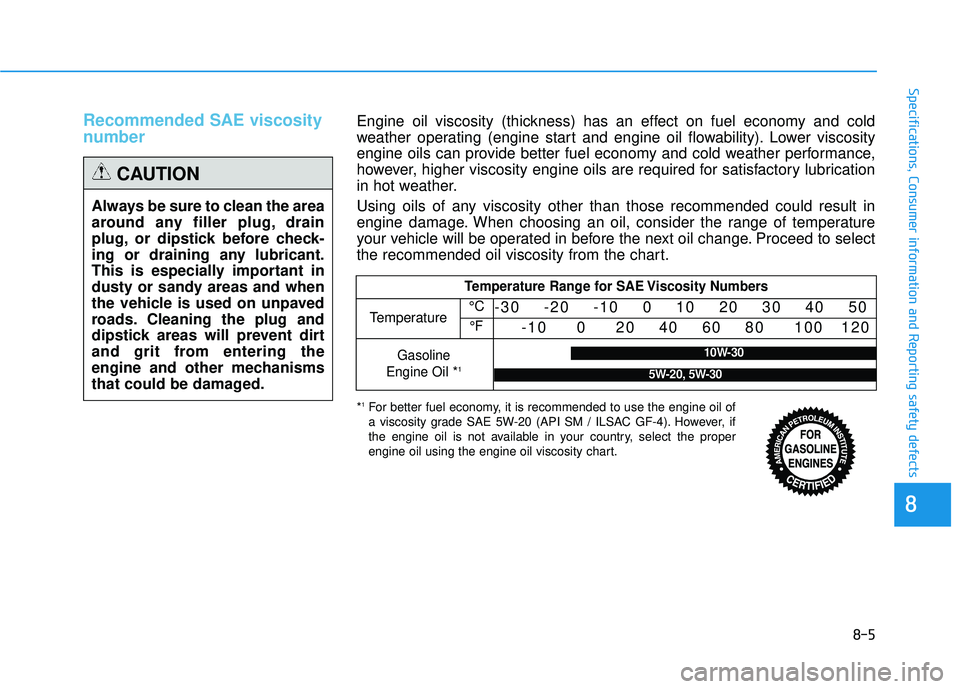
*1
For better fuel economy, it is recommended to use the engine oil of
a viscosity grade SAE 5W-20 (API SM / ILSAC GF-4). However, if
the engine oil is not available in your country, select the proper
engine oil using the engine oil viscosity chart.
Engine oil viscosity (thickness) has an effect on fuel economy and cold
weather operating (engine start and engine oil flowability). Lower viscosity
engine oils can provide better fuel economy and cold weather performance,
however, higher viscosity engine oils are required for satisfactory lubrication
in hot weather.
Using oils of any viscosity other than those recommended could result in
engine damage. When choosing an oil, consider the range of temperature
your vehicle will be operated in before the next oil change. Proceed to select
the recommended oil viscosity from the chart.
Page 647 of 653
I-3
Anti-lock brake system (ABS) ...................................5-31
Electronic stability control (ESC) ..............................5-34
Vehicle stability management (VSM) ........................5-37
Hill-start assist control (HAC) ...................................5-39
Downhill brake control (DBC) ..................................5-40
Bulb replacement ............................................................7-74
Bulb wattage .....................................................................8-2
Button start/stop, see engine start/stop button ..................5-8
California perchlorate notice ..........................................7-94
Care
Tire care ......................................................................7-47
Exterior care ...............................................................7-83
Interior care ................................................................7-88
Cargo security screen ....................................................3-123
CD player ........................................................................4-16
Center console storage ..................................................3-116
Central door lock switch .................................................3-16
Chains Tire chains ..................................................................5-56
Changing a Tire with TPMS ...........................................6-13
Changing tires .................................................................6-16
Check tire inflation pressure ...........................................7-49
Checking the engine oil lever .........................................7-27
Child restraint system (CRS) ..........................................2-36 Selecting a Child Restraint System (CRS).................2-37
Installing a Child Restraint System (CRS) ................2-39 Child-protector rear door lock ........................................3-18
Cigarette lighter ............................................................3-118
Climate control air filter ...............................................3-101
Climate control air filter .................................................7-38
Combined instrument, see instrument cluster ................3-20
Compact spare tire replacement .....................................7-52
Compass with Electric chromic mirror...........................3-46
Consumer information ......................................................8-8
Coolant ............................................................................7-29
Cooling fluid, see engine coolant ...................................7-29
Crankcase emission control system ................................7-90
Cruise control system .....................................................5-45
Cup holder .....................................................................3-119
Dashboard illumination, see instrument panel illumination.3-21
Dashboard, see instrument cluster ..................................3-20
Day/night rearview mirror ..............................................3-44
Daytime running light .....................................................3-80
Defogging (Windshield)................................................3-112
Defroster (Rear window) ................................................3-91
Front windshield defroster .........................................3-92
Defrosting (Windshield)................................................3-112
Digital clcok..................................................................3-121
Dimensions .......................................................................8-2
Display illumination, see instrument panel illumination ....3-21
Displays, see instrument cluster .....................................3-20
I
Index
C
D