2015 Hyundai Sonata change time
[x] Cancel search: change timePage 1 of 603

O
OW
W N
NE
ER
R '
'S
S
M
M A
AN
N U
U A
AL
L
O
Op
pe
er
ra
a t
ti
io
o n
n
M
M a
ai
in
n t
te
e n
n a
an
n c
ce
e
S
S p
pe
ec
ci
if
f i
ic
c a
a t
ti
io
o n
ns
s
All information in this Owner's Manual is current at the time of pub-
lication. However, HYUNDAI reserves the right to make changes at
any time so that our policy of continual product improvement may be
carried out.
This manual applies to all HYUNDAI models and includes descrip-
tions and explanations of optional as well as standard equipment.
As a result, you may find material in this manual that does not apply
to your specific vehicle.
Page 35 of 603
2-8
Seat belts must be snug against your
hips and chest to work properly.
When the seatback is reclined, the
shoulder belt cannot do its job
because it will not be snug against
your chest. Instead, it will be in front
of you. During an accident, you could
be thrown into the seat belt, causing
neck or other injuries.
The more the seatback is reclined,
the greater chance the passenger’s
hips will slide under the lap belt or
the passenger’s neck will strike the
shoulder belt.
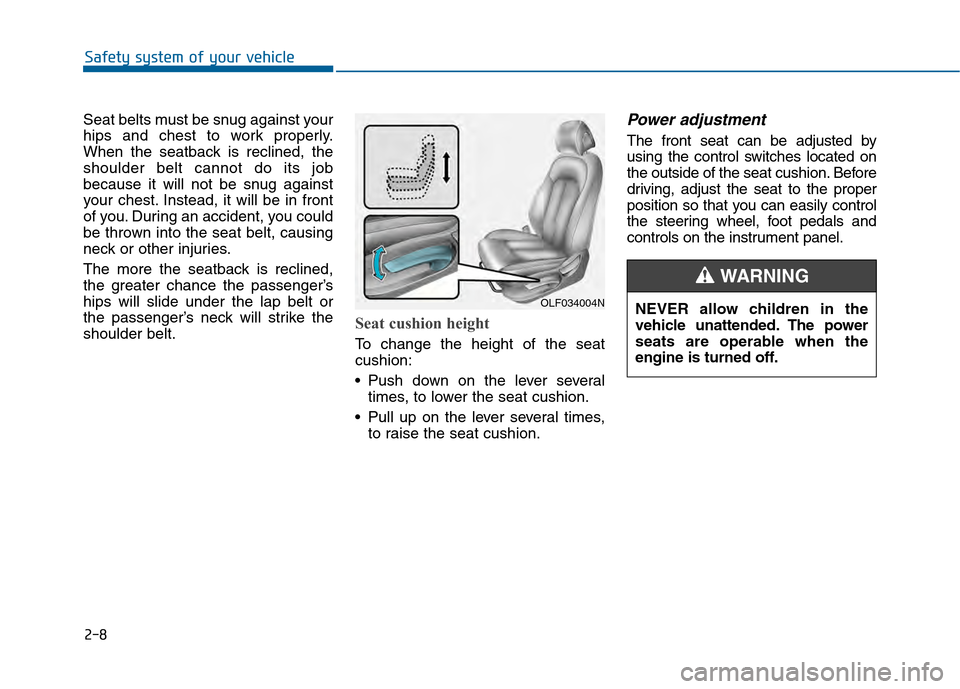
Seat cushion height
To change the height of the seat
cushion:
Push down on the lever severaltimes, to lower the seat cushion.
Pull up on the lever several times, to raise the seat cushion.
Power adjustment
The front seat can be adjusted by
using the control switches located on
the outside of the seat cushion. Before
driving, adjust the seat to the proper
position so that you can easily control
the steering wheel, foot pedals and
controls on the instrument panel.
Safety system of your vehicle
OLF034004NNEVER allow children in the
vehicle unattended. The power
seats are operable when the
engine is turned off.
WARNING
Page 46 of 603

2-19
Safety system of your vehicle
2
Removal/Reinstallation
To remove the head restraint:
1. Raise the head restraint as far asit can go.
2. Press the head restraint release button (1) while pulling the head
restraint up (2).
To reinstall the head restraint:
1. Put the head restraint poles into the holes (3) while pressing the
release button (1).
2. Adjust the head restraint to the appropriate height.
Seat Warmers and
Air Ventilation Seats
Seat warmers (if equipped)
Seat warmers are provided to warm
the seats during cold weather.
To prevent damage to the seat
warmers and seats:
Never use a solvent such aspaint thinner, benzene, alcohol
or gasoline to clean the seats.
Do not place heavy or sharp objects on seats equipped with
seat warmers.
Do not change the seat cover. It may damage the seat warmer.
NOTICE
OLF034073N
The seat warmers can cause a
serious burn, even at low tem-
peratures and especially if used
for long periods of time.
Passengers must be able to feel
if the seat is becoming too warm
so they can turn it off, if needed.
People who cannot detect tem-
perature change or pain to the
skin should use extreme cau-
tion, especially the following
types of passengers:
Infants, children, elderly or
disabled persons, or hospital
outpatients.
People with sensitive skin or
who burn easily.
Fatigued individuals.
Intoxicated individuals.
(Continued)
WARNING
(Continued)
People taking medication that
can cause drowsiness or
sleepiness.
NEVER place anything on the
seat that insulates against heat
when the seat warmer is in oper-
ation, such as a blanket or seat
cushion. This may cause the
seat warmer to overheat, caus-
ing a burn or damage to the seat.
WARNING
Page 47 of 603
2-20
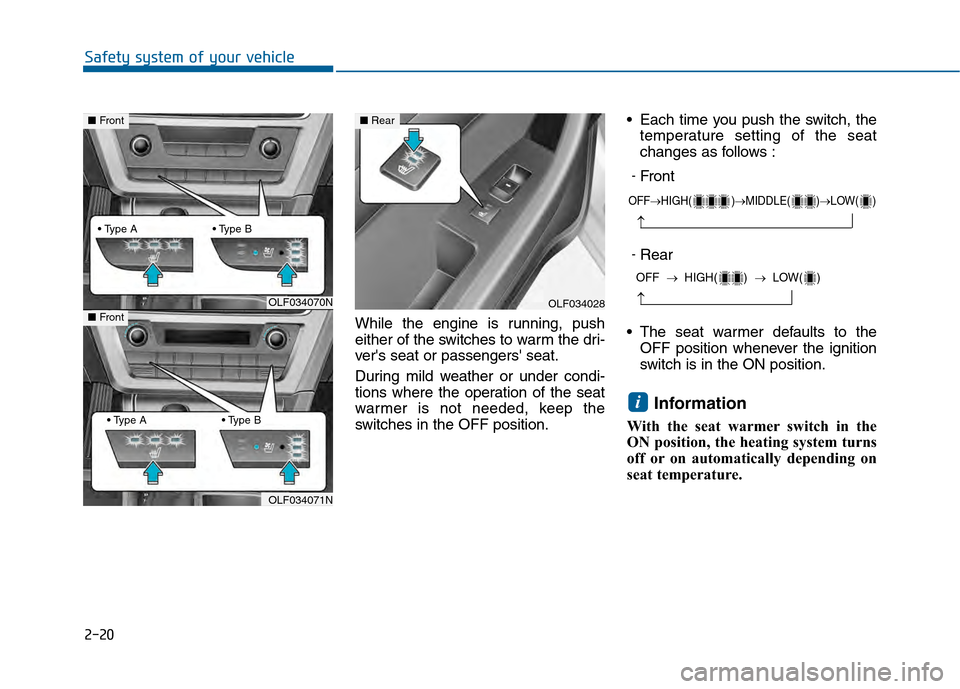
Safety system of your vehicleWhile the engine is running, push
either of the switches to warm the dri-
ver's seat or passengers' seat.
During mild weather or under condi-
tions where the operation of the seat
warmer is not needed, keep the
switches in the OFF position. Each time you push the switch, the
temperature setting of the seat
changes as follows :
The seat warmer defaults to the OFF position whenever the ignition
switch is in the ON position.
Information
With the seat warmer switch in the
ON position, the heating system turns
off or on automatically depending on
seat temperature.
i
OFF→ HIGH( )→ MIDDLE( )→ LOW( )
→
OFF → HIGH( ) → LOW( )
→OLF034070N
OLF034071N
■Front
■ FrontOLF034028
■Rear
-Rear
-Front
Page 48 of 603

2-21
Safety system of your vehicle
2
Air ventilation seats (if equipped)
The air ventilation seats are provided
to cool the front seats by blowing air
through small vent holes on the sur-
face of the seat cushions and seat-
backs.When the operation of the air ventila-
tion seats are not needed, keep the
switches in the OFF position.
While the engine is running, push the
switch to cool the driver's seat or the
front passenger's seat.
Each time you push the switch, the
airflow changes as follows:
The air v entilation seats def ault to
the OFF position whenever the
ignition switch is turned to the ON
position.
To prevent damage to the air ven-
tilation seat system and seats:
Use the air ventilation seats ONLY when the air conditioning
is on. Using the air ventilation
seats for prolonged periods of
time with the air conditioning off
could cause the air ventilation
seats to malfunction.
(Continued)(Continued)
Never use a solvent such as
paint thinner, benzene, alcohol
or gasoline to clean the seats.
Avoid spilling liquids on the sur- face of the front seats and seat-
backs; this may cause the air
vent holes to become blocked
and not work properly.
Do not place materials such as plastic bags or newspapers
under the seats. They may block
the air intake causing the air
vents to not work properly.
Do not change the seat covers. It may damage the air ventilation
seats.
If the air vents do not operate, restart the vehicle. If there is no
change, have your vehicle
inspected by an authorized
HYUNDAI dealer.
NOTICE
OLF034021
■ Front
■Front
OLF034020
OFF→
HIGH( )→ MIDDLE( )→ LOW( )
→
Page 118 of 603
3-23
Convenient features of your vehicle
3
Tilt Steering / Telescope Steering
Adjust the steering wheel so it points
toward your chest, not toward your
face. Make sure you can see the
instrument panel warning lights and
gauges. After adjusting, push the
steering wheel both up and down to
be certain it is locked in position.
Always adjust the position of the
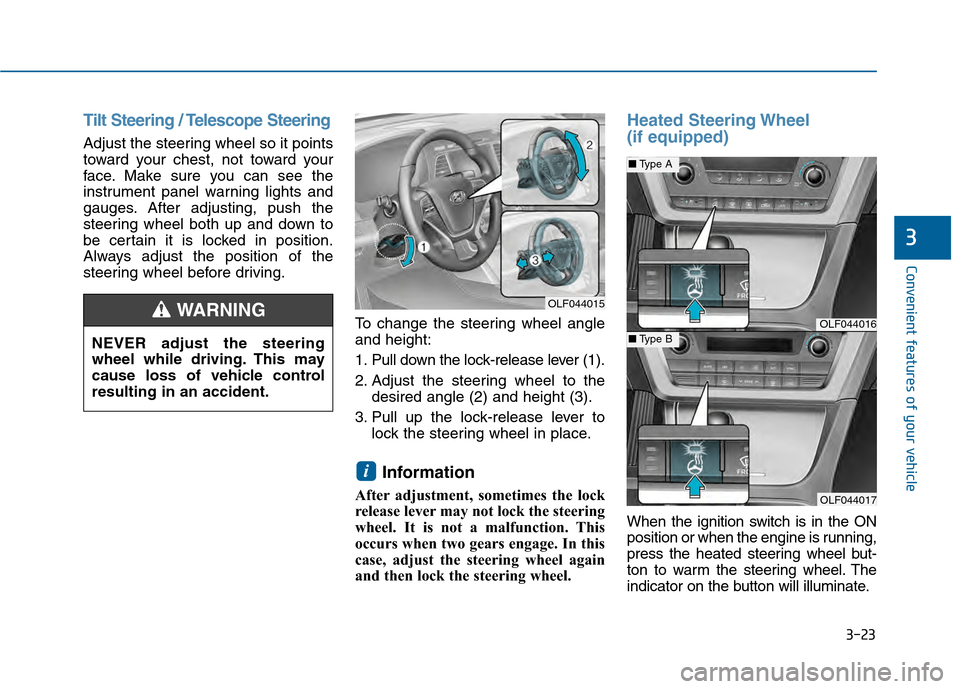
steering wheel before driving.To change the steering wheel angle
and height:
1. Pull down the lock-release lever (1).
2. Adjust the steering wheel to thedesired angle (2) and height (3).
3. Pull up the lock-release lever to lock the steering wheel in place.
Information
After adjustment, sometimes the lock
release lever may not lock the steering
wheel. It is not a malfunction. This
occurs when two gears engage. In this
case, adjust the steering wheel again
and then lock the steering wheel.
Heated Steering Wheel
(if equipped)
When the ignition switch is in the ON
position or when the engine is running,
press the heated steering wheel but-
ton to warm the steering wheel. The
indicator on the button will illuminate.
i
OLF044015
OLF044016
OLF044017
■Type A
■Type BNEVER adjust the steering
wheel while driving. This may
cause loss of vehicle control
resulting in an accident.
WARNING
Page 126 of 603
3-31
Convenient features of your vehicle
3
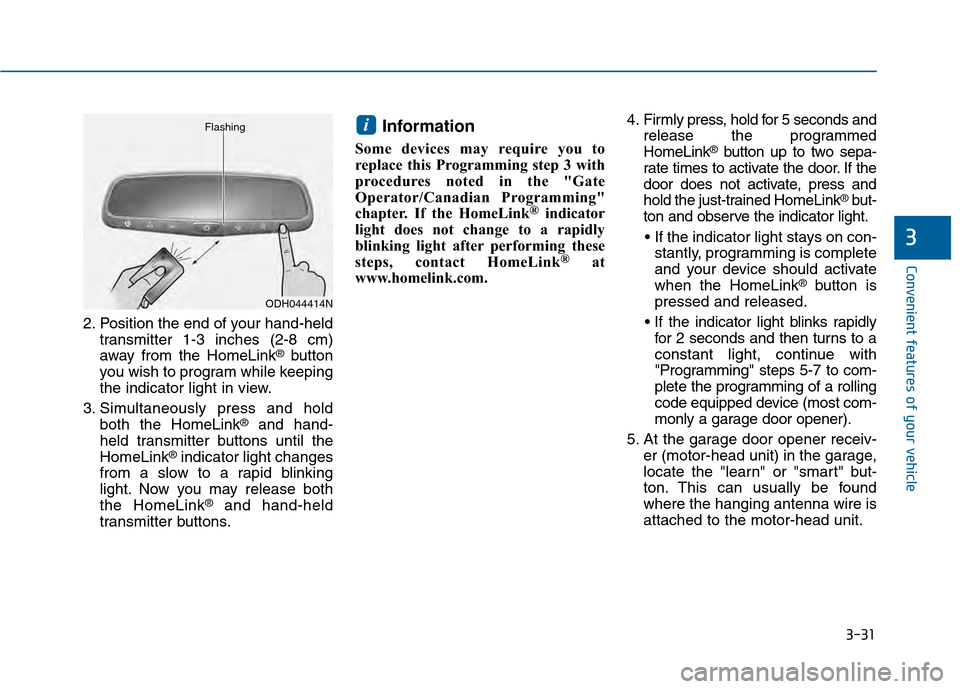
2. Position the end of your hand-heldtransmitter 1-3 inches (2-8 cm)
away from the HomeLink
®button
you wish to program while keeping
the indicator light in view.
3. Simultaneously press and hold both the HomeLink
®and hand-
held transmitter buttons until the
HomeLink
®indicator light changes
from a slow to a rapid blinking
light. Now you may release both
the HomeLink
®and hand-held
transmitter buttons.
Information
Some devices may require you to
replace this Programming step 3 with
procedures noted in the "Gate
Operator/Canadian Programming"
chapter. If the HomeLink
®indicator
light does not change to a rapidly
blinking light after performing these
steps, contact HomeLink
®at
www.homelink.com. 4. Firmly press, hold for 5 seconds and
release the programmed
HomeLink
®button up to two sepa-
rate times to activate the door. If the
door does not activate, press and
hold the just-trained HomeLink
®but-
ton and observe the indicator light.
stantly, programming is complete
and your device should activate
when the HomeLink
®button is
pressed and released.
for 2 seconds and then turns to a
constant light, continue with
"Programming" steps 5-7 to com-
plete the programming of a rolling
code equipped device (most com-
monly a garage door opener).
5. At the garage door opener receiv- er (motor-head unit) in the garage,
locate the "learn" or "smart" but-
ton. This can usually be found
where the hanging antenna wire is
attached to the motor-head unit.
i
ODH044414N
Flashing
Page 128 of 603
3-33
Convenient features of your vehicle
3
Erasing HomeLink®buttons
Individual buttons cannot be erased.
However, to erase all three pro-
grammed buttons:
1. Press and hold the two outerHomeLink
®buttons until the indi-
cator light begins to flash after 10
seconds.
2. Release both buttons. Do not hold for longer than 20 seconds.
The Integrated HomeLink
®Wireless
Control System is now in the training
(learn) mode and can be pro-
grammed at any time following the
appropriate steps in the
Programming chapters above.
NVS
®is a registered trademark and
Z-Nav™ is a trademark of the Gentex
Corporation, Zeeland, Michigan.
HomeLink
®is a registered trademark
owned by Johnson Controls,
Incorporated, Milwaukee, Wisconsin.
FCC ID: NZLTLMHL4
IC: 4112A-TLMHL4
Information
This device complies with Part 15 of
the FCC Rules.
Operation is subject to the following
three conditions:
1. This device may not cause harmful interference, and
2. This device must accept any inter- ference received, including interfer-
ence that may cause undesired
operation.
3. The transceiver has been tested and complies with FCC and Industry
Canada rules. Changes or modifica-
tions not expressly approved by the
party responsible for compliance
could void the user's authority to
operate the device.
Electric chromic mirror (ECM)with compass and HomeLink®
system (for Canada)
Your vehicle may be equipped with a
Gentex Automatic-Dimming Mirror
with a Z-Nav™ Electronic Compass
Display and an Integrated HomeLink
®
Wireless Control System.
During nighttime driving, this feature
will automatically detect and reduce
rearview mirror glare while the com-
pass indicates the direction the vehi-
cle is pointed. The HomeLink
®
Universal Transceiver allows you to
activate your garage door(s), electric
gate, home lighting, etc.
i