Page 135 of 603

3-40
Convenient features of your vehicle
Erasing HomeLink®buttons
Individual buttons cannot be erased.
However, to erase all three pro-
grammed buttons:
1. Press and hold the two outerHomeLink
®buttons until the indi-
cator light begins to flash-after 20
seconds.
2. Release both buttons. Do not hold for longer than 30 seconds.
The Integrated HomeLink
®Wireless
Control System is now in the training
(learn) mode and can be pro-
grammed at any time following the
appropriate steps in the Programming
chapters above.
NVS
®is a registered trademark and
Z-Nav™ is a trademark of the Gentex
Corporation, Zeeland, Michigan.
HomeLink
®is a registered trademark
owned by Johnson Controls,
Incorporated, Milwaukee, Wisconsin.
FCC ID: NZLZTVHL3
IC: 4112A-ZTVHL3
Information
This device complies with Part 15 of
the FCC Rules.
Operation is subject to the following
three conditions:
1. This device may not cause harmful interference, and
2. This device must accept any interfer- ence received, including interference
that may cause undesired operation.
3. The transceiver has been tested and complies with FCC and Industry
Canada rules. Changes or modifica-
tions not expressly approved by the
party responsible for compliance
could void the user's authority to
operate the device.
Outside Rearview Mirror
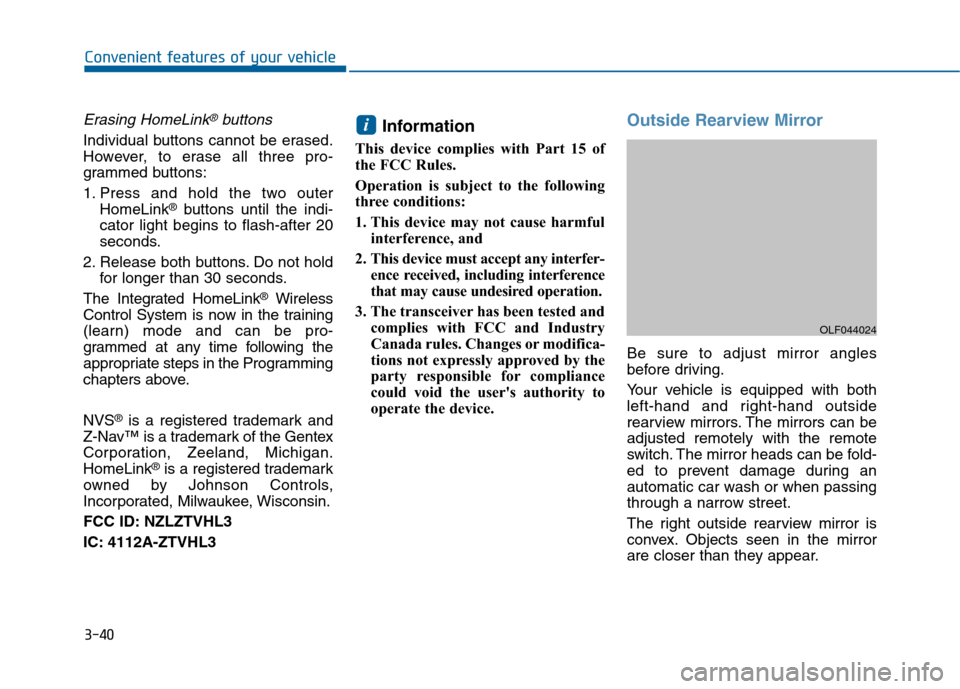
Be sure to adjust mirror angles
before driving.
Your vehicle is equipped with both
left-hand and right-hand outside
rearview mirrors. The mirrors can be
adjusted remotely with the remote
switch. The mirror heads can be fold-
ed to prevent damage during an
automatic car wash or when passing
through a narrow street.
The right outside rearview mirror is
convex. Objects seen in the mirror
are closer than they appear.
i
OLF044024
Page 173 of 603
Lights
3-78
Convenient features of your vehicle
ItemsExplanation
One Touch Turn Signal
The one touch turn signal function will be deactivated.
The lane change signals will blink 3, 5, or 7 times when the turn signal lever ismoved slightly.
For more information, refer to "Light" in this chapter.
Head Lamp Delay
The head lamp delay function will be activated.
The headlamp delay function will be deactivated.
For more information, refer to "Light" in this chapter.
Welcome Light
The welcome light function will be activated.
The welcome light function will be deactivated.
For more information, refer to "Welcome System" in this chapter.
Sound
ItemsExplanation
Park Assist System Vol. (Level 1~3)
BSD (Blind Spot Detection) Sound The BSD sound function will be deactivated.
The BSD sound function will be activated.
Welcome Sound The welcome sound function will be deactivated.
The welcome sound function will be activated.
Page 177 of 603
3-82
Convenient features of your vehicle
Press brake pedal to start engine
This warning message illuminatesif the Engine Start/Stop button
changes to the ACC position twice
by pressing the button repeatedly
without depressing the brake pedal.
It means that you should depress the brake pedal to start the engine.
Press START button with key
This warning message illuminatesif you press the Engine Start/Stop
button while the warning message
“Key not detected” is illuminating.
At this time, the immobilizer indica- tor light blinks.
Low Key Battery
This warning message illuminates if
the battery of the smart key is dis-
charged when the Engine Start/Stop
button changes to the OFF position.
OLF044124LOLF044120LOLF044122L
Page 205 of 603

3-110
Convenient features of your vehicle
Turn signals and lane changesignals
To signal a turn, push down on the
lever for a left turn or up for a right
turn in position (A). To signal a lane
change, move the turn signal lever
slightly and hold it in position (B). The
lever will return to the OFF position
when released or when the turn is
completed.
If an indicator stays on and does not
flash or if it flashes abnormally, one of
the turn signal bulbs may be burned
out and will require replacement.
One touch turn signal function
To activate an One Touch Turn Signal
function, move the turn signal lever
slightly and then release it. The lane
change signals will blink 3, 5 or 7
times.
You can activate or deactivate the
One Touch Turn Signal function or
choose the number of blinking (3, 5,
or 7) from the User Settings Mode
(Light) on the LCD display.
For more information, refer to the
"LCD Display" section in this
chapter.
OLF044091N
•Do not place any accessories,
stickers or tint the windshield.
Have the windshield glass
replaced from an authorized
dealer.
Do not remove or impact relat-
ed parts of the Smart High
Beam system.
Be careful that water doesn’t
get into the Smart High Beam
unit.
Do not place objects on the
dashboard that reflects light
such as mirrors, white paper,
etc. The system may malfunc-
tion if sunlight is reflected.
At times, the Smart High
Beam system may not work
properly, always check the
road conditions for your safe-
ty. When the system does not
operate normally, manually
change between the high
beam and low beam.
WARNING
Page 239 of 603

3-144
Convenient features of your vehicle
Air conditioning
All HYUNDAI Air Conditioning
Systems are filled with environmen-
tally friendly R-134a refrigerant.
1. Start the engine.
2. Push the air conditioning button.
3. Set the mode to the Face Levelmode.
4. Set the air intake control to the recirculated air position. However,
prolonged operation of the recircu-
lated air position will excessively
dry the air. In this case, change the
air position.
5. Adjust the fan speed control and temperature control to maintain
maximum comfort.
When maximum cooling is desired,
set the temperature control to the
extreme left position then set the fan
speed control to the highest speed. When using the air conditioning
system, monitor the engine tem-
perature gauge closely while driv-
ing up hills or in heavy traffic
when outside temperatures are
high. Air conditioning system
operation can cause engine over-
heating. Continue to use the blow-
er fan, but turn the air condition-
ing system off if the engine tem-
perature gauge indicates engine
overheating.
Air conditioning system operation
tips
If the vehicle has been parked in
direct sunlight during hot weather,
open the windows for a short time
to let the hot air inside the vehicle
escape.
After sufficient cooling has been achieved, switch back from the
recirculated air to the fresh outside
air position.
To help reduce moisture inside of the windows on rainy or humid
days, decrease the humidity inside
the vehicle by operating the air
conditioning system with the win-
dows and sunroof closed.
Use the air conditioning system every month only for a few minutes
to ensure maximum system per-
formance.
NOTICE
Page 244 of 603

3-149
Convenient features of your vehicle
3
C
CL
LI
IM
M A
AT
TE
E
C
C O
O N
NT
TR
R O
O L
L
A
A D
DD
DI
IT
T I
IO
O N
NA
AL
L
F
F E
E A
A T
TU
U R
RE
ES
S
(
( I
IF
F
E
E Q
Q U
UI
IP
P P
PE
ED
D )
)
Automatic Ventilation
(if equipped)
When the ignition switch is in the ON
position or when the engine is run-
ning and temperature is below 59°F
(15°C) with the recirculated air posi-
tion selected more than five minutes,
the air intake position will automati-
cally change to the outside (fresh) air
position.
To cancel or reset the Automatic
Ventilation
When the air conditioning system is
on, select Face Level mode and
while pressing the A/C button, press
the recirculated air position button
five times within three seconds.
Sunroof Inside Air
Recirculation (if equipped)
When the heater or air conditioning
system is on with the sunroof
opened, the outside (fresh) air posi-
tion will be automatically selected. At
this time, if you press the recirculated
air position button, the recirculated
air position will be selected but will
change back to the outside (fresh) air
position after 3 minutes.
When the sunroof is closed, the air
intake position will return to the orig-
inal position that was selected.
Page 250 of 603

3-155
Convenient features of your vehicle
3
Clock
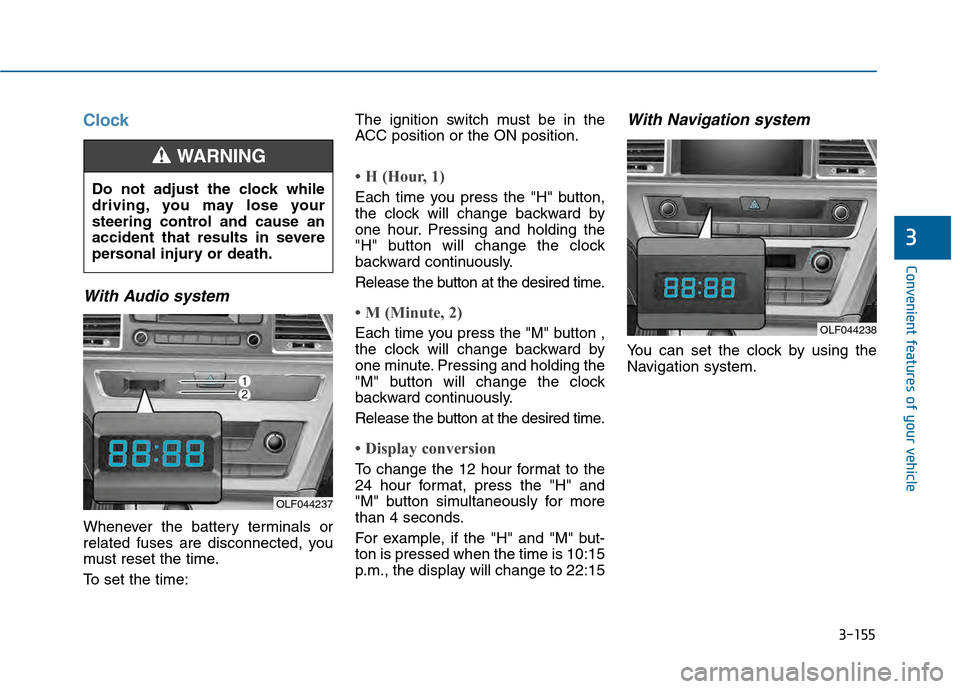
With Audio system
Whenever the battery terminals or
related fuses are disconnected, you
must reset the time.
To set the time:The ignition switch must be in the
ACC position or the ON position.
• H (Hour, 1)
Each time you press the "H" button,
the clock will change backward by
one hour. Pressing and holding the
"H" button will change the clock
backward continuously.
Release the button at the desired time.
• M (Minute, 2)
Each time you press the "M" button ,
the clock will change backward by
one minute. Pressing and holding the
"M" button will change the clock
backward continuously.
Release the button at the desired time.
• Display conversion
To change the 12 hour format to the
24 hour format, press the "H" and
"M" button simultaneously for more
than 4 seconds.
For example, if the "H" and "M" but-
ton is pressed when the time is 10:15
p.m., the display will change to 22:15
With Navigation system
You can set the clock by using the
Navigation system.
Do not adjust the clock while
driving, you may lose your
steering control and cause an
accident that results in severe
personal injury or death.
WARNING
OLF044237
OLF044238
Page 267 of 603

4-14
(Continued)
• If your iPhone
®is connected to both
the Bluetooth®Wireless Technology
and USB, the sound may not be
properly played. In your iPhone
®,
select the Dock c onnector or
Bluetooth
®Wireless Technology to
change the sound output (source).
• iPod mode cannot be operated when the iPod
®cannot be recognized due
to versions that do not support com-
munication protocols.
• For fifth generation iPod
®Nano
devices, the iPod®may not be recog-
nized when the battery level is low.
Please charge the iPod
®for use.
• Search/play orders shown within the iPod
®device may differ with the
orders shown within the audio sys-
tem.
• If the iPod
®malfunctions due to an
iPod®device defect, reset the iPod®
and try again. (To learn more, refer to
your iPod®manual)
(Continued) (Continued)
• Some iPod
®s may not sync with the
System depending on its version. If
the Media is removed before the
Media is recognized, then the sys-
tem may not properly restore the
previously operated mode. (iPad
®
charging is not supported.)
Information - Using the AUX
device
• If an external device connector is connected with the AUX terminal,
then AUX mode will automatically
operate. Once the connector is dis-
connected, the previous mode will
be restored.
• AUX mode can be used only when an external audio player (cam-
corder, car VCR, etc.) has been con-
nected.
• The AUX volume can be controlled separately from other audio modes.
• Connecting a connector jack to the AUX terminal without an external
device will convert the system to
AUX mode, but only output noise.
When an external device is not
being used, also remove the connec-
tor jack.
• When the external device power is connected to the power jack, play-
ing the external device may output
noise. In such cases, disconnect the
power connection before use.
• Fully insert the AUX cable to the AUX jack upon use.i
Multimedia System