2015 Hyundai Santa Fe Sport door lock
[x] Cancel search: door lockPage 169 of 785
Features of your vehicle
76 4
To adjust the Zone setting:
1. Determine the desired Zone
Number based upon your current
location on the Zone Map.
2. Press and hold the button for 6
seconds, the current Zone
Number will appear on the display.
3. Pressing and holding the button
again will cause the numbers to
increment (Note: they will repeat
…13, 14, 15, 1, 2, …). Releasing
the button when the desired Zone
Number appears on the display
will set the new Zone.
4. Within about 5 seconds the com-
pass will start displaying a com-
pass heading again.
There are some conditions that can
cause changes to the vehicle mag-
nets, such as installing a ski rack or
a CB antenna. Body repair work on
the vehicle can also cause changes
to the vehicle's magnetic field. In
these situations, the compass will
need to be re-calibrated to quickly
correct for these changes. To re-cali-
brate the compass:1. Press and hold the button for
more than 9 seconds. When the
compass memory is cleared a "C"
will appear in the display.
2. To calibrate the compass, drive
the vehicle in 2 complete circles at
less than 8 km/h (5 mph).Integrated HomeLink®Wireless
Control System
The HomeLink
®Wireless Control
System provides a convenient way to
replace up to three hand-held radio-
frequency (RF) transmitters with a
single built-in device. This innovative
feature will learn the radio frequency
codes of most current transmitters to
operate devices such as gate opera-
tors, garage door openers, entry
door locks, security systems, even
home lighting. Both standard and
rolling code-equipped transmitters
can be programmed by following the
outlined procedures. Additional
HomeLink
®information can be found
at: www.homelink.com or by calling
1-800-355-3515.
Page 172 of 785
479
Features of your vehicle
4. Firmly press, hold for 5 seconds
and release the programmed
HomeLink
®button up to two sepa-
rate times to activate the door. If the
door does not activate, press and
hold the just-trained HomeLink
®but-
ton and observe the indicator light.
• If the indicator light stays on con-
stantly, programming is complete
and your device should activate
when the HomeLink
®button is
pressed and released.
• If the indicator light blinks rapidly
for 2 seconds and then turns to a
constant light, continue with
"Programming" steps 5-7 to com-
plete the programming of a rolling
code equipped device (most com-
monly a garage door opener).
5. At the garage door opener receiv-
er (motor-head unit) in the garage,
locate the "learn" or "smart" but-
ton. This can usually be found
where the hanging antenna wire is
attached to the motor-head unit.6. Firmly press and release the
"learn" or "smart" button. (The
name and color of the button vary
by manufacturer). There are 30
seconds to initiate step 7.
7. Return to the vehicle and firmly
press, hold for 2 seconds and
release the programmed
HomeLink
®button. Repeat the
"press/hold/release" sequence a
second time, and, depending on
the brand of the garage door
opener (or other rolling code
equipped device), repeat this
sequence a third time to complete
the programming process.
HomeLink
®should now activate your
rolling code equipped device.Gate operator & Canadian pro-
gramming
During programming, your handheld
transmitter may automatically stop
transmitting. Continue to press the
Integrated HomeLink
®Wireless
Control System button (note steps 2
through 3 in the Programming portion
of this document) while you press
and re-press ("cycle") your handheld
transmitter every two seconds until
the frequency signal has been
learned. The indicator light will flash
slowly and then rapidly after several
seconds upon successful training.
Operating HomeLink
®
To operate, simply press and release
the programmed HomeLink®button.
Activation will now occur for the
trained device (i.e. garage door
opener, gate operator, security sys-
tem, entry door lock, home/office
lighting, etc.). For convenience, the
hand-held transmitter of the device
may also be used at any time.
Page 185 of 785
Features of your vehicle
92 4
User Settings Mode
Description
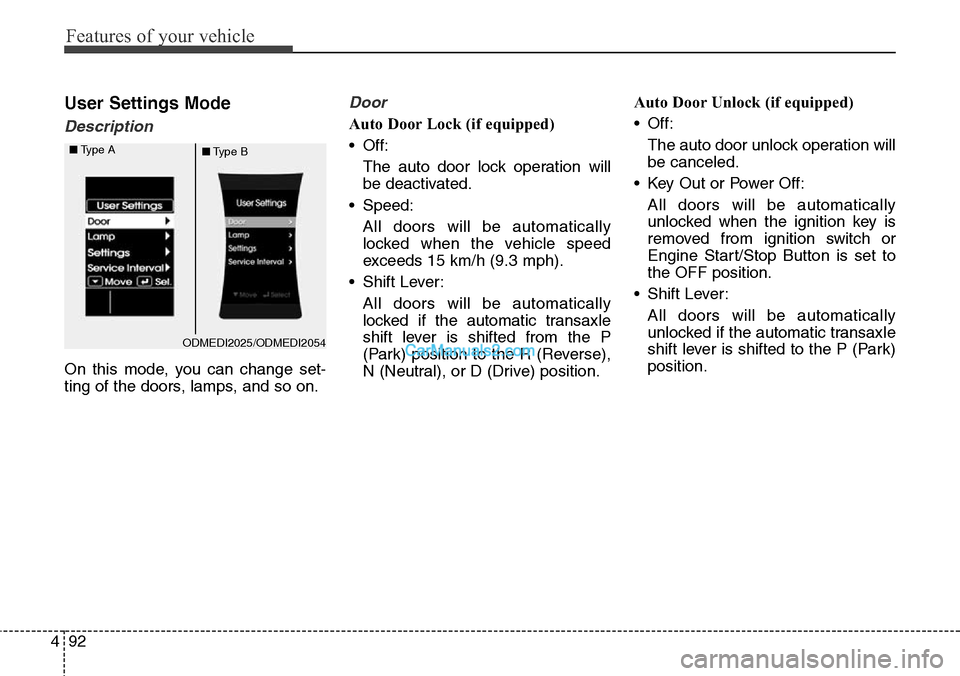
On this mode, you can change set-
ting of the doors, lamps, and so on.
Door
Auto Door Lock (if equipped)
• Off:
The auto door lock operation will
be deactivated.
• Speed:
All doors will be automatically
locked when the vehicle speed
exceeds 15 km/h (9.3 mph).
• Shift Lever:
All doors will be automatically
locked if the automatic transaxle
shift lever is shifted from the P
(Park) position to the R (Reverse),
N (Neutral), or D (Drive) position.Auto Door Unlock (if equipped)
• Off:
The auto door unlock operation will
be canceled.
• Key Out or Power Off:
All doors will be automatically
unlocked when the ignition key is
removed from ignition switch or
Engine Start/Stop Button is set to
the OFF position.
• Shift Lever:
All doors will be automatically
unlocked if the automatic transaxle
shift lever is shifted to the P (Park)
position.
ODMEDI2025/ODMEDI2054 ■Type A
■Type B
Page 186 of 785
493
Features of your vehicle
Two Press Unlock (if equipped)
• Off:
The two press unlock function will
be deactivated. Therefore, all doors
will unlock if the door is unlocked.
• On:
The driver’s door will unlock if the
door is unlocked. When the door is
unlocked again within 4 seconds,
all doors will unlock.
Power Tailgate (if equipped)
If this item is checked, the power tail-
gate system function will be activat-
ed.
Smart Tailgate (if equipped)
If this item is checked, the Smart
Tailgate system function will be acti-
vated.Horn Feedback (if equipped)
• Off:
The Horn feedback operation will
be deactivated.
• On:
After locking the door by pressing
the lock button on the transmitter, if
you press the lock button again
within 4 seconds, the warning
sound will operate once to indicate
that all doors are locked.Lamp
Head Lamp Delay (if equipped)
If this item is checked, the headlamp
delay and headlamp welcome func-
tion will be activated.
Welcome Light (if equipped)
If this item is checked, the welcome
light function of the puddle lamp will
be activated.
Auto Triple Turn (One-touch triple
turn signal) (if equipped)
If this item is checked, the lane
change signals will blink 3 times when
the turn signal lever is moved slightly.
One Touch Turn Signal (if equipped)
• Off:
The one touch turn signal function
will be deactivated.
• 3, 5, 7 Flashing :
The lane change signals will blink
3, 5, or 7 times when the turn sig-
nal lever is moved slightly.
For more details, refer to ''Light'' in this
chapter.
Page 217 of 785
Features of your vehicle
124 4
Battery saver function
• The purpose of this feature is to
prevent the battery from being dis-
charged. The system automatically
turns off the parking lights when
the driver removes the ignition key
(smart key : turns off the engine)
and opens the driver-side door.
• With this feature, the parking lights
will be turned off automatically if
the driver parks on the side of road
at night.
If necessary, to keep the lights on
when the ignition key is removed
(smart key : turns off the engine),
perform the following:
1) Open the driver-side door.
2) Turn the parking lights OFF and
ON again using the light switch
on the steering column.
Headlamp delay (if equipped)
If you turn the ignition switch to the
ACC or OFF position with the head-
lights ON, the headlights remain on
for about 5 minutes. However, if the
driver’s door is opened and closed,
the headlights are turned off after 15
seconds.
The headlights can be turned off by
pressing the lock button on the trans-
mitter (or smart key) twice or turning
the light switch to the OFF or Auto
position.
However, if you turn the light switch
to the Auto position when it is dark
outside, the headlights will not be
turned off.
You can activate or deactivate this
feature. Refer to “User Settings” in
this section.
LIGHTING
CAUTION
If the driver gets out of the vehi-
cle through other doors (other
than the driver's door), the bat-
tery saver function does not
operate and the headlamp delay
does not turn off automatically.
This will cause the battery to be
discharged. In this case, make
sure to turn off the lamp before
getting out of the vehicle.
Page 228 of 785
4135
Features of your vehicle
• OFF (3): The lamps are off even if a
door is opened.
• ROOM (4):The map lamp and
room lamp stays on at
all times.
• DOOR (5):
- The map lamp and room lamp
comes on when doors are
unlocked with a transmitter or
smart key as long as the doors
are closed. The lamps go out
after approximately 30 seconds.
- The map lamp and room lamp
comes on for approximately 30
seconds when doors are unlocked
with a transmitter or smart key as
long as the doors are not opened.
- The map lamp and room lamp will
stay on for approximately 20 min-
utes if a door is opened with the
ignition switch in the ACC or
LOCK/OFF position.
- The map lamp and room lamp will
stay on continuously if the door is
opened with the ignition switch in
the ON position.- The map lamp and room lamp will
go out immediately if the ignition
switch is changed to the ON posi-
tion or all doors are locked.
✽NOTICE
When the lamp is turned on by
pressing the lens (1), the lamp does
not turn off even if the switch is in
the OFF position (3).
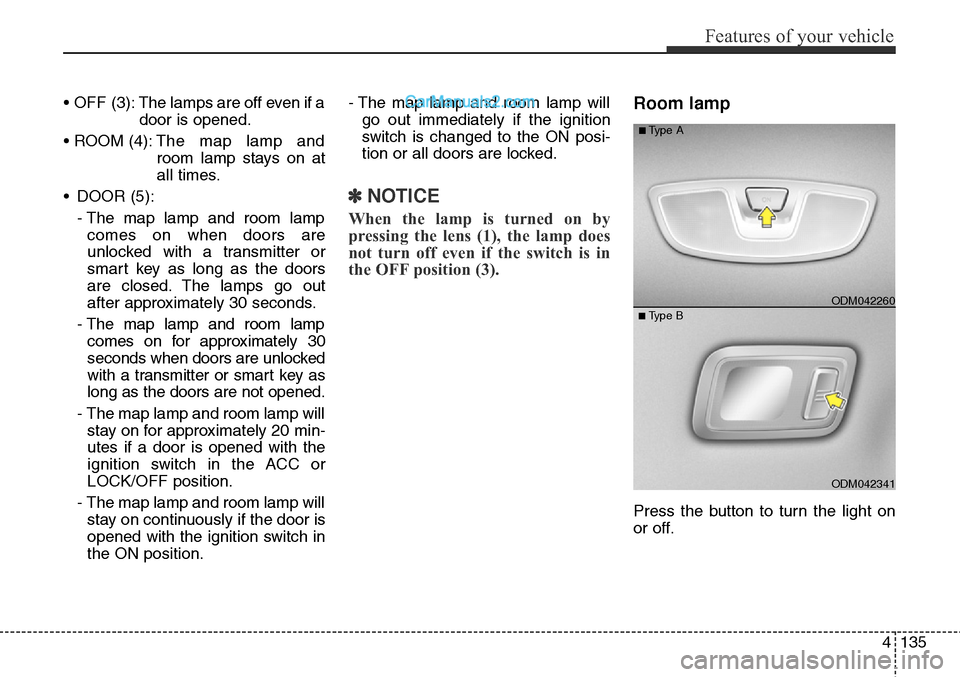
Room lamp
Press the button to turn the light on
or off.
ODM042341
■Type BODM042260
■Type A
Page 230 of 785
4137
Features of your vehicle
Headlamp welcome
When the headlight(light switch in
the headlight or AUTO position) is on
and all doors (and tailgate) are
locked and closed, the headlight,
position light and tail light will come
on for 15 seconds if any of the below
is performed.
• Without smart key system
- When the door unlock button is
pressed on the transmitter.
• With the smart key system
- When the door unlock button is
pressed on the smart key.
At this time, if you press the door lock
button (on the transmitter or smart
key), the lights will turn off immedi-
ately.
Interior light
When the interior light switch is in the
DOOR position and all doors (and
tailgate) are locked and closed, the
room lamp will come on for 30 sec-
onds if any of the below is per-
formed.
• Without smart key system
- When the door unlock button is
pressed on the transmitter.
• With the smart key system
- When the door unlock button is
pressed on the smart key.
- When the button of the outside
door handle is pressed.
At this time, if you press the door lock
button, the lamps will turn off imme-
diately.
Puddle lamp and pocket lamp
(if equipped)
When all doors are locked and
closed, the puddle lamp and pocket
lamp will come on for 15 seconds if
any of the below is performed.
• Without smart key system
- When the door unlock button is
pressed on the transmitter.
• With the smart key system
- When the door unlock button is
pressed on the smart key.
- When the button of the outside
door handle is pressed.
- When the vehicle is approached
with the smart key in possession.
At this time, if you press the door lock
button, the lamps will turn off imme-
diately.
WELCOME SYSTEM (IF EQUIPPED)
Page 572 of 785
53
Driving your vehicle
BEFORE DRIVING
Before entering vehicle
• Be sure that all windows, outside
mirror(s), and outside lights are
clean.
• Check the condition of the tires.
• Check under the vehicle for any
sign of leaks.
• Be sure there are no obstacles
behind you if you intend to back up.
Necessary inspections
Fluid levels, such as engine oil,
engine coolant, brake fluid, and
washer fluid should be checked on a
regular basis, with the exact interval
depending on the fluid. Further
details are provided in Section 7,
“Maintenance”.
Before starting
• Close and lock all doors.
• Position the seat so that all con-
trols are easily reached.
• Adjust the inside and outside
rearview mirrors.
• Be sure that all lights work.
• Check all gauges.
• Check the operation of warning
lights when the ignition switch is
turned to the ON position.
• Release the parking brake and
make sure the brake warning light
goes out.
For safe operation, be sure you are
familiar with your vehicle and its
equipment.
WARNING
Driving while distracted can
result in a loss of vehicle con-
trol, that may lead to an accident,
severe personal injury, and
death. The driver’s primary
responsibility is in the safe and
legal operation of a vehicle, and
use of any handheld devices,
other equipment, or vehicle sys-
tems which take the driver’s
eyes, attention and focus away
from the safe operation of a vehi-
cle or which are not permissible
by law should never be used
during operation of the vehicle.