Page 161 of 785
Features of your vehicle
68 4
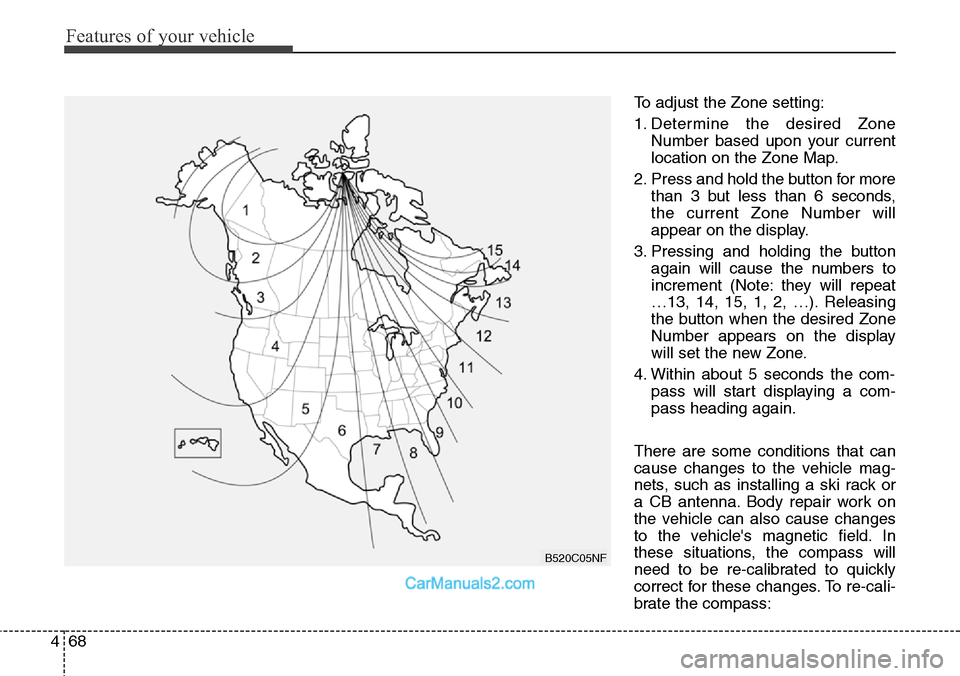
To adjust the Zone setting:
1. Determine the desired Zone
Number based upon your current
location on the Zone Map.
2. Press and hold the button for more
than 3 but less than 6 seconds,
the current Zone Number will
appear on the display.
3. Pressing and holding the button
again will cause the numbers to
increment (Note: they will repeat
…13, 14, 15, 1, 2, …). Releasing
the button when the desired Zone
Number appears on the display
will set the new Zone.
4. Within about 5 seconds the com-
pass will start displaying a com-
pass heading again.
There are some conditions that can
cause changes to the vehicle mag-
nets, such as installing a ski rack or
a CB antenna. Body repair work on
the vehicle can also cause changes
to the vehicle's magnetic field. In
these situations, the compass will
need to be re-calibrated to quickly
correct for these changes. To re-cali-
brate the compass:
B520C05NF
Page 167 of 785
Features of your vehicle
74 4
Automatic-Dimming Night Vision
Safety™ (NVS®) Mirror
The NVS®Mirror in your vehicle is
the most advanced way to reduce
annoying glare in the rearview mirror
during any driving situation. For more
information regarding NVS
®mirrors
and other applications, please refer
to the Gentex website:
www.gentex.com
✽NOTICE
The NVS®Mirror automatically
reduces glare during driving condi-
tions based upon light levels moni-
tored in front of the vehicle and
from the rear of the vehicle. These
light sensors are visible through
openings in the front and rear of the
mirror case. Any object that
obstructs either light sensor will
degrade the automatic dimming
control feature.
Automatic-dimming function
Your mirror will automatically dim
upon detecting glare from the vehi-
cles traveling behind you. The auto-
dimming function can be controlled
by the Dimming ON/OFF Button:
1. Pressing and hold the button for
3 seconds turns the autodimming
function OFF which is indicated by
the green Status Indicator LED
turning off.
2. Pressing and hold the button for
3 seconds again turns the auto-
dimming function ON which is indi-
cated by the green Status
Indicator LED turning on.
The mirror defaults to the ON posi-
tion each time the vehicle is started.Z-Nav™ Compass Display
The NVS™ Mirror in your vehicle is
also equipped with a Z-Nav™
Compass that shows the vehicle
Compass heading in the Display
Window using the 8 basic cardinal
headings (N, NE, E, SE, etc.).
Page 169 of 785
Features of your vehicle
76 4
To adjust the Zone setting:
1. Determine the desired Zone
Number based upon your current
location on the Zone Map.
2. Press and hold the button for 6
seconds, the current Zone
Number will appear on the display.
3. Pressing and holding the button
again will cause the numbers to
increment (Note: they will repeat
…13, 14, 15, 1, 2, …). Releasing
the button when the desired Zone
Number appears on the display
will set the new Zone.
4. Within about 5 seconds the com-
pass will start displaying a com-
pass heading again.
There are some conditions that can
cause changes to the vehicle mag-
nets, such as installing a ski rack or
a CB antenna. Body repair work on
the vehicle can also cause changes
to the vehicle's magnetic field. In
these situations, the compass will
need to be re-calibrated to quickly
correct for these changes. To re-cali-
brate the compass:1. Press and hold the button for
more than 9 seconds. When the
compass memory is cleared a "C"
will appear in the display.
2. To calibrate the compass, drive
the vehicle in 2 complete circles at
less than 8 km/h (5 mph).Integrated HomeLink®Wireless
Control System
The HomeLink
®Wireless Control
System provides a convenient way to
replace up to three hand-held radio-
frequency (RF) transmitters with a
single built-in device. This innovative
feature will learn the radio frequency
codes of most current transmitters to
operate devices such as gate opera-
tors, garage door openers, entry
door locks, security systems, even
home lighting. Both standard and
rolling code-equipped transmitters
can be programmed by following the
outlined procedures. Additional
HomeLink
®information can be found
at: www.homelink.com or by calling
1-800-355-3515.
Page 176 of 785
483
Features of your vehicle
Reverse parking aid function
(if equipped)
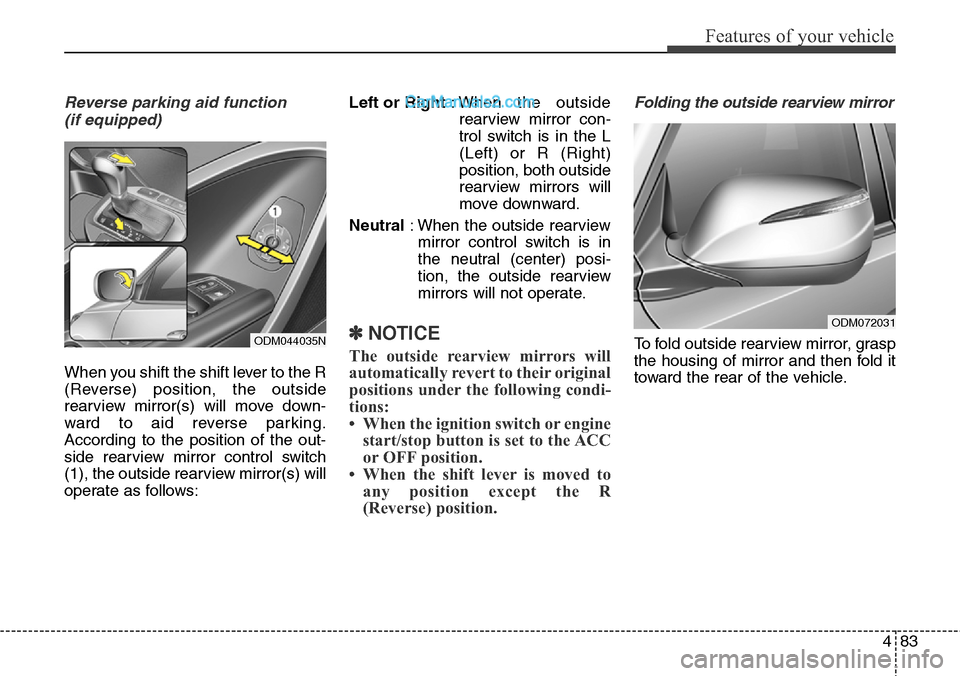
When you shift the shift lever to the R
(Reverse) position, the outside
rearview mirror(s) will move down-
ward to aid reverse parking.
According to the position of the out-
side rearview mirror control switch
(1), the outside rearview mirror(s) will
operate as follows:Left or Right: When the outside
rearview mirror con-
trol switch is in the L
(Left) or R (Right)
position, both outside
rearview mirrors will
move downward.
Neutral: When the outside rearview
mirror control switch is in
the neutral (center) posi-
tion, the outside rearview
mirrors will not operate.
✽NOTICE
The outside rearview mirrors will
automatically revert to their original
positions under the following condi-
tions:
• When the ignition switch or engine
start/stop button is set to the ACC
or OFF position.
• When the shift lever is moved to
any position except the R
(Reverse) position.
Folding the outside rearview mirror
To fold outside rearview mirror, grasp
the housing of mirror and then fold it
toward the rear of the vehicle.
ODM072031
ODM044035N
Page 178 of 785
485
Features of your vehicle
Instrument Cluster Control
Adjusting Instrument Cluster
Illumination
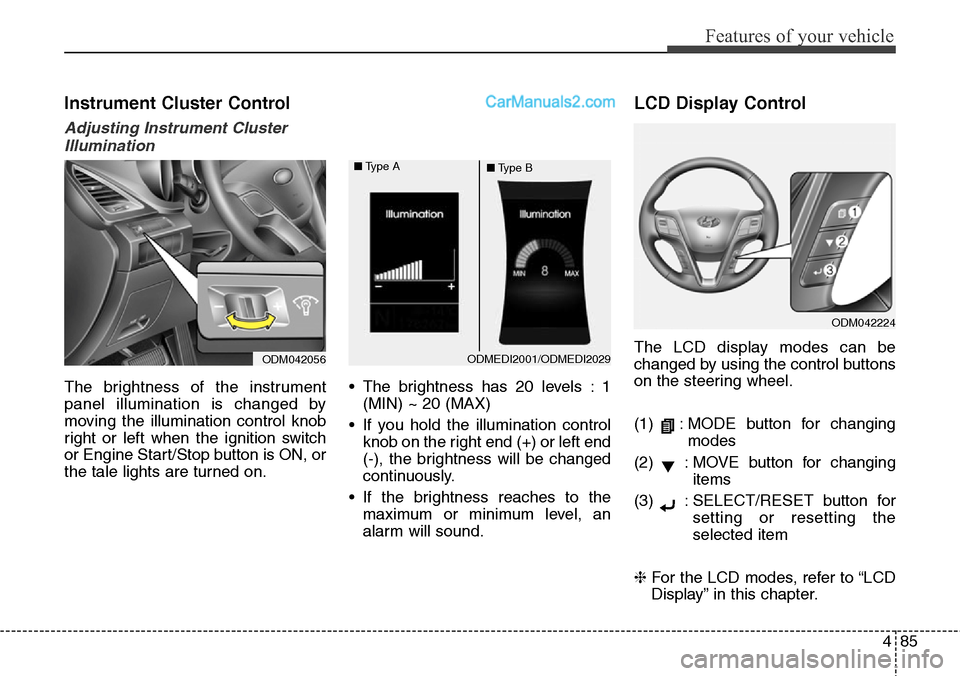
The brightness of the instrument
panel illumination is changed by
moving the illumination control knob
right or left when the ignition switch
or Engine Start/Stop button is ON, or
the tale lights are turned on.• The brightness has 20 levels : 1
(MIN) ~ 20 (MAX)
• If you hold the illumination control
knob on the right end (+) or left end
(-), the brightness will be changed
continuously.
• If the brightness reaches to the
maximum or minimum level, an
alarm will sound.
LCD Display Control
The LCD display modes can be
changed by using the control buttons
on the steering wheel.
(1) : MODE button for changing
modes
(2) : MOVE button for changing
items
(3) : SELECT/RESET button for
setting or resetting the
selected item
❈For the LCD modes, refer to “LCD
Display” in this chapter.
ODM042224
ODM042056ODMEDI2001/ODMEDI2029 ■Type A
■Type B
Page 180 of 785
487
Features of your vehicle
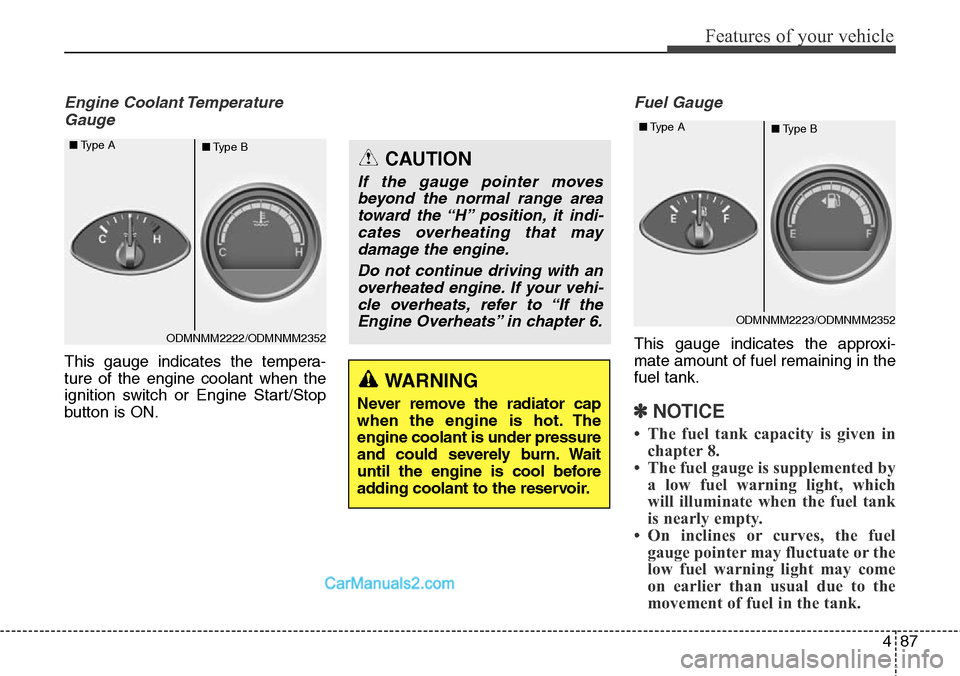
Engine Coolant Temperature
Gauge
This gauge indicates the tempera-
ture of the engine coolant when the
ignition switch or Engine Start/Stop
button is ON.
Fuel Gauge
This gauge indicates the approxi-
mate amount of fuel remaining in the
fuel tank.
✽NOTICE
• The fuel tank capacity is given in
chapter 8.
• The fuel gauge is supplemented by
a low fuel warning light, which
will illuminate when the fuel tank
is nearly empty.
• On inclines or curves, the fuel
gauge pointer may fluctuate or the
low fuel warning light may come
on earlier than usual due to the
movement of fuel in the tank.
WARNING
Never remove the radiator cap
when the engine is hot. The
engine coolant is under pressure
and could severely burn. Wait
until the engine is cool before
adding coolant to the reservoir.
CAUTION
If the gauge pointer moves
beyond the normal range area
toward the “H” position, it indi-
cates overheating that may
damage the engine.
Do not continue driving with an
overheated engine. If your vehi-
cle overheats, refer to “If the
Engine Overheats” in chapter 6.
ODMNMM2222/ODMNMM2352 ■Type A
■Type B
ODMNMM2223/ODMNMM2352 ■Type A
■Type B
Page 184 of 785
491
Features of your vehicle
Service Mode
Service Interval
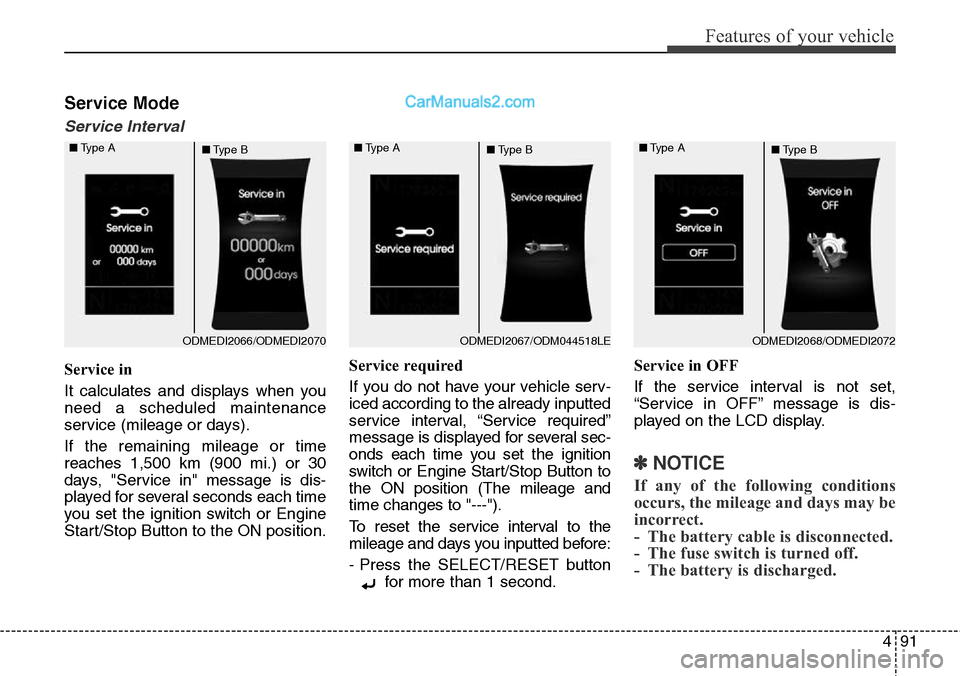
Service in
It calculates and displays when you
need a scheduled maintenance
service (mileage or days).
If the remaining mileage or time
reaches 1,500 km (900 mi.) or 30
days, "Service in" message is dis-
played for several seconds each time
you set the ignition switch or Engine
Start/Stop Button to the ON position.Service required
If you do not have your vehicle serv-
iced according to the already inputted
service interval, “Service required”
message is displayed for several sec-
onds each time you set the ignition
switch or Engine Start/Stop Button to
the ON position (The mileage and
time changes to "---").
To reset the service interval to the
mileage and days you inputted before:
- Press the SELECT/RESET button
for more than 1 second.Service in OFF
If the service interval is not set,
“Service in OFF” message is dis-
played on the LCD display.
✽NOTICE
If any of the following conditions
occurs, the mileage and days may be
incorrect.
- The battery cable is disconnected.
- The fuse switch is turned off.
- The battery is discharged.
ODMEDI2066/ODMEDI2070 ■Type A
■Type BODMEDI2067/ODM044518LE ■Type A
■Type BODMEDI2068/ODMEDI2072 ■Type A
■Type B
Page 185 of 785
Features of your vehicle
92 4
User Settings Mode
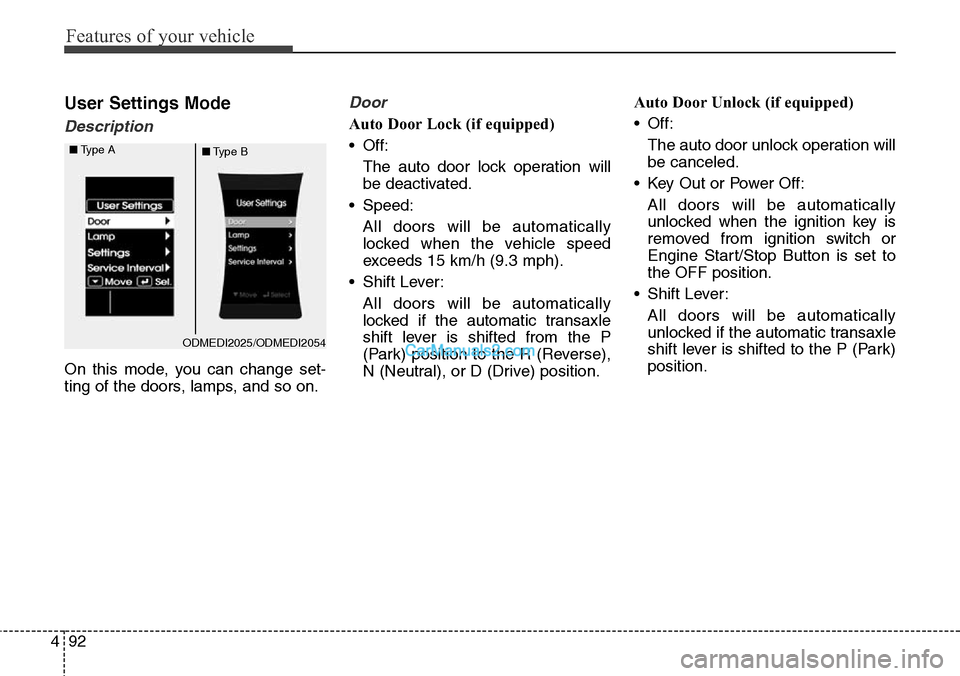
Description
On this mode, you can change set-
ting of the doors, lamps, and so on.
Door
Auto Door Lock (if equipped)
• Off:
The auto door lock operation will
be deactivated.
• Speed:
All doors will be automatically
locked when the vehicle speed
exceeds 15 km/h (9.3 mph).
• Shift Lever:
All doors will be automatically
locked if the automatic transaxle
shift lever is shifted from the P
(Park) position to the R (Reverse),
N (Neutral), or D (Drive) position.Auto Door Unlock (if equipped)
• Off:
The auto door unlock operation will
be canceled.
• Key Out or Power Off:
All doors will be automatically
unlocked when the ignition key is
removed from ignition switch or
Engine Start/Stop Button is set to
the OFF position.
• Shift Lever:
All doors will be automatically
unlocked if the automatic transaxle
shift lever is shifted to the P (Park)
position.
ODMEDI2025/ODMEDI2054 ■Type A
■Type B