2015 Hyundai Genesis Transmission
[x] Cancel search: TransmissionPage 4 of 501

F4
FOREWORD
Thank you for choosing HYUNDAI. We are pleased to welcome you to the growing number of discriminating people who
drive HYUNDAI. The advanced engineering and high-quality construction of each HYUNDAI we build is something of
which we're very proud.
Your Owner's Manual will introduce you to the features and operation of your new HYUNDAI. It is suggested that you
read it carefully because the information it contains can contribute greatly to the satisfaction you receive from your new
car.
The manufacturer also recommends that all service and maintenance on your car be performed by an authorized
HYUNDAI dealer. HYUNDAI dealers are prepared to provide high-quality service, maintenance and any other assistance
that may be required.
HYUNDAI MOTOR AMERICA
Note :Because future owners will also need the information included in this manual, if you sell this HYUNDAI, please
leave the manual in the vehicle for their use. Thank you.
Copyright 2014 HYUNDAI Motor America. All rights reserved. No part of this publication may be reproduced, stored
in any retrieval system or transmitted in any form or by any means without the prior written permission of HYUNDAI
Motor America.Severe engine and transmission damage may result from the use of poor quality fuels and lubricants that
do not meet HYUNDAI specifications. You must always use high quality fuels and lubricants that meet the
specifications listed on Page 8-6 in the Vehicle Specifications section of the Owner's Manual.
CAUTION
Page 16 of 501

F16
Before driving.........................................................5-4
Before entering the vehicle ...........................................5-4
Before starting...................................................................5-4
Engine Start/Stop button ................................................5-6
Automatic transmission .......................................5-11
Automatic transmission operation .............................5-11
Parking ...............................................................................5-17
Good driving practices ...................................................5-17
All Wheel Drive (AWD) ........................................5-19
Using All Wheel Drive (AWD) .......................................5-19
Emergency precautions .................................................5-21
Braking system ...................................................5-23
Power brakes ..................................................................5-23
Disc brakes wear indicator ..........................................5-24
Foot parking brake ........................................................5-24
Electric parking brake (EPB) ........................................5-26
AUTO HOLD .....................................................................5-31
Anti-lock Brake System (ABS) ....................................5-35
Electronic Stability Control (ESC)................................5-38
Hill-Start Assist Control (HAC) ...................................5-41
Good braking practices..................................................5-41
Drive mode integrated control system .............5-42Electronic Control Suspension (ECS) ................5-44
ECS malfunction indicator.............................................5-44
Autonomous Emergency Braking (AEB)............5-45
AEB operation ..................................................................5-46
To cancel the AEB ..........................................................5-47
Warning light and message ..........................................5-48
Cruise control .......................................................5-50
Cruise control operation................................................5-50
Advanced smart cruise control system ............5-54
To convert to cruise control mode .............................5-55
Smart cruise control speed ..........................................5-55
Cancelled automatically .................................................5-58
Smart cruise control vehicle-to-vehicle distance.....5-60
Sensor to detect distance to the vehicle ahead .....5-62
Limitations of the system .............................................5-64
Lane Keeping Assist System (LKAS) .................5-69
LKAS operation ................................................................5-70
LKAS malfunction............................................................5-75
LKAS function change ..................................................5-76
Blind Spot Detection System (BSD) ..................5-78
BSD (Blind Spot Detection) /
LCA (Lane Change Assist) .............................................5-79
RCTA (Rear Cross Traffic Alert) ..................................5-82
F16
5Driving your vehicle
Page 24 of 501

1-5
Your vehicle at a glance
1
I IN
NS
ST
TR
RU
UM
ME
EN
NT
T
P
PA
AN
NE
EL
L
O
OV
VE
ER
RV
VI
IE
EW
W
(
(I
I)
)
1. Light control/Turn signals..3-109 / 3-113
2. Steering wheel audio controls* ........4-4
3.
Bluetooth®wireless technology
hands-free controls* ..........................4-5
4. Instrument cluster ..........................3-61
5. Horn ................................................3-20
6. Driver’s front air bag........................2-48
7. Wiper/Washer................................3-122
8. Advanced smart cruise controls* ....5-54
9. Engine start/stop button ....................5-6
10. Automatic transmission ................5-11
11. Drive mode integrated control
system ..........................................5-42
12. AUTO HOLD ................................5-31
13. Seat warmers and coolers ............2-18
14. Heated steering wheel button ......3-19
15. Parking assist system ................3-127
16. Glove box ....................................3-153
* : if equipped
ODH014004NThe actual shape may differ from the illustration.
Page 39 of 501

2-13
Safety system of your vehicle
2
Make sure the engine is off,
the shift lever is in P and the
parking brake is applied
whenever loading or unload-
ing cargo. The Vehicle may
move if the shift lever is inad-
vertently moved to another
position.
Be careful when loading
cargo through the rear pas-
senger seats to prevent dam-
age to the vehicle interior.
When cargo is loaded through
the rear passenger seats,
ensure the cargo is properly
secured to prevent it from
moving while driving.
Unsecured cargo in the pas-
senger compartment can
cause damage to the vehicle
or injury to it’s occupants.
CAUTION
Cargo
Cargo should always be
secured to prevent it from being
thrown about the vehicle in a
collision and causing injury to
the vehicle occupants. Do not
place objects in the rear seats,
since they cannot be properly
secured and may hit the front
seat occupants in a collision.
WARNING
Cargo loading
Make sure the engine is off, the
automatic transmission is in P
(Park) and the parking brake is
securely applied whenever
loading or unloading cargo.
Failure to take these steps may
allow the vehicle to move if the
shift lever is inadvertently
moved to another position.
WARNING
Page 119 of 501

3-25
Convenient features of your vehicle
3
Programming HomeLink®
Please note the following:
When programming a garage door
opener, it is advised to park the
vehicle outside of the garage.
It is recommended that a new bat-
tery be placed in the hand-held
transmitter of the device being pro-
grammed to HomeLink
®for quicker
training and accurate transmission
of the radio-frequency signal.
Some vehicles may require the
ignition switch to be placed in the
ACC (or "Accessories") position for
programming and/or operation of
HomeLink
®.
In the event that there are still pro-
gramming difficulties or questions
after following the programming
steps listed below, contact
HomeLink
®at: www.homelink.com
or by calling 1-800-355-3515.
Programming
To train most devices, follow these
instructions:
1. For first-time programming, press
and hold the two outside buttons
(
,), HomeLink
®Channel 1
and Channel 3, until the indicator
light begins to flash (after 10 sec-
onds). Release both buttons. Do
not hold the buttons for longer
than 20 seconds.
ODH044413N Flashing
Before programming HomeLink®
to a garage door opener or gate
operator, make sure people and
objects are out of the way of the
device to prevent potential harm
or damage. Do not use the
HomeLink
®with any garage door
opener that lacks the safety stop
and reverse features required by
U.S. federal safety standards
(this includes any garage door
opener model manufactured
before April 1, 1982). A garage
door that cannot detect an object
- signaling the door to stop and
reverse - does not meet current
U.S. federal safety standards.
Using a garage door opener
without these features increases
the risk of serious injury or
death.
WARNING
Page 126 of 501

3-32
Convenient features of your vehicle
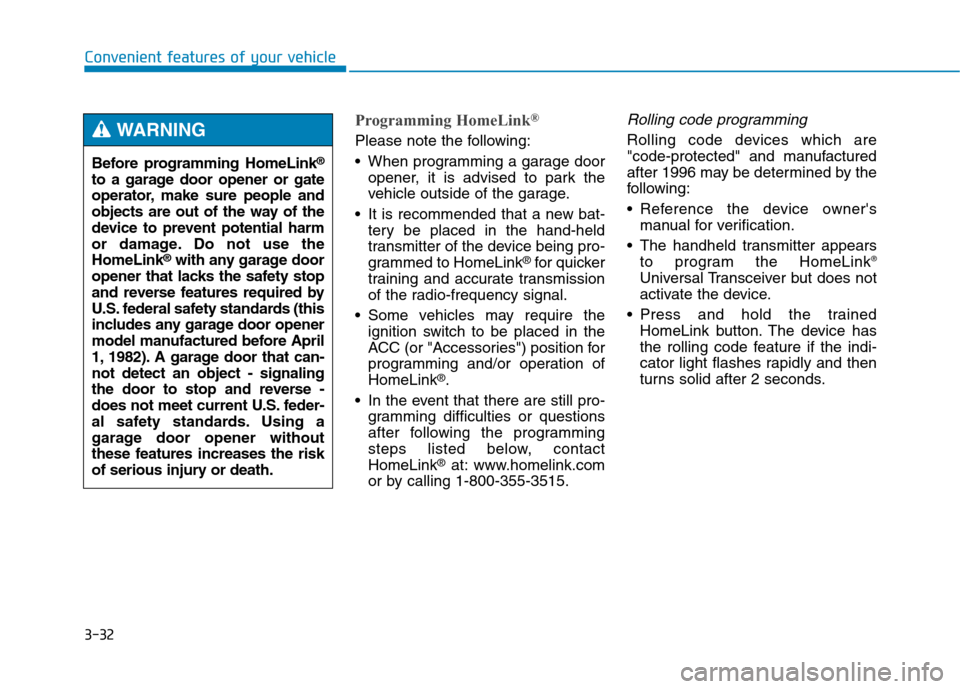
Programming HomeLink®
Please note the following:
When programming a garage door
opener, it is advised to park the
vehicle outside of the garage.
It is recommended that a new bat-
tery be placed in the hand-held
transmitter of the device being pro-
grammed to HomeLink
®for quicker
training and accurate transmission
of the radio-frequency signal.
Some vehicles may require the
ignition switch to be placed in the
ACC (or "Accessories") position for
programming and/or operation of
HomeLink
®.
In the event that there are still pro-
gramming difficulties or questions
after following the programming
steps listed below, contact
HomeLink
®at: www.homelink.com
or by calling 1-800-355-3515.
Rolling code programming
Rolling code devices which are
"code-protected" and manufactured
after 1996 may be determined by the
following:
Reference the device owner's
manual for verification.
The handheld transmitter appears
to program the HomeLink
®
Universal Transceiver but does not
activate the device.
Press and hold the trained
HomeLink button. The device has
the rolling code feature if the indi-
cator light flashes rapidly and then
turns solid after 2 seconds. Before programming HomeLink
®
to a garage door opener or gate
operator, make sure people and
objects are out of the way of the
device to prevent potential harm
or damage. Do not use the
HomeLink
®with any garage door
opener that lacks the safety stop
and reverse features required by
U.S. federal safety standards (this
includes any garage door opener
model manufactured before April
1, 1982). A garage door that can-
not detect an object - signaling
the door to stop and reverse -
does not meet current U.S. feder-
al safety standards. Using a
garage door opener without
these features increases the risk
of serious injury or death.
WARNING
Page 160 of 501

3-66
Convenient features of your vehicle
Outside Temperature Gauge
This gauge indicates the current out-
side air temperatures by 1°F (1°C).
- Temperature range :-40°F ~ 140°F
(-40°C ~ 60°C)
The outside temperature on the dis-
play may not change immediately
like a general thermometer to pre-
vent the driver from being inattentive.
The temperature unit (from °C to °F
or from °F to °C) can be changed as
below procedures.
And, the temperature unit of the clus-
ter and AVN monitor is changed at
the same time.- User Settings Mode in the Cluster :
You can change the temperature
unit in the “Other Features -
Temperature unit” .
- Automatic climate control system :
While pressing the OFF button,
press the AUTO button for 3 sec-
onds or more.
Automatic Transmission Shift
Indicator
This indicator displays which auto-
matic transmission shift lever is
selected.
Reverse : R
Neutral : N
Sports Mode : 1, 2, 3, 4, 5, 6, 7, 8
ODH043058N
■Type A
■Type B
ODH043059N
■Type A
■Type B
Page 168 of 501

3-74
Convenient features of your vehicle
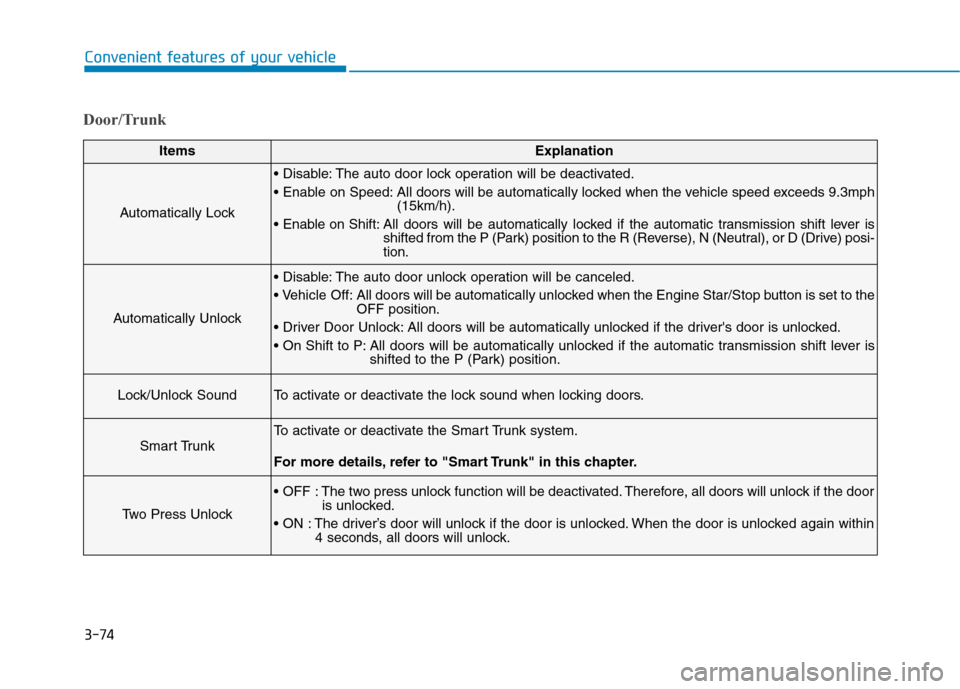
Door/Trunk
ItemsExplanation
Automatically Lock
The auto door lock operation will be deactivated.
All doors will be automatically locked when the vehicle speed exceeds 9.3mph
(15km/h).
All doors will be automatically locked if the automatic transmission shift lever is
shifted from the P (Park) position to the R (Reverse), N (Neutral), or D (Drive) posi-
tion.
Automatically Unlock
The auto door unlock operation will be canceled.
Off: All doors will be automatically unlocked when the Engine Star/Stop button is set to the
OFF position.
All doors will be automatically unlocked if the driver's door is unlocked.
All doors will be automatically unlocked if the automatic transmission shift lever is
shifted to the P (Park) position.
Lock/Unlock SoundTo activate or deactivate the lock sound when locking doors.
Smart Trunk
To activate or deactivate the Smart Trunk system.
For more details, refer to "Smart Trunk" in this chapter.
Two Press Unlock
The two press unlock function will be deactivated. Therefore, all doors will unlock if the door
is unlocked.
The driver’s door will unlock if the door is unlocked. When the door is unlocked again within
4 seconds, all doors will unlock.