2015 HONDA CIVIC COUPE ECO mode
[x] Cancel search: ECO modePage 132 of 441

131
uuOperating the Switches Around the Steering Wheel uWipers and Washers
Controls
Wipers and Washers
The windshield wipers and washers can be
used when the ignition switch is in ON
(w
*1.
■MIST
The wipers run at high speed until you release
the lever.■Wiper switch (OFF, INT, LO, HI)
Change the wiper switch setting according to
the amount of rain.■Adjusting the delay
*
Turn the adjustment ring to adjust the wiper
delay.■Washer
Sprays while you pull the lever toward you.
When you release the lever, the wipers make
two or three more sweeps before stopping.
*1: Models with the smart entry system have an ENGINE START/STOP button instead of an
ignition switch.
1 Wipers and WashersNOTICEDo not use the wipers when the windshield is dry.
The windshield will get scratched, or the rubber
blades will get damaged.NOTICEIn cold weather, the blades may freeze to the
windshield, becoming stuck.
Operating the wipers in this condition may damage
the wipers. Use the defroster to warm the
windshield, then turn the wipers on.
If the vehicle speeds up while the wipers are
operating intermitte ntly, the length of the wipe
interval shortens. When the vehicle starts moving, the
wipers make a single sweep.
When the vehicle speeds up, the wiper operation’s
shortest delay setting ( ) and the LO setting become
the same.
Turn the washers off if no washer fluid comes out.
The pump may get damaged.The wiper motor is equipped with a breaker that may
stop motor operation temporarily to prevent an
overload. Wiper operation will return to normal within a
few minutes, once the circuit has returned to normal.
If the wipers stop operating due to any obstacle such as
the build-up of snow, park the vehicle in a safe place.Rotate the wiper switch to OFF, and turn the ignition
switch to ACCESSORY
( q or LOCK
(0*1, then
remove the obstacle.
Models with adjustment ringAll models
Intermittent Time
Adjustment Ring
*
MIST
INT: OFF
LO : Low speed wipe
HI: High speed wipe Pull to
use
washer.
Low speed with
intermittent
Long delay
Short delay
* Not available on all models
Page 133 of 441

132
uuOperating the Switches Around the Steering Wheel uBrightness Control
Controls
Brightness Control
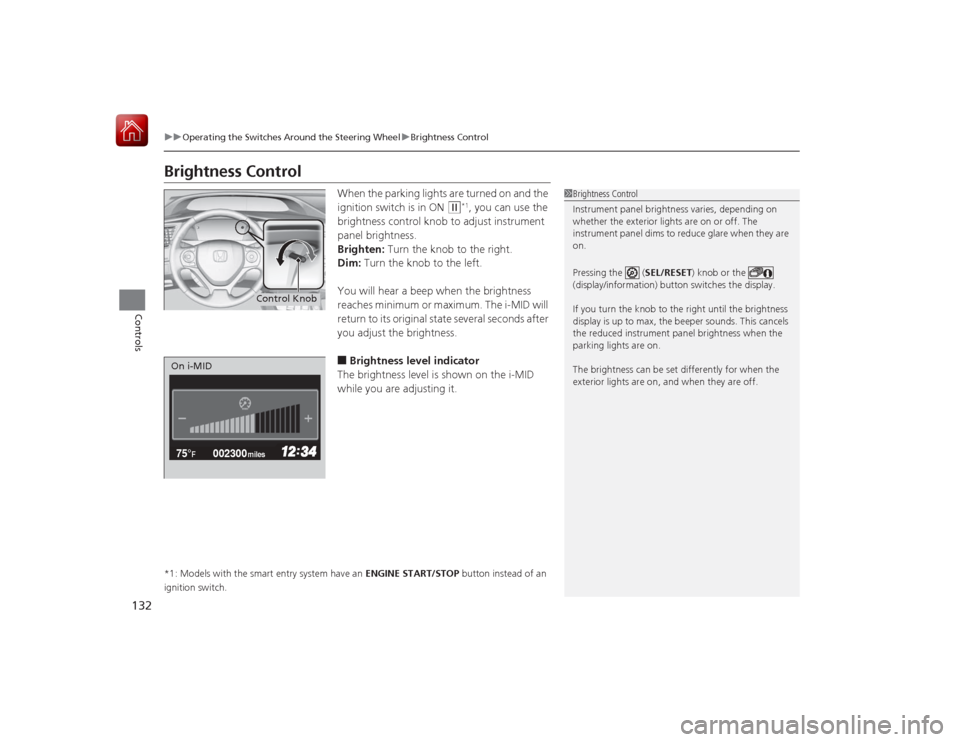
When the parking lights are turned on and the
ignition switch is in ON
(w
*1, you can use the
brightness control knob to adjust instrument
panel brightness.
Brighten: Turn the knob to the right.
Dim: Turn the knob to the left.
You will hear a beep when the brightness
reaches minimum or maximum. The i-MID will
return to its original state several seconds after
you adjust the brightness.
■Brightness level indicator
The brightness level is shown on the i-MID
while you are adjusting it.
*1: Models with the smart entry system have an ENGINE START/STOP button instead of an
ignition switch.
1 Brightness Control
Instrument panel brightness varies, depending on
whether the exterior lights are on or off. The
instrument panel dims to reduce glare when they are
on.
Pressing the ( SEL/RESET) knob or the
(display/information) button switches the display.
If you turn the knob to the right until the brightness
display is up to max, the beeper sounds. This cancels
the reduced instrument panel brightness when the
parking lights are on.
The brightness can be set differently for when the
exterior lights are on, and when they are off.
Control Knob
002300
75°
F miles
On i-MID
Page 146 of 441

145
Continued
Controls
Interior Lights/Interior Convenience ItemsInterior Lights
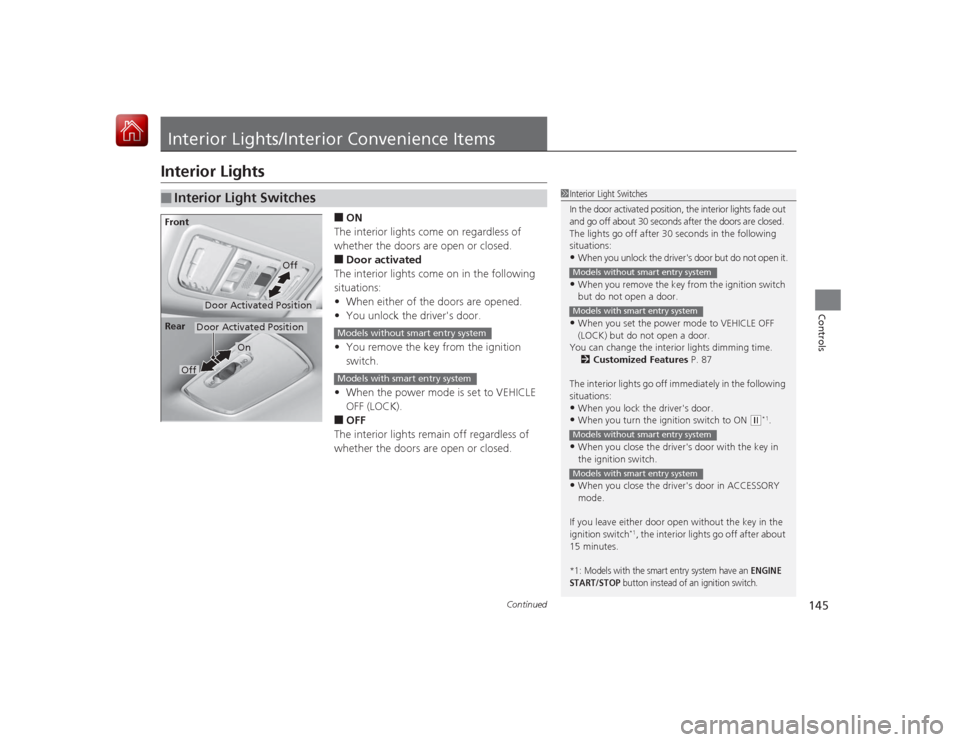
■ON
The interior lights come on regardless of
whether the doors are open or closed.■Door activated
The interior lights come on in the following
situations:
• When either of the doors are opened.
• You unlock the driver's door.
• You remove the key from the ignition
switch.
• When the power mode is set to VEHICLE
OFF (LOCK).■OFF
The interior lights remain off regardless of
whether the doors are open or closed.
■
Interior Light Switches
1 Interior Light Switches
In the door activated position, the interior lights fade out
and go off about 30 seconds after the doors are closed.
The lights go off after 30 seconds in the following
situations:•When you unlock the driver's door but do not open it.•When you remove the key from the ignition switch
but do not open a door.•When you set the power mode to VEHICLE OFF
(LOCK) but do not open a door.
You can change the interior lights dimming time.
2 Customized Features P. 87
The interior lights go off immediately in the following
situations:•When you lock the driver's door.•When you turn the ignition switch to ON
( w*1.
•When you close the driver's door with the key in
the ignition switch.•When you close the driver's door in ACCESSORY
mode.
If you leave either door open without the key in the
ignition switch
*1, the interior lights go off after about
15 minutes.
*1: Models with the smart entry system have an
ENGINE
START/STOP
button instead of an ignition switch.
Models without smart entry systemModels with smart entry systemModels without smart entry systemModels with smart entry system
Door Activated Position
Off
Front
Door Activated Position
On
Off
Rear
Models without smart entry systemModels with smart entry system
Page 155 of 441

uuHeating and Cooling
*uUsing Vents, Heating and A/C
154Controls
1. Adjust the fan speed using the fan control
dial.
2. Select .
3. Adjust the temperature using the
temperature control dial.
4. Press the A/C button (the indicator on).■To rapidly cool down the interior
1. Set the fan to the maximum speed.
2. Set the temperature to maximum cool.
3. Press the button (the indicator on).
Pressing the button turns the air
conditioning system on and automatically
switches the system to fresh air mode.■To rapidly defrost the windows
1. Set the fan to the maximum speed.
2. Press the button.
3. Press the button.
4. Set the temperature to maximum warm.
■
Cooling
*
1To rapidly cool down the interior
If the interior is very warm, you can cool it down
more rapidly by partially opening the windows.
While in the ECON mode, the system has greater
temperature fluctuations.
Pressing the button bypasses the ECON mode
control, and cools down the interior more rapidly.
■
Defrosting the Windshield and Windows
1Defrosting the Windshield and Windows
For your safety, make sure you have a clear view
through all the windows before driving.
Do not set the temperature near the upper or lower
limit.
When cold air hits the windshield, the outside of the
windshield may fog up.
If the side windows fog up, adjust the vents so that
the air hits the side windows.1To rapidly defrost the windows
After defrosting the windows, switch over to fresh air
mode.
If you keep the system in recirculation mode, the
windows may fog up from humidity. This impedes
visibility.
* Not available on all models
Page 157 of 441

uuClimate Control System
*uUsing Automatic Climate Control
156Controls
■Switching between the recirculation and fresh air modes
Press the (recirculation) button and switch the mode depending on
environmental conditions.
Recirculation mode (indicato r on): Recirculates air from the vehicle’s interior through
the system.
Fresh air mode (indicator off): Maintains outside ventilation. Keep the system in
fresh air mode in normal situations.
Pressing the (windshield defroster) button
turns the air conditioning system on and
automatically switches the system to fresh air
mode.
Press the button again to turn off, the
system returns to the previous settings.■To rapidly defrost the windows1.Press the button.
2. Press the button.■
Defrosting the Windshield and Windows
1Using Automatic Climate Control
Pressing the button switches the climate control
system between on and off. When turned on, the
system returns to your last selection.
While in the ECON mode, the climate control system
has greater temperature fluctuations.1Defrosting the Windshield and Windows
For your safety, make sure you have a clear view
through all the windows before driving.
Do not set the temperature near the upper or lower
limit.
When cold air hits the windshield, the outside of the
windshield may fog up.
If the side windows fog up, adjust the vents so that
the air hits the side windows.1To rapidly defrost the windows
After defrosting the windows, switch over to fresh air
mode. If you keep the system in recirculation mode,
the windows may fog up from humidity. This
impedes visibility.
Page 162 of 441

161
uuAudio System uUSB/HDMI ® Port
*
Features
USB/HDMI ® Port
*
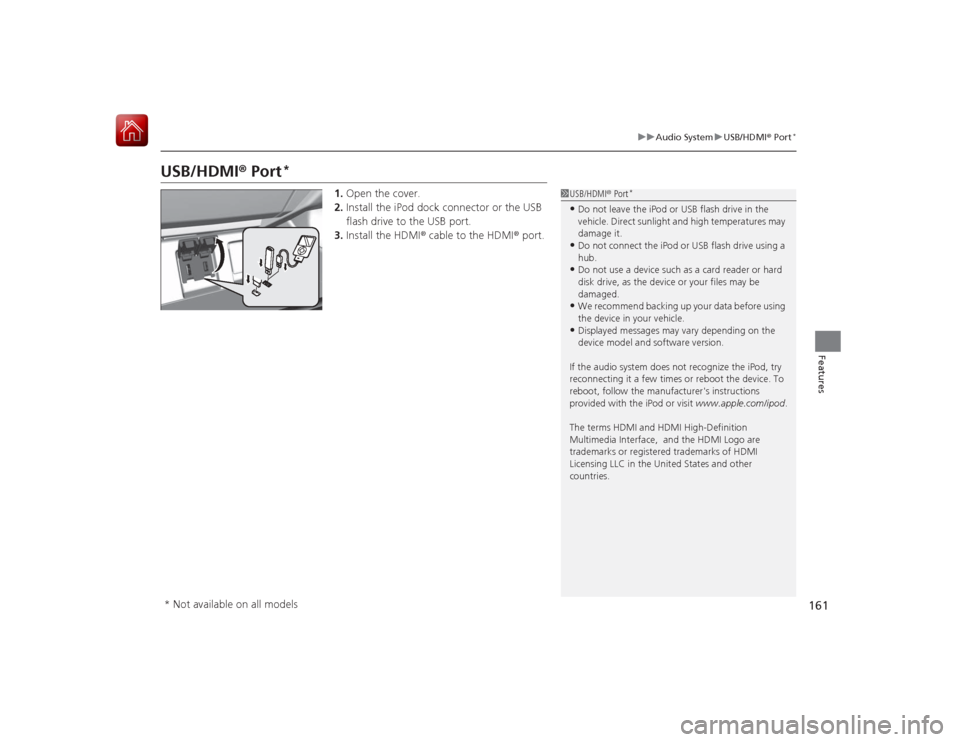
1. Open the cover.
2. Install the iPod dock connector or the USB
flash drive to the USB port.
3. Install the HDMI ® cable to the HDMI ® port.
1USB/HDMI ® Port
*
•Do not leave the iPod or USB flash drive in the
vehicle. Direct sunlight and high temperatures may
damage it.•Do not connect the iPod or USB flash drive using a
hub.•Do not use a device such as a card reader or hard
disk drive, as the device or your files may be
damaged.•We recommend backing up your data before using
the device in your vehicle.•Displayed messages may vary depending on the
device model and software version.
If the audio system does not recognize the iPod, try
reconnecting it a few times or reboot the device. To
reboot, follow the manufacturer's instructions
provided with the iPod or visit www.apple.com/ipod.
The terms HDMI and HDMI High-Definition
Multimedia Interface, and the HDMI Logo are
trademarks or registered trademarks of HDMI
Licensing LLC in the Unit ed States and other
countries.
* Not available on all models
Page 163 of 441

162
uuAudio System uUSB Adapter Cable
Features
USB Adapter Cable
1. Lift the armrest and unclip the USB
connector cable.
2. Install the iPod dock connector or the USB
flash drive to the USB connector.
Auxiliary Input Jack
*
Use the jack to connect standard audio devices.
1.Open the AUX cover.
2. Connect a standard audio device to the
input jack using a 1/8 inch (3.5 mm) stereo
miniplug.
u The audio system automatically switches
to the AUX mode.
1USB Adapter Cable•Do not leave the iPod or USB flash drive in the
vehicle. Direct sunlight and high temperatures may
damage it.•Do not use an extension cable with the USB
adapter cable.•Do not connect the iPod or USB flash drive using a
hub.•Do not use a device such as a card reader or hard
disk drive, as the device or your files may be
damaged.•We recommend backing up your data before using
the device in your vehicle.•Displayed messages may vary depending on the
device model and software version.
If the audio system does not recognize the iPod, try
reconnecting it a few times or reboot the device. To
reboot, follow the manufacturer's instructions
provided with the iPod or visit www.apple.com/ipod.
1Auxiliary Input Jack
*
To switch the mode, press any of the audio mode
buttons. You can return to the AUX mode by
pressing the AUX button.
* Not available on all models
Page 164 of 441

163
uuAudio System uAudio System Theft Protection
*
Features
Audio System Theft Protection
*
The audio system is disabled when it is disconnected from the power source, such as
when the battery is disconnected or goes dead. In certain conditions, the system
may display ENTER CODE
*1/Enter Code
*2.
■Reactivating the audio system
1. Turn the ignition switch to ON
(w
*3.
2. Turn on the audio system.
3. Press and hold the audio system power button for more than two seconds.
u The audio system is reactivated when the audio control unit establishes a
connection with the vehicle control unit. If the control unit fails to recognize
the audio unit, you must go to a dealer and have the audio unit checked.
*1: Models with one display
*2: Models with the display audio system
*3: Models with the smart entry system have an ENGINE START/STOP button instead of an
ignition switch.* Not available on all models