Page 98 of 441
97
uuGauges and Multi-Information Display uintelligent Multi-Information Display (i-MID)
Continued
Instrument Panel
9. Select the location you want to store the
image file in with the
(+
/ (-
button,
then press the SOURCE button.
10. Press the MENU button to exit the
customize screen.
Page 99 of 441
98
uuGauges and Multi- Information Display uintelligent Multi-Information Display (i-MID)
Instrument Panel
Selecting a Wallpaper
1.Press the MENU button.
2. Select Customize Settings with the
(+
/
(-
button, then press the SOURCE button.
3. Select Display Setup with the
(+
/ (-
button, then press the SOURCE button.
4. Select Select Wallpaper with the
(+
/ (-
button, then press the SOURCE button.
5. Select the image f ile you want with the
(+
/
(-
button, then press the SOURCE button.
u When the scroll is stopped, the
thumbnail is displayed.
6. Press the MENU button to exit the
customize screen.
Page 101 of 441
100Controls
ClockAdjusting the ClockYou can adjust the time in the clock display, using the CLOCK knob with the ignition
switch in ON
(w
*1.
■Using the CLOCK knob
1. Press the CLOCK knob to access the clock
adjustment mode screen.
2. Turn the CLOCK knob to adjust the hours.
3. Press the CLOCK knob. The display
switches to minute adjustment.
4. Turn the CLOCK knob to adjust the
minutes.
5. Press the CLOCK knob to complete clock
adjustment.
*1: Models with the smart entry system have an ENGINE START/STOP button instead of an
ignition switch.■
Adjusting the Time
1 Adjusting the Clock
The clock is automatically updated through the
navigation system, so the time does not need to be
adjusted.
You can customize the clock display to show the 12
hour clock or 24 hour clock.
2 Customized Features P. 87Models with navigation systemModels without display audio
Models without navigation systemCLOCK Knob
Models without display audio
On i-MID
Page 102 of 441
101
uuClock uAdjusting the Clock
Controls
■Using the Settings menu on the audio/
information screen
1. Select Settings .
2. Select Clock/Info .
3. Select Clock Adjustment .
4. Select or to change hour.
5. Select or to change minute, then
select OK.
1Adjusting the Clock
You can customize the clock display to show the 12
hour clock or 24 hour clock.
2 Customized Features
* P. 220
The clock display is set to off by factory default.
You can turn the clock display on and off. 2 Customized Features* P. 220
The clock is automatically updated when your
smartphone is connected to the audio system.
Models with display audio
Models with display audio
3
4
3
4
* Not available on all models
Page 133 of 441

132
uuOperating the Switches Around the Steering Wheel uBrightness Control
Controls
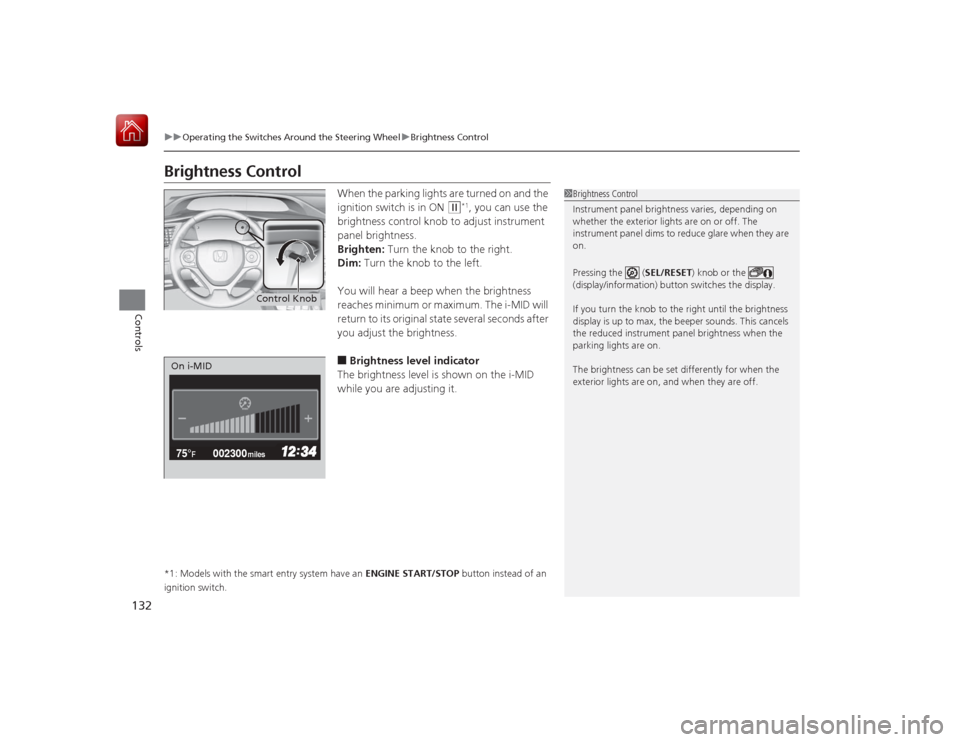
Brightness Control
When the parking lights are turned on and the
ignition switch is in ON
(w
*1, you can use the
brightness control knob to adjust instrument
panel brightness.
Brighten: Turn the knob to the right.
Dim: Turn the knob to the left.
You will hear a beep when the brightness
reaches minimum or maximum. The i-MID will
return to its original state several seconds after
you adjust the brightness.
■Brightness level indicator
The brightness level is shown on the i-MID
while you are adjusting it.
*1: Models with the smart entry system have an ENGINE START/STOP button instead of an
ignition switch.
1 Brightness Control
Instrument panel brightness varies, depending on
whether the exterior lights are on or off. The
instrument panel dims to reduce glare when they are
on.
Pressing the ( SEL/RESET) knob or the
(display/information) button switches the display.
If you turn the knob to the right until the brightness
display is up to max, the beeper sounds. This cancels
the reduced instrument panel brightness when the
parking lights are on.
The brightness can be set differently for when the
exterior lights are on, and when they are off.
Control Knob
002300
75°
F miles
On i-MID
Page 156 of 441

155
Continued
Controls
Climate Control System
*
Using Automatic Climate ControlThe automatic climate control system maintains the interior temperature you select.
The system also selects the proper mix of heated or cooled air that raises or lowers
the interior temperature to your preference as quickly as possible.
Use the system when the engine is running.
1.Press the AUTO button.
2. Adjust the interior temperature using the temperature control dial.
3. Press the (on/off) button to cancel.
1Using Automatic Climate Control
If any buttons are pressed while using the climate
control system in auto, the function of the button
that was pressed will take priority.
The AUTO indicator will go off, but functions
unrelated to the button that were pressed will be
controlled automatically.
To prevent cold air from blowing in from outside, the
fan may not start immediately when the AUTO
button is pressed.
If the interior is very warm, you can cool it down
more rapidly by partially opening the windows,
turning the system on AUTO, and setting the
temperature to low. Change the fresh mode to
recirculation mode until the temperature cools down.
When you set the temperature to the lower or upper
limit, Lo or Hi is displayed.
(ON/OFF) Button
(Recirculation) Button
Floor and
defroster
vents
Floor vents
Dashboard
and floor
vents
Dashboard
vents
AUTO
Button
A/C (Air Conditioning) Button
Temperature
Control Dial
Fan Control
Dial
* Not available on all models
Page 160 of 441

159
Features
This chapter describes how to operate technology features.
Audio SystemAbout Your Audio System ................ 160
USB/HDMI ® Port
*............................. 161
USB Adapter Cable .......................... 162
Auxiliary Input Jack*........................ 162
Audio System Theft Protection
*....... 163
Audio Remote Controls .................... 164
Audio System Basic Operation ........ 166
Adjusting the Sound ........................ 167
Playing AM/FM Radio ....................... 168
Playing a CD .................................... 171
Models with one display
Playing an iPod ................................ 174
Playing Internet Radio ...................... 177
Playing a USB Flash Drive ................. 179
Playing Bluetooth® Audio................. 182
Audio System Basic Operation ........ 184
Audio/Information Screen ................ 185
Adjusting the Sound ........................ 189
Display Setup ................................... 190
Playing AM/FM Radio ....................... 191
Playing a CD .................................... 194
Playing an iPod ................................ 197Models with display audio system
Playing Internet Radio ...................... 200
Playing a USB Flash Drive ................. 202
Playing Bluetooth ® Audio ................ 205
Playing a Video Using the HDMI® ..... 207
Smartphone Apps ............................ 209
Siri Eyes Free .................................... 210
Audio Error Messages ...................... 211
General Information on the Audio System ............................................. 217
Customized Features
*...................... 220
Bluetooth ® HandsFreeLink ®..... 233 , 264
* Not available on all models
Page 162 of 441

161
uuAudio System uUSB/HDMI ® Port
*
Features
USB/HDMI ® Port
*
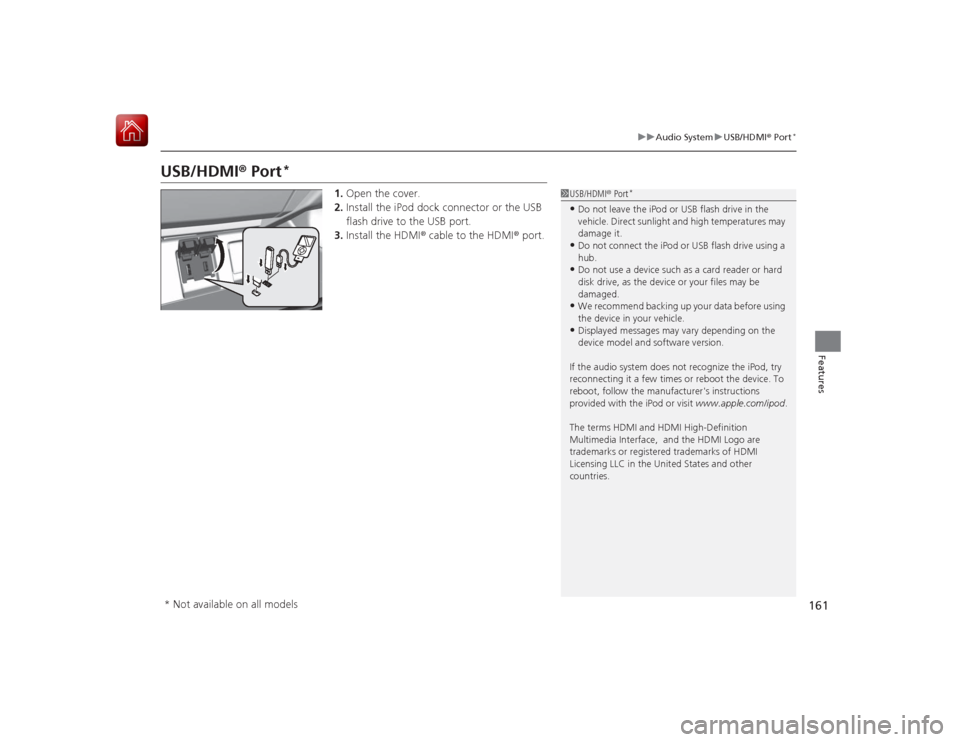
1. Open the cover.
2. Install the iPod dock connector or the USB
flash drive to the USB port.
3. Install the HDMI ® cable to the HDMI ® port.
1USB/HDMI ® Port
*
•Do not leave the iPod or USB flash drive in the
vehicle. Direct sunlight and high temperatures may
damage it.•Do not connect the iPod or USB flash drive using a
hub.•Do not use a device such as a card reader or hard
disk drive, as the device or your files may be
damaged.•We recommend backing up your data before using
the device in your vehicle.•Displayed messages may vary depending on the
device model and software version.
If the audio system does not recognize the iPod, try
reconnecting it a few times or reboot the device. To
reboot, follow the manufacturer's instructions
provided with the iPod or visit www.apple.com/ipod.
The terms HDMI and HDMI High-Definition
Multimedia Interface, and the HDMI Logo are
trademarks or registered trademarks of HDMI
Licensing LLC in the Unit ed States and other
countries.
* Not available on all models