Page 242 of 401

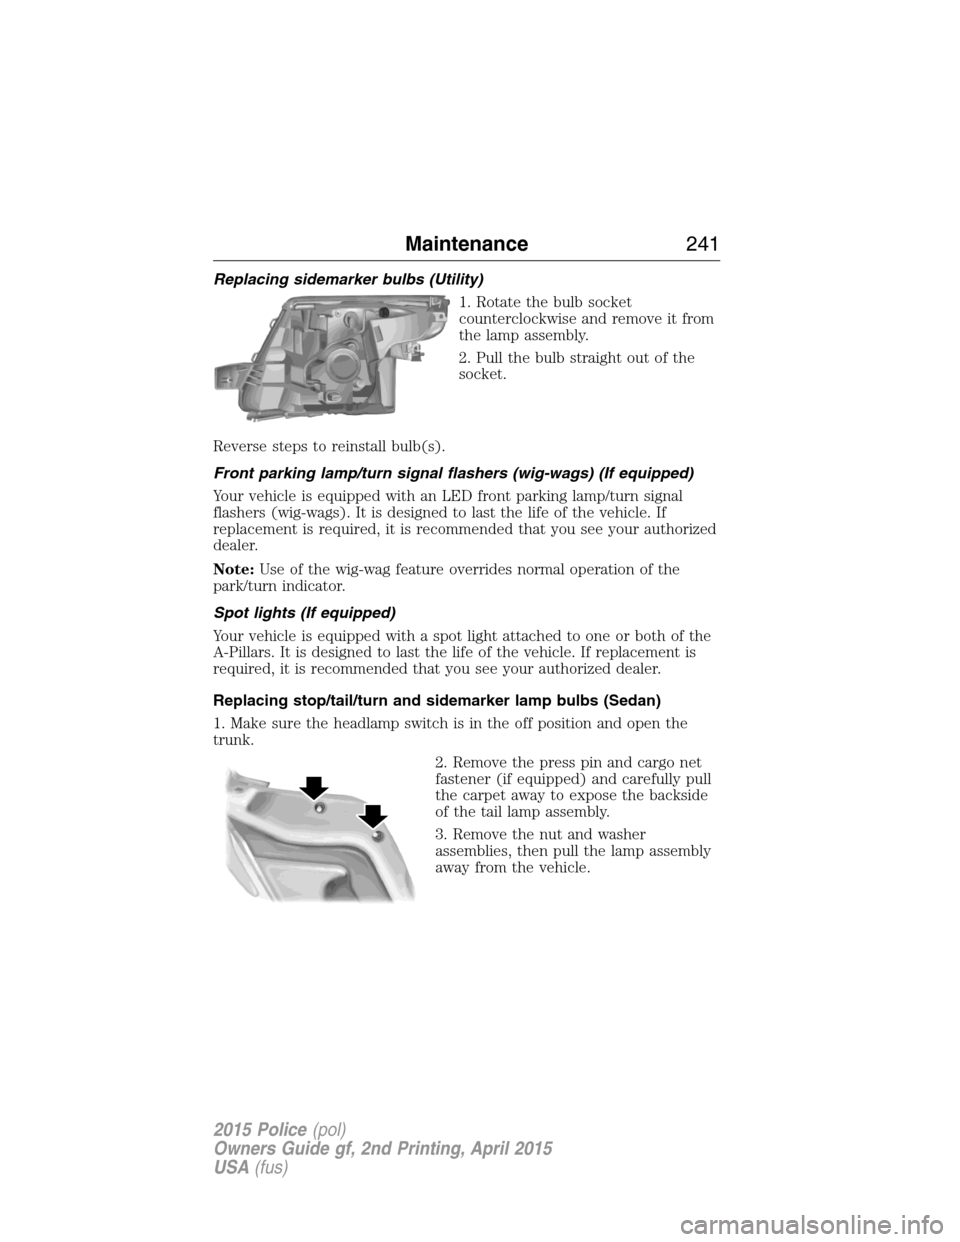
Replacing sidemarker bulbs (Utility)
1. Rotate the bulb socket
counterclockwise and remove it from
the lamp assembly.
2. Pull the bulb straight out of the
socket.
Reverse steps to reinstall bulb(s).
Front parking lamp/turn signal flashers (wig-wags) (If equipped)
Your vehicle is equipped with an LED front parking lamp/turn signal
flashers (wig-wags). It is designed to last the life of the vehicle. If
replacement is required, it is recommended that you see your authorized
dealer.
Note:Use of the wig-wag feature overrides normal operation of the
park/turn indicator.
Spot lights (If equipped)
Your vehicle is equipped with a spot light attached to one or both of the
A-Pillars. It is designed to last the life of the vehicle. If replacement is
required, it is recommended that you see your authorized dealer.
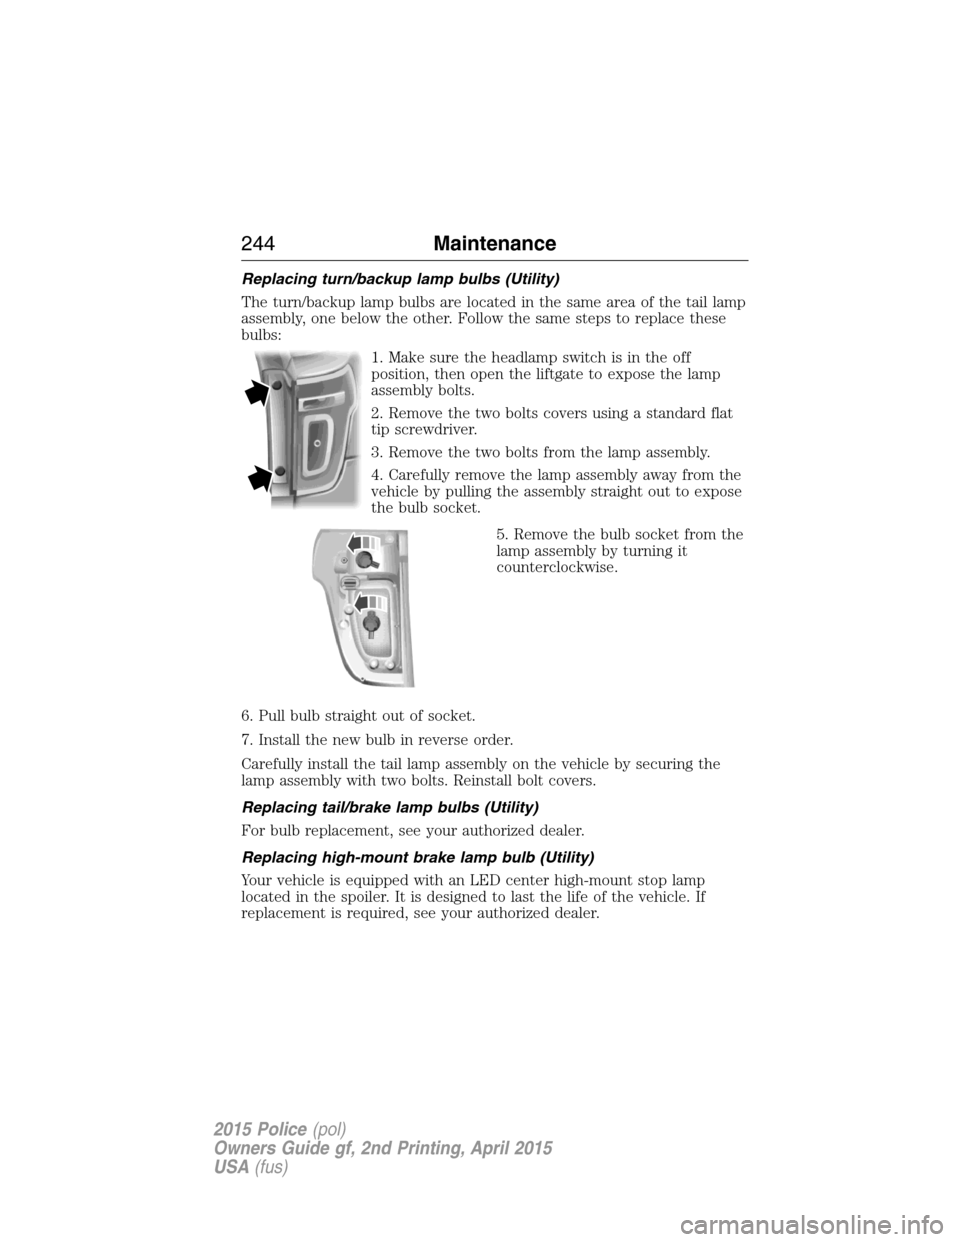
Replacing stop/tail/turn and sidemarker lamp bulbs (Sedan)
1. Make sure the headlamp switch is in the off position and open the
trunk.
2. Remove the press pin and cargo net
fastener (if equipped) and carefully pull
the carpet away to expose the backside
of the tail lamp assembly.
3. Remove the nut and washer
assemblies, then pull the lamp assembly
away from the vehicle.
Maintenance241
2015 Police(pol)
Owners Guide gf, 2nd Printing, April 2015
USA(fus)
Page 243 of 401
4. Remove the bulb socket by
rotating it counterclockwise, then
pulling it out of the lamp assembly.
5. Pull the bulb straight from the
socket.
Install new bulb(s) in reverse order.
Replacing backup lamp bulbs (Sedan)
1. Make sure the headlamp switch is in the off position.
2. Remove the deck lid trim panel press pins
and carefully pull the panel away to expose
the backside of the backup lamp assembly.
3. Remove bulb socket by rotating it
counterclockwise, then pull it out of
the lamp assembly.
242Maintenance
2015 Police(pol)
Owners Guide gf, 2nd Printing, April 2015
USA(fus)
Page 245 of 401

Replacing turn/backup lamp bulbs (Utility)
The turn/backup lamp bulbs are located in the same area of the tail lamp
assembly, one below the other. Follow the same steps to replace these
bulbs:
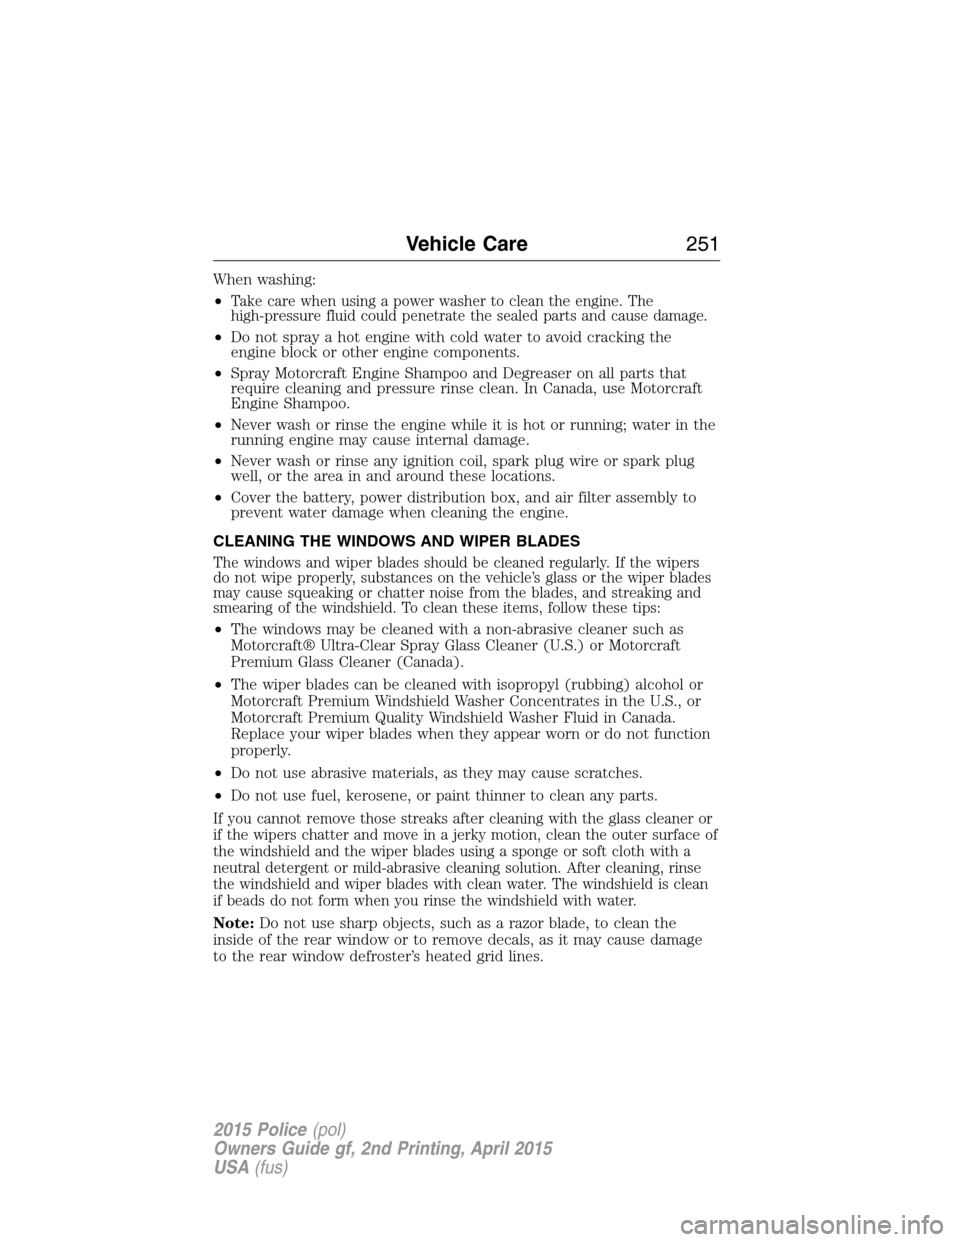
1. Make sure the headlamp switch is in the off
position, then open the liftgate to expose the lamp
assembly bolts.
2. Remove the two bolts covers using a standard flat
tip screwdriver.
3. Remove the two bolts from the lamp assembly.
4. Carefully remove the lamp assembly away from the
vehicle by pulling the assembly straight out to expose
the bulb socket.
5. Remove the bulb socket from the
lamp assembly by turning it
counterclockwise.
6. Pull bulb straight out of socket.
7. Install the new bulb in reverse order.
Carefully install the tail lamp assembly on the vehicle by securing the
lamp assembly with two bolts. Reinstall bolt covers.
Replacing tail/brake lamp bulbs (Utility)
For bulb replacement, see your authorized dealer.
Replacing high-mount brake lamp bulb (Utility)
Your vehicle is equipped with an LED center high-mount stop lamp
located in the spoiler. It is designed to last the life of the vehicle. If
replacement is required, see your authorized dealer.
244Maintenance
2015 Police(pol)
Owners Guide gf, 2nd Printing, April 2015
USA(fus)
Page 252 of 401

When washing:
•
Take care when using a power washer to clean the engine. The
high-pressure fluid could penetrate the sealed parts and cause damage.
•Do not spray a hot engine with cold water to avoid cracking the
engine block or other engine components.
•Spray Motorcraft Engine Shampoo and Degreaser on all parts that
require cleaning and pressure rinse clean. In Canada, use Motorcraft
Engine Shampoo.
•Never wash or rinse the engine while it is hot or running; water in the
running engine may cause internal damage.
•Never wash or rinse any ignition coil, spark plug wire or spark plug
well, or the area in and around these locations.
•Cover the battery, power distribution box, and air filter assembly to
prevent water damage when cleaning the engine.
CLEANING THE WINDOWS AND WIPER BLADES
The windows and wiper blades should be cleaned regularly. If the wipers
do not wipe properly, substances on the vehicle’s glass or the wiper blades
may cause squeaking or chatter noise from the blades, and streaking and
smearing of the windshield. To clean these items, follow these tips:
•The windows may be cleaned with a non-abrasive cleaner such as
Motorcraft® Ultra-Clear Spray Glass Cleaner (U.S.) or Motorcraft
Premium Glass Cleaner (Canada).
•The wiper blades can be cleaned with isopropyl (rubbing) alcohol or
Motorcraft Premium Windshield Washer Concentrates in the U.S., or
Motorcraft Premium Quality Windshield Washer Fluid in Canada.
Replace your wiper blades when they appear worn or do not function
properly.
•Do not use abrasive materials, as they may cause scratches.
•Do not use fuel, kerosene, or paint thinner to clean any parts.
If you cannot remove those streaks after cleaning with the glass cleaner or
if the wipers chatter and move in a jerky motion, clean the outer surface of
the windshield and the wiper blades using a sponge or soft cloth with a
neutral detergent or mild-abrasive cleaning solution. After cleaning, rinse
the windshield and wiper blades with clean water. The windshield is clean
if beads do not form when you rinse the windshield with water.
Note:Do not use sharp objects, such as a razor blade, to clean the
inside of the rear window or to remove decals, as it may cause damage
to the rear window defroster’s heated grid lines.
Vehicle Care251
2015 Police(pol)
Owners Guide gf, 2nd Printing, April 2015
USA(fus)
Page 286 of 401

If you get a flat tire while driving, do not apply the brake heavily.
Instead, gradually decrease your speed. Hold the steering wheel firmly
and slowly move to a safe place on the side of the road.
Have a flat serviced by an authorized dealer in order to prevent damage
to the system sensors. SeeTire Pressure Monitoring Systemearlier in
the chapter. During repairing or replacing of the flat tire, have the
authorized dealer inspect the system sensor for damage.
Tire Change Procedure
WARNING:When one of the front wheels is off the ground, the
transmission alone will not prevent your vehicle from moving or
slipping off the jack, even if the transmission is in park(P).
WARNING:To help prevent your vehicle from moving when you
change a tire, be sure to place the transmission in park(P),set
the parking brake and block (in both directions) the wheel that is
diagonally opposite (other side and end of your vehicle) to the tire
being changed.
WARNING:Never get underneath a vehicle that is supported
only by a jack. If the vehicle slips off the jack, you or someone
else could be seriously injured.
WARNING:Do not attempt to change a tire on the side of your
vehicle close to moving traffic. Pull far enough off the road to
avoid the danger of being hit when operating the jack or changing the
wheel.
WARNING:Always use the jack provided as original equipment
with your vehicle. If using a jack other than the one provided as
original equipment with your vehicle, make sure the jack capacity is
adequate for the vehicle weight, including any vehicle cargo or
modifications.
Wheels and Tires285
2015 Police(pol)
Owners Guide gf, 2nd Printing, April 2015
USA(fus)
Page 287 of 401
WARNING:To reduce the risk of possible serious injury or
death, do not remove the full size spare tire from the factory
secured location. This location is necessary to achieve police-rated
75 mph (120 km/h) rear impact crash-test performance. Removal
increases the risk of fuel leak in high-speed rear impacts.
Note:Passengers should not remain in the vehicle when the vehicle is
being jacked.
Note:For sedan, only the original equipment tire or 245/55R18 tire with
outer diameter less than 725 millimeters will stow in the tire tub.
Utility
1. Park on a level surface, set the parking brake and activate the hazard
flashers.
2. Place the transmission in park(P)and turn the engine off.
3. Lift the floor cargo cover, then
remove the wing nut that secures
the spare tire by turning it
counterclockwise.
4. Lift and remove the spare tire
from the spare tire well.
286Wheels and Tires
2015 Police(pol)
Owners Guide gf, 2nd Printing, April 2015
USA(fus)
Page 288 of 401
5. Remove the wing bolt that
secures the jack kit by turning it
counterclockwise.
6. Remove the jack kit which
includes the jack (D), wheel wrench
(lug wrench) (C), wheel chock (E),
L-shaped bolt (A) and the tow
recovery hook (B).
7. Turn the lead screw (where the
lug wrench attaches) of the jack by
hand to release the wheel wrench
from the jack. Press the button on
the wrench to extend the handle.
Fold down the wrench socket.
Sedan
1. Park on a level surface, set the parking brake and activate the hazard
flashers.
2. Place the transmission in park(P)and turn the engine off.
Wheels and Tires287
2015 Police(pol)
Owners Guide gf, 2nd Printing, April 2015
USA(fus)
Page 289 of 401
3. Lift the trunk cargo cover, then
remove the wing nut that secures
the spare tire by turning it
counterclockwise.
4. Lift and remove the spare tire
from the trunk.
5. Remove the second wing nut that
secures the jack retention bracket
by turning it counterclockwise, then
remove the jack kit from the
vehicle.
6. Remove the jack and the wrench
from the felt bag. Fold down the
wrench socket to use to loosen the
lug nuts and to operate the jack.
Vehicle Jacking
1. Block the diagonally opposite
wheel.
2. Loosen each wheel lug nut
one-half turn counterclockwise but
do not remove them until the wheel
is raised off the ground.
3. The vehicle jacking points are shown here, and are depicted on the
yellow warning label on the jack.
Note:Jack at the specified locations to avoid damage to the vehicle.
288Wheels and Tires
2015 Police(pol)
Owners Guide gf, 2nd Printing, April 2015
USA(fus)