Page 156 of 401

Note:Do not use the camera system if either the trunk (sedan) or the
liftgate (utility) is ajar.
Note:If the image does not turn off while the transmission is not inR
(Reverse) and your driving over a speed of 5 mph (8 km/h), have the
system inspected by your authorized dealer.
Note:When towing, the camera only sees what is being towed behind
the vehicle. This might not provide adequate coverage as it usually
provides in normal operation and some objects might not be seen. In
some vehicles the guidelines (if equipped) may disappear once the trailer
tow connector is engaged.
Note:The camera may not operate correctly under the following
conditions:
•Nighttime or dark areas if one or both reverse lamps are not
operating.
•The camera’s view is obstructed by mud, water or debris. Clean the
lens with a soft, lint-free cloth and non-abrasive cleaner.
•The rear of the vehicle is hit or damaged, causing the camera to
become misaligned.
Guidelines
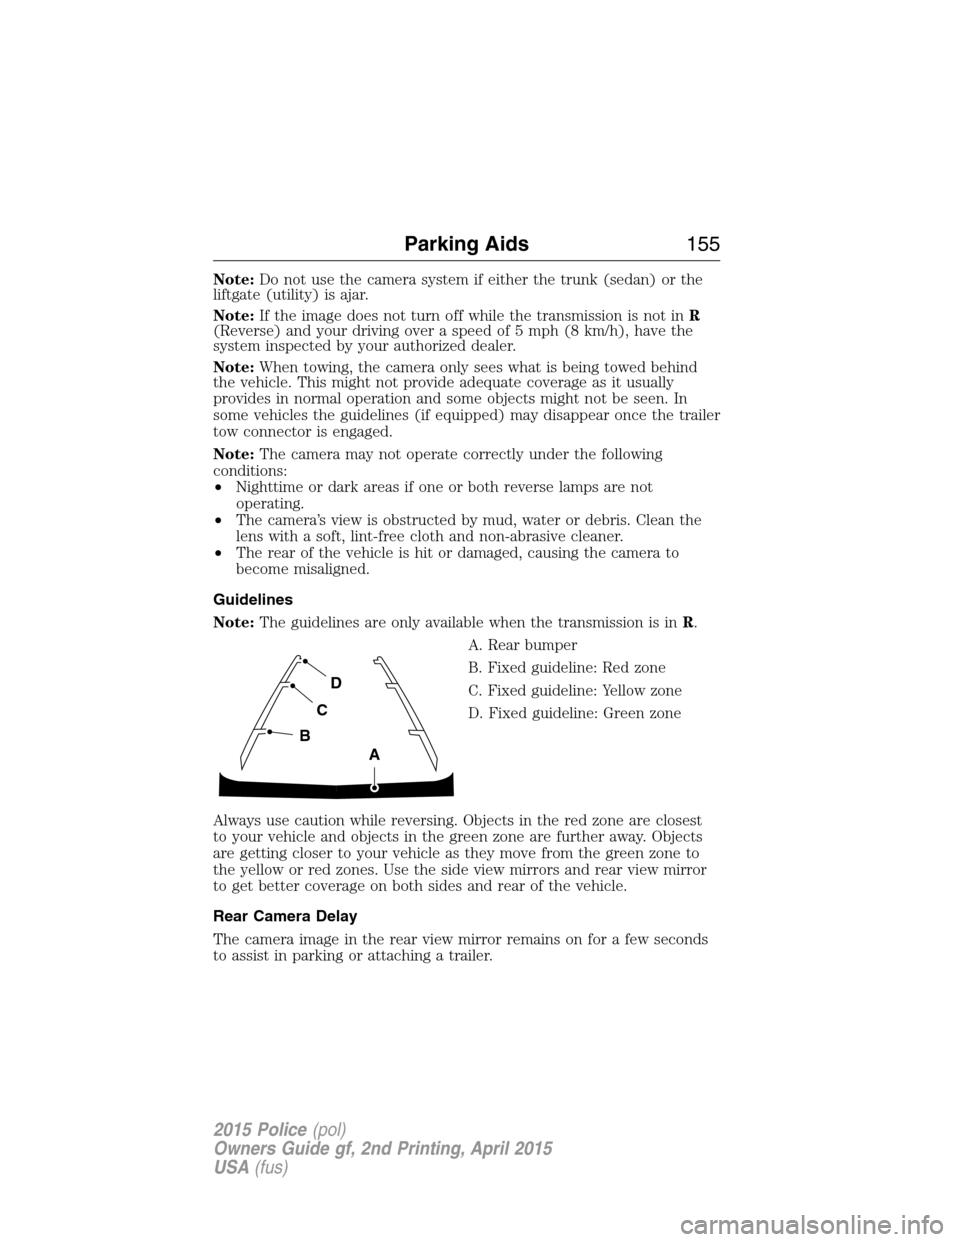
Note:The guidelines are only available when the transmission is inR.
A. Rear bumper
B. Fixed guideline: Red zone
C. Fixed guideline: Yellow zone
D. Fixed guideline: Green zone
Always use caution while reversing. Objects in the red zone are closest
to your vehicle and objects in the green zone are further away. Objects
are getting closer to your vehicle as they move from the green zone to
the yellow or red zones. Use the side view mirrors and rear view mirror
to get better coverage on both sides and rear of the vehicle.
Rear Camera Delay
The camera image in the rear view mirror remains on for a few seconds
to assist in parking or attaching a trailer.
D
C
B
A
Parking Aids155
2015 Police(pol)
Owners Guide gf, 2nd Printing, April 2015
USA(fus)
Page 166 of 401
CARGO MANAGEMENT
Load Safe Label
Refer to the label on the trunk lid or liftgate for additional information
about the spare wheel and tire.
Load Floor
Do not permanently remove the foam structure under the load floor that
surrounds the spare tire. It is necessary to properly support the load
floor.
The maximum load floor cargo weight, evenly distributed and with a full
size spare tire installed, is:
•Utility — 800 pounds (362 kilograms)
•Sedan — 420 pounds (190 kilograms)
Cargo Vault (If Equipped)
Use the key to lock and unlock the
door. Turn the handle to open it.
Electronic Utility Tray (If Equipped, Sedan Only)
Note:Make sure the key is not in the trunk vault before moving the tray
rearward.
Note:You must latch the tray in the forward position before operating
the vehicle. This helps prevent damage to your vehicle or equipment.
Load Carrying165
2015 Police(pol)
Owners Guide gf, 2nd Printing, April 2015
USA(fus)
Page 206 of 401
Fuse or relay
numberFuse amp
ratingProtected components
81 20A* Spot lights
82 15A* Rear washer (Utility)
83 — Not used
84 20A* Trailer tow park lamps (Utility)
85 — Not used
86 7.5A* Powertrain control module
keep-alive power and relay,
Canister vent solenoid
87 5A* Run/start relay coil
88 — Run/start relay
89 5A* Front blower relay coil, Electrical
power assist steering module
90 10A* Powertrain control module
run/start
91 — Not used
92 10A* Anti-lock brake system module
93 5A* Rear window defroster relay,
Run/start relay, Trunk release
relay
94 30A** Passenger compartment fuse
panel run/start
95 2A* Center console start feed
96 — Not used
97 — Not used
98 — Air conditioner clutch relay
*Mini Fuses **Cartridge Fuses
Fuses205
2015 Police(pol)
Owners Guide gf, 2nd Printing, April 2015
USA(fus)
Page 242 of 401

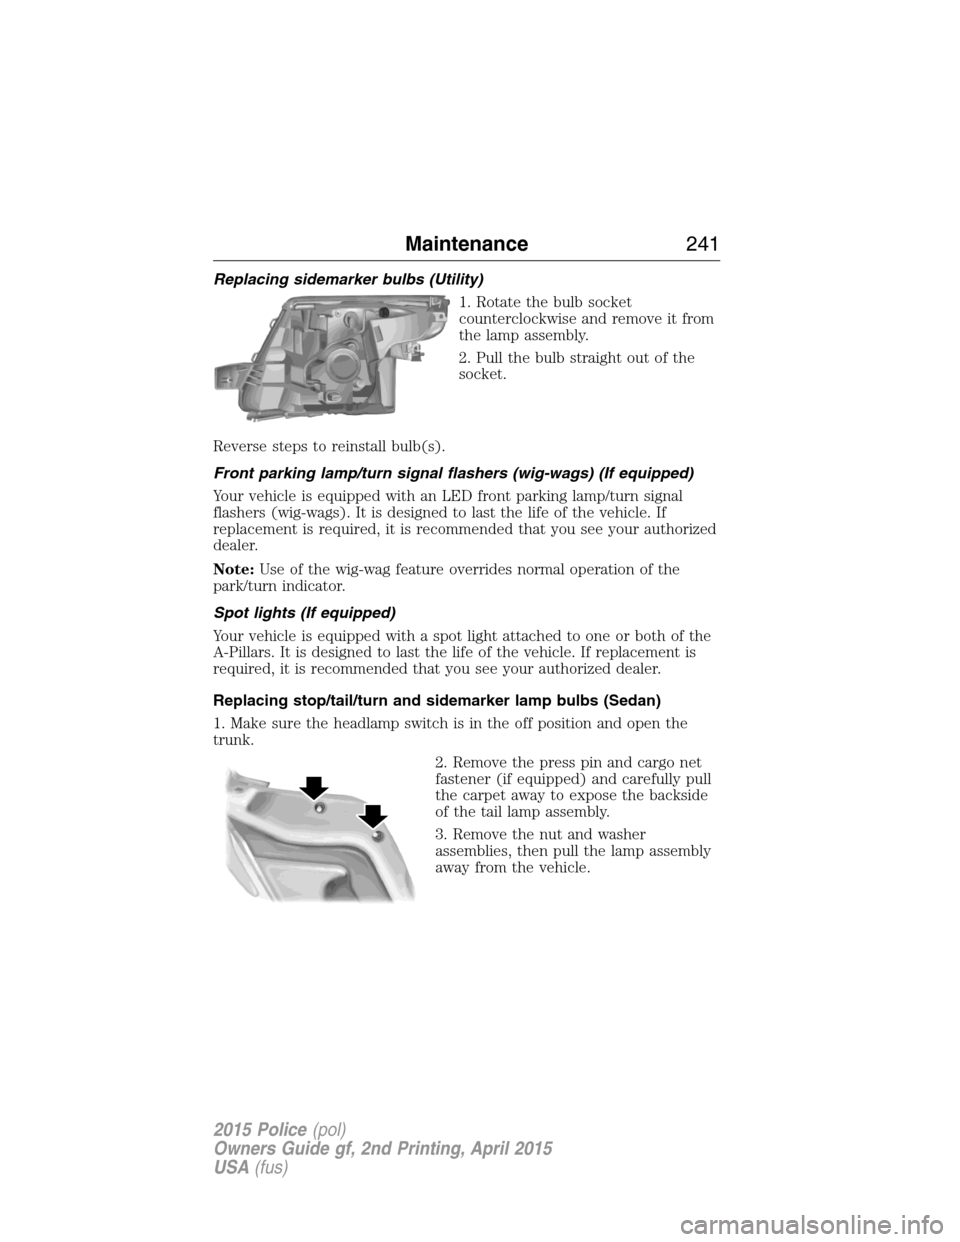
Replacing sidemarker bulbs (Utility)
1. Rotate the bulb socket
counterclockwise and remove it from
the lamp assembly.
2. Pull the bulb straight out of the
socket.
Reverse steps to reinstall bulb(s).
Front parking lamp/turn signal flashers (wig-wags) (If equipped)
Your vehicle is equipped with an LED front parking lamp/turn signal
flashers (wig-wags). It is designed to last the life of the vehicle. If
replacement is required, it is recommended that you see your authorized
dealer.
Note:Use of the wig-wag feature overrides normal operation of the
park/turn indicator.
Spot lights (If equipped)
Your vehicle is equipped with a spot light attached to one or both of the
A-Pillars. It is designed to last the life of the vehicle. If replacement is
required, it is recommended that you see your authorized dealer.
Replacing stop/tail/turn and sidemarker lamp bulbs (Sedan)
1. Make sure the headlamp switch is in the off position and open the
trunk.
2. Remove the press pin and cargo net
fastener (if equipped) and carefully pull
the carpet away to expose the backside
of the tail lamp assembly.
3. Remove the nut and washer
assemblies, then pull the lamp assembly
away from the vehicle.
Maintenance241
2015 Police(pol)
Owners Guide gf, 2nd Printing, April 2015
USA(fus)
Page 256 of 401

•Do not use hydrofluoric acid-based or high caustic-based wheel
cleaners, steel wool, fuels or strong household detergent.
•If you intend on parking your vehicle for an extended period after
cleaning the wheels with a wheel cleaner, drive your vehicle for a few
minutes before doing so. This reduces the risk of increased corrosion
of the brake discs.
VEHICLE STORAGE
If you plan on storing your vehicle for an extended period of time
(30 days or more), read the following maintenance recommendations to
make sure your vehicle stays in good operating condition.
All motor vehicles and their components were engineered and tested for
reliable, regular driving. Long-term storage under various conditions may
lead to component degradation or failure unless specific precautions are
taken to preserve the components.
General
•Store all vehicles in a dry, ventilated place.
•Protect from sunlight, if possible.
•If vehicles are stored outside, they require regular maintenance to
protect against rust and damage.
Body
•Wash vehicle thoroughly to remove dirt, grease, oil, tar or mud from
exterior surfaces, rear-wheel housing and underside of front fenders.
•Periodically wash vehicles stored in exposed locations.
•Touch up raw or primed metal to prevent rust.
•Cover chrome and stainless steel parts with a thick coat of auto wax
to prevent discoloration. Re-wax as necessary when the vehicle is
washed.
•Lubricate hood latch, all door latches and trunk lid hinges with a light
grade oil.
•Cover interior trim to prevent fading.
•Keep all rubber parts free from oil and solvents.
Vehicle Care255
2015 Police(pol)
Owners Guide gf, 2nd Printing, April 2015
USA(fus)
Page 289 of 401
3. Lift the trunk cargo cover, then
remove the wing nut that secures
the spare tire by turning it
counterclockwise.
4. Lift and remove the spare tire
from the trunk.
5. Remove the second wing nut that
secures the jack retention bracket
by turning it counterclockwise, then
remove the jack kit from the
vehicle.
6. Remove the jack and the wrench
from the felt bag. Fold down the
wrench socket to use to loosen the
lug nuts and to operate the jack.
Vehicle Jacking
1. Block the diagonally opposite
wheel.
2. Loosen each wheel lug nut
one-half turn counterclockwise but
do not remove them until the wheel
is raised off the ground.
3. The vehicle jacking points are shown here, and are depicted on the
yellow warning label on the jack.
Note:Jack at the specified locations to avoid damage to the vehicle.
288Wheels and Tires
2015 Police(pol)
Owners Guide gf, 2nd Printing, April 2015
USA(fus)
Page 293 of 401
Sedan
1. Insert the straight end of the jack retention
bracket through the eyelet of the angled bracket
and swing the retention bracket over the jack.
With the jack in place, place the end of the
retention bracket over the threaded stud in the
trunk floor and secure it with the plastic wing
nut.
2. Screw the extension bolt onto the threaded
stud of the jack retention bracket.
3. Place the flat tire in the spare
tire well with the wheel facing up.
4. Safely secure the wheel by
screwing the large wing nut onto
the extension bolt.
292Wheels and Tires
2015 Police(pol)
Owners Guide gf, 2nd Printing, April 2015
USA(fus)
Page 297 of 401
TECHNICAL SPECIFICATIONS
Items CapacityRecommended Fluids
and LubricantsFord part number /
Ford specification
Brake fluid
1
Between MIN and
MAX on reservoirMotorcraft DOT 4 Low
Viscosity High
Performance Motor
Vehicle Brake FluidPM-20 / WSS-M6C65-A2
Door latch, hood
latch, auxiliary hood
latch, seat tracks,
trunk and liftgate
latches—Motorcraft Multi-Purpose
Grease SprayXL-5 /
ESB-M1C93-B
Lock cylinders —Motorcraft Penetrating
and Lock LubricantXL-1 /
None
Automatic
transmission fluid
2,3
6F35 transmission
9.0 qt (8.5L)
Motorcraft
MERCON LVXT-10-QLVC (U.S.);
CXT-10-LV12 (Canada) /
MERCON LV 6F50 transmission
10.9 qt (10.3L)
6F55 transmission
11.6 qt (11.0L)
Rear differential
fluid2.4 pt (1.15L)Motorcraft SAE 80W-90
Premium Rear Axle
LubricantXY-80W90-QL /
WSP-M2C197-A
296Capacities and Specifications
2015 Police(pol)
Owners Guide gf, 2nd Printing, April 2015
USA(fus)