2015 FORD FOCUS ELECTRIC manual transmission
[x] Cancel search: manual transmissionPage 5 of 369
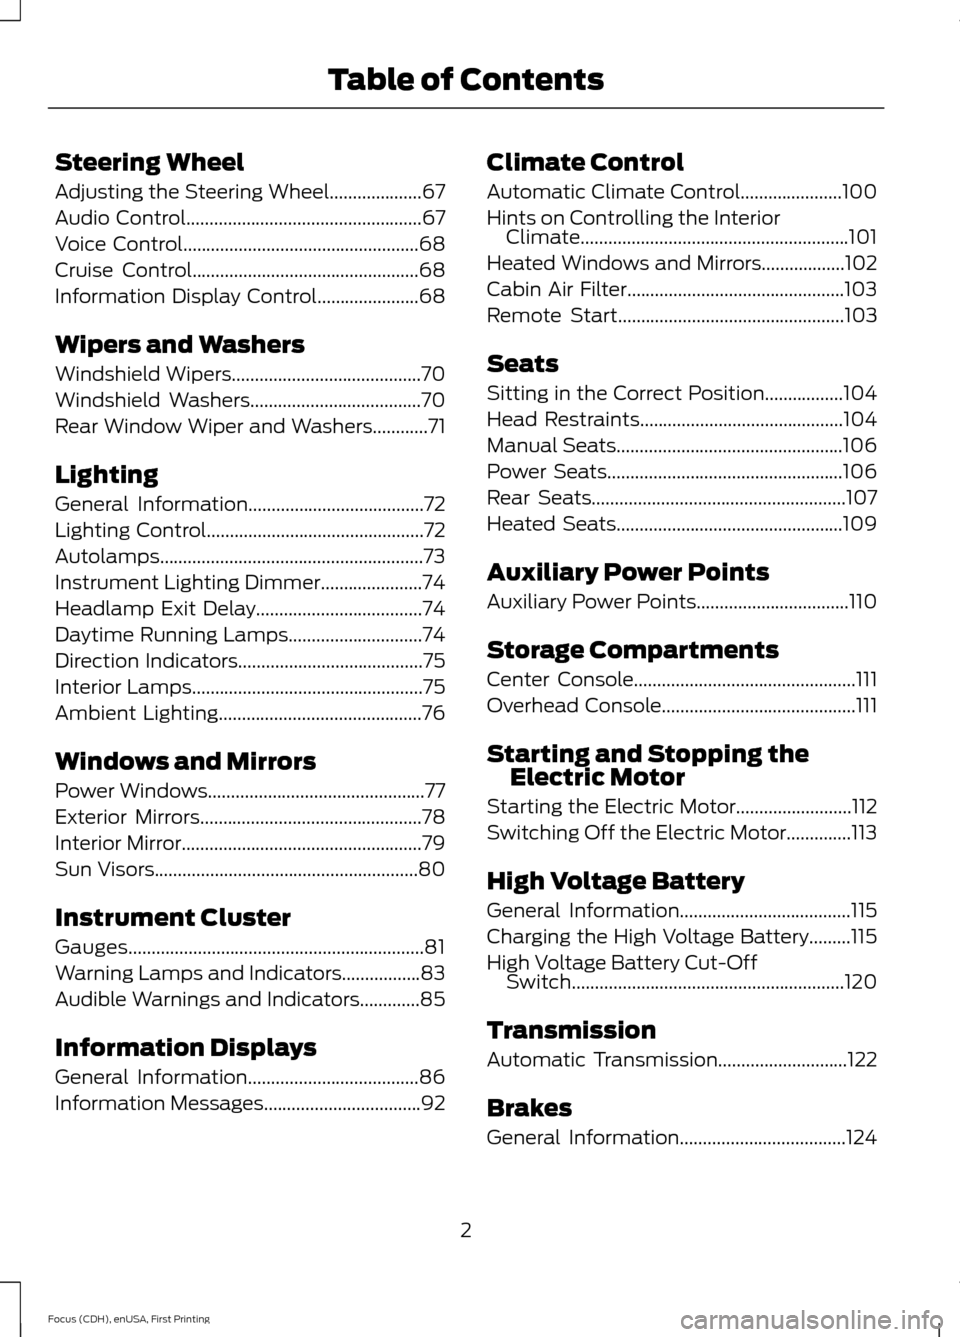
Steering Wheel
Adjusting the Steering Wheel....................67
Audio Control...................................................67
Voice Control
...................................................68
Cruise Control.................................................68
Information Display Control
......................68
Wipers and Washers
Windshield Wipers
.........................................70
Windshield Washers.....................................70
Rear Window Wiper and Washers
............71
Lighting
General Information
......................................72
Lighting Control
...............................................72
Autolamps
.........................................................73
Instrument Lighting Dimmer......................74
Headlamp Exit Delay
....................................74
Daytime Running Lamps
.............................74
Direction Indicators
........................................75
Interior Lamps..................................................75
Ambient Lighting
............................................76
Windows and Mirrors
Power Windows...............................................77
Exterior Mirrors
................................................78
Interior Mirror
....................................................79
Sun Visors
.........................................................80
Instrument Cluster
Gauges................................................................81
Warning Lamps and Indicators.................83
Audible Warnings and Indicators.............85
Information Displays
General Information.....................................86
Information Messages
..................................92 Climate Control
Automatic Climate Control......................100
Hints on Controlling the Interior
Climate..........................................................101
Heated Windows and Mirrors..................102
Cabin Air Filter...............................................103
Remote Start
.................................................103
Seats
Sitting in the Correct Position
.................104
Head Restraints............................................104
Manual Seats
.................................................106
Power Seats
...................................................106
Rear Seats
.......................................................107
Heated Seats.................................................109
Auxiliary Power Points
Auxiliary Power Points.................................110
Storage Compartments
Center Console................................................111
Overhead Console
..........................................111
Starting and Stopping the Electric Motor
Starting the Electric Motor.........................112
Switching Off the Electric Motor..............113
High Voltage Battery
General Information
.....................................115
Charging the High Voltage Battery.........115
High Voltage Battery Cut-Off Switch...........................................................120
Transmission
Automatic Transmission............................122
Brakes
General Information
....................................124
2
Focus (CDH), enUSA, First Printing Table of Contents
Page 17 of 369
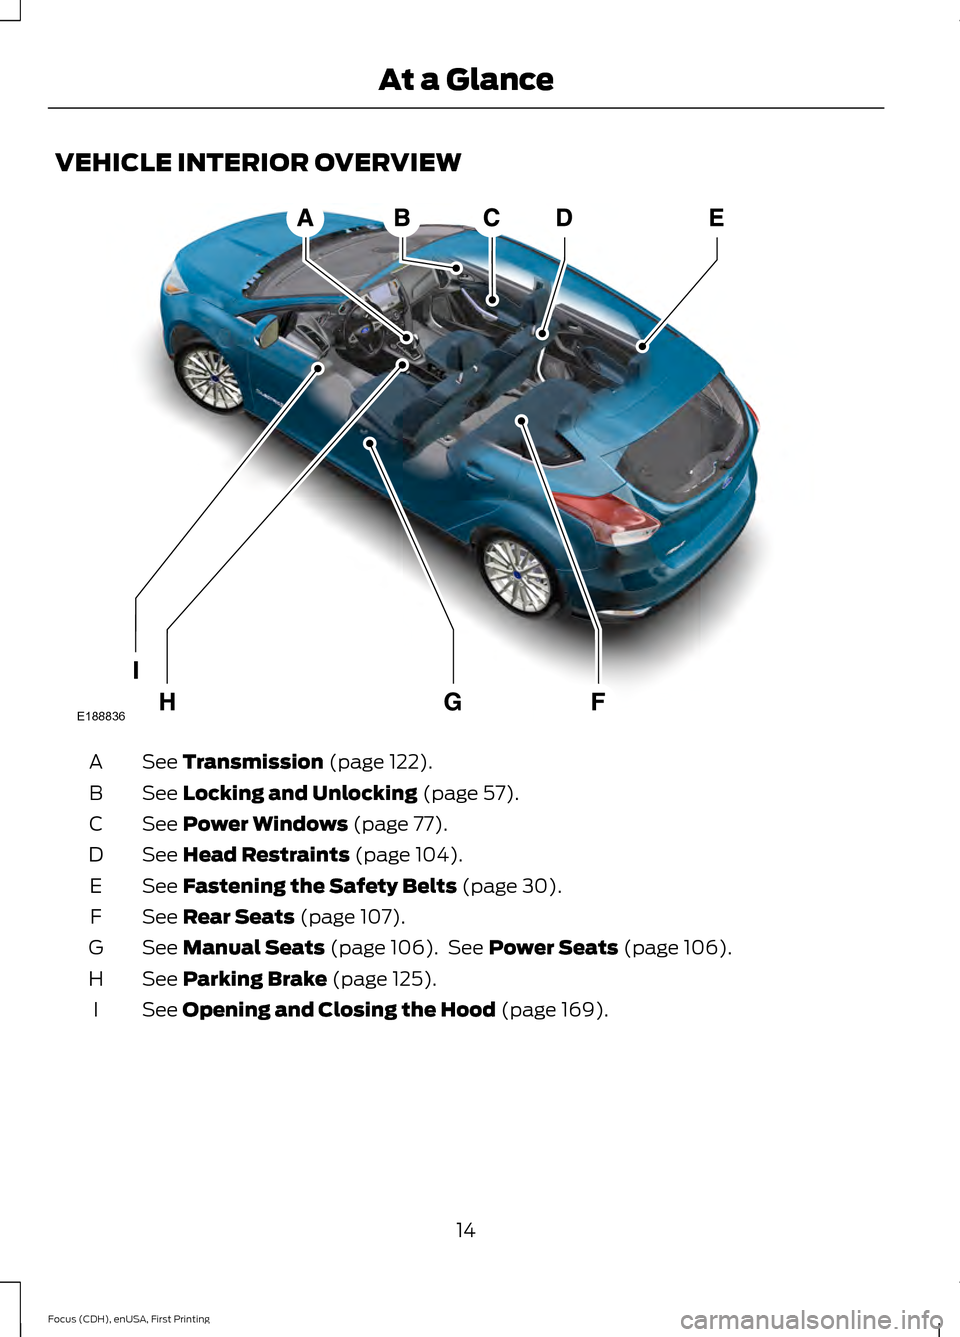
VEHICLE INTERIOR OVERVIEW
See Transmission (page 122).
A
See
Locking and Unlocking (page 57).
B
See
Power Windows (page 77).
C
See
Head Restraints (page 104).
D
See
Fastening the Safety Belts (page 30).
E
See
Rear Seats (page 107).
F
See
Manual Seats (page 106). See Power Seats (page 106).
G
See
Parking Brake (page 125).
H
See
Opening and Closing the Hood (page 169).
I
14
Focus (CDH), enUSA, First Printing At a GlanceE188836
Page 77 of 369
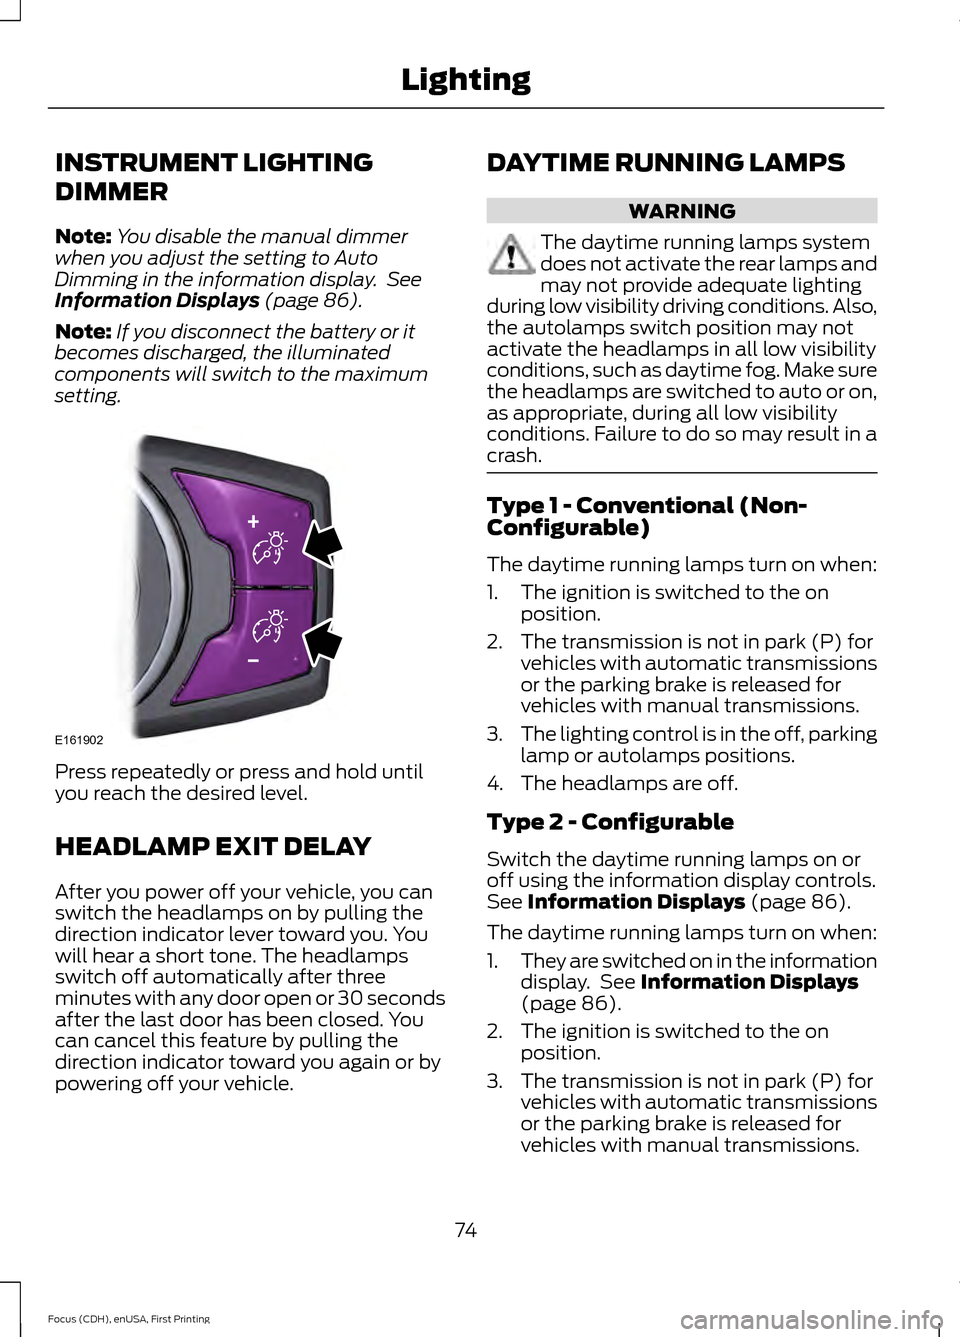
INSTRUMENT LIGHTING
DIMMER
Note:
You disable the manual dimmer
when you adjust the setting to Auto
Dimming in the information display. See
Information Displays (page 86).
Note: If you disconnect the battery or it
becomes discharged, the illuminated
components will switch to the maximum
setting. Press repeatedly or press and hold until
you reach the desired level.
HEADLAMP EXIT DELAY
After you power off your vehicle, you can
switch the headlamps on by pulling the
direction indicator lever toward you. You
will hear a short tone. The headlamps
switch off automatically after three
minutes with any door open or 30 seconds
after the last door has been closed. You
can cancel this feature by pulling the
direction indicator toward you again or by
powering off your vehicle. DAYTIME RUNNING LAMPS WARNING
The daytime running lamps system
does not activate the rear lamps and
may not provide adequate lighting
during low visibility driving conditions. Also,
the autolamps switch position may not
activate the headlamps in all low visibility
conditions, such as daytime fog. Make sure
the headlamps are switched to auto or on,
as appropriate, during all low visibility
conditions. Failure to do so may result in a
crash. Type 1 - Conventional (Non-
Configurable)
The daytime running lamps turn on when:
1. The ignition is switched to the on
position.
2. The transmission is not in park (P) for vehicles with automatic transmissions
or the parking brake is released for
vehicles with manual transmissions.
3. The lighting control is in the off, parking
lamp or autolamps positions.
4. The headlamps are off.
Type 2 - Configurable
Switch the daytime running lamps on or
off using the information display controls.
See
Information Displays (page 86).
The daytime running lamps turn on when:
1. They are switched on in the information
display. See
Information Displays
(page 86).
2. The ignition is switched to the on position.
3. The transmission is not in park (P) for vehicles with automatic transmissions
or the parking brake is released for
vehicles with manual transmissions.
74
Focus (CDH), enUSA, First Printing LightingE161902
Page 128 of 369
standard friction braking. When the battery
is almost fully charged, the amount of
regenerative braking is limited to avoid
overcharging, and the requested
deceleration is produced by standard
friction braking alone.
Regenerative braking does not take the
place of the standard friction brakes; it only
assists them. Regenerative braking has
also been designed to interact with the
anti-lock brake system. Regenerative
braking is disabled when the anti-lock
brake system is activated or the battery is
fully charged.
HINTS ON DRIVING WITH
ANTI-LOCK BRAKES
Note:
When the system is operating, the
brake pedal will pulse and may travel
further. Maintain pressure on the brake
pedal. You may also hear a noise from the
system. This is normal.
The anti-lock braking system will not
eliminate the risks when:
• You drive too closely to the vehicle in
front of you.
• Your vehicle is hydroplaning.
• You take corners too fast.
• The road surface is poor.
PARKING BRAKE WARNING
Always set the parking brake fully
and make sure you shift the gearshift
lever to park (P). Switch the ignition
off and remove the key whenever you leave
your vehicle. Note:
Do not press the release button while
pulling the lever up.
To apply the parking brake: 1. Press the foot brake pedal firmly.
2. Pull the parking brake lever up to its
fullest extent.
Note: If you park your vehicle on a hill and
facing uphill, shift the gearshift lever to park
(P) and turn the steering wheel away from
the curb.
Note: If you park your vehicle on a hill and
facing downhill, shift the gearshift lever to
park (P) and turn the steering wheel toward
the curb.
To release the parking brake:
1. Press the brake pedal firmly.
2. Pull the lever up slightly.
3. Press the release button and push the lever down.
HILL START ASSIST WARNINGS
The system does not replace the
parking brake. When you leave your
vehicle, always apply the parking
brake and shift the transmission into park
(P) for automatic transmission or first gear
for manual transmission. You must remain in your vehicle once
you have activated the system.
During all times, you are responsible
for controlling your vehicle,
supervising the system and
intervening, if required. If the engine is revved excessively, or
if a malfunction is detected, the
system will be deactivated.
The system makes it easier to pull away
when your vehicle is on a slope without the
need to use the parking brake.
125
Focus (CDH), enUSA, First Printing Brakes
Page 129 of 369
When the system is active, your vehicle will
remain stationary on the slope for two to
three seconds after you release the brake
pedal. This allows you time to move your
foot from the brake to the accelerator
pedal. The brakes are released
automatically once the engine has
developed sufficient drive to prevent your
vehicle from rolling down the slope. This
is an advantage when pulling away on a
slope, for example from a car park ramp,
traffic lights or when reversing uphill into
a parking space.
The system will activate automatically on
any slope that will cause significant vehicle
rollback. For vehicles with a manual
transmission, you can switch this feature
off using the information display. See
Information Displays (page 86). The
system will remain on or off depending on
how it was last set.
Note: The system only functions when you
bring your vehicle to a complete stop. Shift
into reverse (R) when facing downhill and
first gear (1) when facing uphill.
Note: There is no warning lamp to indicate
the system is either on or off.
Using Hill Start Assist
1. Press the brake pedal to bring your vehicle to a complete standstill. Keep
the brake pedal pressed.
2. If the sensors detect that your vehicle is on a slope, the system will activate
automatically.
3. When you remove your foot from the brake pedal, your vehicle will remain
on the slope without rolling away for
about two or three seconds. This hold
time will automatically be extended if
you are in the process of driving off.
4. Drive off in the normal manner. The brakes will release automatically.
126
Focus (CDH), enUSA, First Printing Brakes
Page 135 of 369
Always use caution while reversing.
Objects in the red zone are closest to your
vehicle and objects in the green zone are
farther away. Objects are getting closer to
your vehicle as they move from the green
zone to the yellow or red zones. Use the
side view mirrors and rear view mirror to
get better coverage on both sides and rear
of your vehicle.
Manual Zoom
WARNING
When manual zoom is on, the full
area behind your vehicle may not
show. Be aware of your surroundings
when using the manual zoom feature. Note:
Manual zoom is only available when
the transmission is in reverse (R).
Note: When you enable manual zoom, only
the centerline is shown.
Selectable settings for this feature are
Zoom in (+) and Zoom out (-). Press the
symbol in the camera screen to change the
view. The default setting is Zoom OFF.
This allows you to get a closer view of an
object behind your vehicle. The zoomed
image keeps the bumper in the image to
provide a reference. The zoom is only
active while the transmission is in reverse
(R).
Camera System Settings
To access any of the rear view camera
system settings, make the following
selections in the multifunctional display
when the transmission is not in reverse (R):
• With Touch Screen: Settings > Vehicle
> Camera Settings
• Without Touch Screen: Menu > Camera
Settings Enhanced Park Aids or Park Pilot (If
Equipped)
Selectable settings for this feature are ON
and OFF.
The system uses red, yellow and green
highlights that appear on top of the video
image when any of the sensing systems
detect an object.
Rear Camera Delay
Selectable settings for this feature are ON
and OFF.
The default setting for the rear camera
delay is OFF.
When shifting the transmission out of
reverse (R) and into any gear other than
park (P), the camera image remains in the
display until:
•
Your vehicle speed sufficiently
increases.
• You shift your vehicle into park (P).
• 10 seconds of time elapse.
132
Focus (CDH), enUSA, First Printing Parking Aids
Page 146 of 369
TOWING A TRAILER
WARNING
Never tow a trailer with your vehicle.
This powertrain is not designed to
tow.
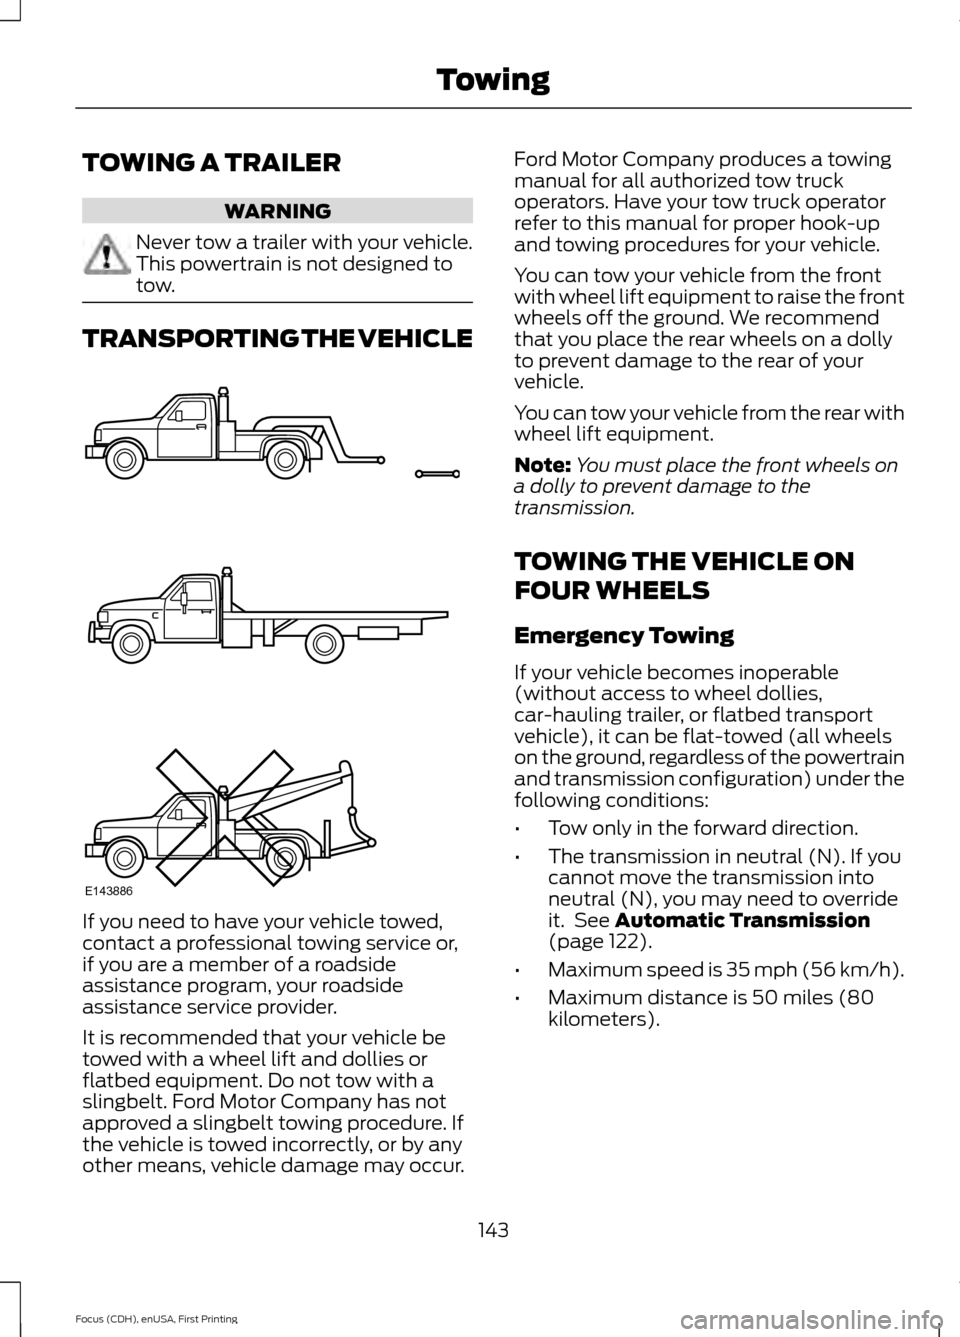
TRANSPORTING THE VEHICLE
If you need to have your vehicle towed,
contact a professional towing service or,
if you are a member of a roadside
assistance program, your roadside
assistance service provider.
It is recommended that your vehicle be
towed with a wheel lift and dollies or
flatbed equipment. Do not tow with a
slingbelt. Ford Motor Company has not
approved a slingbelt towing procedure. If
the vehicle is towed incorrectly, or by any
other means, vehicle damage may occur. Ford Motor Company produces a towing
manual for all authorized tow truck
operators. Have your tow truck operator
refer to this manual for proper hook-up
and towing procedures for your vehicle.
You can tow your vehicle from the front
with wheel lift equipment to raise the front
wheels off the ground. We recommend
that you place the rear wheels on a dolly
to prevent damage to the rear of your
vehicle.
You can tow your vehicle from the rear with
wheel lift equipment.
Note:
You must place the front wheels on
a dolly to prevent damage to the
transmission.
TOWING THE VEHICLE ON
FOUR WHEELS
Emergency Towing
If your vehicle becomes inoperable
(without access to wheel dollies,
car-hauling trailer, or flatbed transport
vehicle), it can be flat-towed (all wheels
on the ground, regardless of the powertrain
and transmission configuration) under the
following conditions:
• Tow only in the forward direction.
• The transmission in neutral (N). If you
cannot move the transmission into
neutral (N), you may need to override
it. See Automatic Transmission
(page 122).
• Maximum speed is 35 mph (56 km/h).
• Maximum distance is 50 miles (80
kilometers).
143
Focus (CDH), enUSA, First Printing TowingE143886
Page 273 of 369
WARNINGS
Store the portable music player in a
secure location, such as the center
console or the glove box, when your
vehicle is moving. Hard objects may
become projectiles in a crash or sudden
stop, which may increase the risk of serious
injury. The audio extension cable must be
long enough to allow the portable music
player to be safely stored while your
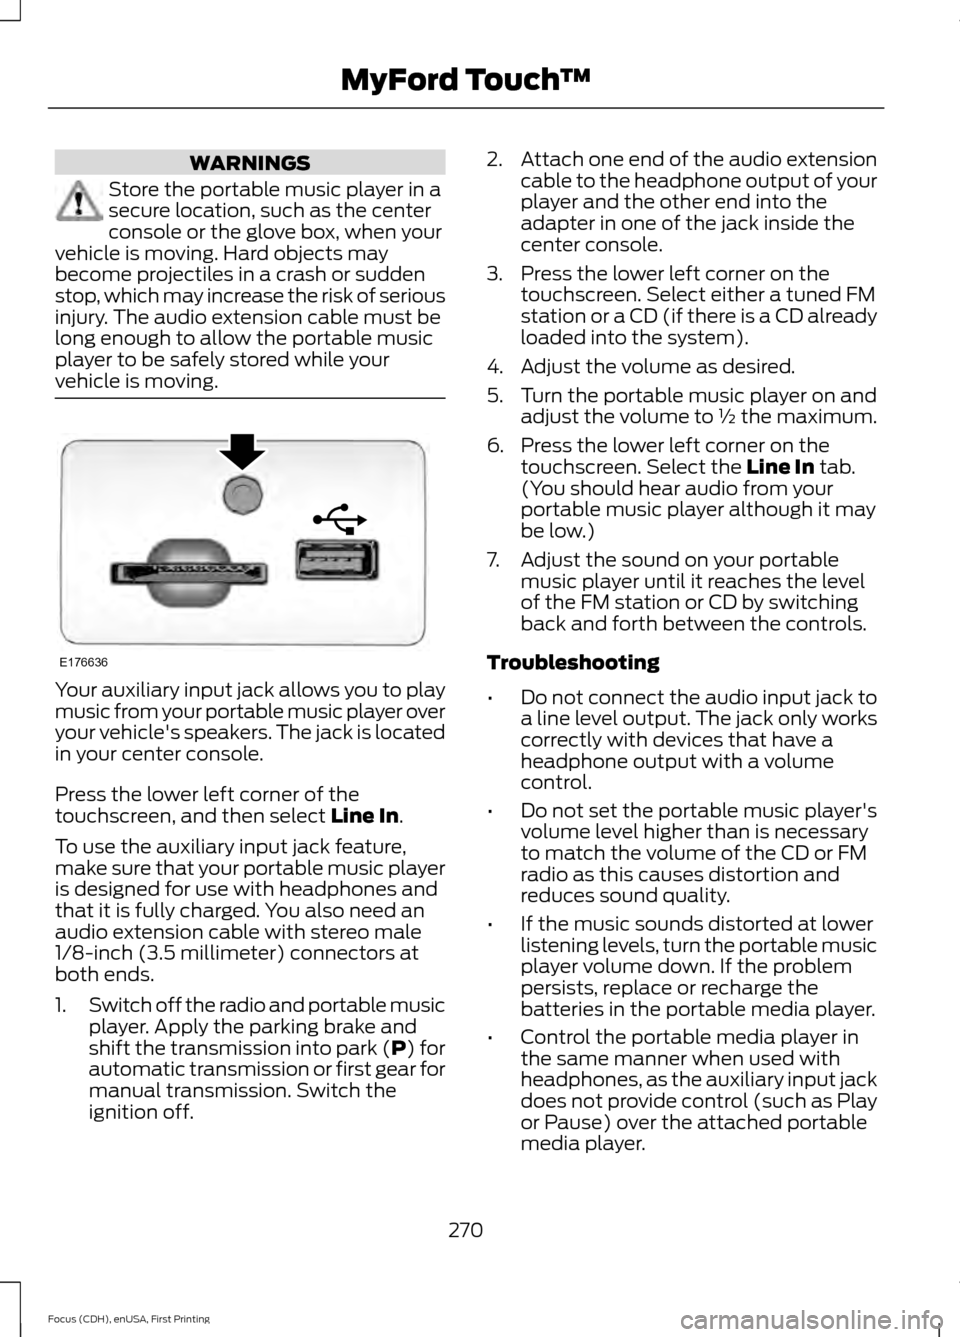
vehicle is moving. Your auxiliary input jack allows you to play
music from your portable music player over
your vehicle's speakers. The jack is located
in your center console.
Press the lower left corner of the
touchscreen, and then select Line In.
To use the auxiliary input jack feature,
make sure that your portable music player
is designed for use with headphones and
that it is fully charged. You also need an
audio extension cable with stereo male
1/8-inch (3.5 millimeter) connectors at
both ends.
1. Switch off the radio and portable music
player. Apply the parking brake and
shift the transmission into park (P) for
automatic transmission or first gear for
manual transmission. Switch the
ignition off. 2.
Attach one end of the audio extension
cable to the headphone output of your
player and the other end into the
adapter in one of the jack inside the
center console.
3. Press the lower left corner on the touchscreen. Select either a tuned FM
station or a CD (if there is a CD already
loaded into the system).
4. Adjust the volume as desired.
5. Turn the portable music player on and adjust the volume to ½ the maximum.
6. Press the lower left corner on the touchscreen. Select the
Line In tab.
(You should hear audio from your
portable music player although it may
be low.)
7. Adjust the sound on your portable music player until it reaches the level
of the FM station or CD by switching
back and forth between the controls.
Troubleshooting
• Do not connect the audio input jack to
a line level output. The jack only works
correctly with devices that have a
headphone output with a volume
control.
• Do not set the portable music player's
volume level higher than is necessary
to match the volume of the CD or FM
radio as this causes distortion and
reduces sound quality.
• If the music sounds distorted at lower
listening levels, turn the portable music
player volume down. If the problem
persists, replace or recharge the
batteries in the portable media player.
• Control the portable media player in
the same manner when used with
headphones, as the auxiliary input jack
does not provide control (such as Play
or Pause) over the attached portable
media player.
270
Focus (CDH), enUSA, First Printing MyFord Touch
™E176636