2015 FORD F250 SUPER DUTY manual transmission
[x] Cancel search: manual transmissionPage 5 of 470

Lighting
Lighting Control..............................................65
Autolamps........................................................65
Instrument Lighting Dimmer.....................66
Daytime Running Lamps............................66
Front Fog Lamps............................................67
Direction Indicators........................................67
Interior Lamps.................................................67
Windows and Mirrors
Power Windows.............................................69
Global Opening...............................................70
Exterior Mirrors................................................70
Interior Mirror....................................................72
Sun Visors..........................................................73
Moonroof...........................................................73
Instrument Cluster
Gauges................................................................75
Warning Lamps and Indicators..................77
Audible Warnings and Indicators............80
Information Displays
General Information.......................................81
Information Messages..................................92
Climate Control
Manual Climate Control............................103
Automatic Climate Control......................104
Hints on Controlling the InteriorClimate........................................................106
Heated Windows and Mirrors..................108
Remote Start.................................................109
Seats
Sitting in the Correct Position...................110
Head Restraints.............................................110
Manual Seats..................................................112
Power Seats.....................................................113
Memory Function...........................................113
Rear Seats........................................................114
Heated Seats..................................................116
Climate Controlled Seats...........................118
Front Seat Armrest.......................................119
Rear Seat Armrest........................................120
Universal Garage DoorOpener
Universal Garage Door Opener.................121
Auxiliary Power Points
Auxiliary Power Points................................129
Storage Compartments
Center Console...............................................131
Overhead Console.........................................131
Starting and Stopping theEngine
General Information....................................132
Ignition Switch...............................................132
Starting a Gasoline Engine........................133
Engine Block Heater....................................134
Fuel and Refueling
Safety Precautions......................................136
Fuel Quality.....................................................137
Running Out of Fuel....................................138
Refueling..........................................................138
Fuel Consumption.......................................140
Emission Control System...........................141
Transmission
Automatic Transmission...........................144
Power Take-Off.............................................150
Four-Wheel Drive
Using Four-Wheel Drive..............................151
2
Super Duty (), enUSA
Table of Contents
Page 51 of 470

Sounding a Panic Alarm
Note:The panic alarm will only operatewhen the ignition is off.
Press the button to activate thealarm. Press the button again orturn the ignition on to deactivateit.
Remote Start (If Equipped)
WARNING
To avoid exhaust fumes, do not useremote start if your vehicle is parkedindoors or areas that are not wellventilated.
Note:Do not use remote start if your vehicleis low on fuel.
The remote start button is on thetransmitter.
This feature allows you to start yourvehicle from outside the vehicle. Thetransmitter has an extended operatingrange.
Vehicles with automatic climate controlcan be set to operate when you remotestart the vehicle. See Climate Control(page 103). A manual climate controlsystem will run at the setting it was set towhen you switch the vehicle off.
Many states and provinces haverestrictions for the use of remote start.Check your local and state or provinciallaws for specific requirements regardingremote start systems.
The remote start system will not work if:
•the ignition is on
•the alarm system is triggered
•you disable the feature
•the hood is open
•the transmission is not in P
•the vehicle battery voltage is too low
•the service engine soon indicator is on.
Remote Starting the Vehicle
Note:You must press each button withinthree seconds of each other. Your vehiclewill not remote start and the horn will notsound if you do not follow this sequence.
The label on your transmitter details thestarting procedure.
To remote start your vehicle:
1. Press the lock button to lock all thedoors.
2. Press the remote start button twice.The exterior lamps will flash twice.
The horn will sound if the system fails tostart.
Note:If you remote start your vehicle withan integrated keyhead transmitter, you mustswitch the ignition on before driving yourvehicle. If you remote start your vehicle withan intelligent access transmitter, you mustpress the START/STOP button on theinstrument panel once while applying thebrake pedal before driving your vehicle.
The power windows will not work duringthe remote start and the radio will not turnon automatically.
The parking lamps will remain on and thevehicle will run for 5, 10, or 15 minutes,depending on the setting.
48
Super Duty (), enUSA
Keys and Remote ControlsE138624 E138625 E138626
Page 70 of 470
The system switches the headlamps onwith a reduced output in daylightconditions.
To switch the system on:
1. Switch the ignition on.
2. Switch the lighting control to the off,or parking lamp position.
3. Disengage the parking brake.
4. Make sure the transmission selectorlever is not in position P.
FRONT FOG LAMPS (IF EQUIPPED)
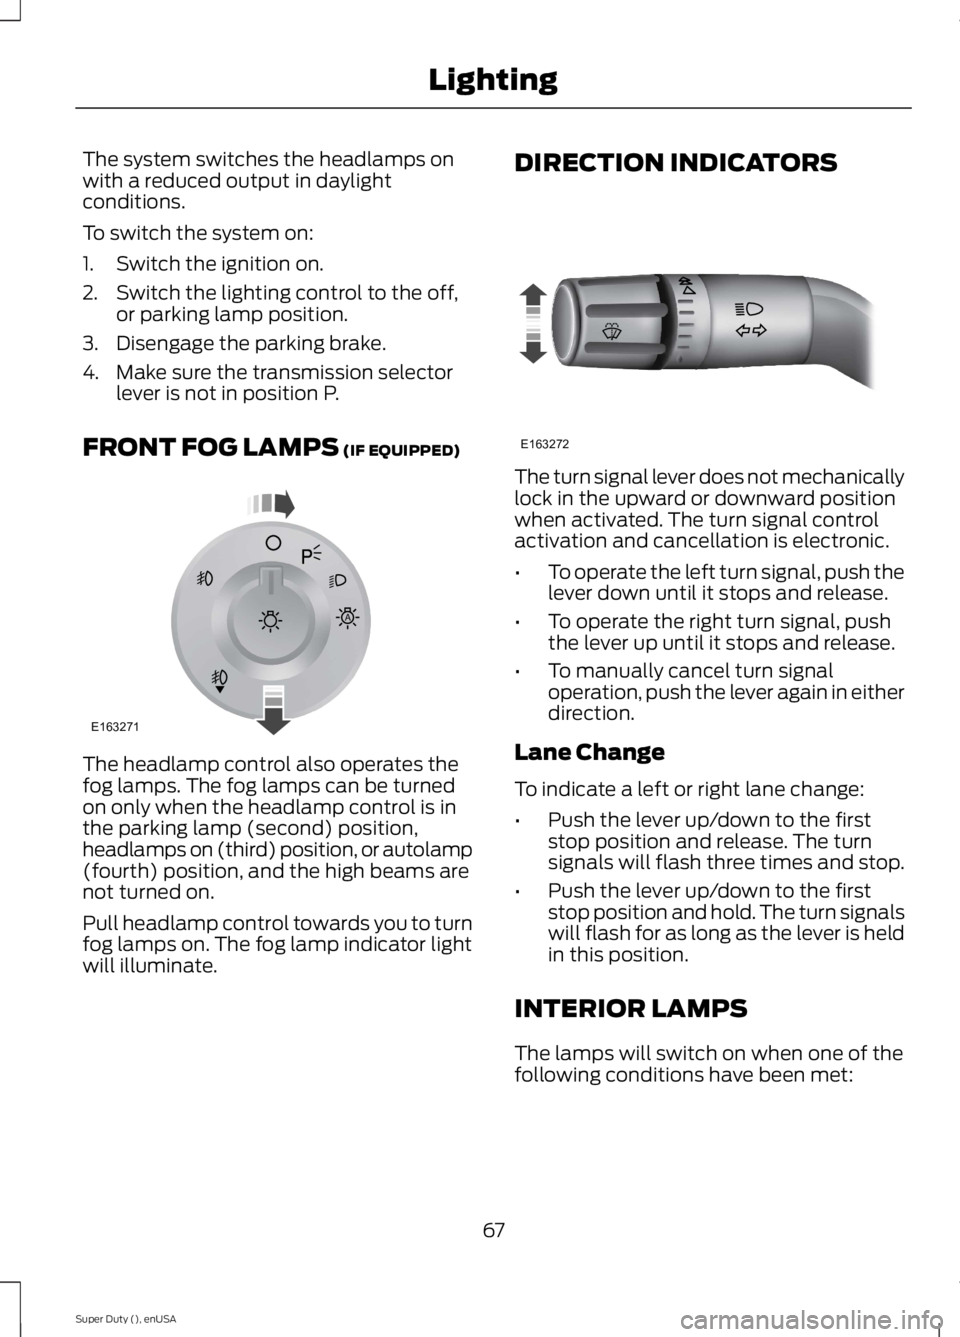
The headlamp control also operates thefog lamps. The fog lamps can be turnedon only when the headlamp control is inthe parking lamp (second) position,headlamps on (third) position, or autolamp(fourth) position, and the high beams arenot turned on.
Pull headlamp control towards you to turnfog lamps on. The fog lamp indicator lightwill illuminate.
DIRECTION INDICATORS
The turn signal lever does not mechanicallylock in the upward or downward positionwhen activated. The turn signal controlactivation and cancellation is electronic.
•To operate the left turn signal, push thelever down until it stops and release.
•To operate the right turn signal, pushthe lever up until it stops and release.
•To manually cancel turn signaloperation, push the lever again in eitherdirection.
Lane Change
To indicate a left or right lane change:
•Push the lever up/down to the firststop position and release. The turnsignals will flash three times and stop.
•Push the lever up/down to the firststop position and hold. The turn signalswill flash for as long as the lever is heldin this position.
INTERIOR LAMPS
The lamps will switch on when one of thefollowing conditions have been met:
67
Super Duty (), enUSA
LightingE163271
A E163272
Page 150 of 470
M (Manual) without Overdrive
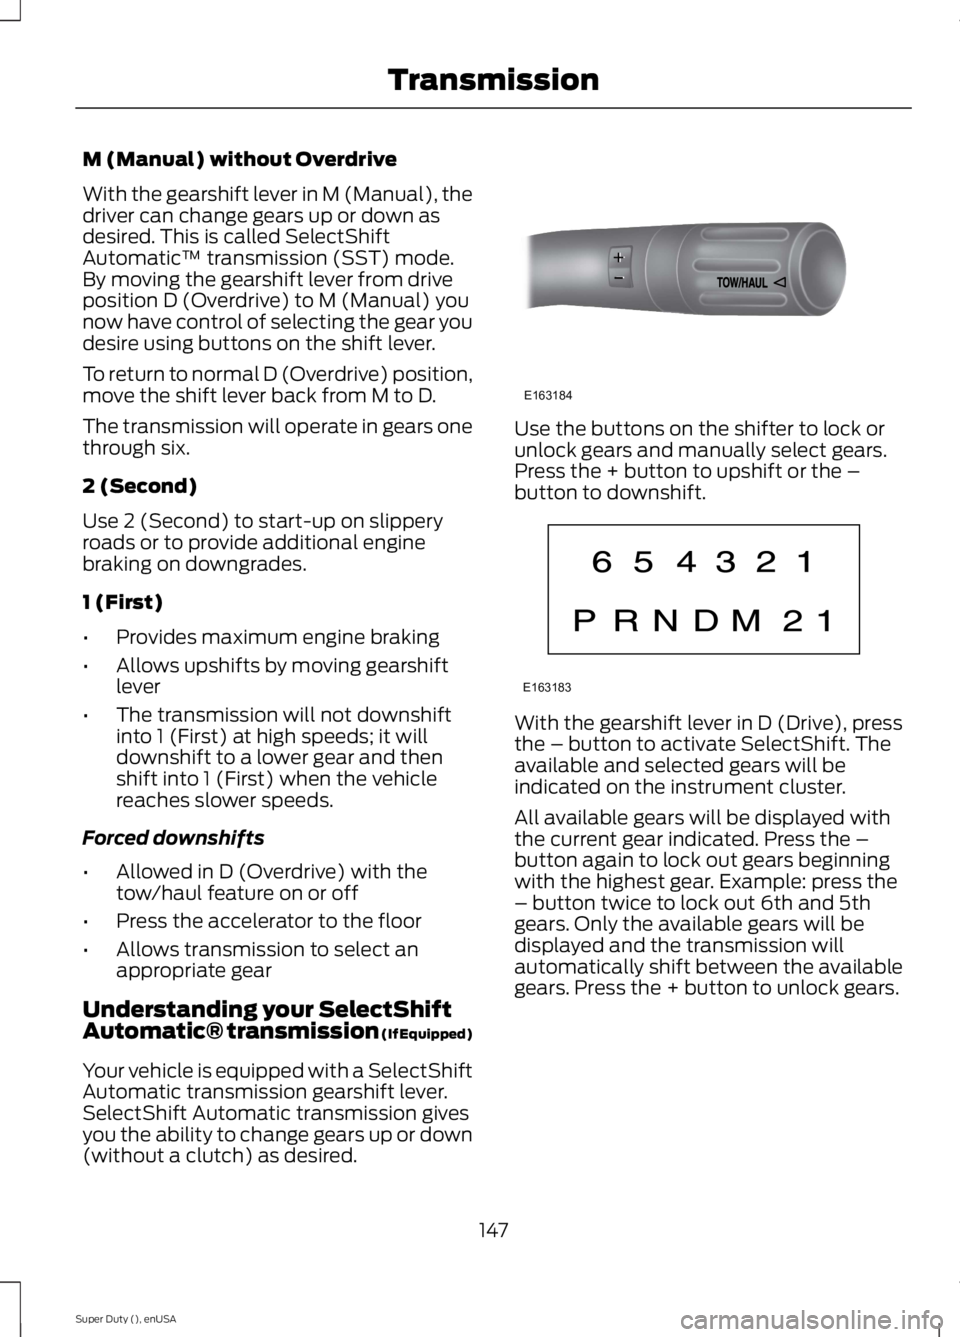
With the gearshift lever in M (Manual), thedriver can change gears up or down asdesired. This is called SelectShiftAutomatic™ transmission (SST) mode.By moving the gearshift lever from driveposition D (Overdrive) to M (Manual) younow have control of selecting the gear youdesire using buttons on the shift lever.
To return to normal D (Overdrive) position,move the shift lever back from M to D.
The transmission will operate in gears onethrough six.
2 (Second)
Use 2 (Second) to start-up on slipperyroads or to provide additional enginebraking on downgrades.
1 (First)
•Provides maximum engine braking
•Allows upshifts by moving gearshiftlever
•The transmission will not downshiftinto 1 (First) at high speeds; it willdownshift to a lower gear and thenshift into 1 (First) when the vehiclereaches slower speeds.
Forced downshifts
•Allowed in D (Overdrive) with thetow/haul feature on or off
•Press the accelerator to the floor
•Allows transmission to select anappropriate gear
Understanding your SelectShiftAutomatic® transmission (If Equipped)
Your vehicle is equipped with a SelectShiftAutomatic transmission gearshift lever.SelectShift Automatic transmission givesyou the ability to change gears up or down(without a clutch) as desired.
Use the buttons on the shifter to lock orunlock gears and manually select gears.Press the + button to upshift or the –button to downshift.
With the gearshift lever in D (Drive), pressthe – button to activate SelectShift. Theavailable and selected gears will beindicated on the instrument cluster.
All available gears will be displayed withthe current gear indicated. Press the –button again to lock out gears beginningwith the highest gear. Example: press the– button twice to lock out 6th and 5thgears. Only the available gears will bedisplayed and the transmission willautomatically shift between the availablegears. Press the + button to unlock gears.
147
Super Duty (), enUSA
TransmissionE163184 E163183
Page 151 of 470
By moving the gearshift lever from the D(Drive) position to the M (Manual) positionyou may now manually select the gear youdesire. Only the current gear will bedisplayed. Press the + button or the –button to upshift or downshift. If the –button is pressed at a vehicle speed that
would cause an engine overspeed, therequested gear will flash then disappearand the transmission will remain in thecurrent gear.
Recommended shift speeds
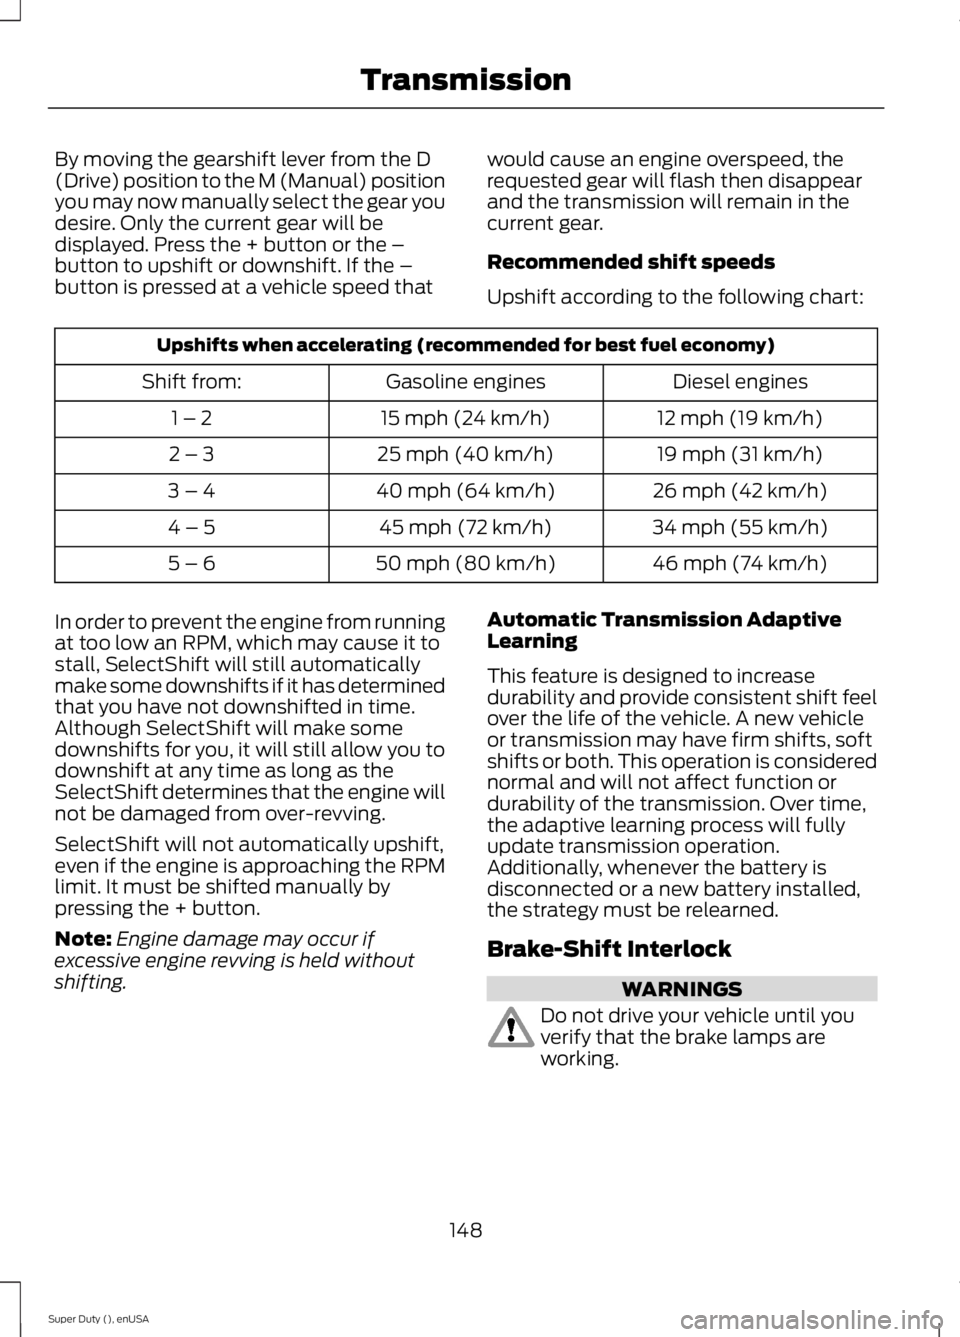
Upshift according to the following chart:
Upshifts when accelerating (recommended for best fuel economy)
Diesel enginesGasoline enginesShift from:
12 mph (19 km/h)15 mph (24 km/h)1 – 2
19 mph (31 km/h)25 mph (40 km/h)2 – 3
26 mph (42 km/h)40 mph (64 km/h)3 – 4
34 mph (55 km/h)45 mph (72 km/h)4 – 5
46 mph (74 km/h)50 mph (80 km/h)5 – 6
In order to prevent the engine from runningat too low an RPM, which may cause it tostall, SelectShift will still automaticallymake some downshifts if it has determinedthat you have not downshifted in time.Although SelectShift will make somedownshifts for you, it will still allow you todownshift at any time as long as theSelectShift determines that the engine willnot be damaged from over-revving.
SelectShift will not automatically upshift,even if the engine is approaching the RPMlimit. It must be shifted manually bypressing the + button.
Note:Engine damage may occur ifexcessive engine revving is held withoutshifting.
Automatic Transmission AdaptiveLearning
This feature is designed to increasedurability and provide consistent shift feelover the life of the vehicle. A new vehicleor transmission may have firm shifts, softshifts or both. This operation is considerednormal and will not affect function ordurability of the transmission. Over time,the adaptive learning process will fullyupdate transmission operation.Additionally, whenever the battery isdisconnected or a new battery installed,the strategy must be relearned.
Brake-Shift Interlock
WARNINGS
Do not drive your vehicle until youverify that the brake lamps areworking.
148
Super Duty (), enUSA
Transmission
Page 162 of 470
On some Four-wheel drive vehicles, whenthe transfer case is in the N (Neutral)position, the engine and transmission aredisconnected from the rest of the driveline.Therefore, the vehicle is free to roll even ifthe automatic transmission is in P (Park)or the manual transmission is in gear. Donot leave the vehicle unattended with thetransfer case in the N (Neutral) position.Always set the parking brake fully and turnoff the ignition when leaving the vehicle.
Maintenance and Modifications
The suspension and steering systems onyour vehicle have been designed andtested to provide predictable performancewhether loaded or empty. For this reason,we strongly recommend that you do notmake modifications such as adding orremoving parts (i.e. lift kits or stabilizerbars) or by using replacement parts notequivalent to the original factoryequipment.
We recommend that you use caution whenyour vehicle has either a high load or device(i.e. ladder or luggage racks). Anymodifications to your vehicle that raise thecenter of gravity may cause your vehicleto roll over when there is a loss of vehiclecontrol.
Failure to maintain your vehicle correctlymay void the warranty, increase your repaircost, reduce vehicle performance andoperational capabilities and adverselyaffect you and your passenger's safety. Werecommend you frequently inspect yourvehicle's chassis components when yourvehicle is subject to off road usage.
159
Super Duty (), enUSA
Four-Wheel Drive (If Equipped)
Page 176 of 470
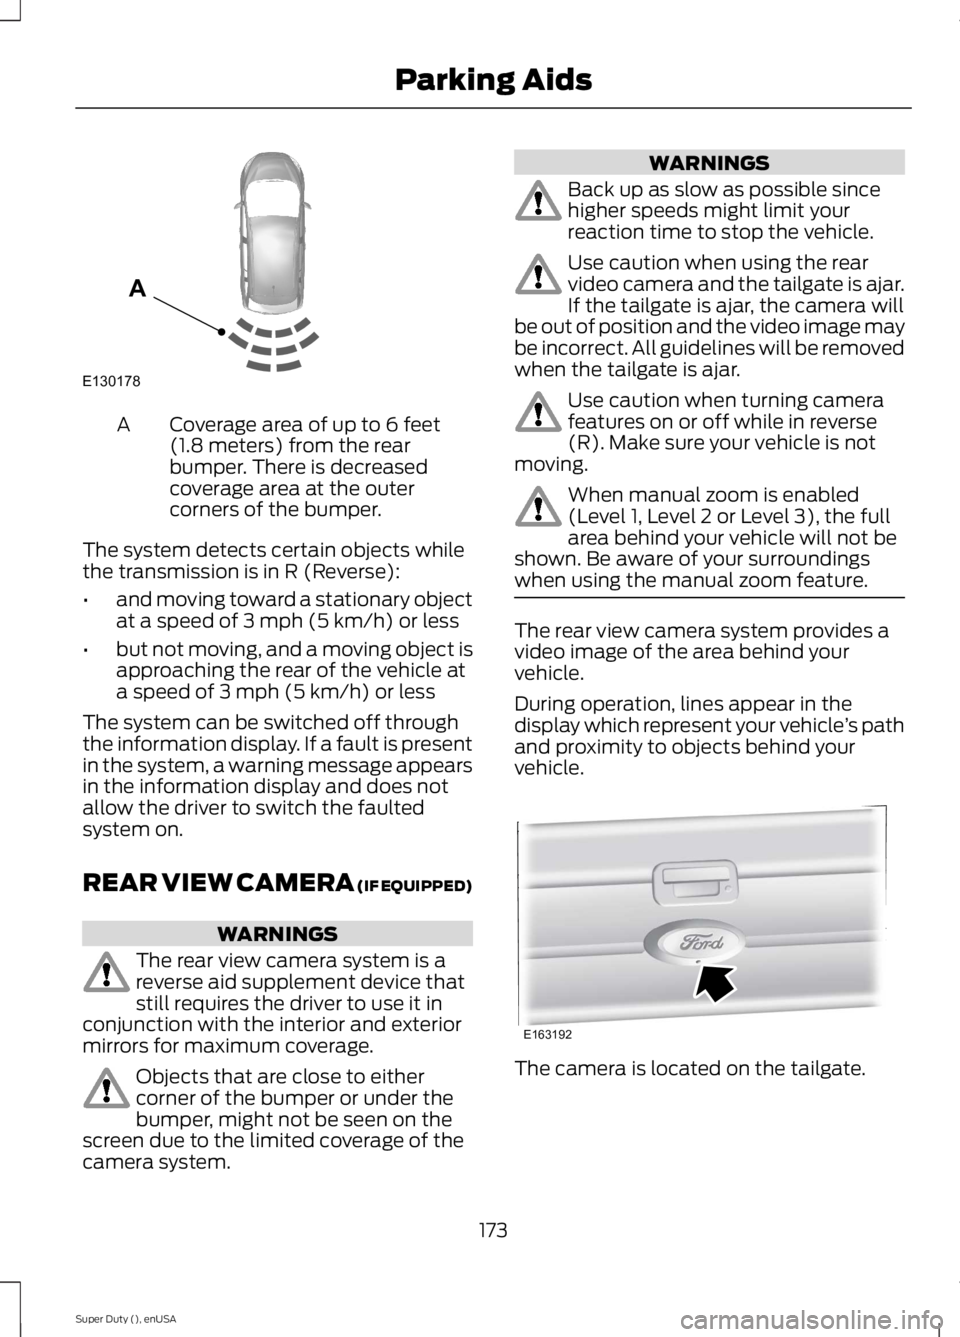
Coverage area of up to 6 feet(1.8 meters) from the rearbumper. There is decreasedcoverage area at the outercorners of the bumper.
A
The system detects certain objects whilethe transmission is in R (Reverse):
•and moving toward a stationary objectat a speed of 3 mph (5 km/h) or less
•but not moving, and a moving object isapproaching the rear of the vehicle ata speed of 3 mph (5 km/h) or less
The system can be switched off throughthe information display. If a fault is presentin the system, a warning message appearsin the information display and does notallow the driver to switch the faultedsystem on.
REAR VIEW CAMERA (IF EQUIPPED)
WARNINGS
The rear view camera system is areverse aid supplement device thatstill requires the driver to use it inconjunction with the interior and exteriormirrors for maximum coverage.
Objects that are close to eithercorner of the bumper or under thebumper, might not be seen on thescreen due to the limited coverage of thecamera system.
WARNINGS
Back up as slow as possible sincehigher speeds might limit yourreaction time to stop the vehicle.
Use caution when using the rearvideo camera and the tailgate is ajar.If the tailgate is ajar, the camera willbe out of position and the video image maybe incorrect. All guidelines will be removedwhen the tailgate is ajar.
Use caution when turning camerafeatures on or off while in reverse(R). Make sure your vehicle is notmoving.
When manual zoom is enabled(Level 1, Level 2 or Level 3), the fullarea behind your vehicle will not beshown. Be aware of your surroundingswhen using the manual zoom feature.
The rear view camera system provides avideo image of the area behind yourvehicle.
During operation, lines appear in thedisplay which represent your vehicle’s pathand proximity to objects behind yourvehicle.
The camera is located on the tailgate.
173
Super Duty (), enUSA
Parking AidsE130178
A E163192
Page 178 of 470
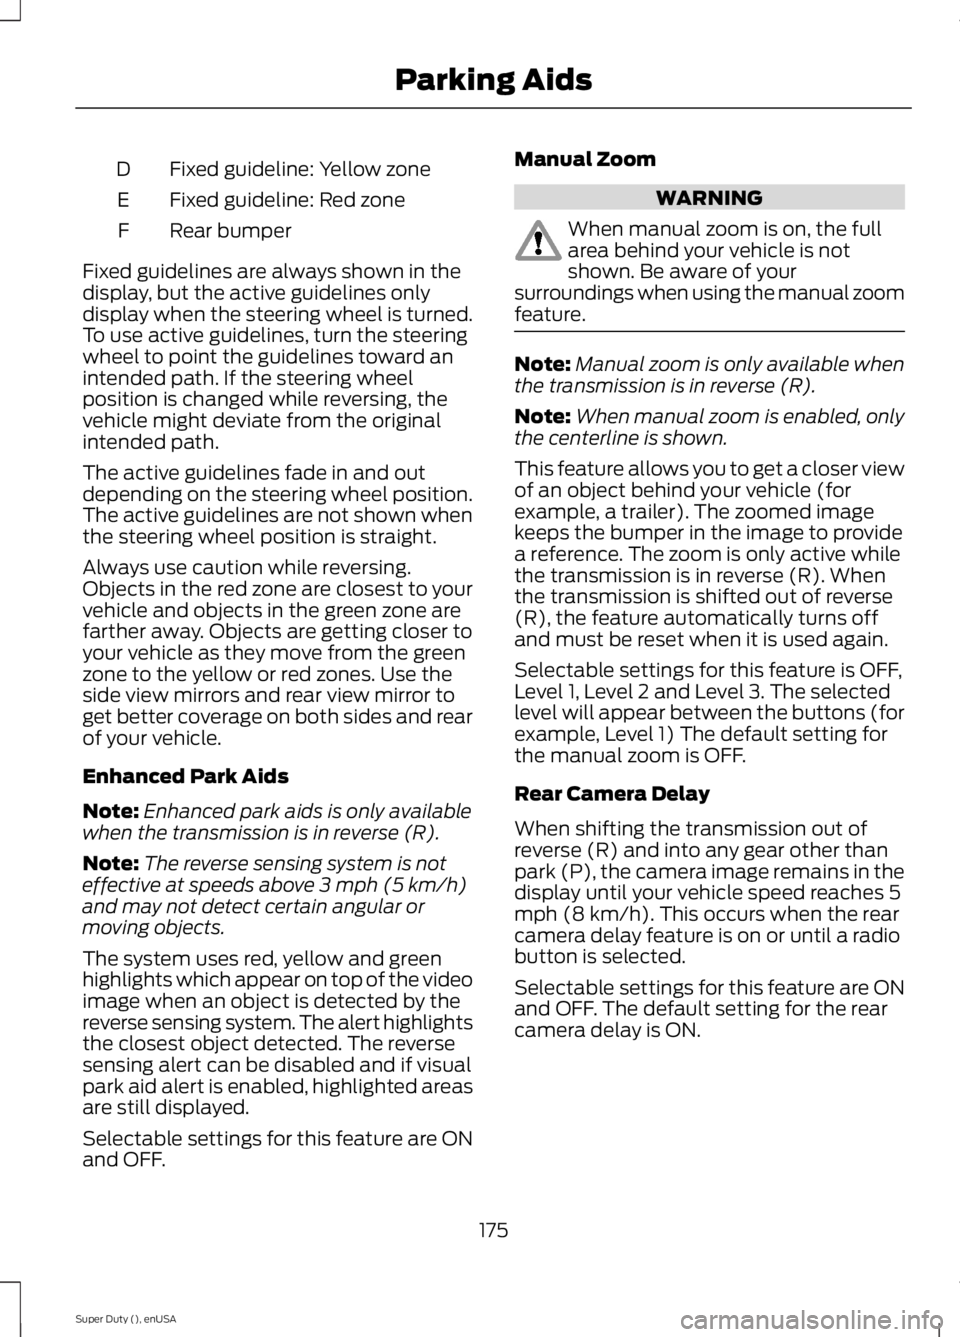
Fixed guideline: Yellow zoneD
Fixed guideline: Red zoneE
Rear bumperF
Fixed guidelines are always shown in thedisplay, but the active guidelines onlydisplay when the steering wheel is turned.To use active guidelines, turn the steeringwheel to point the guidelines toward anintended path. If the steering wheelposition is changed while reversing, thevehicle might deviate from the originalintended path.
The active guidelines fade in and outdepending on the steering wheel position.The active guidelines are not shown whenthe steering wheel position is straight.
Always use caution while reversing.Objects in the red zone are closest to yourvehicle and objects in the green zone arefarther away. Objects are getting closer toyour vehicle as they move from the greenzone to the yellow or red zones. Use theside view mirrors and rear view mirror toget better coverage on both sides and rearof your vehicle.
Enhanced Park Aids
Note:Enhanced park aids is only availablewhen the transmission is in reverse (R).
Note:The reverse sensing system is noteffective at speeds above 3 mph (5 km/h)and may not detect certain angular ormoving objects.
The system uses red, yellow and greenhighlights which appear on top of the videoimage when an object is detected by thereverse sensing system. The alert highlightsthe closest object detected. The reversesensing alert can be disabled and if visualpark aid alert is enabled, highlighted areasare still displayed.
Selectable settings for this feature are ONand OFF.
Manual Zoom
WARNING
When manual zoom is on, the fullarea behind your vehicle is notshown. Be aware of yoursurroundings when using the manual zoomfeature.
Note:Manual zoom is only available whenthe transmission is in reverse (R).
Note:When manual zoom is enabled, onlythe centerline is shown.
This feature allows you to get a closer viewof an object behind your vehicle (forexample, a trailer). The zoomed imagekeeps the bumper in the image to providea reference. The zoom is only active whilethe transmission is in reverse (R). Whenthe transmission is shifted out of reverse(R), the feature automatically turns offand must be reset when it is used again.
Selectable settings for this feature is OFF,Level 1, Level 2 and Level 3. The selectedlevel will appear between the buttons (forexample, Level 1) The default setting forthe manual zoom is OFF.
Rear Camera Delay
When shifting the transmission out ofreverse (R) and into any gear other thanpark (P), the camera image remains in thedisplay until your vehicle speed reaches 5mph (8 km/h). This occurs when the rearcamera delay feature is on or until a radiobutton is selected.
Selectable settings for this feature are ONand OFF. The default setting for the rearcamera delay is ON.
175
Super Duty (), enUSA
Parking Aids