2015 FORD F250 SUPER DUTY warning
[x] Cancel search: warningPage 116 of 470
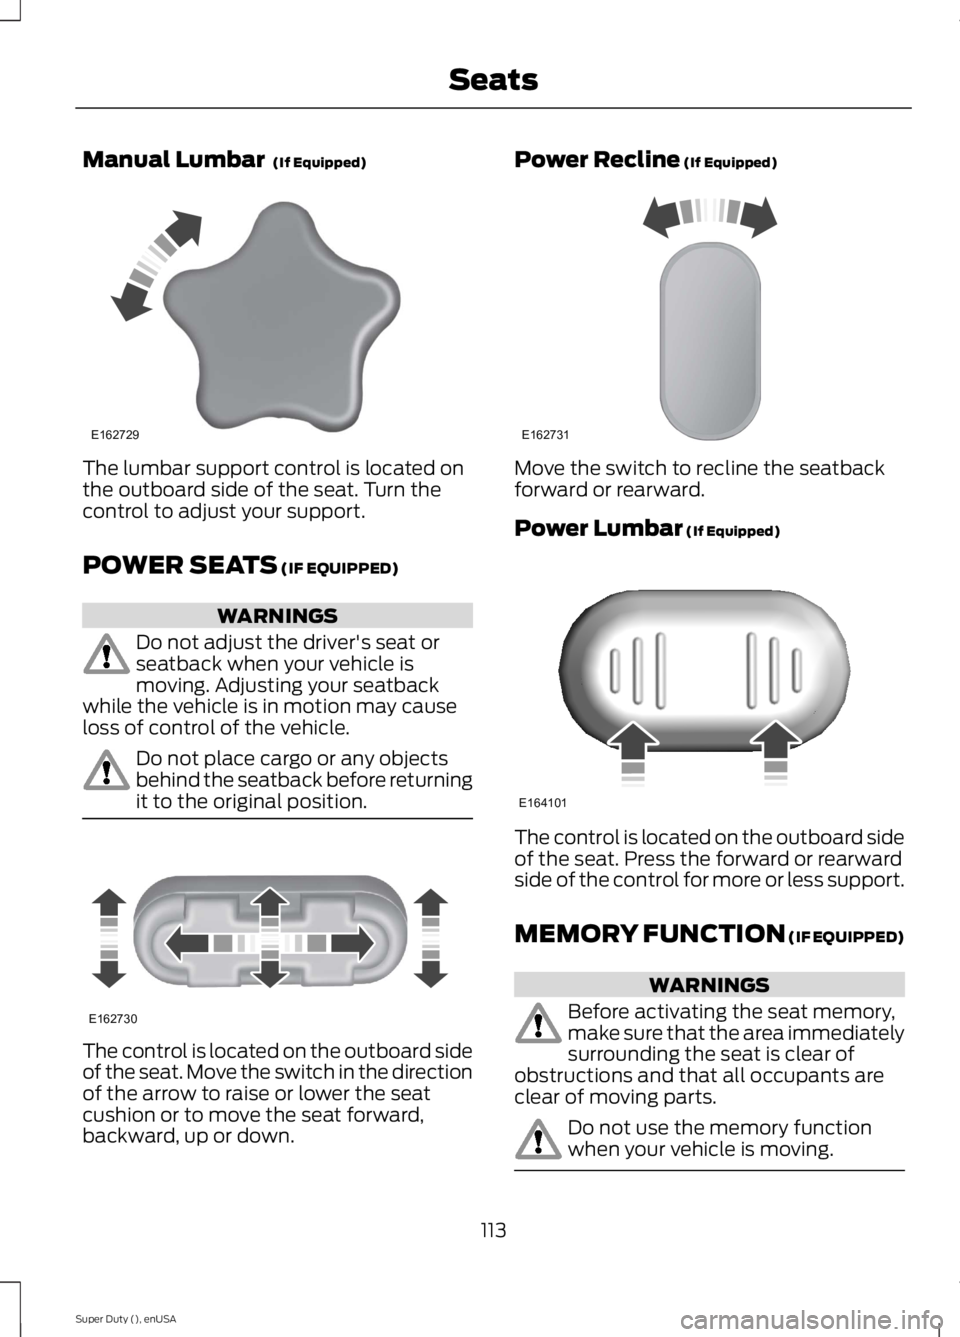
Manual Lumbar (If Equipped)
The lumbar support control is located onthe outboard side of the seat. Turn thecontrol to adjust your support.
POWER SEATS (IF EQUIPPED)
WARNINGS
Do not adjust the driver's seat orseatback when your vehicle ismoving. Adjusting your seatbackwhile the vehicle is in motion may causeloss of control of the vehicle.
Do not place cargo or any objectsbehind the seatback before returningit to the original position.
The control is located on the outboard sideof the seat. Move the switch in the directionof the arrow to raise or lower the seatcushion or to move the seat forward,backward, up or down.
Power Recline (If Equipped)
Move the switch to recline the seatbackforward or rearward.
Power Lumbar (If Equipped)
The control is located on the outboard sideof the seat. Press the forward or rearwardside of the control for more or less support.
MEMORY FUNCTION (IF EQUIPPED)
WARNINGS
Before activating the seat memory,make sure that the area immediatelysurrounding the seat is clear ofobstructions and that all occupants areclear of moving parts.
Do not use the memory functionwhen your vehicle is moving.
113
Super Duty (), enUSA
SeatsE162729 E162730 E162731 E164101
Page 118 of 470
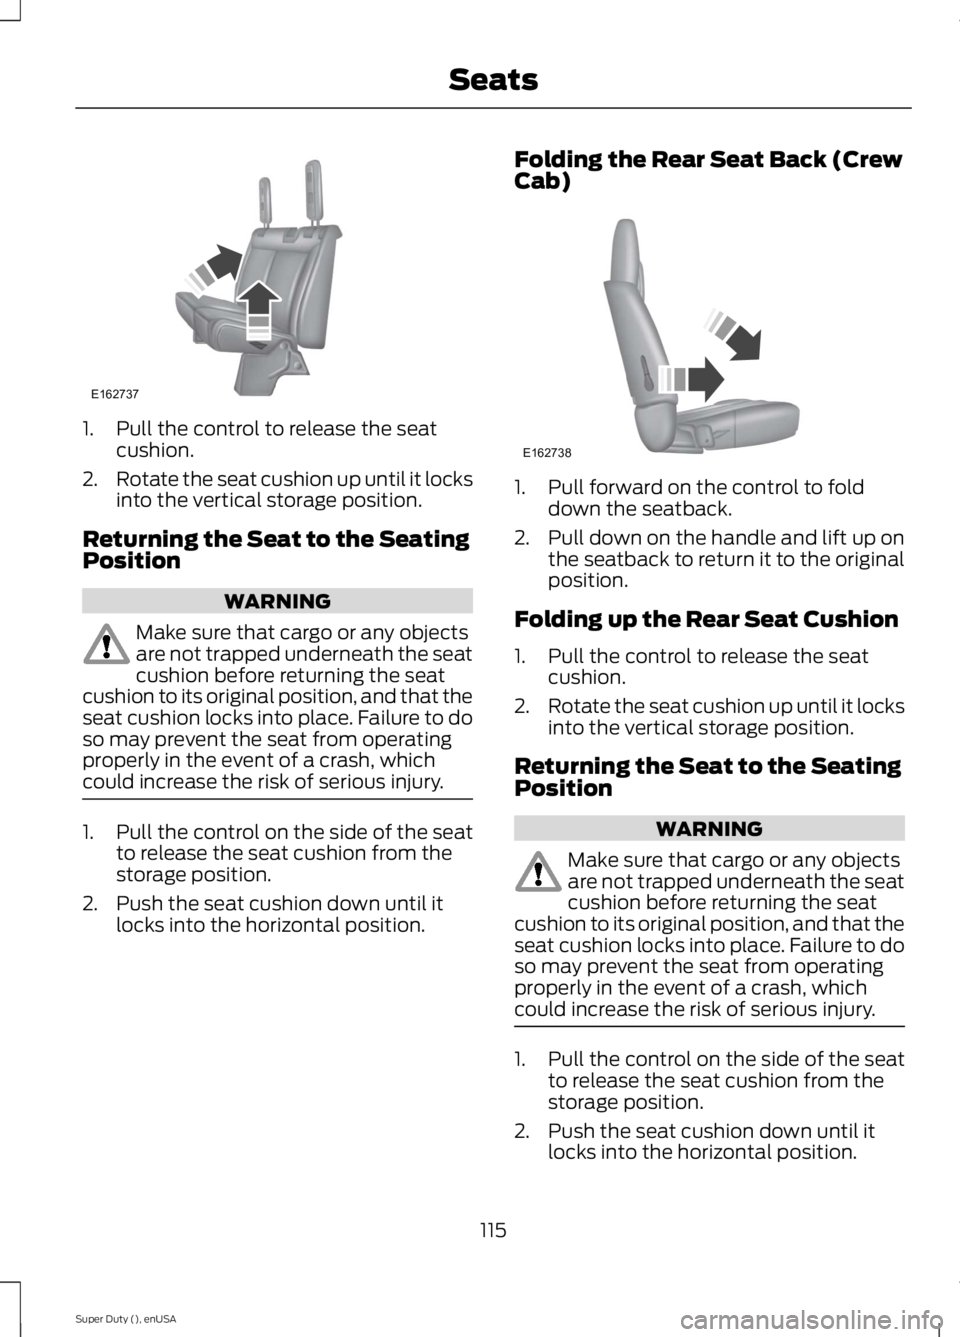
1. Pull the control to release the seatcushion.
2.Rotate the seat cushion up until it locksinto the vertical storage position.
Returning the Seat to the SeatingPosition
WARNING
Make sure that cargo or any objectsare not trapped underneath the seatcushion before returning the seatcushion to its original position, and that theseat cushion locks into place. Failure to doso may prevent the seat from operatingproperly in the event of a crash, whichcould increase the risk of serious injury.
1. Pull the control on the side of the seatto release the seat cushion from thestorage position.
2. Push the seat cushion down until itlocks into the horizontal position.
Folding the Rear Seat Back (CrewCab)
1. Pull forward on the control to folddown the seatback.
2.Pull down on the handle and lift up onthe seatback to return it to the originalposition.
Folding up the Rear Seat Cushion
1. Pull the control to release the seatcushion.
2.Rotate the seat cushion up until it locksinto the vertical storage position.
Returning the Seat to the SeatingPosition
WARNING
Make sure that cargo or any objectsare not trapped underneath the seatcushion before returning the seatcushion to its original position, and that theseat cushion locks into place. Failure to doso may prevent the seat from operatingproperly in the event of a crash, whichcould increase the risk of serious injury.
1. Pull the control on the side of the seatto release the seat cushion from thestorage position.
2. Push the seat cushion down until itlocks into the horizontal position.
115
Super Duty (), enUSA
SeatsE162737 E162738
Page 119 of 470
Rear Under Seat Storage (CrewCab) (If Equipped)
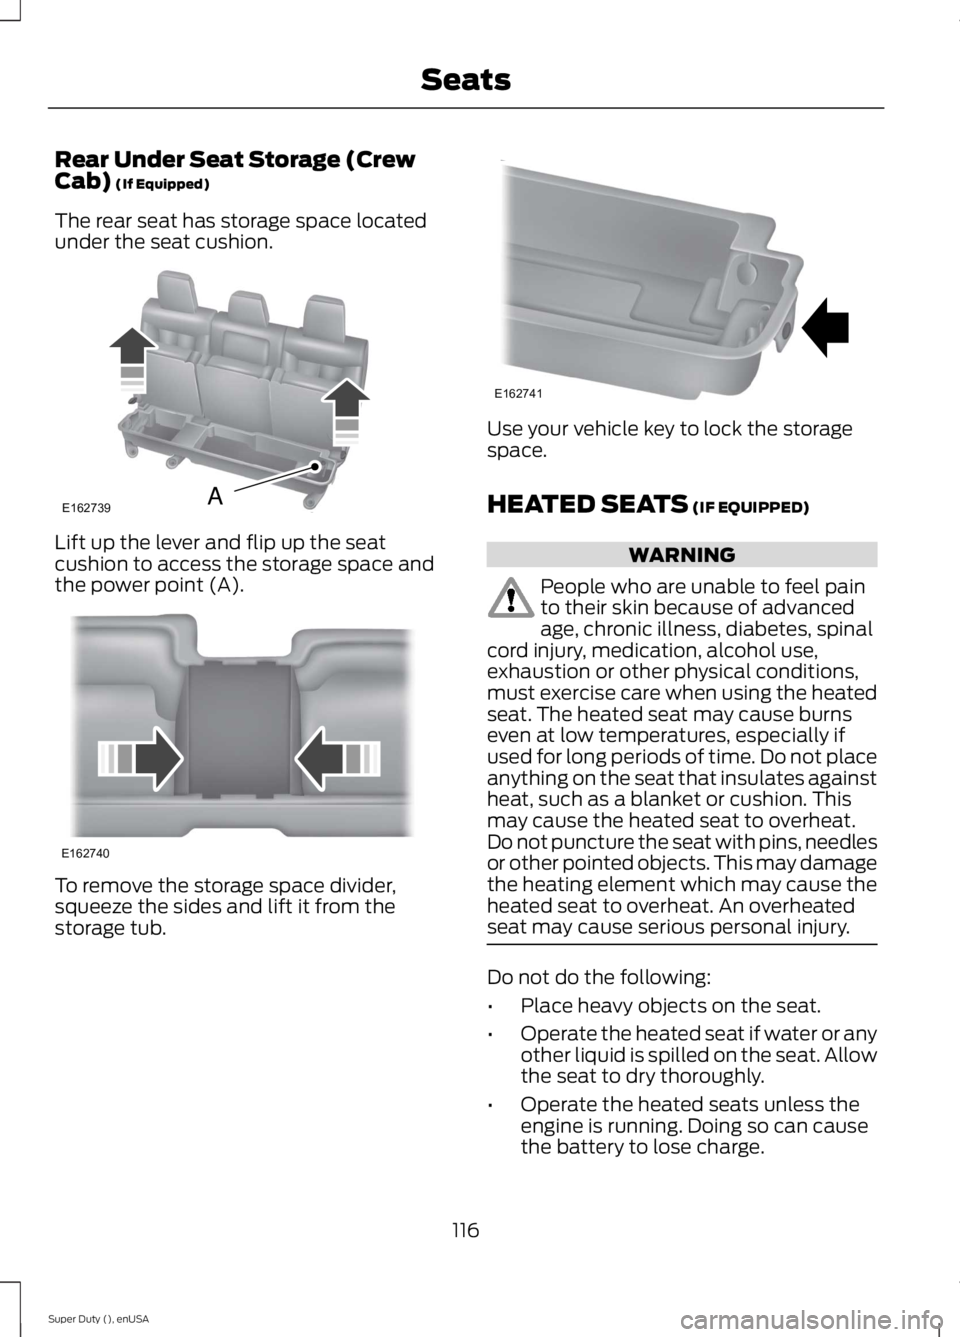
The rear seat has storage space locatedunder the seat cushion.
Lift up the lever and flip up the seatcushion to access the storage space andthe power point (A).
To remove the storage space divider,squeeze the sides and lift it from thestorage tub.
Use your vehicle key to lock the storagespace.
HEATED SEATS (IF EQUIPPED)
WARNING
People who are unable to feel painto their skin because of advancedage, chronic illness, diabetes, spinalcord injury, medication, alcohol use,exhaustion or other physical conditions,must exercise care when using the heatedseat. The heated seat may cause burnseven at low temperatures, especially ifused for long periods of time. Do not placeanything on the seat that insulates againstheat, such as a blanket or cushion. Thismay cause the heated seat to overheat.Do not puncture the seat with pins, needlesor other pointed objects. This may damagethe heating element which may cause theheated seat to overheat. An overheatedseat may cause serious personal injury.
Do not do the following:
•Place heavy objects on the seat.
•Operate the heated seat if water or anyother liquid is spilled on the seat. Allowthe seat to dry thoroughly.
•Operate the heated seats unless theengine is running. Doing so can causethe battery to lose charge.
116
Super Duty (), enUSA
SeatsE162739A E162740 E162741
Page 120 of 470
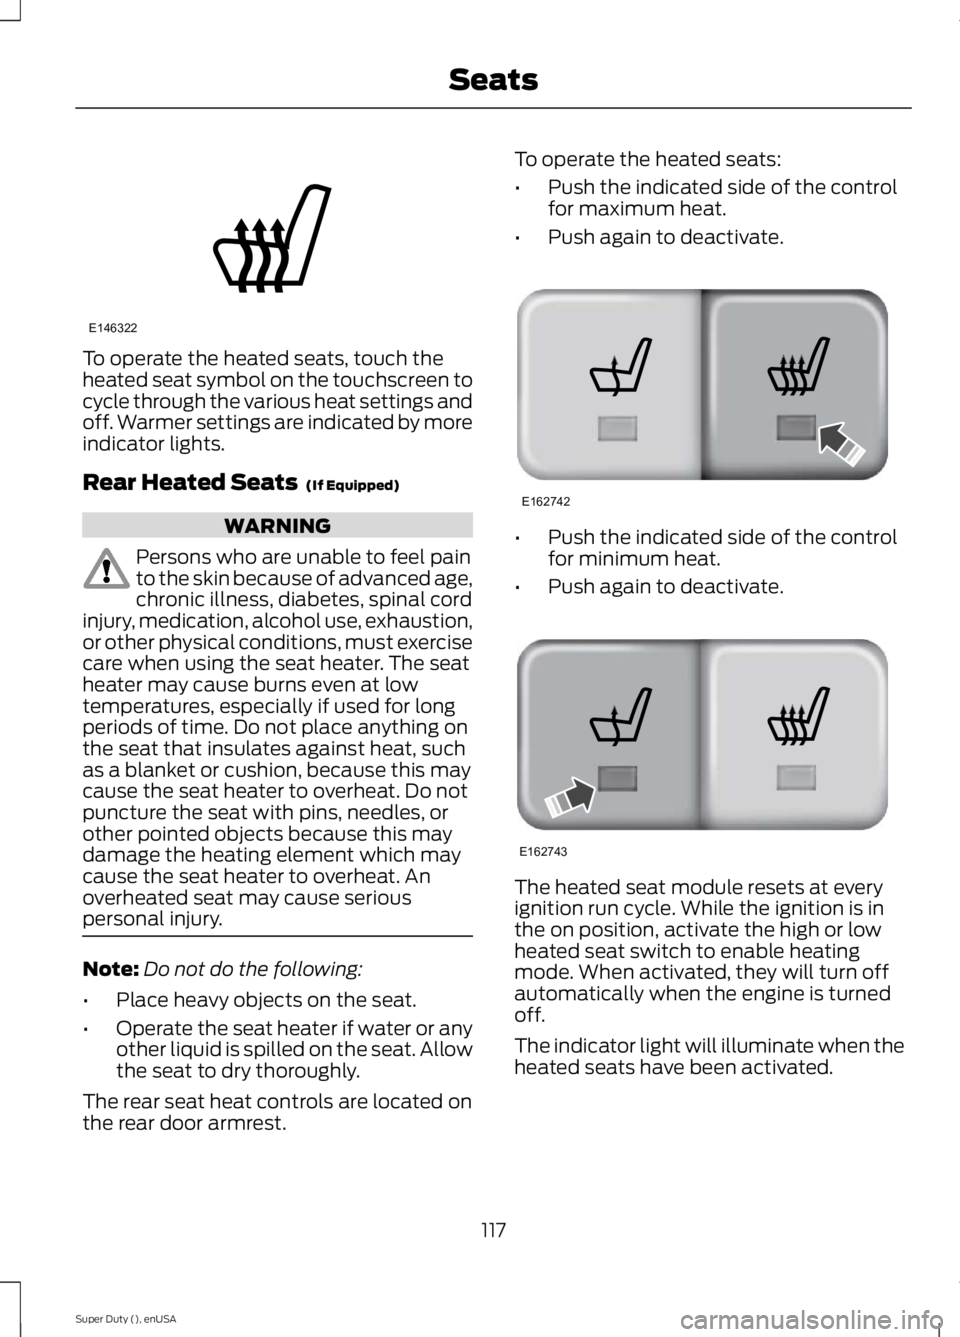
To operate the heated seats, touch theheated seat symbol on the touchscreen tocycle through the various heat settings andoff. Warmer settings are indicated by moreindicator lights.
Rear Heated Seats (If Equipped)
WARNING
Persons who are unable to feel painto the skin because of advanced age,chronic illness, diabetes, spinal cordinjury, medication, alcohol use, exhaustion,or other physical conditions, must exercisecare when using the seat heater. The seatheater may cause burns even at lowtemperatures, especially if used for longperiods of time. Do not place anything onthe seat that insulates against heat, suchas a blanket or cushion, because this maycause the seat heater to overheat. Do notpuncture the seat with pins, needles, orother pointed objects because this maydamage the heating element which maycause the seat heater to overheat. Anoverheated seat may cause seriouspersonal injury.
Note:Do not do the following:
•Place heavy objects on the seat.
•Operate the seat heater if water or anyother liquid is spilled on the seat. Allowthe seat to dry thoroughly.
The rear seat heat controls are located onthe rear door armrest.
To operate the heated seats:
•Push the indicated side of the controlfor maximum heat.
•Push again to deactivate.
•Push the indicated side of the controlfor minimum heat.
•Push again to deactivate.
The heated seat module resets at everyignition run cycle. While the ignition is inthe on position, activate the high or lowheated seat switch to enable heatingmode. When activated, they will turn offautomatically when the engine is turnedoff.
The indicator light will illuminate when theheated seats have been activated.
117
Super Duty (), enUSA
SeatsE146322 E162742 E162743
Page 121 of 470
CLIMATE CONTROLLED SEATS
Heated Seats (If Equipped)
WARNING
People who are unable to feel painto their skin because of advancedage, chronic illness, diabetes, spinalcord injury, medication, alcohol use,exhaustion or other physical conditions,must exercise care when using the heatedseat. The heated seat may cause burnseven at low temperatures, especially ifused for long periods of time. Do not placeanything on the seat that insulates againstheat, such as a blanket or cushion. Thismay cause the heated seat to overheat.Do not puncture the seat with pins, needlesor other pointed objects. This may damagethe heating element which may cause theheated seat to overheat. An overheatedseat may cause serious personal injury.
Do not do the following:
•Place heavy objects on the seat.
•Operate the heated seat if water or anyother liquid is spilled on the seat. Allowthe seat to dry thoroughly.
•Operate the heated seats unless theengine is running. Doing so can causethe battery to lose charge.
To operate the heated seats, touch theheated seat symbol on the touchscreen tocycle through the various heat settings andoff. Warmer settings are indicated by moreindicator lights.
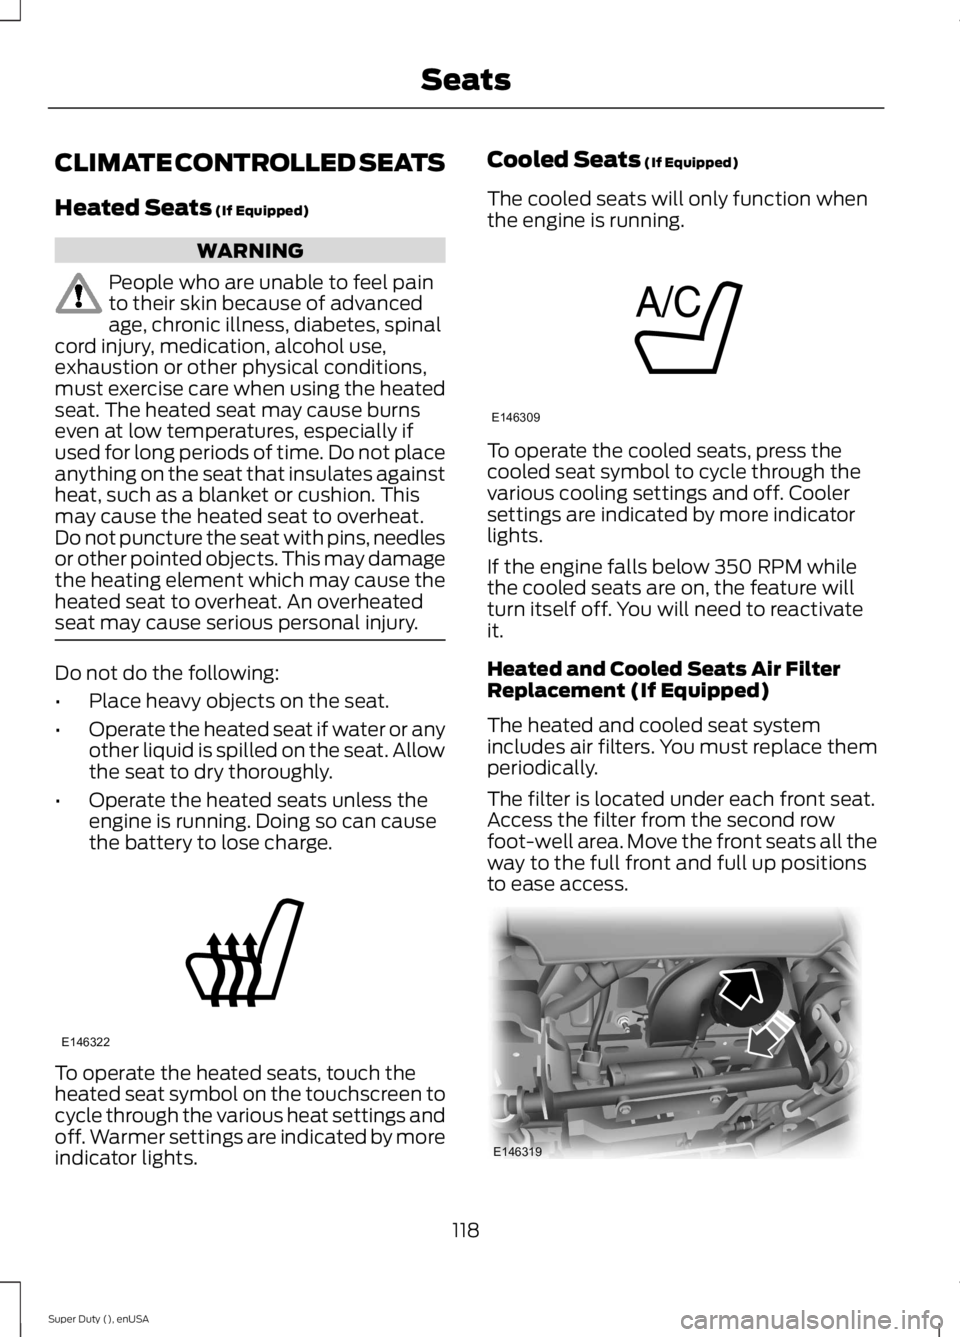
Cooled Seats (If Equipped)
The cooled seats will only function whenthe engine is running.
To operate the cooled seats, press thecooled seat symbol to cycle through thevarious cooling settings and off. Coolersettings are indicated by more indicatorlights.
If the engine falls below 350 RPM whilethe cooled seats are on, the feature willturn itself off. You will need to reactivateit.
Heated and Cooled Seats Air FilterReplacement (If Equipped)
The heated and cooled seat systemincludes air filters. You must replace themperiodically.
The filter is located under each front seat.Access the filter from the second rowfoot-well area. Move the front seats all theway to the full front and full up positionsto ease access.
118
Super Duty (), enUSA
SeatsE146322 E146309 E146319
Page 124 of 470
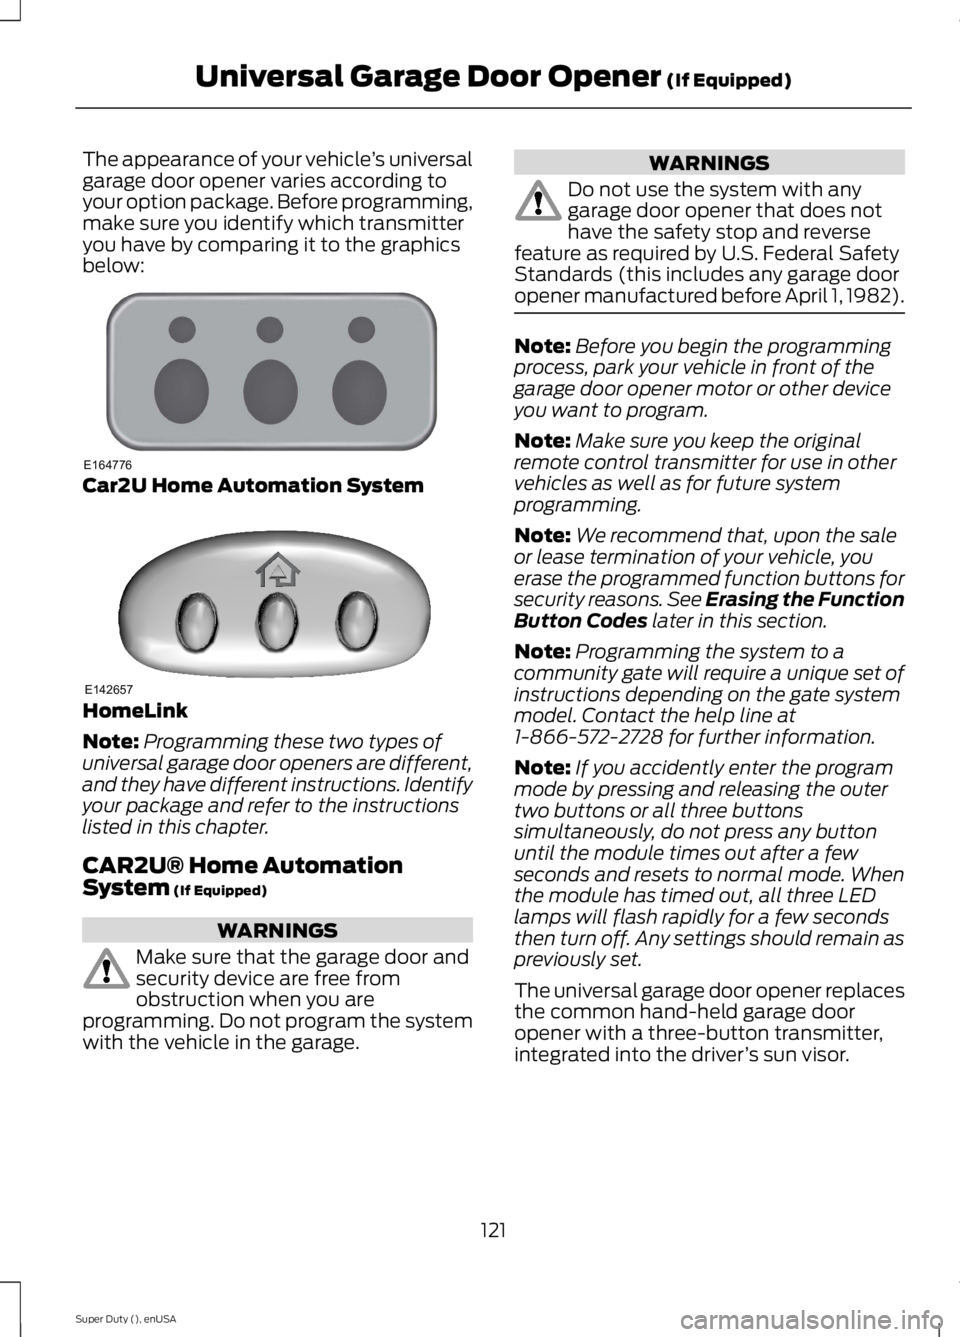
The appearance of your vehicle’s universalgarage door opener varies according toyour option package. Before programming,make sure you identify which transmitteryou have by comparing it to the graphicsbelow:
Car2U Home Automation System
HomeLink
Note:Programming these two types ofuniversal garage door openers are different,and they have different instructions. Identifyyour package and refer to the instructionslisted in this chapter.
CAR2U® Home AutomationSystem (If Equipped)
WARNINGS
Make sure that the garage door andsecurity device are free fromobstruction when you areprogramming. Do not program the systemwith the vehicle in the garage.
WARNINGS
Do not use the system with anygarage door opener that does nothave the safety stop and reversefeature as required by U.S. Federal SafetyStandards (this includes any garage dooropener manufactured before April 1, 1982).
Note:Before you begin the programmingprocess, park your vehicle in front of thegarage door opener motor or other deviceyou want to program.
Note:Make sure you keep the originalremote control transmitter for use in othervehicles as well as for future systemprogramming.
Note:We recommend that, upon the saleor lease termination of your vehicle, youerase the programmed function buttons forsecurity reasons. See Erasing the FunctionButton Codes later in this section.
Note:Programming the system to acommunity gate will require a unique set ofinstructions depending on the gate systemmodel. Contact the help line at1-866-572-2728 for further information.
Note:If you accidently enter the programmode by pressing and releasing the outertwo buttons or all three buttonssimultaneously, do not press any buttonuntil the module times out after a fewseconds and resets to normal mode. Whenthe module has timed out, all three LEDlamps will flash rapidly for a few secondsthen turn off. Any settings should remain aspreviously set.
The universal garage door opener replacesthe common hand-held garage dooropener with a three-button transmitter,integrated into the driver’s sun visor.
121
Super Duty (), enUSA
Universal Garage Door Opener (If Equipped)E164776 E142657
Page 127 of 470
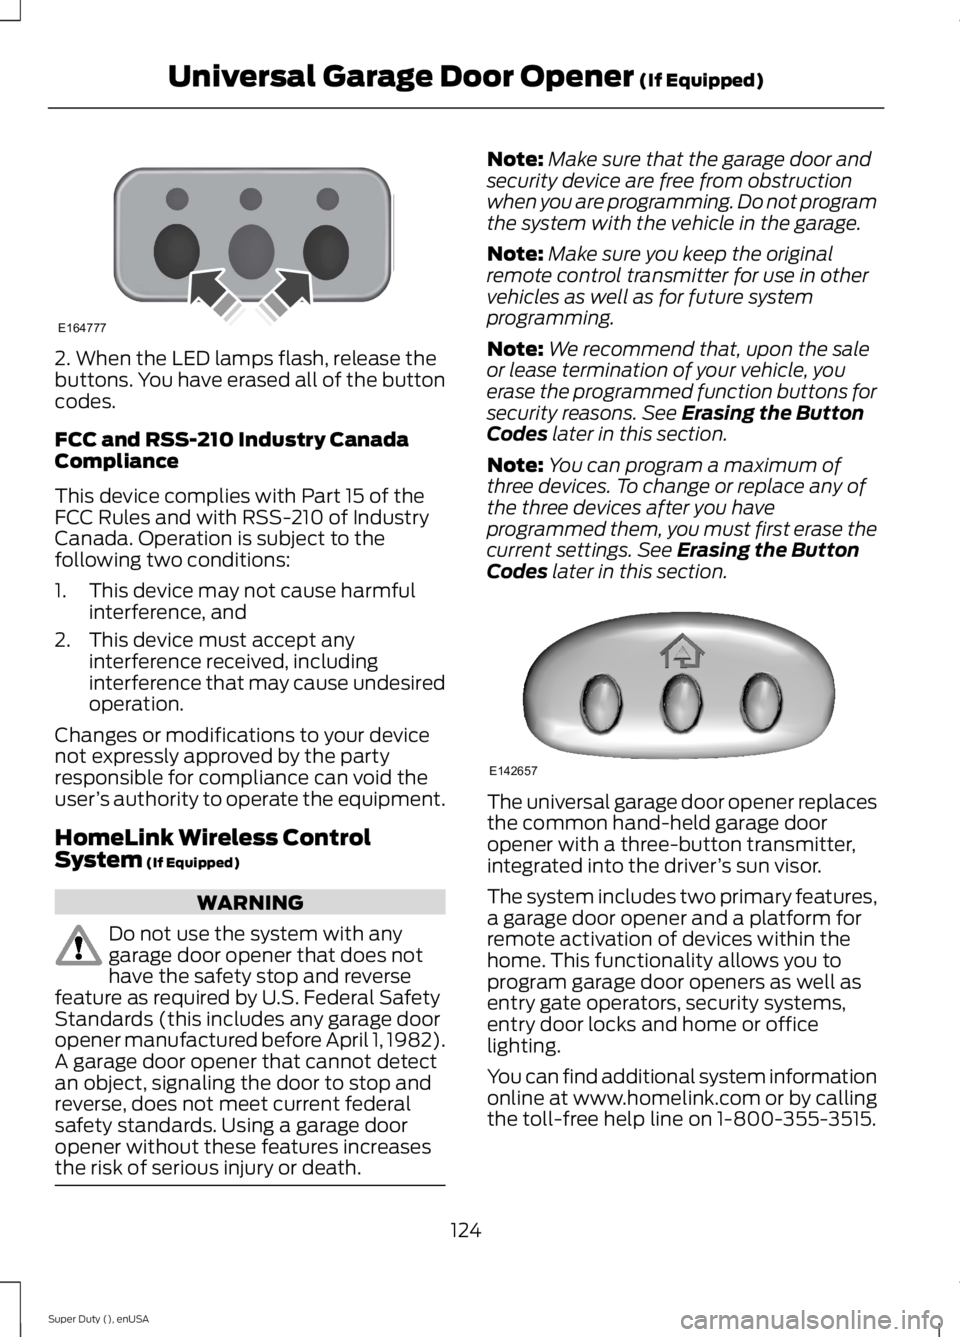
2. When the LED lamps flash, release thebuttons. You have erased all of the buttoncodes.
FCC and RSS-210 Industry CanadaCompliance
This device complies with Part 15 of theFCC Rules and with RSS-210 of IndustryCanada. Operation is subject to thefollowing two conditions:
1. This device may not cause harmfulinterference, and
2. This device must accept anyinterference received, includinginterference that may cause undesiredoperation.
Changes or modifications to your devicenot expressly approved by the partyresponsible for compliance can void theuser’s authority to operate the equipment.
HomeLink Wireless ControlSystem (If Equipped)
WARNING
Do not use the system with anygarage door opener that does nothave the safety stop and reversefeature as required by U.S. Federal SafetyStandards (this includes any garage dooropener manufactured before April 1, 1982).A garage door opener that cannot detectan object, signaling the door to stop andreverse, does not meet current federalsafety standards. Using a garage dooropener without these features increasesthe risk of serious injury or death.
Note:Make sure that the garage door andsecurity device are free from obstructionwhen you are programming. Do not programthe system with the vehicle in the garage.
Note:Make sure you keep the originalremote control transmitter for use in othervehicles as well as for future systemprogramming.
Note:We recommend that, upon the saleor lease termination of your vehicle, youerase the programmed function buttons forsecurity reasons. See Erasing the ButtonCodes later in this section.
Note:You can program a maximum ofthree devices. To change or replace any ofthe three devices after you haveprogrammed them, you must first erase thecurrent settings. See Erasing the ButtonCodes later in this section.
The universal garage door opener replacesthe common hand-held garage dooropener with a three-button transmitter,integrated into the driver’s sun visor.
The system includes two primary features,a garage door opener and a platform forremote activation of devices within thehome. This functionality allows you toprogram garage door openers as well asentry gate operators, security systems,entry door locks and home or officelighting.
You can find additional system informationonline at www.homelink.com or by callingthe toll-free help line on 1-800-355-3515.
124
Super Duty (), enUSA
Universal Garage Door Opener (If Equipped)E164777 E142657
Page 132 of 470
12 Volt DC Power Point
WARNING
Do not plug optional electricalaccessories into the cigar lightersocket (if equipped). Improper useof the lighter can cause damage notcovered by your warranty, and can resultin fire or serious injury.
Note:If used when the engine is notrunning, the battery will discharge. Theremay be insufficient power to restart yourengine.
Note:Do not insert objects other than anaccessory plug into the power point. Thiswill damage the outlet and blow the fuse.
Note:Do not hang any type of accessory oraccessory bracket from the plug.
Note:Do not use the power point over thevehicle capacity of 12 volt DC 180 watts ora fuse may blow.
Note:Do not use the power point foroperating a cigar lighter element.
Note:Improper use of the power point cancause damage not covered by yourwarranty.
Note:Always keep the power point capsclosed when not in use.
Run the engine for full capacity use of thepower point. To prevent the battery frombeing discharged:
•do not use the power point longer thannecessary when the engine is notrunning
•do not leave devices plugged inovernight or when the vehicle is parkedfor extended periods.
Locations
Power points may be found:
•On the instrument panel (twolocations).
•Inside the center console.
•On the rear of the center console.
•Inside the front under-seat storagecompartment (if equipped).
•Inside the rear under-seat storagecompartment (if equipped).
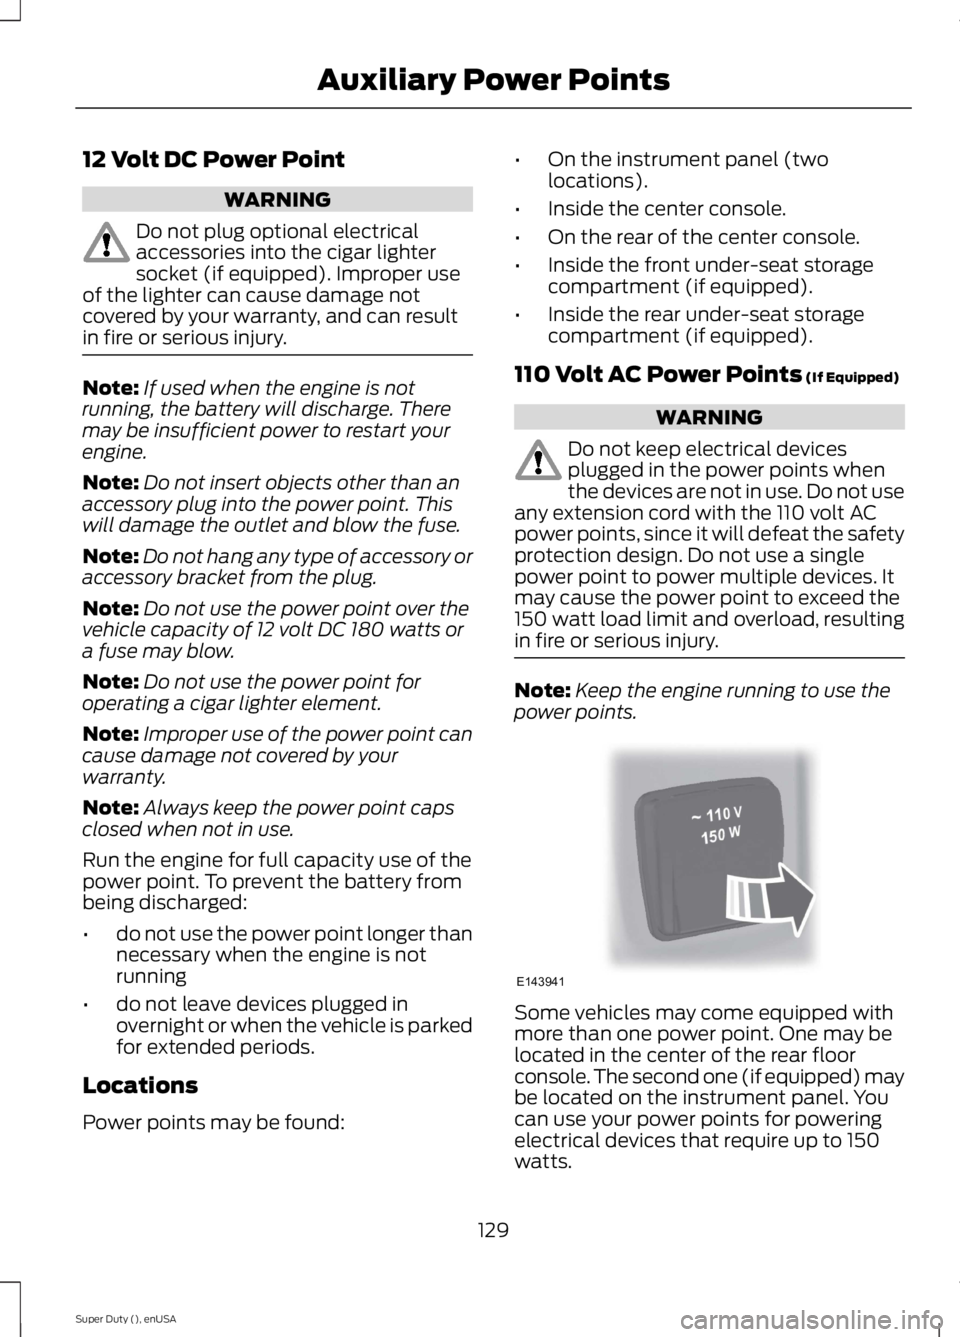
110 Volt AC Power Points (If Equipped)
WARNING
Do not keep electrical devicesplugged in the power points whenthe devices are not in use. Do not useany extension cord with the 110 volt ACpower points, since it will defeat the safetyprotection design. Do not use a singlepower point to power multiple devices. Itmay cause the power point to exceed the150 watt load limit and overload, resultingin fire or serious injury.
Note:Keep the engine running to use thepower points.
Some vehicles may come equipped withmore than one power point. One may belocated in the center of the rear floorconsole. The second one (if equipped) maybe located on the instrument panel. Youcan use your power points for poweringelectrical devices that require up to 150watts.
129
Super Duty (), enUSA
Auxiliary Power PointsE143941