2015 FORD F250 SUPER DUTY service
[x] Cancel search: servicePage 271 of 470
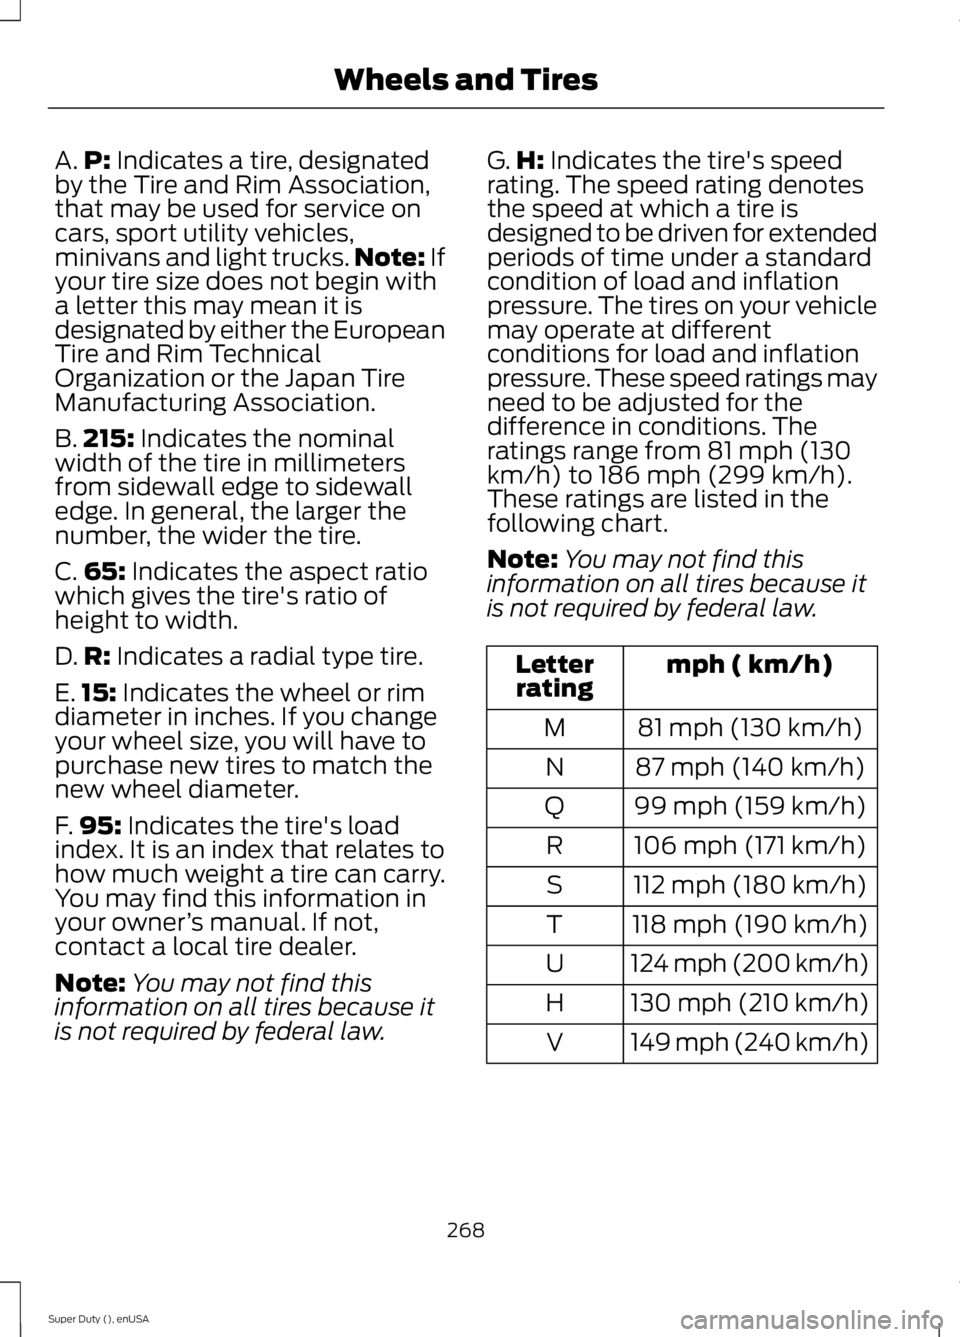
A.P: Indicates a tire, designatedby the Tire and Rim Association,that may be used for service oncars, sport utility vehicles,minivans and light trucks.Note: Ifyour tire size does not begin witha letter this may mean it isdesignated by either the EuropeanTire and Rim TechnicalOrganization or the Japan TireManufacturing Association.
B.215: Indicates the nominalwidth of the tire in millimetersfrom sidewall edge to sidewalledge. In general, the larger thenumber, the wider the tire.
C.65: Indicates the aspect ratiowhich gives the tire's ratio ofheight to width.
D.R: Indicates a radial type tire.
E.15: Indicates the wheel or rimdiameter in inches. If you changeyour wheel size, you will have topurchase new tires to match thenew wheel diameter.
F.95: Indicates the tire's loadindex. It is an index that relates tohow much weight a tire can carry.You may find this information inyour owner’s manual. If not,contact a local tire dealer.
Note:You may not find thisinformation on all tires because itis not required by federal law.
G.H: Indicates the tire's speedrating. The speed rating denotesthe speed at which a tire isdesigned to be driven for extendedperiods of time under a standardcondition of load and inflationpressure. The tires on your vehiclemay operate at differentconditions for load and inflationpressure. These speed ratings mayneed to be adjusted for thedifference in conditions. Theratings range from 81 mph (130km/h) to 186 mph (299 km/h).These ratings are listed in thefollowing chart.
Note:You may not find thisinformation on all tires because itis not required by federal law.
mph ( km/h)Letterrating
81 mph (130 km/h)M
87 mph (140 km/h)N
99 mph (159 km/h)Q
106 mph (171 km/h)R
112 mph (180 km/h)S
118 mph (190 km/h)T
124 mph (200 km/h)U
130 mph (210 km/h)H
149 mph (240 km/h)V
268
Super Duty (), enUSA
Wheels and Tires
Page 273 of 470
*Temperature: The temperaturegrades are A (the highest), B andC, representing the tire'sresistance to the generation ofheat and its ability to dissipateheat when tested under controlledconditions on a specified indoorlaboratory test wheel.
M.Maximum InflationPressure: Indicates the tiremanufacturers' maximumpermissible pressure or thepressure at which the maximumload can be carried by the tire. Thispressure is normally higher thanthe vehicle manufacturer'srecommended cold inflationpressure which can be found onthe Safety ComplianceCertification Label (affixed toeither the door hinge pillar,door-latch post, or the door edgethat meets the door-latch post,next to the driver's seatingposition), or Tire Label located onthe B-pillar or the edge of thedriver's door. The cold inflationpressure should never be set lowerthan the recommended pressureon the vehicle label.
The tire suppliers may haveadditional markings, notes orwarnings such as standard loador radial tubeless.
Additional InformationContained on the Tire Sidewallfor LT Type Tires
Note:Tire Quality Grades do notapply to this type of tire.
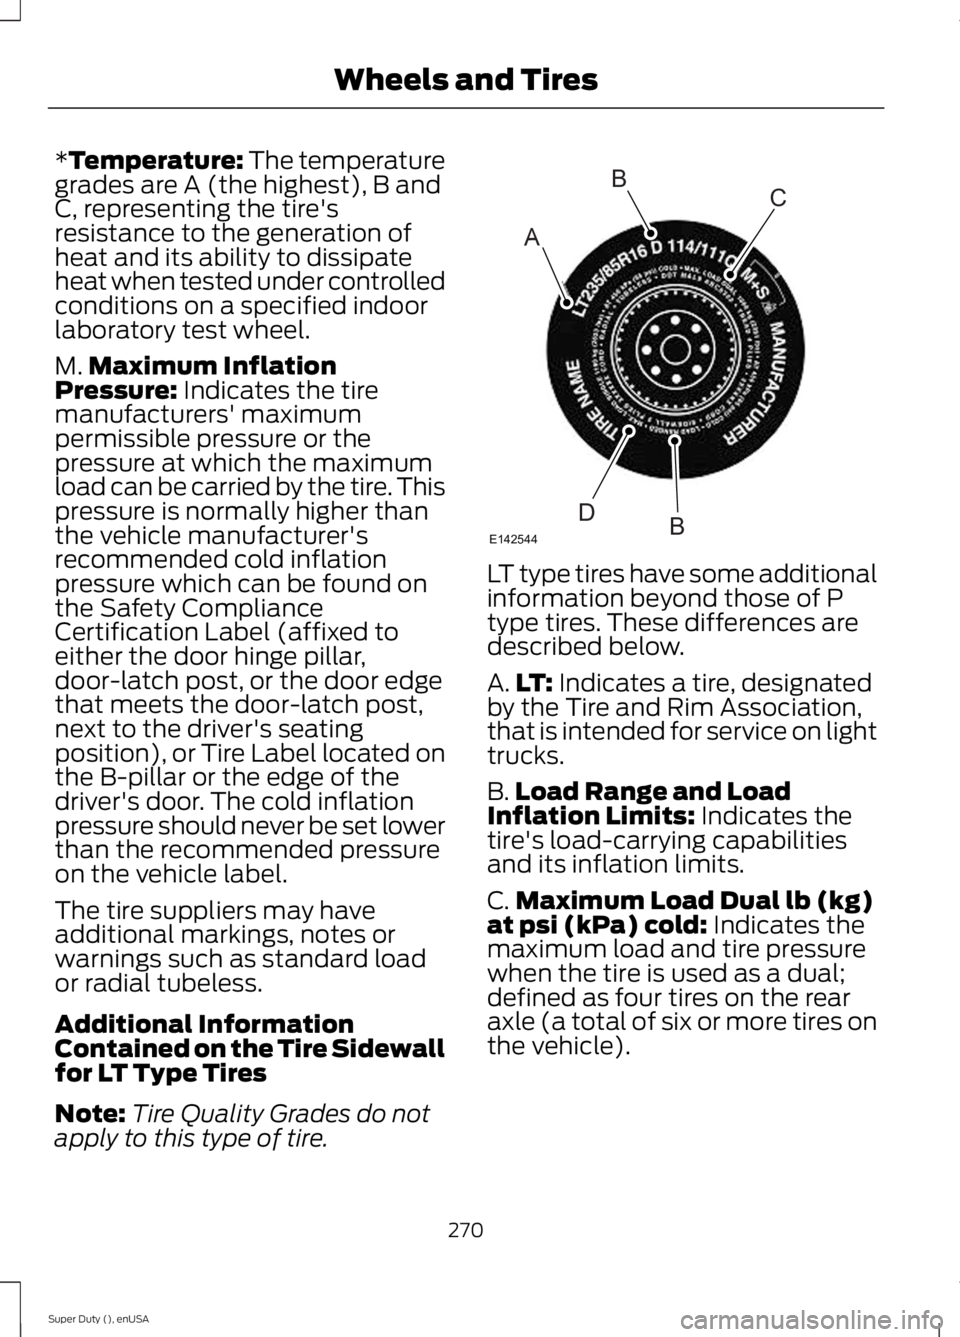
LT type tires have some additionalinformation beyond those of Ptype tires. These differences aredescribed below.
A.LT: Indicates a tire, designatedby the Tire and Rim Association,that is intended for service on lighttrucks.
B.Load Range and LoadInflation Limits: Indicates thetire's load-carrying capabilitiesand its inflation limits.
C.Maximum Load Dual lb (kg)at psi (kPa) cold: Indicates themaximum load and tire pressurewhen the tire is used as a dual;defined as four tires on the rearaxle (a total of six or more tires onthe vehicle).
270
Super Duty (), enUSA
Wheels and TiresA
BC
BDE142544
Page 274 of 470
D.Maximum Load Single lb(kg) at psi (kPa) cold: Indicatesthe maximum load and tirepressure when the tire is used asa single; defined as two tires(total) on the rear axle.
Information on T Type Tires
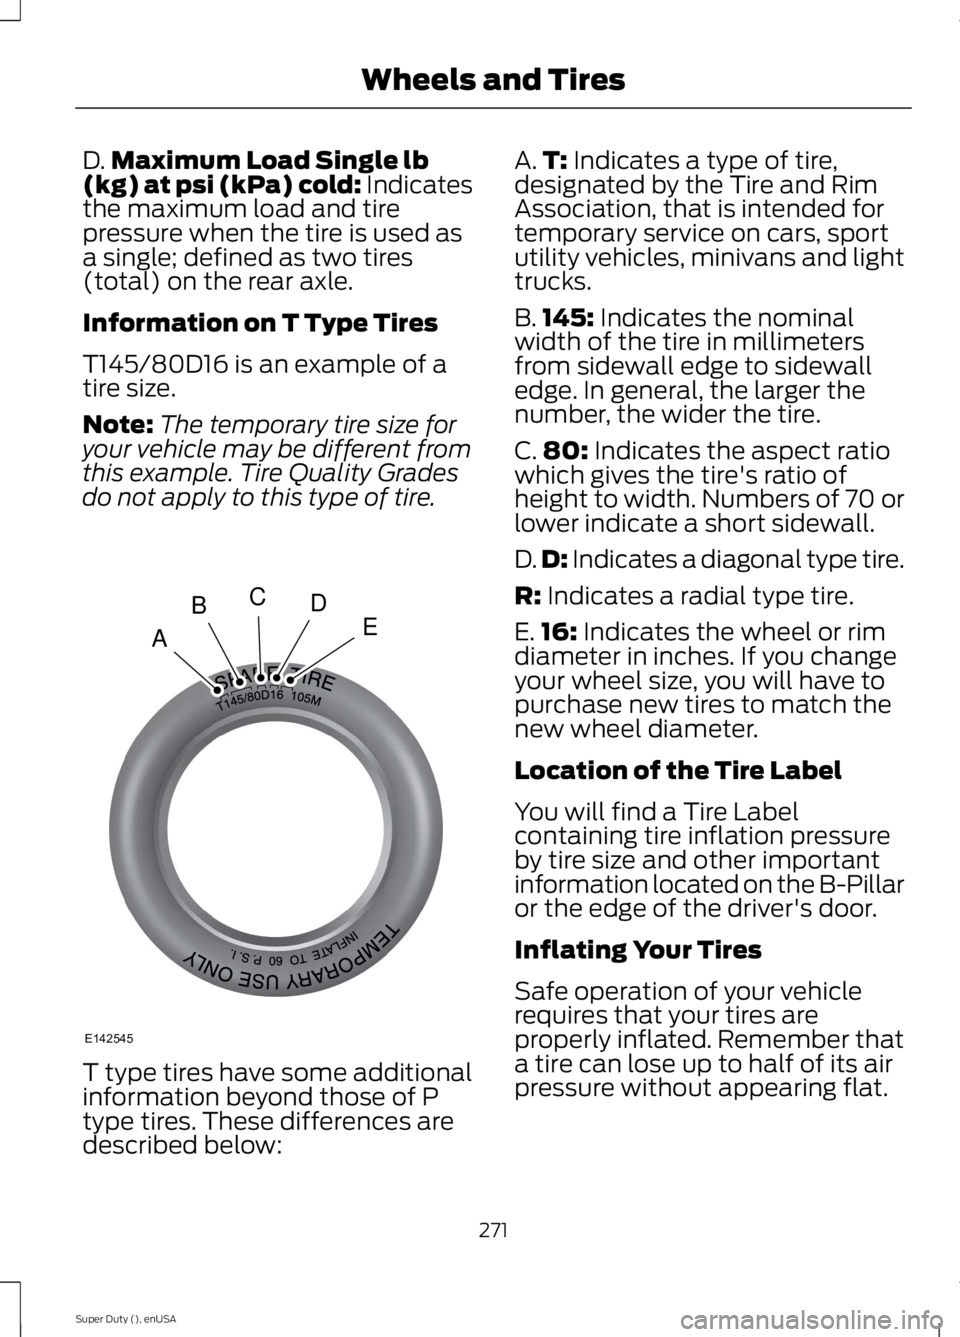
T145/80D16 is an example of atire size.
Note:The temporary tire size foryour vehicle may be different fromthis example. Tire Quality Gradesdo not apply to this type of tire.
T type tires have some additionalinformation beyond those of P
type tires. These differences aredescribed below:
A.T: Indicates a type of tire,designated by the Tire and RimAssociation, that is intended fortemporary service on cars, sportutility vehicles, minivans and lighttrucks.
B.145: Indicates the nominalwidth of the tire in millimetersfrom sidewall edge to sidewalledge. In general, the larger thenumber, the wider the tire.
C.80: Indicates the aspect ratiowhich gives the tire's ratio ofheight to width. Numbers of 70 orlower indicate a short sidewall.
D.D: Indicates a diagonal type tire.
R: Indicates a radial type tire.
E.16: Indicates the wheel or rimdiameter in inches. If you changeyour wheel size, you will have topurchase new tires to match thenew wheel diameter.
Location of the Tire Label
You will find a Tire Labelcontaining tire inflation pressureby tire size and other importantinformation located on the B-Pillaror the edge of the driver's door.
Inflating Your Tires
Safe operation of your vehiclerequires that your tires areproperly inflated. Remember thata tire can lose up to half of its airpressure without appearing flat.
271
Super Duty (), enUSA
Wheels and TiresA
BCDE
E142545
Page 275 of 470
Every day before you drive, checkyour tires. If one looks lower thanthe others, use a tire gauge tocheck pressure of all tires andadjust if required.
At least once a month and beforelong trips, inspect each tire andcheck the tire pressure with a tiregauge (including spare, ifequipped). Inflate all tires to theinflation pressure recommendedby Ford Motor Company.
You are strongly urged to buy areliable tire pressure gauge, asautomatic service station gaugesmay be inaccurate. Fordrecommends the use of a digitalor dial-type tire pressure gaugerather than a stick-type tirepressure gauge.
Use the recommended coldinflation pressure for optimum tireperformance and wear.Under-inflation or over-inflationmay cause uneven treadwearpatterns
WARNING
Under-inflation is the mostcommon cause of tire failuresand may result in severe tirecracking, tread separation orblowout, with unexpected loss ofvehicle control and increased riskof injury. Under-inflation increasessidewall flexing and rollingresistance, resulting in heatbuildup and internal damage tothe tire. It also may result inunnecessary tire stress, irregularwear, loss of vehicle control andaccidents. A tire can lose up tohalf of its air pressure and notappear to be flat!
Always inflate your tires to theFord recommended inflationpressure even if it is less than themaximum inflation pressureinformation found on the tire. TheFord recommended tire inflationpressure is found on the SafetyCompliance Certification Label orTire Label (affixed to either thedoor hinge pillar, door-latch post,or the door edge that meets thedoor-latch post, next to thedriver's seating position), or TireLabel located on the B-pillar orthe edge of the driver's door.Failure to follow the tire pressurerecommendations can causeuneven treadwear patterns andadversely affect the way yourvehicle handles
272
Super Duty (), enUSA
Wheels and Tires
Page 277 of 470
Note:If you have to drive adistance to get air for your tire(s),check and record the tire pressurefirst and add the appropriate airpressure when you get to thepump. It is normal for tires to heatup and the air pressure inside to goup as you drive.
2. Remove the cap from the valveon one tire, then firmly press thetire gauge onto the valve andmeasure the pressure.
3. Add enough air to reach therecommended air pressure.
Note:If you overfill the tire, releaseair by pressing on the metal stemin the center of the valve. Thenrecheck the pressure with your tiregauge.
4. Replace the valve cap.
5. Repeat this procedure for eachtire, including the spare.
Note:Some spare tires operate ata higher inflation pressure than theother tires. For T type mini-sparetires, (see the Dissimilar sparewheel and tire assemblyinformation for a description. Storeand maintain at 60 psi (4.15 bar).For full-size and dissimilar sparetires, see the Dissimilar spare wheeland tire assembly information fora description. Store and maintainat the higher of the front and rearinflation pressure as shown on theSafety Compliance CertificationLabel or Tire Label.
6. Visually inspect the tires tomake sure there are no nails orother objects embedded thatcould poke a hole in the tire andcause an air leak.
7. Check the sidewalls to makesure there are no gouges, cuts orbulges.
Tire Inflation Information
WARNING
An inflated tire and rim canbe very dangerous ifimproperly used, serviced ormaintained. To reduce the risk ofserious injury, never attempt tore-inflate a tire which has been runflat or seriously under-inflatedwithout first removing the tire
from the wheel assembly forinspection. Do not attempt to addair to tires or replace tires orwheels without first takingprecautions to protect personsand property.
All tires with Steel Carcass Plies(if equipped):
This type of tire utilizes steel cordsin the sidewalls. As such, theycannot be treated like normal lighttruck tires. Tire service, includingadjusting tire pressure, must beperformed by personnel trained,supervised and equippedaccording to Federal OccupationalSafety and Health Administrationregulations. For example, during
274
Super Duty (), enUSA
Wheels and Tires
Page 282 of 470
WARNINGS
When inflating the tire formounting pressures up to 20 psi(1.38 bar) greater than themaximum pressure on the tiresidewall, the followingprecautions must be taken toprotect the person mounting thetire:
1. Make sure that you have thecorrect tire and wheel size.
2. Lubricate the tire bead andwheel bead seat area again.
3. Stand at a minimum of 12 feet(3.6 meters) away from the wheeland tire assembly.
4. Use both eye and earprotection.
For a mounting pressure morethan 20 psi (1.38 bar) greater thanthe maximum pressure, a Forddealer or other tire serviceprofessional should do themounting.
Always inflate steel carcass tireswith a remote air fill with theperson inflating standing at aminimum of 12 feet (3.6 meters)away from the wheel and tireassembly
Important: Remember to replacethe wheel valve stems when the
road tires are replaced on yourvehicle
The two front tires or two rear tiresshould generally be replaced as apair.
The tire pressure sensors mountedin the wheels are not designed tobe used in aftermarket wheels.
The use of wheels or tires notrecommended by Ford MotorCompany may affect theoperation of your tire pressuremonitoring system.
If the tire pressure monitoringsystem indicator is flashing, thesystem is malfunctioning. Yourreplacement tire might beincompatible with your tirepressure monitoring system, orsome component of the systemmay be damaged.
Safety Practices
WARNINGS
If your vehicle is stuck insnow, mud, or sand, do notrapidly spin the tires; spinning thetires can tear the tire and causean explosion. A tire can explode inas little as three to five seconds.
Do not spin the wheels atover 35 mph (56 km/h). Thetires may fail and injure apassenger or bystander.
Driving habits have a great dealto do with your tire mileage andsafety.
*Observe posted speed limits
279
Super Duty (), enUSA
Wheels and Tires
Page 287 of 470
You should always have your tires servicedby an authorized dealer.
Check the tire pressure periodically (atleast monthly) using an accurate tiregauge. See Inflating Your Tires in thischapter.
Understanding Your Tire PressureMonitoring System
The tire pressure monitoring systemmeasures pressure in your four road tiresand sends the tire pressure readings toyour vehicle. The low tire pressure warninglight will turn on if the tire pressure issignificantly low. Once the light isilluminated, your tires are under-inflatedand need to be inflated to themanufacturer’s recommended tirepressure. Even if the light turns on and ashort time later turns off, your tire pressurestill needs to be checked.
When Your Temporary Spare Tire isInstalled
When one of your road tires needs to bereplaced with the temporary spare, thesystem will continue to identify an issue toremind you that the damaged road wheeland tire assembly needs to be repaired andput back on your vehicle.
To restore the full function of the tirepressure monitoring system, have thedamaged road wheel and tire assemblyrepaired and remounted on your vehicle.
When You Believe Your System is NotOperating Properly
The main function of the tire pressuremonitoring system is to warn you whenyour tires need air. It can also warn you inthe event the system is no longer capableof functioning as intended. See thefollowing chart for information concerningyour tire pressure monitoring system:
284
Super Duty (), enUSA
Wheels and Tires
Page 290 of 470
•To reduce the chances of interferencefrom another vehicle, perform thesystem reset procedure at least threefeet (one meter) away from anotherFord Motor Company vehicleundergoing the system reset procedureat the same time.
•Do not wait more than two minutesbetween resetting each tire sensor orthe system will time-out and the entireprocedure will have to be repeated onall four wheels.
•A double horn will sound indicating theneed to repeat the procedure.
Performing the System Reset Procedure
Read the entire procedure beforeattempting.
1. Drive the vehicle above 20 mph (32km/h) for at least two minutes, thenpark in a safe location where you caneasily get to all four tires and haveaccess to an air pump.
2.Place the ignition in the off position andkeep the key in the ignition.
3. Cycle the ignition to the on positionwith the engine off.
4. Turn the hazard flashers on then offthree times. You must accomplish thiswithin 10 seconds. If the reset modehas been entered successfully, the hornwill sound once, the system indicatorwill flash and a message is shown inthe information display. If this does notoccur, please try again starting at Step2. If after repeated attempts to enterthe reset mode, the horn does notsound, the system indicator does notflash and no message is shown in theinformation display, seek service fromyour authorized dealer.
5. Train the tire pressure monitoringsystem sensors in the tires using thefollowing system reset sequencestarting with the left front tire in thefollowing clockwise order: Left front(driver's side front tire), Right front(passenger's side front tire), Right rear(passenger's side rear tire), Left rear(driver's side rear tire)
6. Remove the valve cap from the valvestem on the left front tire. Decrease theair pressure until the horn sounds.Note: The single horn chirp confirmsthat the sensor identification code hasbeen learned by the module for thisposition. If a double horn is heard, thereset procedure was unsuccessful, andyou must repeat it.
7. Remove the valve cap from the valvestem on the right front tire. Decreasethe air pressure until the horn sounds.
8. Remove the valve cap from the valvestem on the right rear tire. Decrease theair pressure until the horn sounds.
9. Remove the valve cap from the valvestem on the left rear tire. Decrease theair pressure until the horn sounds.Training is complete after the hornsounds for the last tire trained (driver'sside rear tire), the system indicatorstops flashing, and a message is shownin the information display.
10.Turn the ignition off. If two short hornbeeps are heard, the reset procedurewas unsuccessful and you mustrepeat it. If after repeating theprocedure and two short beeps areheard when the ignition is turned tooff, seek assistance from yourauthorized dealer.
287
Super Duty (), enUSA
Wheels and Tires