2015 FORD F250 SUPER DUTY steering
[x] Cancel search: steeringPage 233 of 470
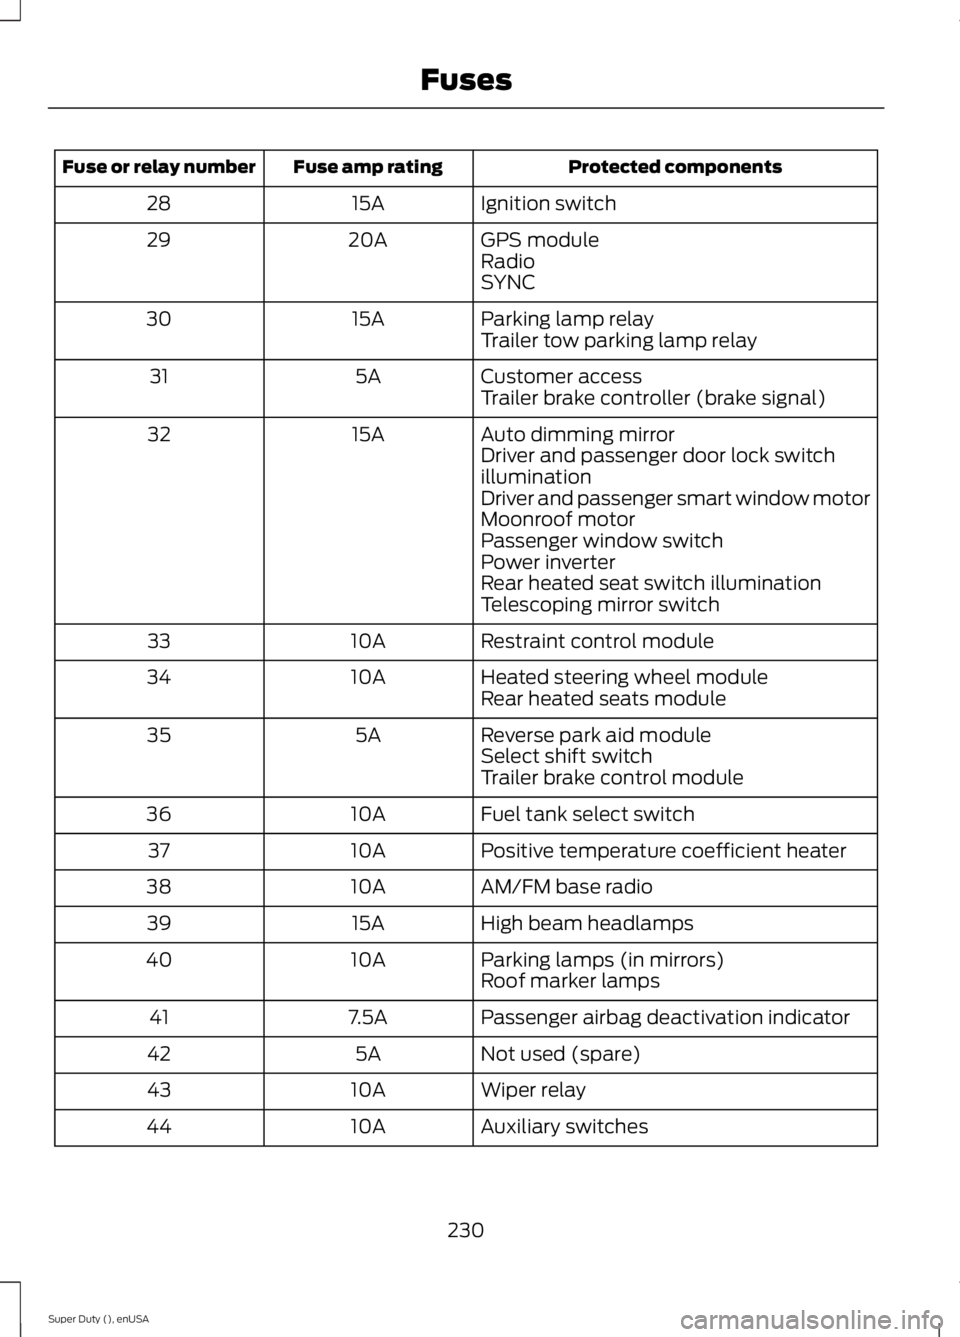
Protected componentsFuse amp ratingFuse or relay number
Ignition switch15A28
GPS module20A29RadioSYNC
Parking lamp relay15A30Trailer tow parking lamp relay
Customer access5A31Trailer brake controller (brake signal)
Auto dimming mirror15A32Driver and passenger door lock switchilluminationDriver and passenger smart window motorMoonroof motorPassenger window switchPower inverterRear heated seat switch illuminationTelescoping mirror switch
Restraint control module10A33
Heated steering wheel module10A34Rear heated seats module
Reverse park aid module5A35Select shift switchTrailer brake control module
Fuel tank select switch10A36
Positive temperature coefficient heater10A37
AM/FM base radio10A38
High beam headlamps15A39
Parking lamps (in mirrors)10A40Roof marker lamps
Passenger airbag deactivation indicator7.5A41
Not used (spare)5A42
Wiper relay10A43
Auxiliary switches10A44
230
Super Duty (), enUSA
Fuses
Page 237 of 470
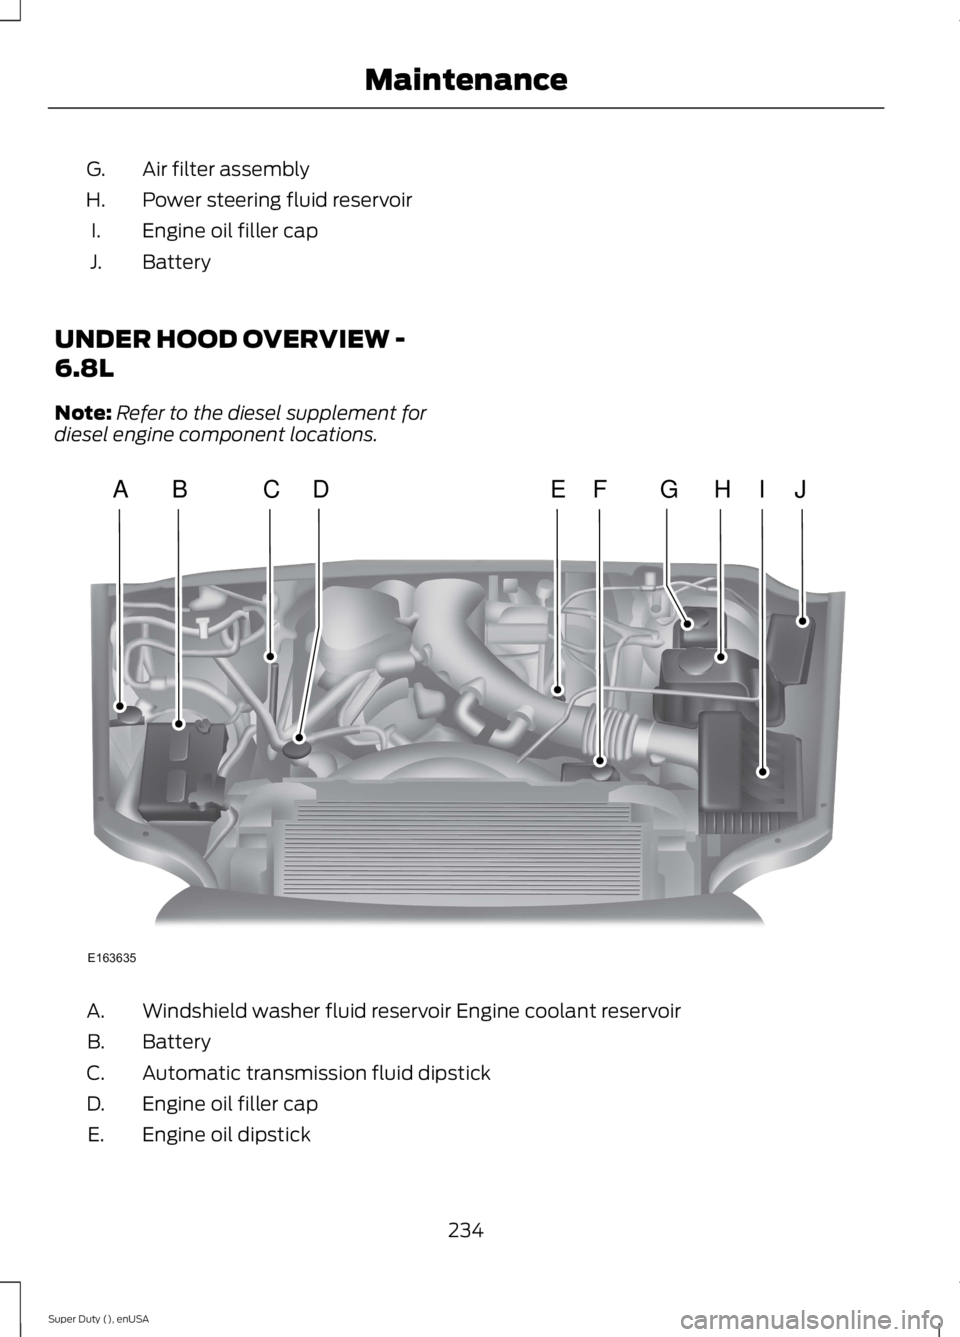
Air filter assemblyG.
Power steering fluid reservoirH.
Engine oil filler capI.
BatteryJ.
UNDER HOOD OVERVIEW -
6.8L
Note:Refer to the diesel supplement fordiesel engine component locations.
Windshield washer fluid reservoir Engine coolant reservoirA.
BatteryB.
Automatic transmission fluid dipstickC.
Engine oil filler capD.
Engine oil dipstickE.
234
Super Duty (), enUSA
MaintenanceE163635
ABCEHIJFDG
Page 238 of 470
Power steering fluid reservoirF.
Brake fluid reservoirG.
Engine coolant reservoirH.
Air filter assemblyI.
Power distribution boxJ.
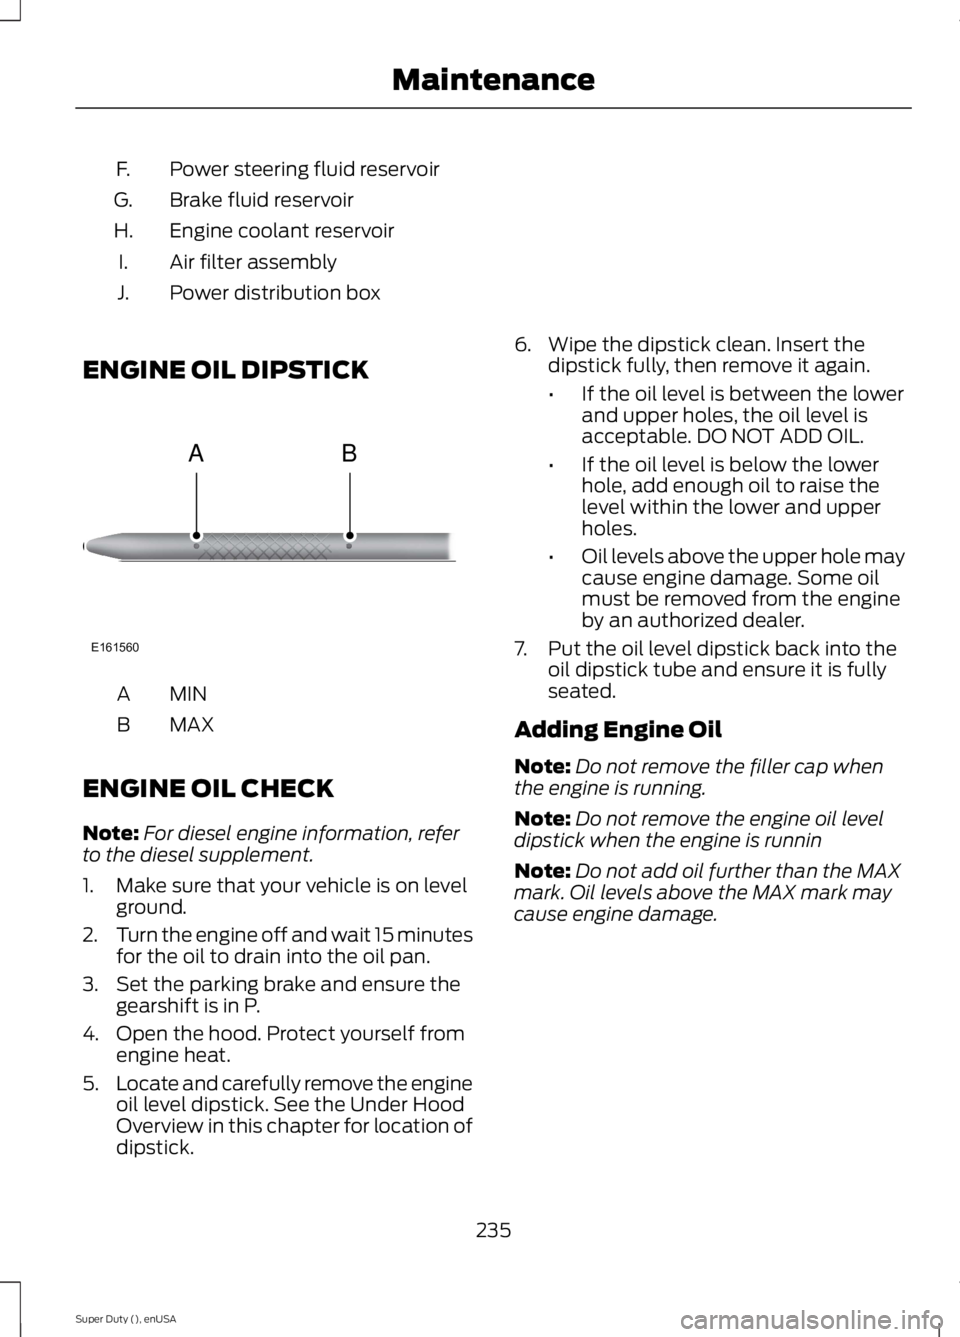
ENGINE OIL DIPSTICK
MINA
MAXB
ENGINE OIL CHECK
Note:For diesel engine information, referto the diesel supplement.
1. Make sure that your vehicle is on levelground.
2.Turn the engine off and wait 15 minutesfor the oil to drain into the oil pan.
3. Set the parking brake and ensure thegearshift is in P.
4. Open the hood. Protect yourself fromengine heat.
5.Locate and carefully remove the engineoil level dipstick. See the Under HoodOverview in this chapter for location ofdipstick.
6. Wipe the dipstick clean. Insert thedipstick fully, then remove it again.
•If the oil level is between the lowerand upper holes, the oil level isacceptable. DO NOT ADD OIL.
•If the oil level is below the lowerhole, add enough oil to raise thelevel within the lower and upperholes.
•Oil levels above the upper hole maycause engine damage. Some oilmust be removed from the engineby an authorized dealer.
7. Put the oil level dipstick back into theoil dipstick tube and ensure it is fullyseated.
Adding Engine Oil
Note:Do not remove the filler cap whenthe engine is running.
Note:Do not remove the engine oil leveldipstick when the engine is runnin
Note:Do not add oil further than the MAXmark. Oil levels above the MAX mark maycause engine damage.
235
Super Duty (), enUSA
MaintenanceE161560
AB
Page 241 of 470
Recycled Engine Coolant
Ford Motor Company does not recommendthe use of recycled engine coolant since aFord-approved recycling process is not yetavailable.
Used engine coolant should be disposedof in an appropriate manner. Follow yourcommunity’s regulations and standardsfor recycling and disposing of automotivefluids.
Severe Climates
If you drive in extremely cold climates:
•It may be necessary to have a Fordauthorized dealer increase the coolantconcentration above 50%.
•A coolant concentration of 60% willprovide improved freeze pointprotection. Engine coolantconcentrations above 60% willdecrease the overheat protectioncharacteristics of the engine coolantand may cause engine damage.
If you drive in extremely hot climates:
•It may be necessary to have a Fordauthorized dealer decrease the coolantconcentration to 40%.
•A coolant concentration of 40% willprovide improved overheat protection.Engine coolant concentrations below40% will decrease the corrosion/freezeprotection characteristics of the enginecoolant and may cause enginedamage.
Vehicles driven year-round in non-extremeclimates should use prediluted enginecoolant for optimum cooling system andengine protection.
What You Should Know About Fail-Safe Cooling
If the engine coolant supply is depleted,this feature allows the vehicle to be driventemporarily before incremental componentdamage is incurred. The “fail-safe”distance depends on ambienttemperatures, vehicle load and terrain.
How Fail-Safe Cooling Works
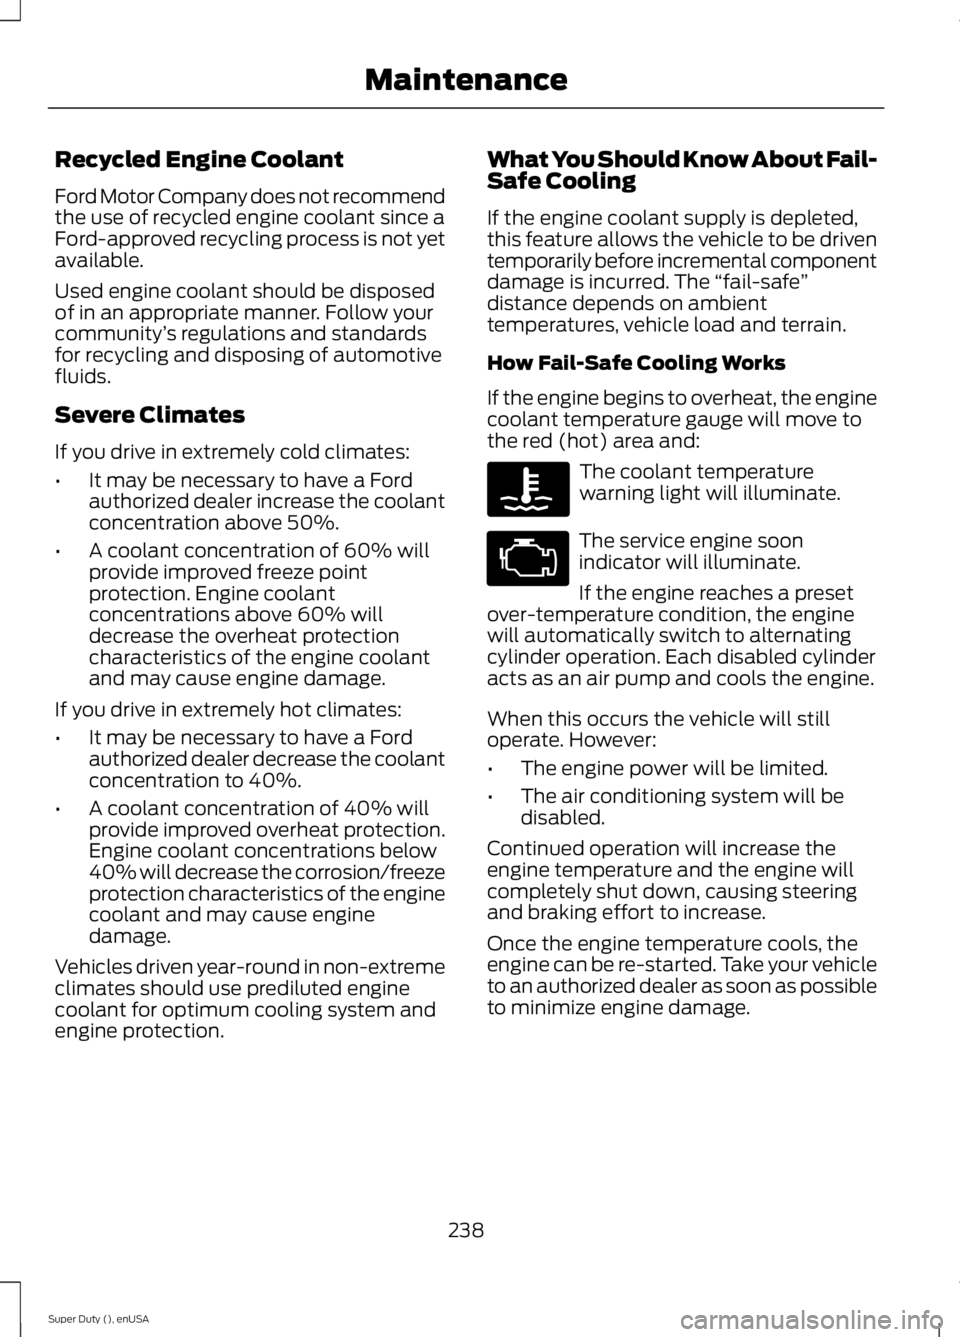
If the engine begins to overheat, the enginecoolant temperature gauge will move tothe red (hot) area and:
The coolant temperaturewarning light will illuminate.
The service engine soonindicator will illuminate.
If the engine reaches a presetover-temperature condition, the enginewill automatically switch to alternatingcylinder operation. Each disabled cylinderacts as an air pump and cools the engine.
When this occurs the vehicle will stilloperate. However:
•The engine power will be limited.
•The air conditioning system will bedisabled.
Continued operation will increase theengine temperature and the engine willcompletely shut down, causing steeringand braking effort to increase.
Once the engine temperature cools, theengine can be re-started. Take your vehicleto an authorized dealer as soon as possibleto minimize engine damage.
238
Super Duty (), enUSA
Maintenance
Page 242 of 470
When Fail-Safe Mode Is Activated
WARNINGS
Fail-safe mode is for use duringemergencies only. Operate thevehicle in fail-safe mode only as longas necessary to bring the vehicle to rest ina safe location and seek immediate repairs.When in fail-safe mode, the vehicle willhave limited power, will not be able tomaintain high-speed operation, and maycompletely shut down without warning,potentially losing engine power, powersteering assist, and power brake assist,which may increase the possibility of acrash resulting in serious injury.
Never remove the coolant reservoircap while the engine is running or hot.
You have limited engine power when in thefail-safe mode, so drive the vehicle withcaution. The vehicle will not be able tomaintain high-speed operation and theengine will run rough. Remember that theengine is capable of completely shuttingdown automatically to prevent enginedamage, therefore:
1. Pull off the road as soon as safelypossible and turn off the engine.
2. Arrange for the vehicle to be taken toan authorized dealer.
3. If this is not possible, wait a shortperiod for the engine to cool.
4. Check the coolant level and replenishif low.
5. Re-start the engine and take yourvehicle to an authorized dealer.
Note:Driving the vehicle without repairingthe engine problem increases the chance ofengine damage. Take your vehicle to anauthorized dealer as soon as possible.
Engine Fluid TemperatureManagement (If Equipped)
WARNING
To reduce the risk of collision andinjury, be prepared that the vehiclespeed may reduce and the vehiclemay not be able to accelerate with fullpower until the fluid temperatures reduce.
Your vehicle has been designed to pull atrailer, but because of the added load, thevehicle’s engine may temporarily reachhigher temperatures during severeoperating conditions such as ascending along or steep grade while pulling a trailerin hot ambient temperatures.
At this time, you may notice your enginecoolant temperature gauge needle movetoward the H and the POWER REDUCEDTO LOWER TEMP message may appearin the information display.
You may notice a reduction in the vehicle’sspeed caused by reduced engine power.Your vehicle has been designed to enterthis mode if certain high temperature/highload conditions take place in order tomanage the engine’s fluid temperatures.The amount of speed reduction willdepend on the vehicle loading, towing,grade, ambient temperature, and otherfactors. If this occurs, there is no need topull off the road. The vehicle can continueto be driven while this message is active
The air conditioning may also cycle on andoff during severe operating conditions toprotect overheating of the engine. Whenthe engine coolant temperature decreasesto a more normal operating temperature,the air conditioning will turn on once again.If you notice any of the following:
239
Super Duty (), enUSA
Maintenance
Page 246 of 470
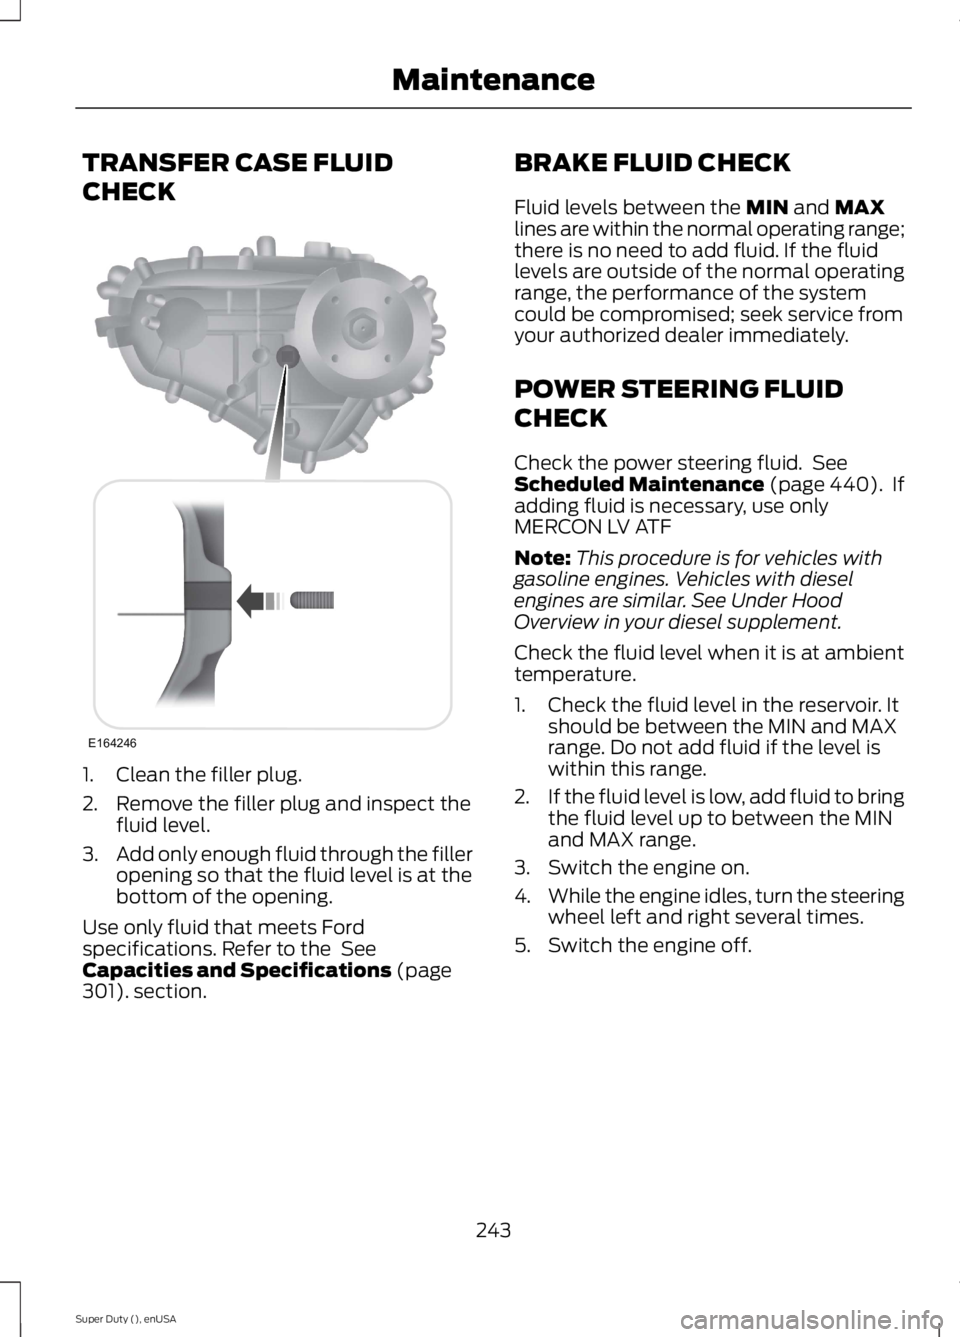
TRANSFER CASE FLUID
CHECK
1. Clean the filler plug.
2. Remove the filler plug and inspect thefluid level.
3.Add only enough fluid through the filleropening so that the fluid level is at thebottom of the opening.
Use only fluid that meets Fordspecifications. Refer to the SeeCapacities and Specifications (page301). section.
BRAKE FLUID CHECK
Fluid levels between the MIN and MAXlines are within the normal operating range;there is no need to add fluid. If the fluidlevels are outside of the normal operatingrange, the performance of the systemcould be compromised; seek service fromyour authorized dealer immediately.
POWER STEERING FLUID
CHECK
Check the power steering fluid. SeeScheduled Maintenance (page 440). Ifadding fluid is necessary, use onlyMERCON LV ATF
Note:This procedure is for vehicles withgasoline engines. Vehicles with dieselengines are similar. See Under HoodOverview in your diesel supplement.
Check the fluid level when it is at ambienttemperature.
1. Check the fluid level in the reservoir. Itshould be between the MIN and MAXrange. Do not add fluid if the level iswithin this range.
2.If the fluid level is low, add fluid to bringthe fluid level up to between the MINand MAX range.
3. Switch the engine on.
4.While the engine idles, turn the steeringwheel left and right several times.
5. Switch the engine off.
243
Super Duty (), enUSA
MaintenanceE164246
Page 249 of 470
control fan, heated steering wheel, audioand navigation system. A message may beshown in the information displays to alertthe driver that battery protection actionsare active. These messages are only fornotification that an action is taking place,and not intended to indicate an electricalproblem or that the battery requiresreplacement.
Electrical accessory installation
To ensure proper operation of the BMS,any electrical devices that are added tothe vehicle should not have their groundconnection made directly at the negativebattery post. A connection at the negativebattery post can cause inaccuratemeasurements of the battery conditionand potential incorrect system operation.
Note:Electrical or electronic accessoriesadded to the vehicle by the dealer or theowner may adversely affect batteryperformance and durability, and may alsoaffect the performance of other electricalsystems in the vehicle.
When a battery replacement is required,the battery should only be replaced witha Ford recommended replacement batterywhich matches the electrical requirementsof the vehicle. After battery replacement,or in some cases after charging the batterywith the external charger, the BMS requireseight hours of vehicle sleep time (key offwith doors closed) to relearn the newbattery state of charge. Prior to relearningthe state of charge, the BMS may disableelectrical features (to protect the battery)earlier than normal.
CHECKING THE WIPER
BLADES
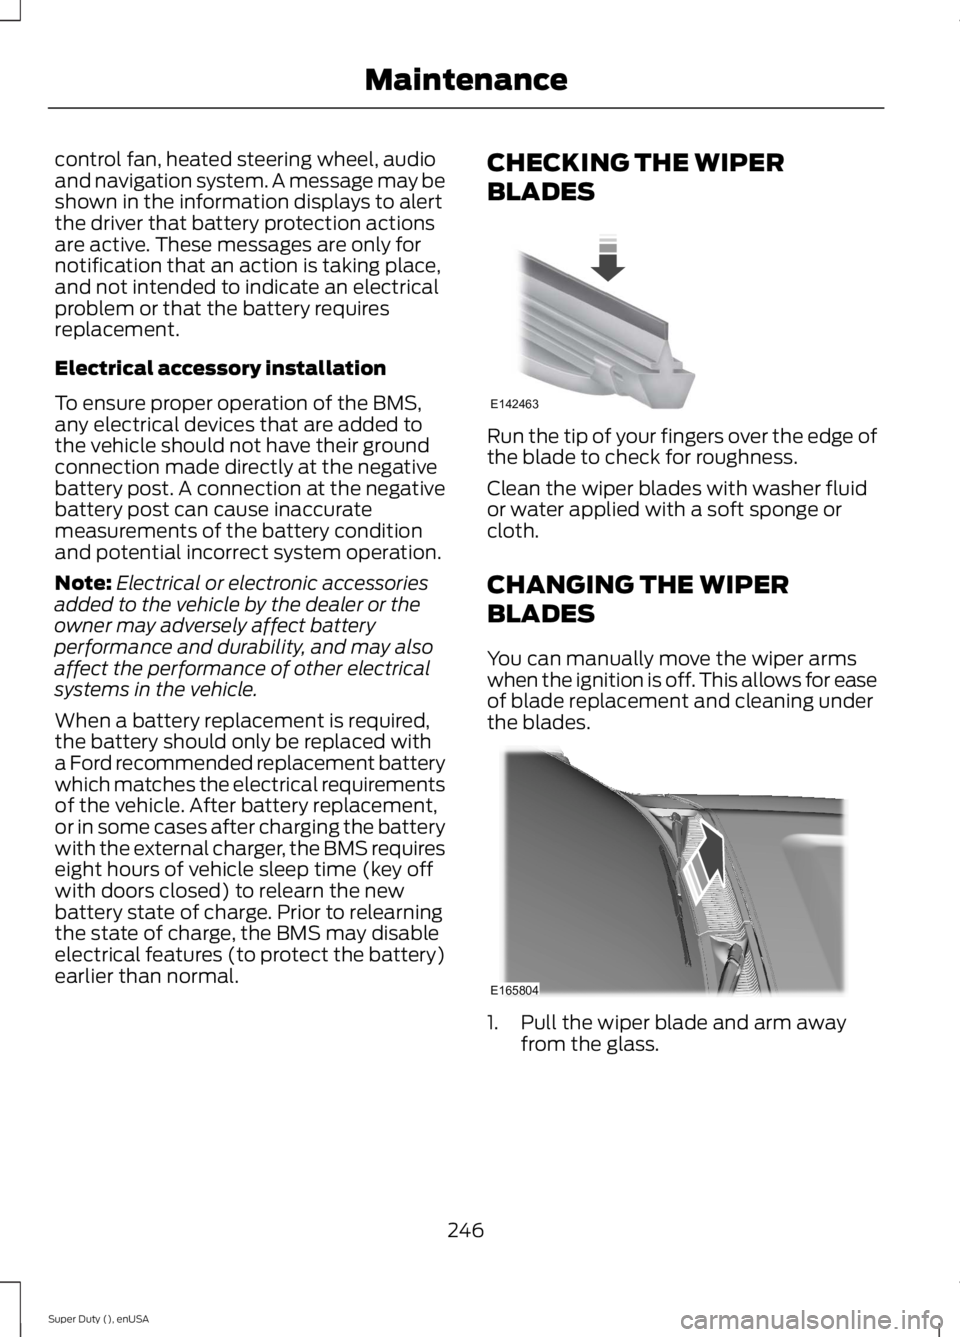
Run the tip of your fingers over the edge ofthe blade to check for roughness.
Clean the wiper blades with washer fluidor water applied with a soft sponge orcloth.
CHANGING THE WIPER
BLADES
You can manually move the wiper armswhen the ignition is off. This allows for easeof blade replacement and cleaning underthe blades.
1. Pull the wiper blade and arm awayfrom the glass.
246
Super Duty (), enUSA
MaintenanceE142463 E165804
Page 261 of 470
•Never wash or rinse any ignition coil,spark plug wire or spark plug well, orthe area in and around these locations.
•Cover the battery, power distributionbox, and air filter assembly to preventwater damage when cleaning theengine.
CLEANING THE WINDOWS AND
WIPER BLADES
Car wash chemicals and environmentalfallout can result in windshield and wiperblade contamination. Dirty windshield andwipers will result in poor windshield wiperoperation. Keep the windshield and wiperblades clean to maintain windshield wiperperformance.
To clean the windshield and wiper blades:
•Clean the windshield with anon-abrasive glass cleaner.
•For windshields contaminated withtree sap, chemicals, wax or bugs, cleanthe entire windshield using steel wool(no greater than 0000 grade) in acircular motion and rinse with water.
•Clean the wiper blades with isopropylrubbing alcohol or windshield washerfluid.
Note: Do not use razor blades or othersharp objects to clean or remove decalsfrom the inside of the heated rear window.The vehicle warranty does not coverdamage caused to the heated rear windowgrid lines.
CLEANING THE INTERIOR
WARNINGS
Do not use cleaning solvents, bleachor dye on the vehicle’s safety belts,as these actions may weaken thebelt webbing.
WARNINGS
On vehicles equipped withseat-mounted airbags, do not usechemical solvents or strongdetergents. Such products couldcontaminate the side airbag system andaffect performance of the side airbag in acollision.
For fabric, carpets, cloth seats, safety beltsand seats equipped with side airbags:
•Remove dust and loose dirt with avacuum cleaner.
•Remove light stains and soil withMotorcraft Professional StrengthCarpet & Upholstery Cleaner.
•If grease or tar is present on thematerial, spot-clean the area first withMotorcraft Spot and Stain Remover. InCanada, use Motorcraft Multi-PurposeCleaner.
•If a ring forms on the fabric after spotcleaning, clean the entire areaimmediately (but do not oversaturate)or the ring will set.
•Do not use household cleaningproducts or glass cleaners, which canstain and discolor the fabric and affectthe flame retardant abilities of the seatmaterials.
CLEANING THE INSTRUMENT
PANEL AND INSTRUMENT
CLUSTER LENS
WARNING
Do not use chemical solvents orstrong detergents when cleaning thesteering wheel or instrument panelto avoid contamination of the airbagsystem.
258
Super Duty (), enUSA
Vehicle Care