2015 FORD F250 SUPER DUTY ESP
[x] Cancel search: ESPPage 158 of 470
If SHIFT DELAYED PULL FORWARD isdisplayed in the information display,transfer case gear tooth blockage ispresent. To alleviate this condition, placethe transmission in a forward gear, movethe vehicle forward approximately 5 feet(1.5 meters), and shift the transmissionback to neutral to allow the transfer caseto complete the range shift.
How Your Vehicle Differs FromOther Vehicles
WARNING
Vehicles with a higher center ofgravity such as utility and four-wheeldrive vehicles handle differently thanvehicles with a lower center of gravity.Utility and four-wheel drive vehicles arenot designed for cornering at speeds ashigh as passenger cars any more thanlow-slung sports cars are designed toperform satisfactorily under off-roadconditions. Avoid sharp turns, excessivespeed and abrupt maneuvers in thesevehicles. Failure to drive cautiously couldresult in an increased risk of loss of vehiclecontrol, vehicle rollover, personal injury anddeath.
Truck and utility vehicles can differ fromsome other vehicles. Your vehicle may behigher to allow it to travel over roughterrain without getting hung up ordamaging underbody components.
The differences that make your vehicle soversatile also make it handle differentlythan an ordinary passenger car.
Maintain steering wheel control at alltimes, especially in rough terrain. Sincesudden changes in terrain can result inabrupt steering wheel motion, make sureyou grip the steering wheel from theoutside. Do not grip the spokes.
Drive cautiously to avoid vehicle damagefrom concealed objects such as rocks andstumps.
You should either know the terrain orexamine maps of the area before driving.Map out your route before driving in thearea. To maintain steering and brakingcontrol of your vehicle, you must have allfour wheels on the ground and they mustbe rolling, not sliding or spinning.
Driving Off-Road With Truck andUtility Vehicles
Note:On some models, the initial shift fromtwo-wheel drive to four-wheel drive whilethe vehicle is moving can cause somemomentary clunk and ratcheting sounds.This is the front drivetrain coming up tospeed and the automatic locking hubsengaging and is not cause for concern.
Note:Your vehicle may be equipped witha front air dam that can become damaged(due to reduced ground clearance) whentaking your vehicle off-road. This air damcan be taken off by removing two bolts.
Four-wheel drive vehicles are speciallyequipped for driving on sand, snow, mudand rough terrain and have operatingcharacteristics that are somewhatdifferent from conventional vehicles, bothon and off the road.
Power is supplied to all four wheelsthrough a transfer case. On Four-wheeldrive vehicles, the transfer case allows youto select 4WD when necessary.Information on transfer case operation andshifting procedures can be found in thischapter. Information on transfer casemaintenance can be found in theMaintenance chapter. You should becomethoroughly familiar with this informationbefore you operate your vehicle.
155
Super Duty (), enUSA
Four-Wheel Drive (If Equipped)
Page 159 of 470
Four-wheel drive (when you select a 4WDmode) uses all four wheels to power thevehicle. This increases traction, enablingyou to drive over terrain and roadconditions that a conventional two-wheeldrive vehicle cannot.
Basic Operating Principles
•Drive slower in strong crosswinds whichcan affect the normal steeringcharacteristics of your vehicle.
•When driving your vehicle on surfacesmade slippery by loose sand, water,gravel, snow or ice proceed with care.
•Do not use Four-wheel drive on dry,hard surfaced roads. Doing so willproduce excessive noise, increase tirewear and may damage drivecomponents. Four-wheel drive modesare only intended for consistentlyslippery or loose surfaces.
If Your Vehicle leaves the Road
If your vehicle leaves the road, reduce yourvehicle speed and avoid severe braking.When your vehicle speed has been reducedease your vehicle back onto the road. Donot turn the steering wheel sharply whilereturning your vehicle to the road.
It may be safer to stay on the shoulder ofthe road and slow down gradually beforereturning to the road. You may lose controlif you do not slow down or if you turn thesteering wheel too sharply or abruptly.
It may be less risky to strike small objects,such as freeway reflectors, with minordamage to your vehicle rather thanattempt a sudden return to the road whichcould cause your vehicle to slide sidewaysout of control or roll over. Remember, yoursafety and the safety of others should beyour primary concern.
Emergency Maneuvers
In an unavoidable emergency situationwhere a sudden sharp turn must be made,remember to avoid over-driving yourvehicle (i.e. turn the steering wheel only asrapidly and as far as required to avoid theemergency). Excessive steering can resultin loss of vehicle control. Apply smoothpressure to the accelerator pedal or brakepedal when changes in vehicle speed arerequired. Avoid abrupt steering,acceleration and braking. This could resultin an increased risk of vehicle roll over, lossof vehicle control and personal injury. Useall available road surface to bring yourvehicle to a safe direction of travel.
In the event of an emergency stop, avoidskidding the tires and do not attempt anysharp steering wheel movements.
If your vehicle goes from one type ofsurface to another (i.e. from concrete togravel) there will be a change in the wayyour vehicle responds to a maneuver (i.e.steering, acceleration or braking).
Sand
When driving over sand, try to keep all fourwheels on the most solid area of the trail.Avoid reducing the tire pressures but shiftto a lower gear and drive steadily throughthe terrain. Apply the accelerator slowlyand avoid excessive wheel slip.
When driving at slow speeds in deep sandunder high outside temperatures, use a lowgear when possible. Low gear operationwill maximize the engine and transmissioncooling capability.
Avoid driving at excessive speeds, thiscauses vehicle momentum to work againstyou and your vehicle could become stuckto the point that assistance may berequired from another vehicle. Remember,you may be able to back out the way youcame if you proceed with caution.
156
Super Duty (), enUSA
Four-Wheel Drive (If Equipped)
Page 160 of 470
Mud and Water
Mud
Be cautious of sudden changes in vehiclespeed or direction when you are driving inmud. Even four-wheel drive vehicles canlose traction in slick mud. If your vehicledoes slide, steer in the direction of the slideuntil you regain control of your vehicle.
After driving through mud, clean off residuestuck to rotating driveshafts and tires.Excess mud stuck on tires and rotatingdriveshafts can cause an imbalance thatcould damage drive components.
Water
If you must drive through high water, driveslowly. Traction or brake capability maybe limited.
When driving through water, determine thedepth and avoid water higher than thebottom of the hubs. If the ignition systemgets wet, your vehicle may stall.
Once through water, always try the brakes.Wet brakes do not stop your vehicle aseffectively as dry brakes. Drying can beimproved by applying light pressure to thebrake pedal while moving slowly.
Note:Driving through deep water maydamage the transmission. If the front or rearaxle is submerged in water, the axlelubricant and power transfer unit lubricantshould be checked and changed ifnecessary.
Driving on Hilly or Sloping Terrain
Although natural obstacles may make itnecessary to travel diagonally up or downa hill or steep incline, you should alwaystry to drive straight up or straight down.
Note:Avoid turning on steep slopes or hills.A danger lies in losing traction, slippingsideways and possible vehicle roll over.Whenever driving on a hill, determinebeforehand the route you will use. Do notdrive over the crest of a hill without seeingwhat conditions are on the other side. Donot drive in reverse over a hill without theaid of an observer.
When climbing a steep slope or hill, startin a lower gear rather than downshifting toa lower gear from a higher gear once theascent has started. This reduces strain onthe engine and the possibility of stalling.
If your vehicle stalls, do not try to turnaround because this could cause vehicleroll over. It is better to reverse back to asafe location.
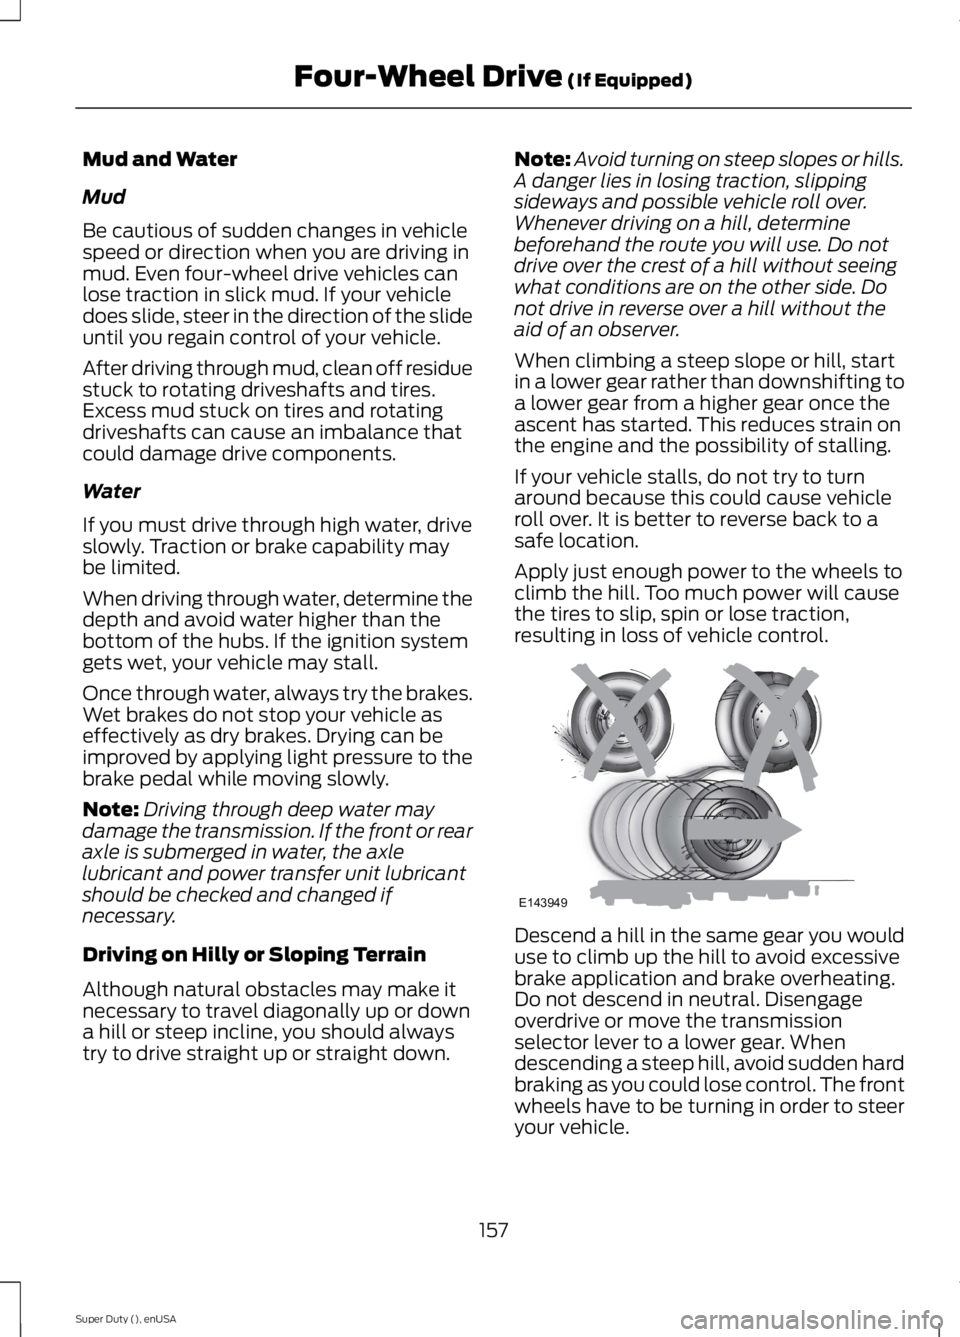
Apply just enough power to the wheels toclimb the hill. Too much power will causethe tires to slip, spin or lose traction,resulting in loss of vehicle control.
Descend a hill in the same gear you woulduse to climb up the hill to avoid excessivebrake application and brake overheating.Do not descend in neutral. Disengageoverdrive or move the transmissionselector lever to a lower gear. Whendescending a steep hill, avoid sudden hardbraking as you could lose control. The frontwheels have to be turning in order to steeryour vehicle.
157
Super Duty (), enUSA
Four-Wheel Drive (If Equipped)E143949
Page 163 of 470
LIMITED SLIP DIFFERENTIAL
This axle provides added traction onslippery surfaces, particularly when onewheel is on a poor traction surface. Undernormal conditions, the limited-slip axlefunctions like a standard rear axle. The axlemay exhibit a slight noise or vibrationduring tight turns with low vehicle speed.This is normal behavior and indicates theaxle is working.
ELECTRONIC LOCKING
DIFFERENTIAL
Note:The electronic locking differential isfor off-road use only and is not for use ondry pavement. Using the electronic lockingdifferential on dry pavement will result inincreased tire wear, noise and vibration.
The electronic locking differential is adevice housed in the rear axle that allowsboth rear wheels to turn at the samespeed. The electronic locking differentialcan provide additional traction should yourvehicle become stuck. You can activatethe differential electronically and shift iton the fly within the differential operatingspeed range. The differential is for use inmud, rocks, sand, or any off-road conditionwhere you need maximum traction. It isnot for use on dry pavement.
The following conditions will affect theelectronic locking differential:
•On 2WD vehicles and 4WD vehicles in2H (4X2) or 4H (4X4 High), the ELDwill not engage if the vehicle speed isabove 20 mph (32 km/h).
•On 2WD vehicles and 4WD vehicles in2H (4X2) or 4H (4X4 High), the ELDwill automatically disengage at speedsabove 25 mph (40 km/h) and willautomatically reengage at speedsbelow 20 mph (32 km/h).
•On 4WD vehicles in 4L (4X4 Low), theELD can be engaged at any speed andwill not automatically disengage.
Activating the Electronic LockingDifferential (If Equipped)
Note:Do not use electronic lockingdifferential on dry, hard surfaced roads.Doing so will produce excessive noise,vibration and increase tire wear.
Note:If the electronic locking differentialhas difficulty disengaging, release theaccelerator pedal and turn the steeringwheel in the opposite direction while rolling.
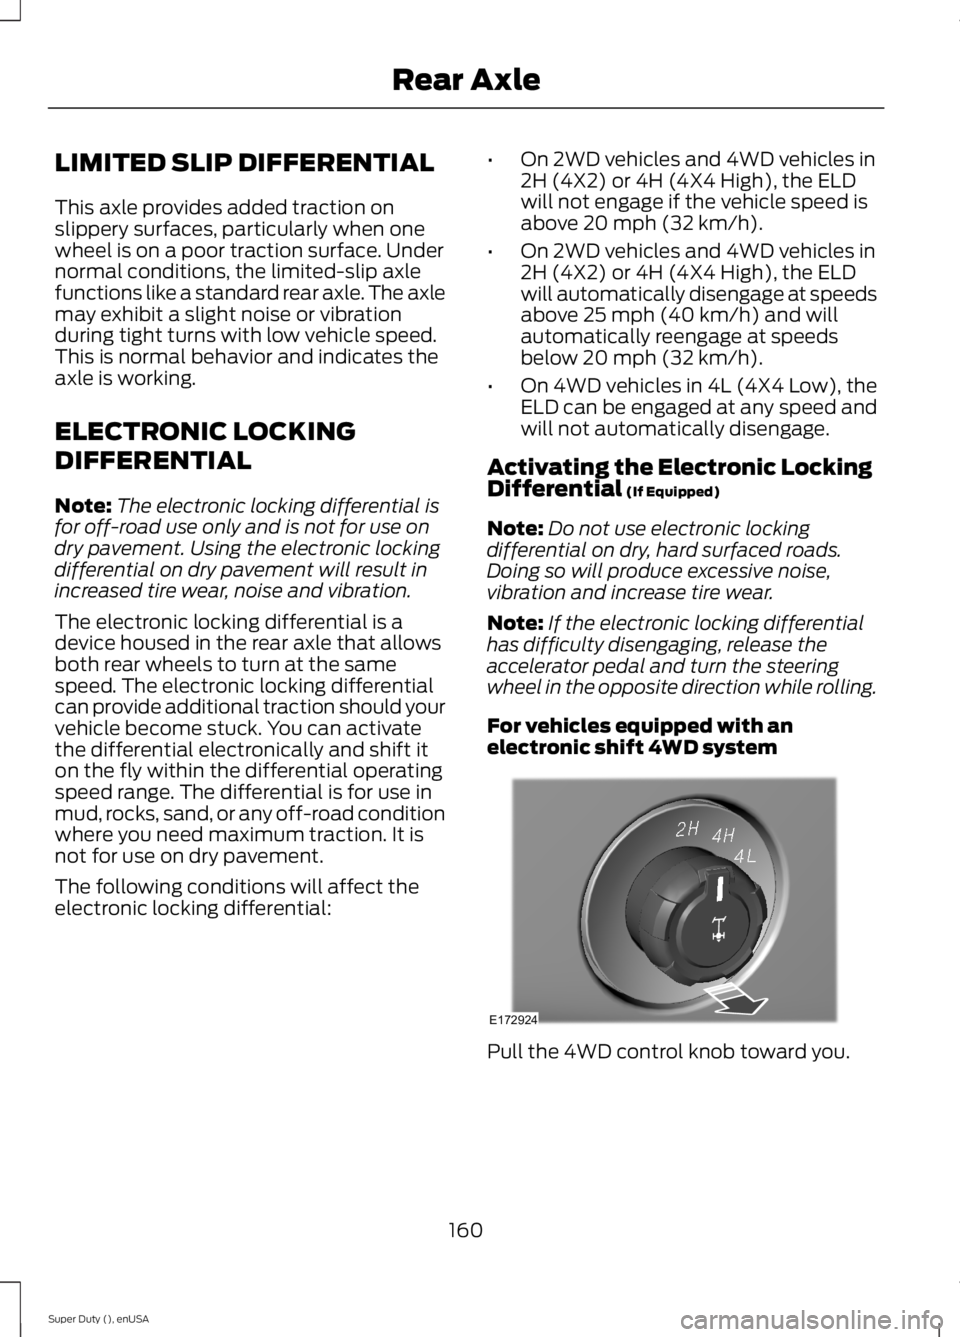
For vehicles equipped with anelectronic shift 4WD system
Pull the 4WD control knob toward you.
160
Super Duty (), enUSA
Rear AxleE172924
Page 166 of 470

PARKING BRAKE
WARNING
Always set the parking brake fullyand make sure the transmissionselector lever is placed in position P.Failure to set the parking brake and engagepark could result in vehicle roll-away,property damage or bodily injury. Turn theignition to the lock position and removethe key whenever you leave your vehicle.
Apply the parking brake whenever yourvehicle is parked. Press the pedaldownward to set the parking brake. Thebrake warning lamp in the instrumentcluster will illuminate and remainsilluminated until the parking brake isreleased.
To release, pull the brake release leverlocated at the lower left side of theinstrument panel.
If you are parking your vehicle on a gradeor with a trailer, press and hold the brakepedal down, then set the parking brake.There may be a little vehicle movement asthe parking brake sets to hold the vehicle'sweight. This is normal and should be noreason for concern. If needed, press andhold the service brake pedal down, thentry reapplying the parking brake. Chock thewheels if required. If the parking brakecannot hold the weight of the vehicle, theparking brake may need to be serviced orthe vehicle may be overloaded.
HILL START ASSIST
WARNINGS
The system does not replace theparking brake. When you leave yourvehicle, always apply the parkingbrake and put the transmission in park (P).
WARNINGS
You must remain in your vehicle onceyou have activated the system.
During all times, you are responsiblefor controlling your vehicle,supervising the system andintervening, if required.
If the engine is revved excessively, orif a malfunction is detected, thesystem will be deactivated.
The system makes it easier to pull awaywhen your vehicle is on a slope without theneed to use the parking brake.
When the system is active, your vehicle willremain stationary on the slope for two tothree seconds after you release the brakepedal. This allows you time to move yourfoot from the brake to the acceleratorpedal. The brakes are releasedautomatically once the engine hasdeveloped sufficient drive to prevent yourvehicle from rolling down the slope. Thisis an advantage when pulling away on aslope, (for example from a car park ramp,traffic lights or when reversing uphill intoa parking space).
The system will activate automatically onany slope that will cause significant vehiclerollback.
Using Hill Start Assist
1. Press the brake pedal to bring yourvehicle to a complete standstill. Keepthe brake pedal pressed.
2. If the sensors detect that your vehicleis on a slope, the system will activateautomatically.
3. When you remove your foot from thebrake pedal, your vehicle will remainon the slope without rolling away forabout two or three seconds. This holdtime will automatically be extended ifyou are in the process of driving off.
163
Super Duty (), enUSA
Brakes
Page 173 of 470
PRINCIPLE OF OPERATION
WARNINGS
Hill descent control cannot controldescent in all surface conditions andcircumstances, such as ice orextremely steep grades. Hill descentcontrol is a driver assist system and cannotsubstitute for good judgment by the driver.Failure to do so may result in loss of vehiclecontrol, crash or serious injury.
Hill descent control does not providehill hold at zero miles per hour (0kilometers per hour). When stopped,the parking brake must be applied or thevehicle must be placed in P (Park) or itmay roll away.
Hill descent control allows the driver to setand maintain vehicle speed whiledescending steep grades in various surfaceconditions.
Hill descent control can maintain vehiclespeeds on downhill grades between 2 mph(3 km/h) and 12 mph (20 km/h). Above 20mph (32 km/h), the system remainsarmed, but descent speed cannot be setor maintained.
Hill descent control requires a coolingdown interval after a period of sustaineduse. The amount of time that the featurecan remain active before cooling varieswith conditions. The system will provide awarning in the message center and a chimewill sound when the system is about todisengage for cooling. At this time,manually apply the brakes as needed tomaintain descent speed.
USING HILL DESCENT
CONTROL
Press and release the hilldescent button located on theinstrument panel. A light in thecluster will illuminate and achime will sound when this feature isactivated.
To increase descent speed, press theaccelerator pedal until the desired speedis reached. To decrease descent speed,press the brake pedal until the desiredspeed is reached.
Whether accelerating or decelerating, oncethe desired descent speed is reached,remove your feet from the pedals and thechosen vehicle speed will be maintained.
Note:Noise from the ABS pump motor maybe observed during hill descent controloperation. This is a normal characteristic ofthe ABS and should be no reason forconcern.
Hill descent modes
•At speeds below 20 mph (32 km/h):When the Hill Descent Control switchis pressed and Hill Descent Control isactive, the Hill Descent Control telltalewill flash.
•At speeds below 20 mph (32 km/h):When the Hill Descent Control switchis pressed and conditions are notcorrect for hill descent activation, theHill Descent Control system will beenabled, the Hill Descent Controltelltale will be solid and a message willdisplay in the information display.
170
Super Duty (), enUSA
Terrain Response (If Equipped)E163957
Page 174 of 470

•At speeds above 20 mph (32 km/h):When the Hill Descent Control switchis pressed, the Hill Descent Controlsystem will be enabled, the telltale inthe cluster will not be illuminated anda message will be displayed in theinformation display.
Refer to the Information Displays foradditional Hill Descent Control messages.See Information Messages (page 92).
171
Super Duty (), enUSA
Terrain Response (If Equipped)
Page 189 of 470
Tailgate Removal
WARNING
Always properly secure cargo toprevent shifting cargo or cargo fallingfrom vehicle, which could result incompromised vehicle stability and seriouspersonal injury to vehicle occupants orothers.
You can remove the tailgate for moreloading room.
Note:Skip to Step 4 if your vehicle doesnot have a rearview camera.
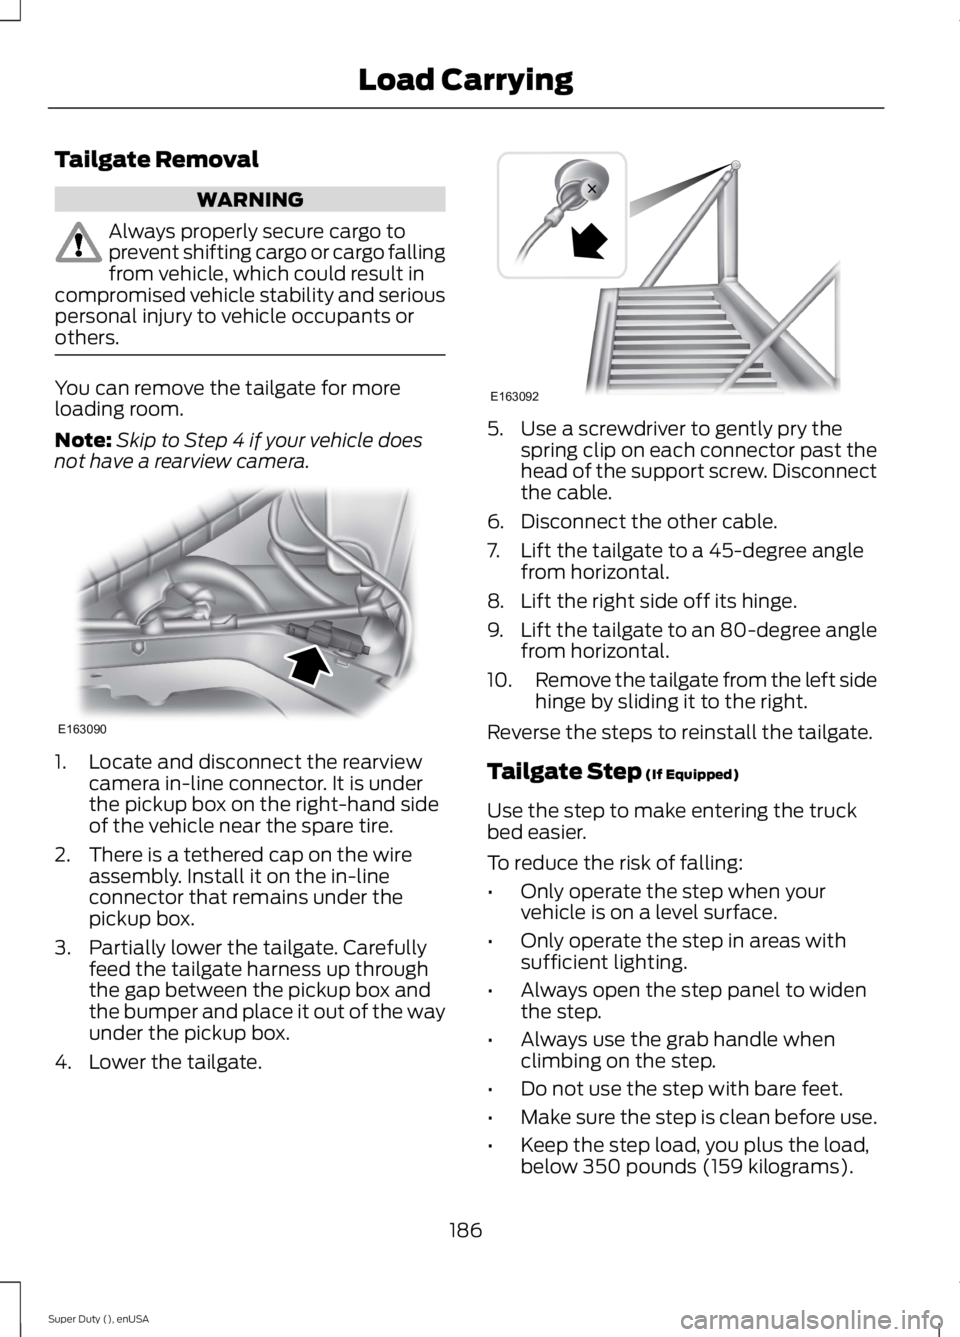
1. Locate and disconnect the rearviewcamera in-line connector. It is underthe pickup box on the right-hand sideof the vehicle near the spare tire.
2. There is a tethered cap on the wireassembly. Install it on the in-lineconnector that remains under thepickup box.
3. Partially lower the tailgate. Carefullyfeed the tailgate harness up throughthe gap between the pickup box andthe bumper and place it out of the wayunder the pickup box.
4. Lower the tailgate.
5. Use a screwdriver to gently pry thespring clip on each connector past thehead of the support screw. Disconnectthe cable.
6. Disconnect the other cable.
7. Lift the tailgate to a 45-degree anglefrom horizontal.
8. Lift the right side off its hinge.
9.Lift the tailgate to an 80-degree anglefrom horizontal.
10.Remove the tailgate from the left sidehinge by sliding it to the right.
Reverse the steps to reinstall the tailgate.
Tailgate Step (If Equipped)
Use the step to make entering the truckbed easier.
To reduce the risk of falling:
•Only operate the step when yourvehicle is on a level surface.
•Only operate the step in areas withsufficient lighting.
•Always open the step panel to widenthe step.
•Always use the grab handle whenclimbing on the step.
•Do not use the step with bare feet.
•Make sure the step is clean before use.
•Keep the step load, you plus the load,below 350 pounds (159 kilograms).
186
Super Duty (), enUSA
Load CarryingE163090 E163092