2015 FORD F250 SUPER DUTY towing
[x] Cancel search: towingPage 147 of 470

AUTOMATIC TRANSMISSION
WARNING
Always set the parking brake fullyand make sure the gearshift islatched in P (Park). Turn the ignitionto the off position and remove the keywhenever you leave your vehicle.
Understanding the Shift Positionsof the 5–Speed AutomaticTransmission (If Equipped)
Putting your vehicle in or out of gear:
1. Fully press down the brake pedal.
2. Move the gearshift lever into thedesired gear.
3. Come to a complete stop.
4. Move the gearshift lever and securelylatch it in P (Park)
P (Park)
This position locks the transmission andprevents the rear wheels from turning.
R (Reverse)
With the gearshift lever in R (Reverse), thevehicle will move backward. Always cometo a complete stop before shifting into andout of R (Reverse).
N (Neutral)
With the gearshift lever in N (Neutral), thevehicle can be started and is free to roll.Hold the brake pedal down while in thisposition.
D (Overdrive) with tow/haul off
D (Overdrive) with tow/haul off is thenormal driving position for the best fueleconomy. The overdrive function allowsautomatic upshifts and downshifts throughgears one through five.
D (Overdrive) with tow/haul on
The tow/haul feature improvestransmission operation when towing atrailer or a heavy load. All transmissiongear ranges are available when usingtow/haul.
To activate tow/haul, press thebutton on the end of thegearshift lever. The TOW HAULindicator light will illuminate in theinstrument cluster.
Tow/haul delays upshifts to reducefrequency of transmission shifting.Tow/haul also provides engine braking inall forward gears when the transmission isin the D (Overdrive) position; this enginebraking will slow the vehicle and assist thedriver in controlling the vehicle whendescending a grade. Depending on drivingconditions and load conditions, the
144
Super Duty (), enUSA
TransmissionE161511
P R N D 3 2 1 E163182 E161509
Page 149 of 470

R (Reverse)
With the gearshift lever in R (Reverse), thevehicle will move backward. Always cometo a complete stop before shifting into andout of R (Reverse).
N (Neutral)
With the gearshift lever in N (Neutral), thevehicle can be started and is free to roll.Hold the brake pedal down while in thisposition.
D (Overdrive) with tow/haul off
D (Overdrive) with tow/haul off is thenormal driving position for the best fueleconomy. The overdrive function allowsautomatic upshifts and downshifts throughgears one through six.
D (Overdrive) with tow/haul on
The tow/haul feature improvestransmission operation when towing atrailer or a heavy load. All transmissiongear ranges are available when usingtow/haul.
To activate tow/haul, press thebutton on the end of thegearshift lever. The TOW HAULindicator light will illuminate in theinstrument cluster.
Tow/haul delays upshifts to reducefrequency of transmission shifting.Tow/haul also provides engine braking inall forward gears when the transmission isin the D (Overdrive) position; this enginebraking will slow the vehicle and assist thedriver in controlling the vehicle whendescending a grade. Depending on drivingconditions and load conditions, thetransmission may downshift, slow thevehicle and control the vehicle speed whendescending a hill, without the acceleratorpedal being pressed. The amount ofdownshift braking provided will vary basedupon the amount the brake pedal ispressed.
Tow/haul may be automatically activated(without pressing the tow/haul button).This provides engine braking to assist thevehicles braking system when goingdownhill and repetitive braking is sensed.Once the tow/haul mode has beenautomatically activated it will notautomatically deactivate.
To deactivate the tow/haul feature andreturn to normal driving mode, press thebutton on the end of the gearshift lever.The TOW HAUL light will no longer beilluminated.
Tow/haul will also deactivate when thevehicle is powered down for a few minutes.
WARNING
Do not use the tow/haul or enginebrake features when driving in icy orslippery conditions as the increasedengine braking can cause the rear wheelsto slide and your vehicle to swing aroundwith the possible loss of vehicle control.
146
Super Duty (), enUSA
TransmissionE163182 E161509
Page 155 of 470
•provides 4x4 High engagement anddisengagement while the vehicle ismoving.
•is operated by a rotary control locatedon the instrument panel that allowsyou select 4x2, 4x4 High or 4x4 Lowoperation.
•uses auto-manual hub locks that canbe engaged and disengagedautomatically based on the 4x4 modeselected.
•will increase fuel economy when usedin the recommended AUTO lock mode.
4WD Indicator Lights
Note:When a 4X4 system fault is present,the system will typically remain in whichever4X4 mode was selected prior to the faultcondition occurring. It will not default to 4X2in all circumstances. When this warning isdisplayed, have your vehicle serviced by anauthorized dealer.
4X2
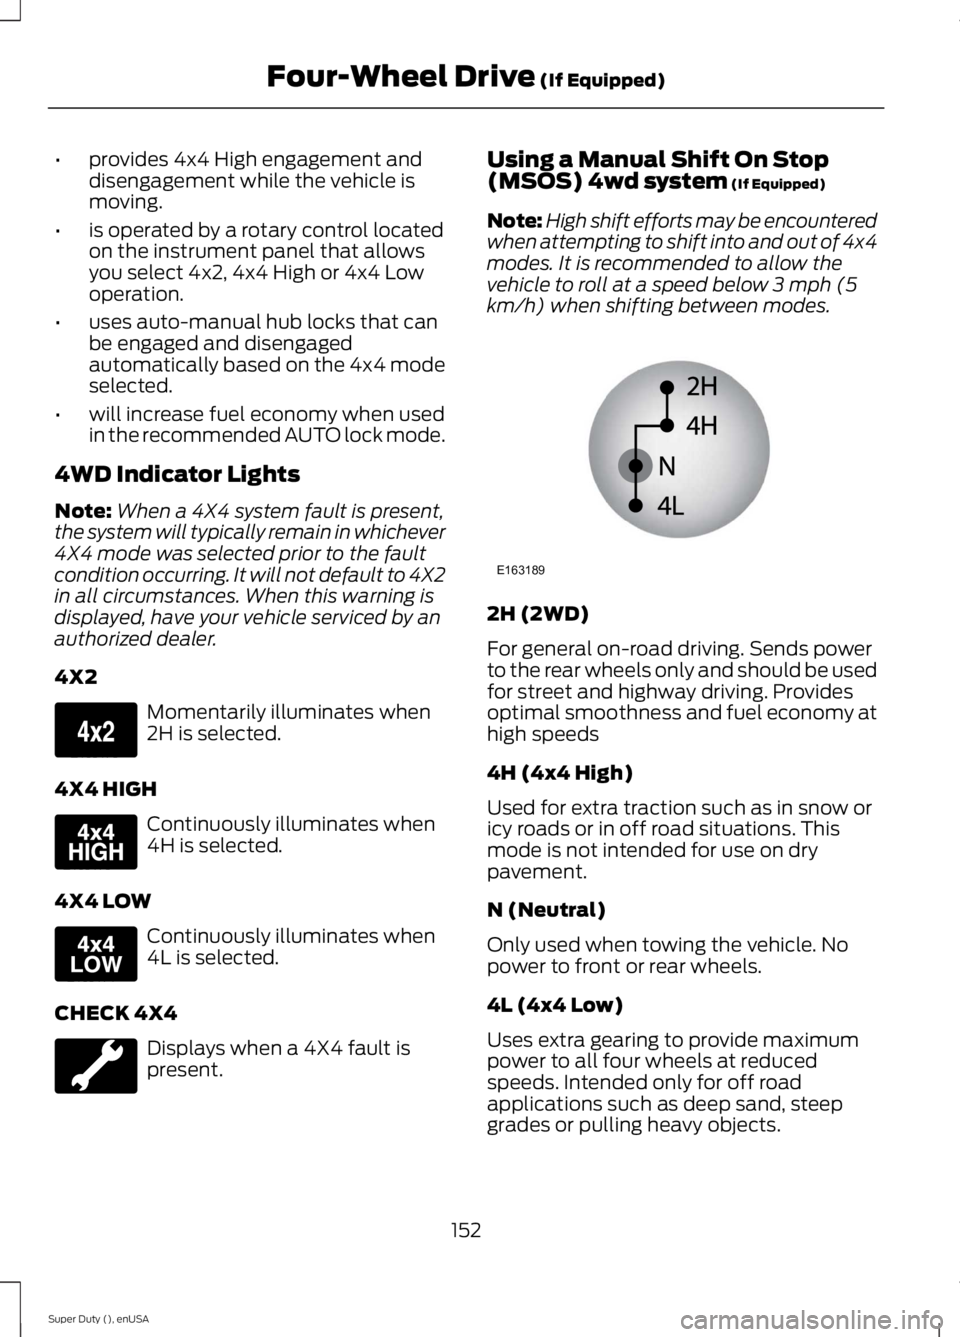
Momentarily illuminates when2H is selected.
4X4 HIGH
Continuously illuminates when4H is selected.
4X4 LOW
Continuously illuminates when4L is selected.
CHECK 4X4
Displays when a 4X4 fault ispresent.
Using a Manual Shift On Stop(MSOS) 4wd system (If Equipped)
Note:High shift efforts may be encounteredwhen attempting to shift into and out of 4x4modes. It is recommended to allow thevehicle to roll at a speed below 3 mph (5km/h) when shifting between modes.
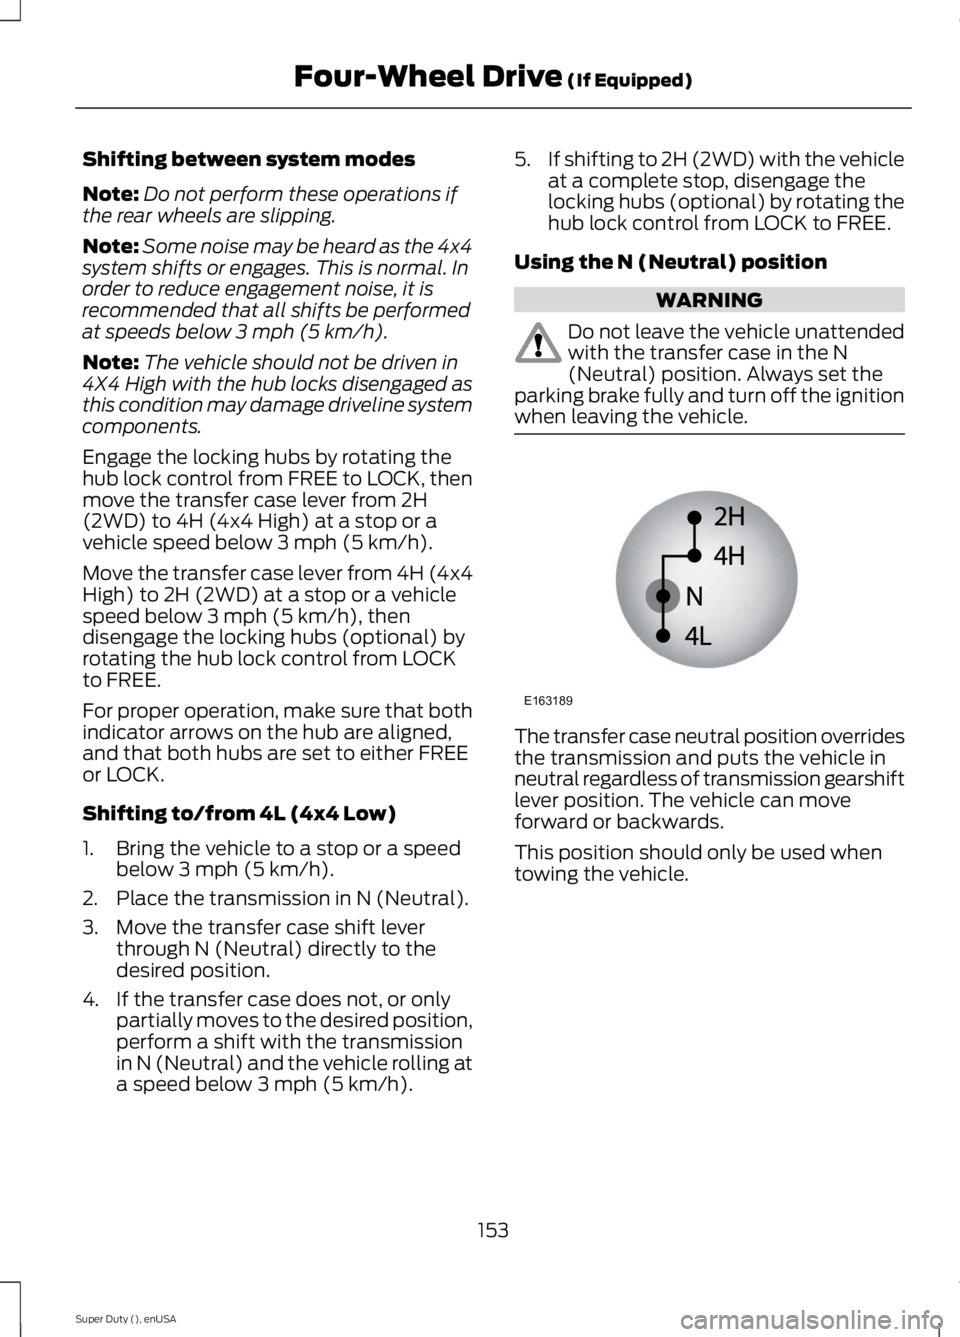
2H (2WD)
For general on-road driving. Sends powerto the rear wheels only and should be usedfor street and highway driving. Providesoptimal smoothness and fuel economy athigh speeds
4H (4x4 High)
Used for extra traction such as in snow oricy roads or in off road situations. Thismode is not intended for use on drypavement.
N (Neutral)
Only used when towing the vehicle. Nopower to front or rear wheels.
4L (4x4 Low)
Uses extra gearing to provide maximumpower to all four wheels at reducedspeeds. Intended only for off roadapplications such as deep sand, steepgrades or pulling heavy objects.
152
Super Duty (), enUSA
Four-Wheel Drive (If Equipped)E163173 E163175 E163174 E163189
Page 156 of 470
Shifting between system modes
Note:Do not perform these operations ifthe rear wheels are slipping.
Note:Some noise may be heard as the 4x4system shifts or engages. This is normal. Inorder to reduce engagement noise, it isrecommended that all shifts be performedat speeds below 3 mph (5 km/h).
Note:The vehicle should not be driven in4X4 High with the hub locks disengaged asthis condition may damage driveline systemcomponents.
Engage the locking hubs by rotating thehub lock control from FREE to LOCK, thenmove the transfer case lever from 2H(2WD) to 4H (4x4 High) at a stop or avehicle speed below 3 mph (5 km/h).
Move the transfer case lever from 4H (4x4High) to 2H (2WD) at a stop or a vehiclespeed below 3 mph (5 km/h), thendisengage the locking hubs (optional) byrotating the hub lock control from LOCKto FREE.
For proper operation, make sure that bothindicator arrows on the hub are aligned,and that both hubs are set to either FREEor LOCK.
Shifting to/from 4L (4x4 Low)
1. Bring the vehicle to a stop or a speedbelow 3 mph (5 km/h).
2. Place the transmission in N (Neutral).
3. Move the transfer case shift leverthrough N (Neutral) directly to thedesired position.
4. If the transfer case does not, or onlypartially moves to the desired position,perform a shift with the transmissionin N (Neutral) and the vehicle rolling ata speed below 3 mph (5 km/h).
5.If shifting to 2H (2WD) with the vehicleat a complete stop, disengage thelocking hubs (optional) by rotating thehub lock control from LOCK to FREE.
Using the N (Neutral) position
WARNING
Do not leave the vehicle unattendedwith the transfer case in the N(Neutral) position. Always set theparking brake fully and turn off the ignitionwhen leaving the vehicle.
The transfer case neutral position overridesthe transmission and puts the vehicle inneutral regardless of transmission gearshiftlever position. The vehicle can moveforward or backwards.
This position should only be used whentowing the vehicle.
153
Super Duty (), enUSA
Four-Wheel Drive (If Equipped)E163189
Page 177 of 470
Using the Rear View CameraSystem
The rear view camera system displayswhat is behind your vehicle when you placethe transmission in reverse (R).
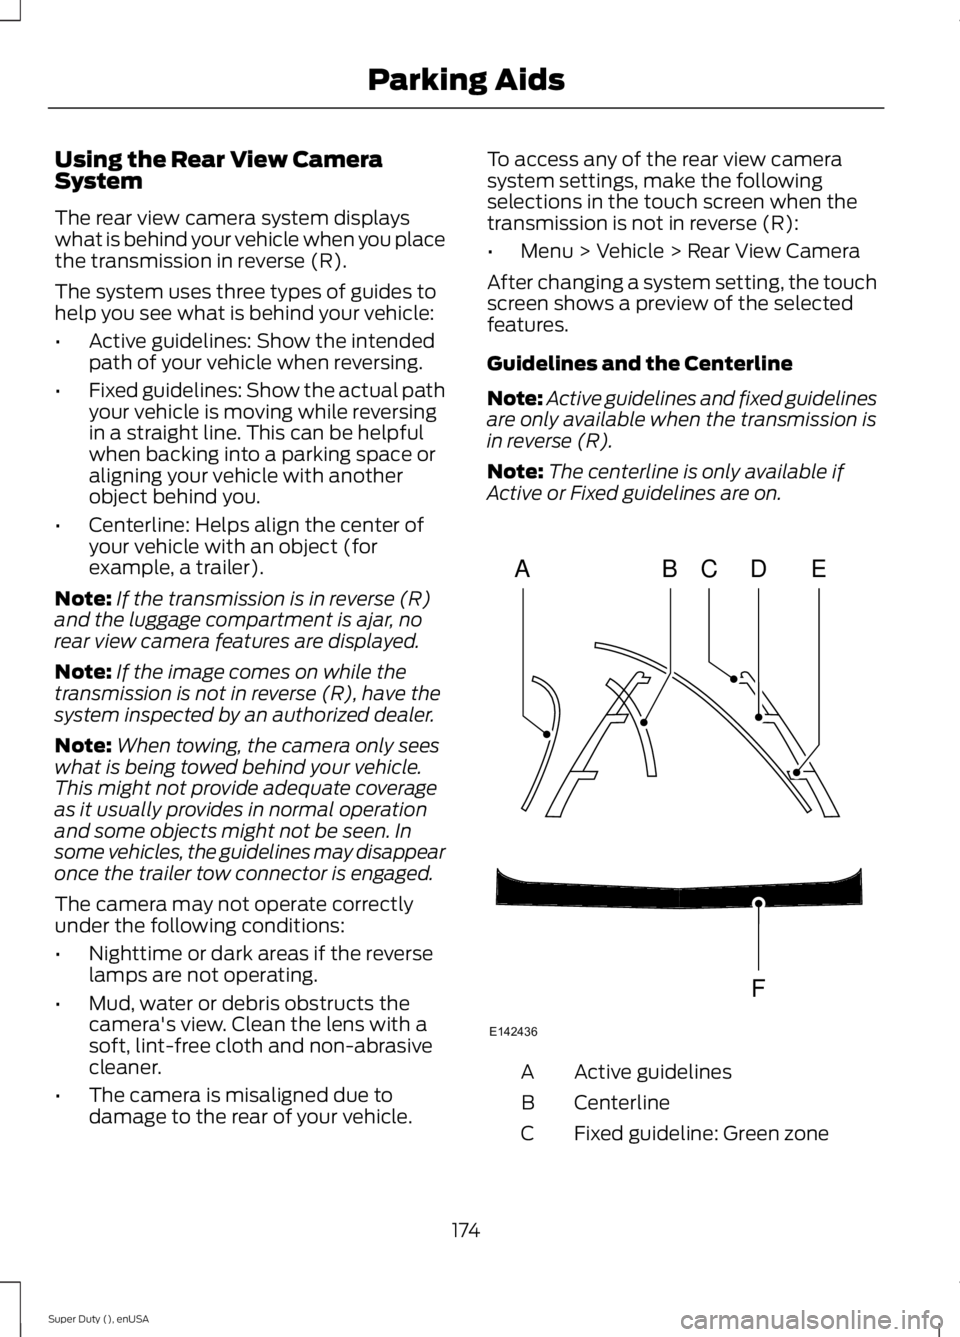
The system uses three types of guides tohelp you see what is behind your vehicle:
•Active guidelines: Show the intendedpath of your vehicle when reversing.
•Fixed guidelines: Show the actual pathyour vehicle is moving while reversingin a straight line. This can be helpfulwhen backing into a parking space oraligning your vehicle with anotherobject behind you.
•Centerline: Helps align the center ofyour vehicle with an object (forexample, a trailer).
Note:If the transmission is in reverse (R)and the luggage compartment is ajar, norear view camera features are displayed.
Note:If the image comes on while thetransmission is not in reverse (R), have thesystem inspected by an authorized dealer.
Note:When towing, the camera only seeswhat is being towed behind your vehicle.This might not provide adequate coverageas it usually provides in normal operationand some objects might not be seen. Insome vehicles, the guidelines may disappearonce the trailer tow connector is engaged.
The camera may not operate correctlyunder the following conditions:
•Nighttime or dark areas if the reverselamps are not operating.
•Mud, water or debris obstructs thecamera's view. Clean the lens with asoft, lint-free cloth and non-abrasivecleaner.
•The camera is misaligned due todamage to the rear of your vehicle.
To access any of the rear view camerasystem settings, make the followingselections in the touch screen when thetransmission is not in reverse (R):
•Menu > Vehicle > Rear View Camera
After changing a system setting, the touchscreen shows a preview of the selectedfeatures.
Guidelines and the Centerline
Note:Active guidelines and fixed guidelinesare only available when the transmission isin reverse (R).
Note:The centerline is only available ifActive or Fixed guidelines are on.
Active guidelinesA
CenterlineB
Fixed guideline: Green zoneC
174
Super Duty (), enUSA
Parking AidsABCD
F
E
E142436
Page 183 of 470
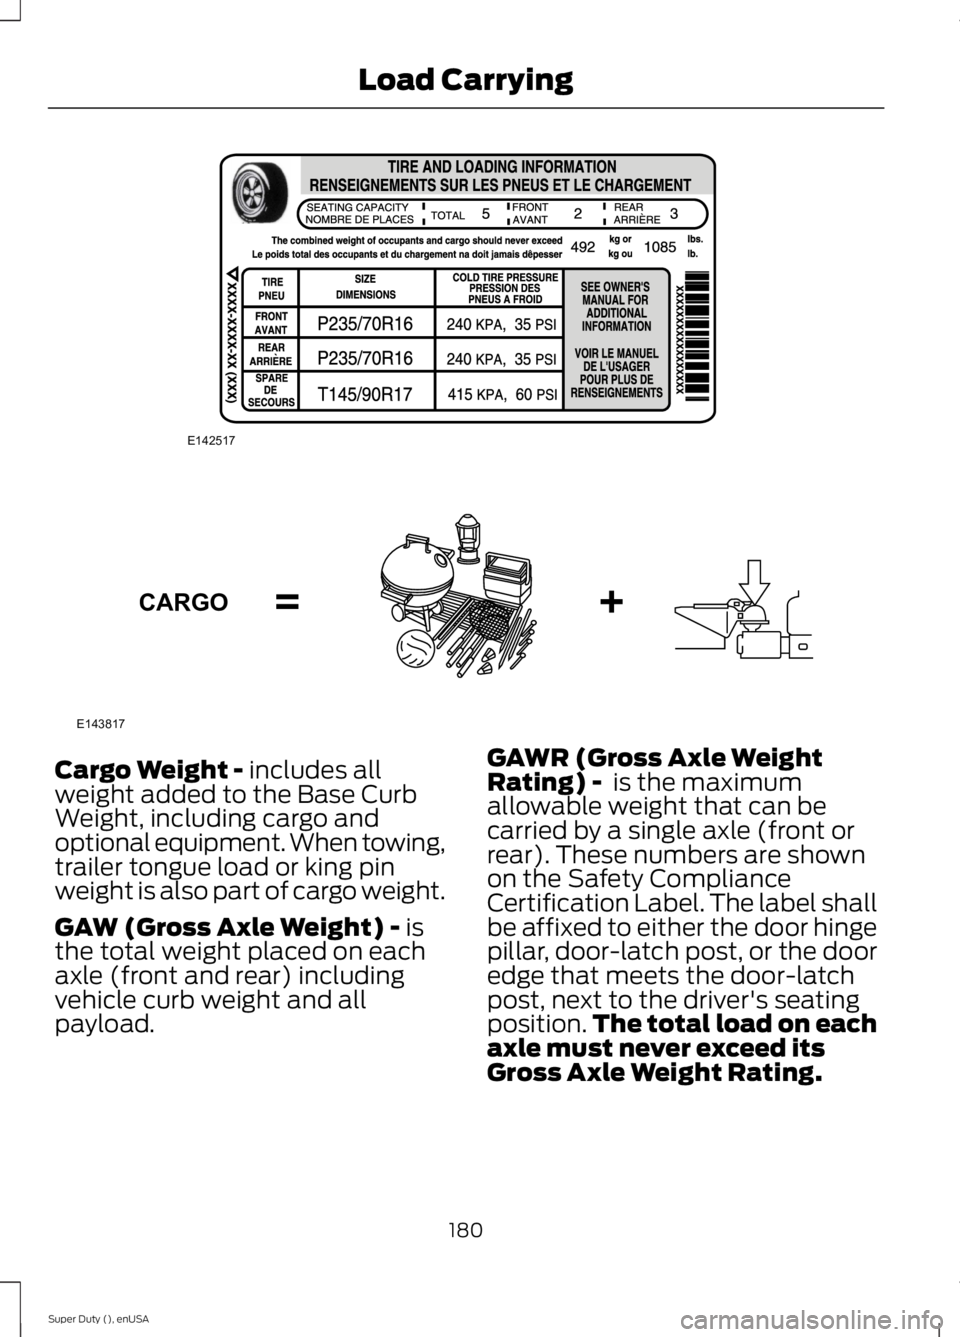
Cargo Weight - includes allweight added to the Base CurbWeight, including cargo andoptional equipment. When towing,trailer tongue load or king pinweight is also part of cargo weight.
GAW (Gross Axle Weight) - isthe total weight placed on eachaxle (front and rear) includingvehicle curb weight and allpayload.
GAWR (Gross Axle WeightRating) - is the maximumallowable weight that can becarried by a single axle (front orrear). These numbers are shownon the Safety ComplianceCertification Label. The label shallbe affixed to either the door hingepillar, door-latch post, or the dooredge that meets the door-latchpost, next to the driver's seatingposition.The total load on eachaxle must never exceed itsGross Axle Weight Rating.
180
Super Duty (), enUSA
Load CarryingE142517 E143817CARGO
Page 184 of 470
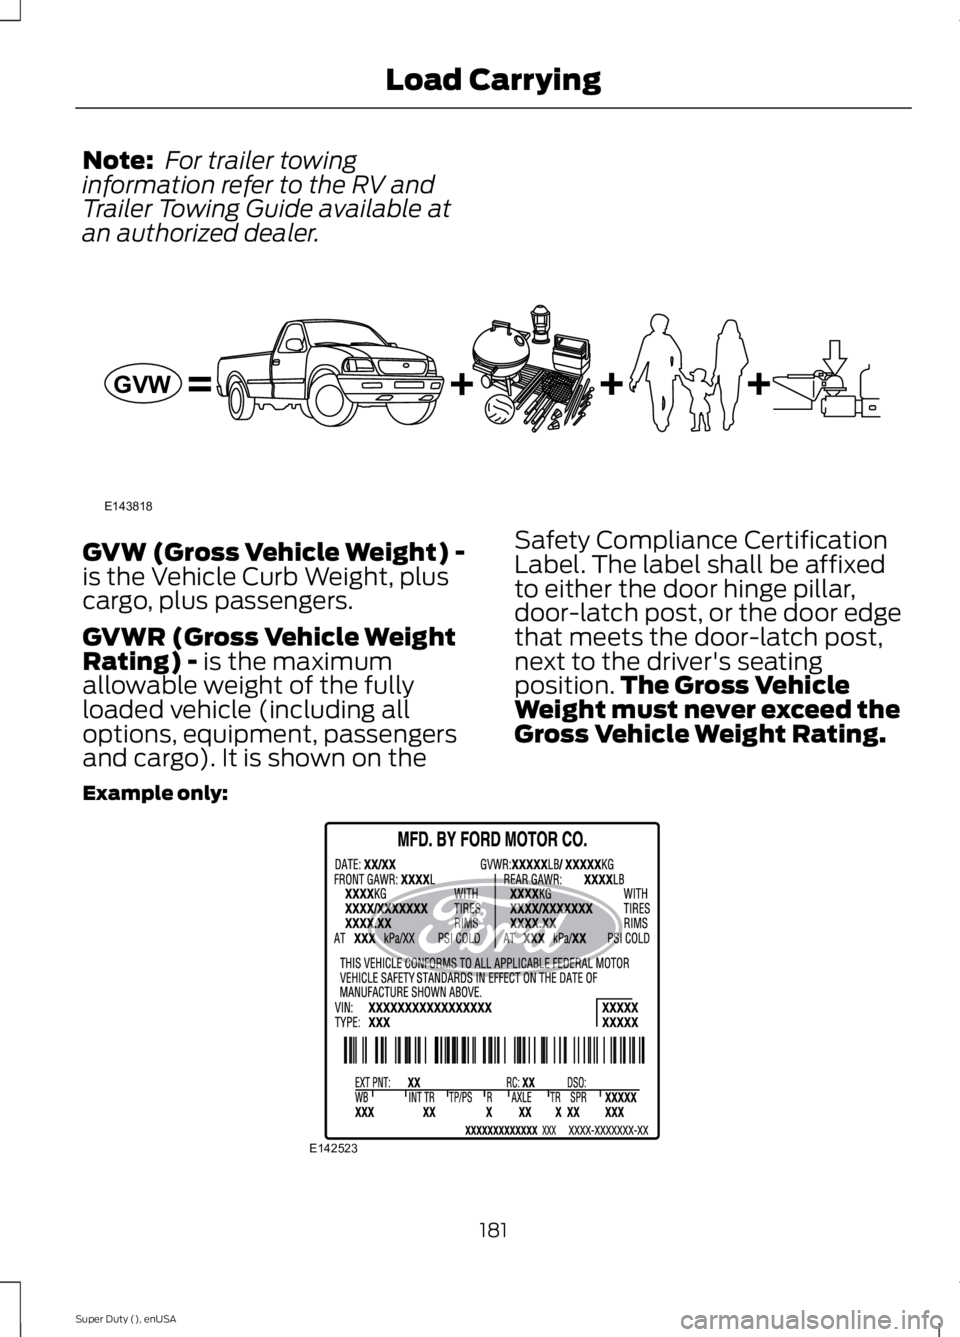
Note: For trailer towinginformation refer to the RV andTrailer Towing Guide available atan authorized dealer.
GVW (Gross Vehicle Weight) -is the Vehicle Curb Weight, pluscargo, plus passengers.
GVWR (Gross Vehicle WeightRating) - is the maximumallowable weight of the fullyloaded vehicle (including alloptions, equipment, passengersand cargo). It is shown on the
Safety Compliance CertificationLabel. The label shall be affixedto either the door hinge pillar,door-latch post, or the door edgethat meets the door-latch post,next to the driver's seatingposition.The Gross VehicleWeight must never exceed theGross Vehicle Weight Rating.
Example only:
181
Super Duty (), enUSA
Load CarryingE143818GVW E142523
Page 185 of 470
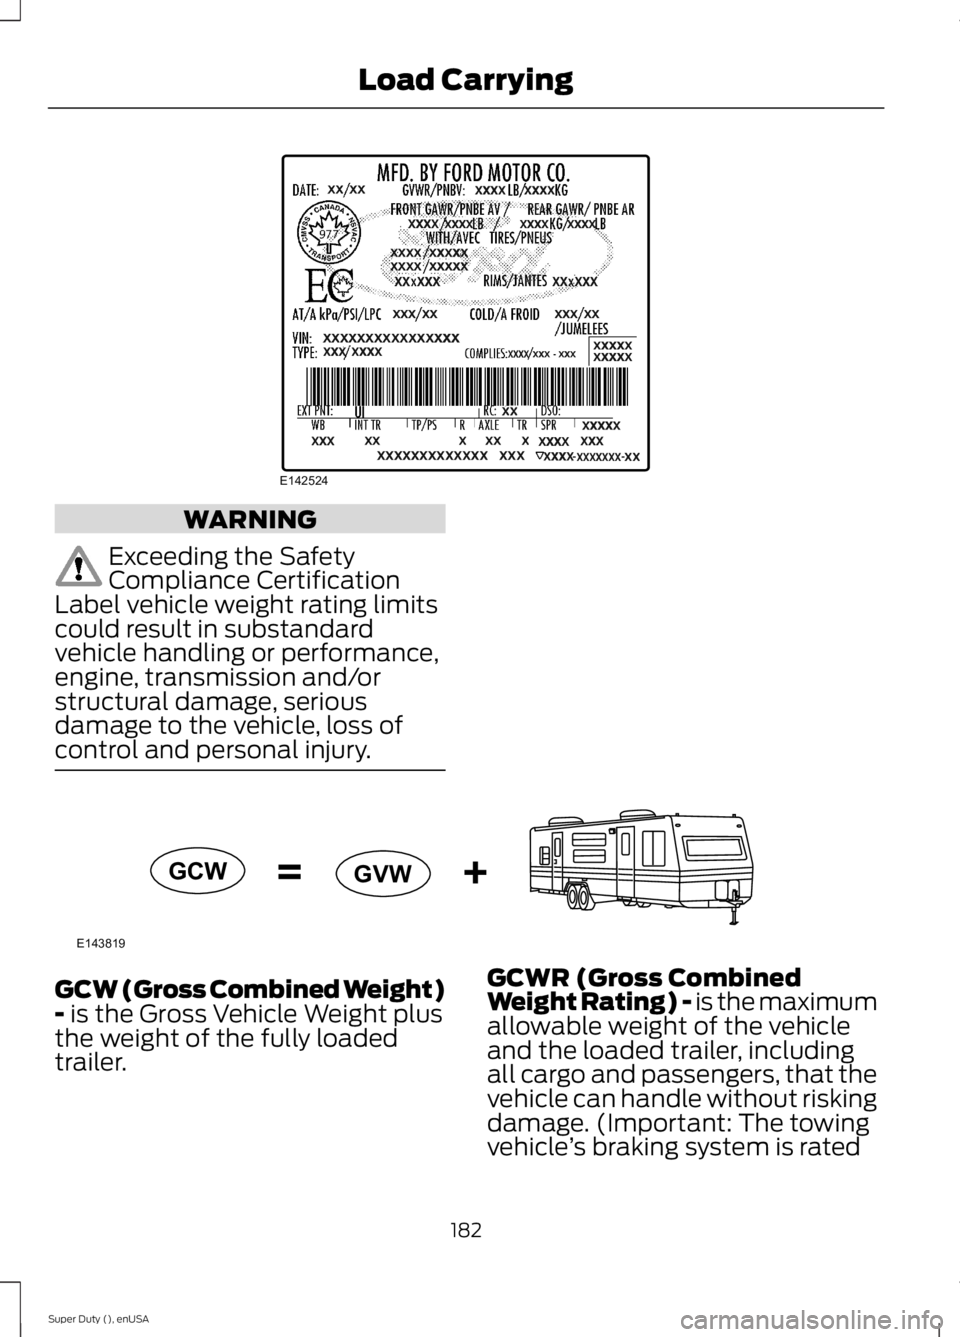
WARNING
Exceeding the SafetyCompliance CertificationLabel vehicle weight rating limitscould result in substandardvehicle handling or performance,engine, transmission and/orstructural damage, seriousdamage to the vehicle, loss ofcontrol and personal injury.
GCW (Gross Combined Weight)- is the Gross Vehicle Weight plusthe weight of the fully loadedtrailer.
GCWR (Gross CombinedWeight Rating) - is the maximumallowable weight of the vehicleand the loaded trailer, includingall cargo and passengers, that thevehicle can handle without riskingdamage. (Important: The towingvehicle’s braking system is rated
182
Super Duty (), enUSA
Load CarryingE142524 E143819GCW
GVW