2015 FORD F250 SUPER DUTY warning
[x] Cancel search: warningPage 294 of 470
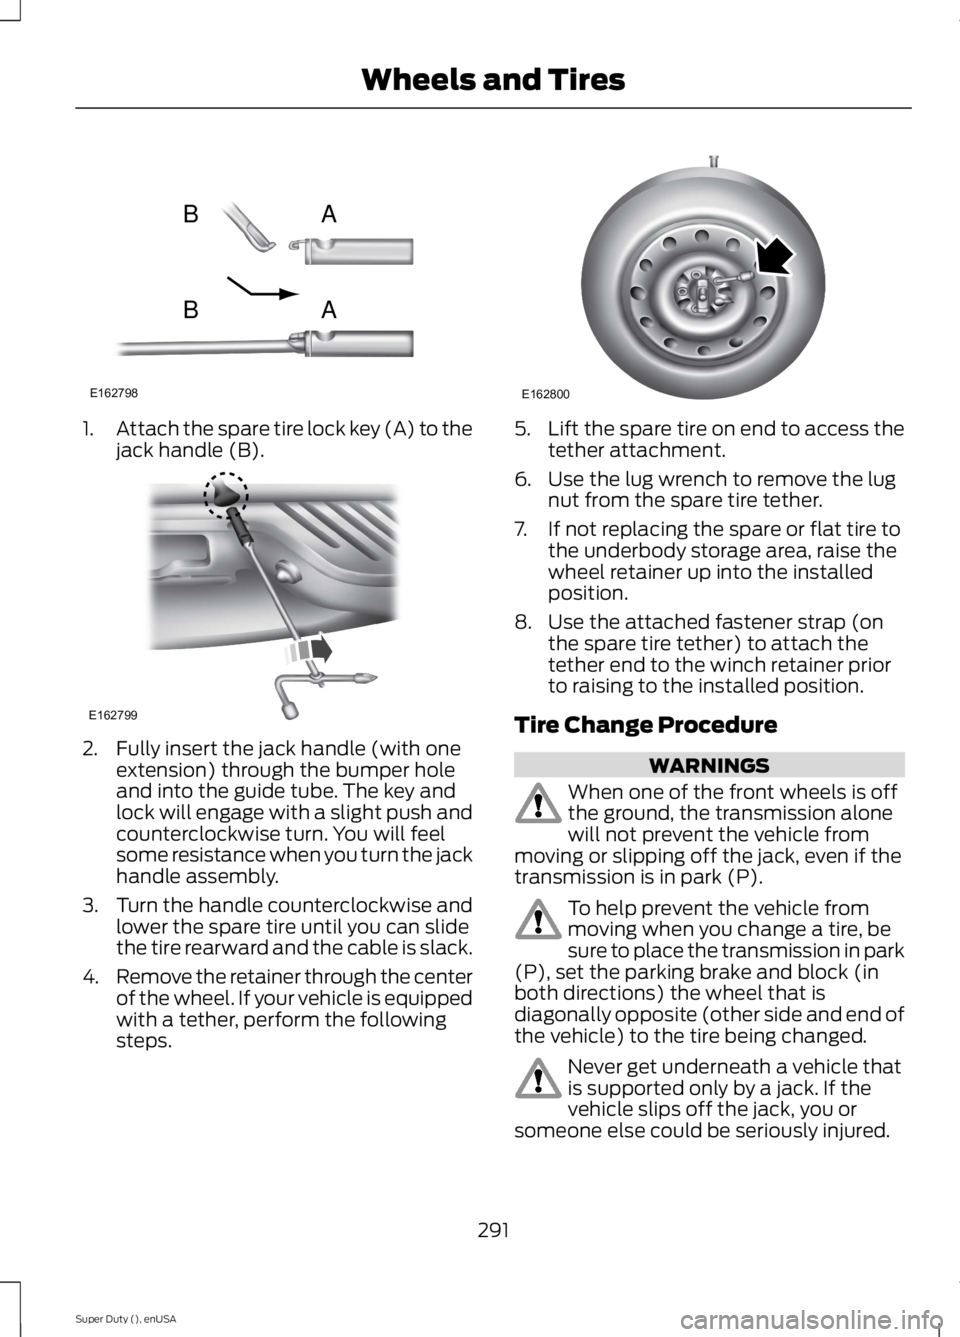
1.Attach the spare tire lock key (A) to thejack handle (B).
2. Fully insert the jack handle (with oneextension) through the bumper holeand into the guide tube. The key andlock will engage with a slight push andcounterclockwise turn. You will feelsome resistance when you turn the jackhandle assembly.
3.Turn the handle counterclockwise andlower the spare tire until you can slidethe tire rearward and the cable is slack.
4.Remove the retainer through the centerof the wheel. If your vehicle is equippedwith a tether, perform the followingsteps.
5.Lift the spare tire on end to access thetether attachment.
6. Use the lug wrench to remove the lugnut from the spare tire tether.
7. If not replacing the spare or flat tire tothe underbody storage area, raise thewheel retainer up into the installedposition.
8. Use the attached fastener strap (onthe spare tire tether) to attach thetether end to the winch retainer priorto raising to the installed position.
Tire Change Procedure
WARNINGS
When one of the front wheels is offthe ground, the transmission alonewill not prevent the vehicle frommoving or slipping off the jack, even if thetransmission is in park (P).
To help prevent the vehicle frommoving when you change a tire, besure to place the transmission in park(P), set the parking brake and block (inboth directions) the wheel that isdiagonally opposite (other side and end ofthe vehicle) to the tire being changed.
Never get underneath a vehicle thatis supported only by a jack. If thevehicle slips off the jack, you orsomeone else could be seriously injured.
291
Super Duty (), enUSA
Wheels and TiresE162798
AB
AB E162799 E162800
Page 295 of 470
WARNINGS
Do not attempt to change a tire onthe side of the vehicle close tomoving traffic. Pull far enough off theroad to avoid the danger of being hit whenoperating the jack or changing the wheel.
Always use the jack provided asoriginal equipment with your vehicle.If using a jack other than the oneprovided as original equipment with yourvehicle, make sure the jack capacity isadequate for the vehicle weight, includingany vehicle cargo or modifications.
Note:Passengers should not remain in thevehicle when the vehicle is being jacked.
Park on a level surface, set the parkingbrake and activate the hazard flashers.
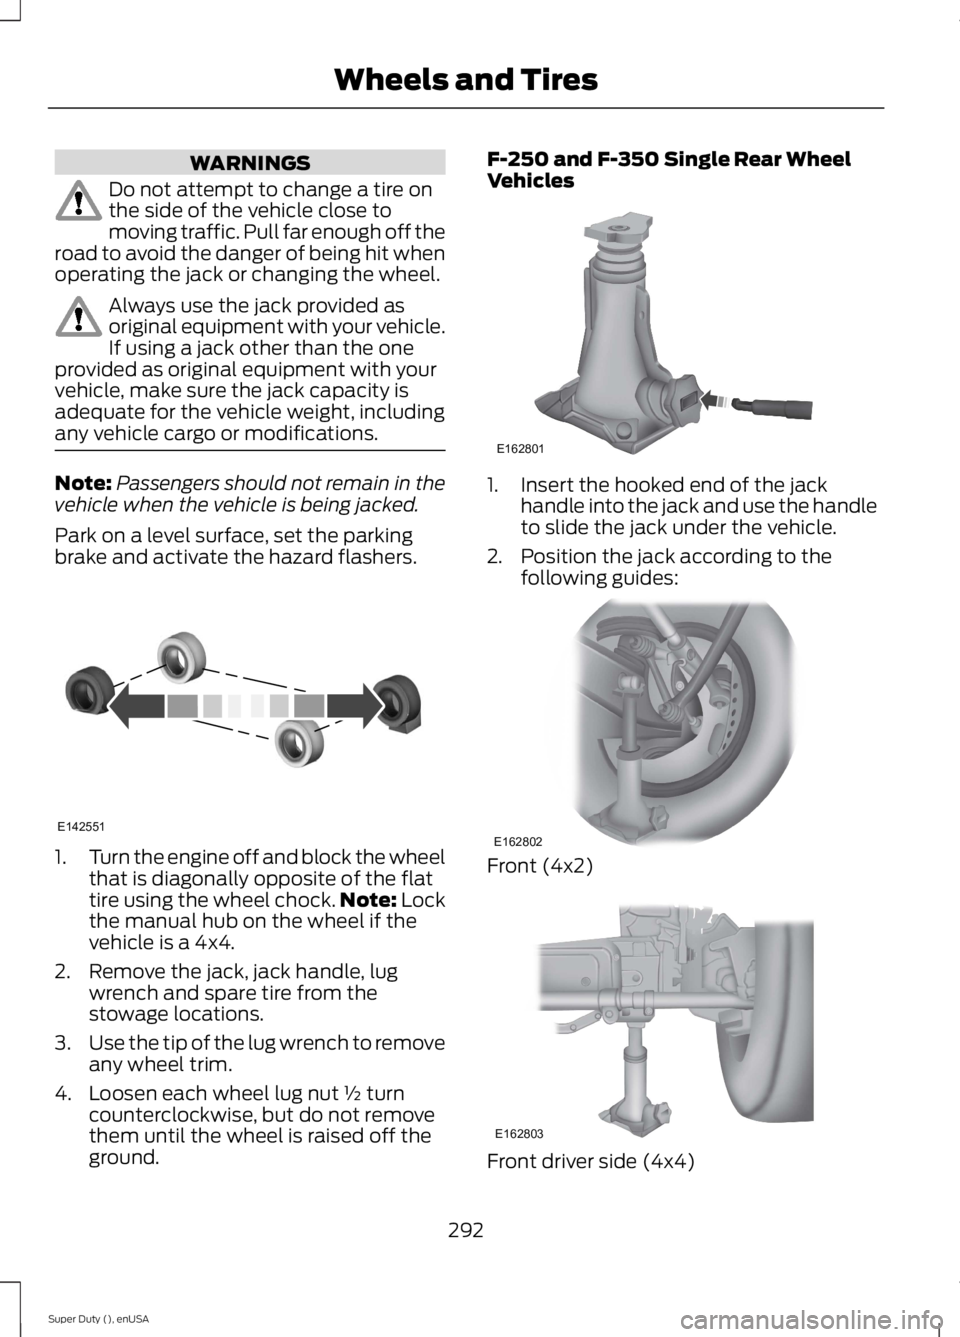
1.Turn the engine off and block the wheelthat is diagonally opposite of the flattire using the wheel chock.Note: Lockthe manual hub on the wheel if thevehicle is a 4x4.
2. Remove the jack, jack handle, lugwrench and spare tire from thestowage locations.
3.Use the tip of the lug wrench to removeany wheel trim.
4. Loosen each wheel lug nut ½ turncounterclockwise, but do not removethem until the wheel is raised off theground.
F-250 and F-350 Single Rear WheelVehicles
1. Insert the hooked end of the jackhandle into the jack and use the handleto slide the jack under the vehicle.
2. Position the jack according to thefollowing guides:
Front (4x2)
Front driver side (4x4)
292
Super Duty (), enUSA
Wheels and TiresE142551 E162801 E162802 E162803
Page 302 of 470
TECHNICAL SPECIFICATIONS
Wheel Lug Nut Torque Specifications
WARNING
When a wheel is installed, always remove any corrosion, dirt or foreign materialspresent on the mounting surfaces of the wheel or the surface of the wheel hub,brake drum or brake disc that contacts the wheel. Make sure that any fastenersthat attach the rotor to the hub are secured so they do not interfere with the mountingsurfaces of the wheel. Installing wheels without correct metal-to-metal contact at thewheel mounting surfaces can cause the wheel nuts to loosen and the wheel to come offwhile the vehicle is in motion, resulting in loss of control.
lb.ft (Nm)Bolt size
165 lb.ft (224 Nm)M14 x 1.5
*Torque specifications are for nut and bolt threads free of dirt and rust. Use only Fordrecommended replacement fasteners.
On vehicles equipped with single rear wheels, retighten the lug nuts to the specified torqueat 100 miles (160 kilometers) after any wheel disturbance (such as tire rotation, changinga flat tire, wheel removal).
On vehicles equipped with dual rear wheels, retighten the wheel lug nuts to the specifiedtorque at 100 miles (160 kilometers), and again at 500 miles (800 kilometers) of newvehicle operation and after any wheel disturbance (such as tire rotation, changing a flattire, wheel removal).
It is important to follow the proper wheel mounting and lug nut torque procedures.
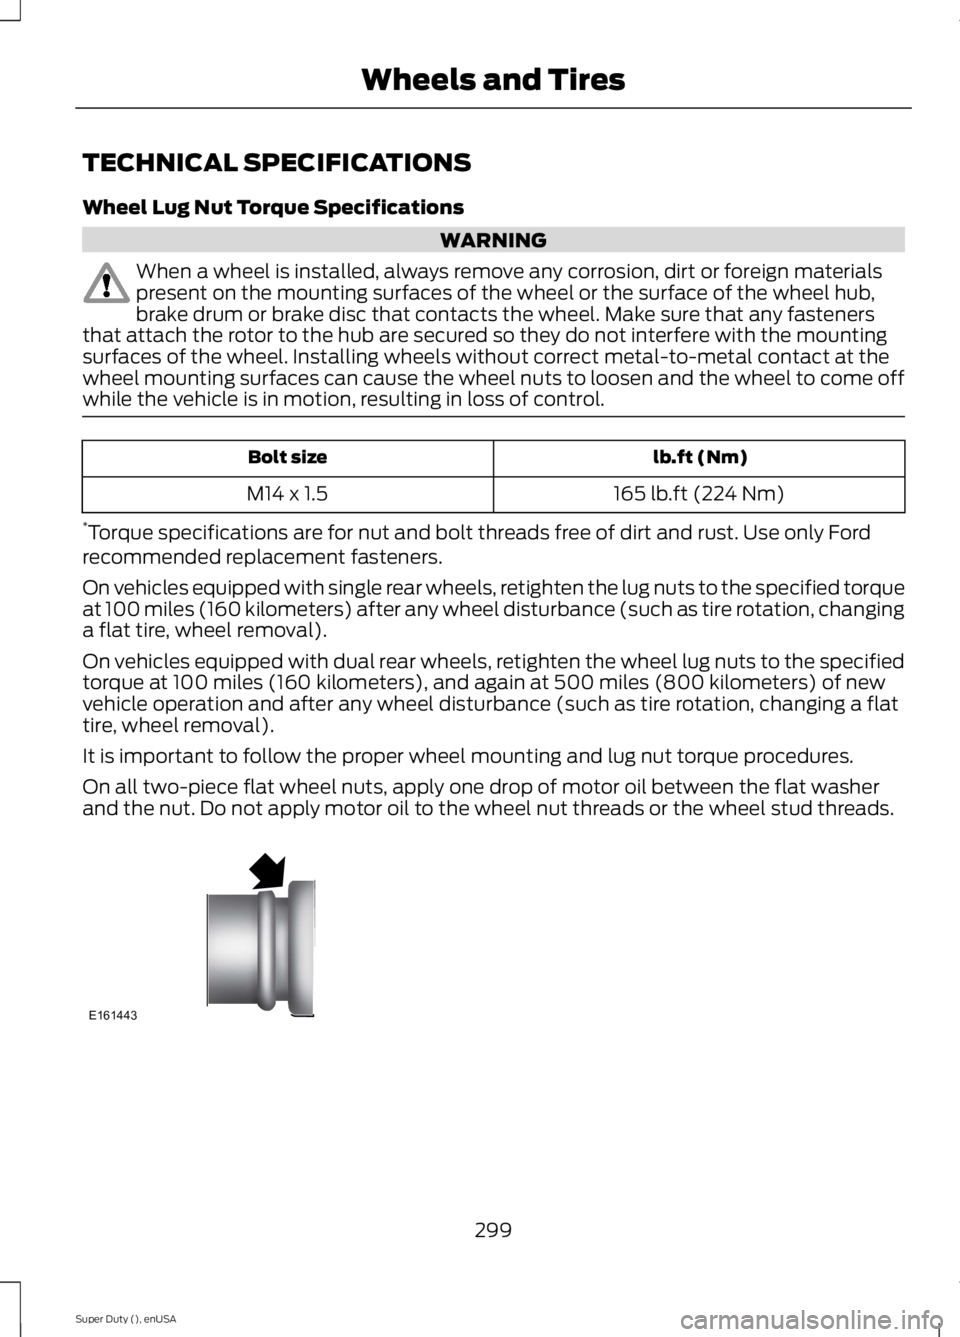
On all two-piece flat wheel nuts, apply one drop of motor oil between the flat washerand the nut. Do not apply motor oil to the wheel nut threads or the wheel stud threads.
299
Super Duty (), enUSA
Wheels and TiresE161443
Page 312 of 470
1Add 8 oz. (236 ml) of Additive Friction Modifier XL-3 or equivalent meeting FordSpecification EST-M2C118–A for complete refill of limited slip Ford axles. Ford designrear axles contain a synthetic lubricant that does not require changing unless you submergethe axle in water.2Ford recommends using Motorcraft (Ford) DOT 3 LV High Performance Motor VehicleBrake Fluid, Motorcraft (Ford) DOT 4 LV High Performance Motor Vehicle Brake Fluid orequivalent meeting WSS-M6C65-A1 or WSS-M6C65-A2. Use of any fluid other than therecommended fluid may cause degraded brake performance and not meet the Fordperformance standards. Keep brake fluid clean and dry. Contamination with dirt, water,petroleum products or other materials may result in brake system damage and possiblefailure.3Add the coolant type originally equipped in your vehicle.4Ford has designed your engine to use Motorcraft engine oils or equivalent oils that meetFord’s specification. It is also acceptable to use an engine oil of recommended viscositygrade that meets API SN requirements and displays the API Certification Mark for gasolineengines.5Do not use oils labeled as API SN unless the label also display the API certification mark.These oils do not meet the requirements of your vehicles engine and emissions system.6Do not use supplemental engine oil additives. They are unnecessary and could lead toengine damage not covered by your Ford warranty.7Use the correct automatic transmission fluid. Transmission fluid requirements areindicated on the dipstick blade or the dipstick handle. Check the container to verify thefluid you are adding is of the correct type. Refer to your scheduled maintenance informationto determine the correct service interval.
Note:Automatic transmissions that require MERCON LV should only use MERCON LV fluid.Use of any fluid other than the recommended fluid may cause transmission damage.8Indicates only approximate dry-fill capacity. Some applications may vary based on coolersize and if equipped with an in-tank cooler. You should set the amount of transmissionfluid and fluid level by the indication on the dipstick’s normal operating range.9Fill to the proper capacity according to dipstick Type A. For correct dipstick type, SeeAutomatic Transmission Fluid Check (page 240).9Fill to the proper capacity according to dipstick Type B. For correct dipstick type, SeeAutomatic Transmission Fluid Check (page 240).10See the Warning below:
WARNING
The air conditioning refrigerant system contains refrigerant R-134a under highpressure. Opening the air conditioning refrigerant system can cause personal injury.Have the air conditioning refrigerant system serviced only by qualified personnel.
309
Super Duty (), enUSA
Capacities and Specifications
Page 314 of 470

•MP3 folder mode represents a folderstructure consisting of one level offolders. The CD player numbers all MP3tracks on the disc (noted by the .mp3file extension) and all folderscontaining MP3 files, from F001(folder) T001 (track) to F253 T255.
•Creating discs with only one level offolders helps with navigation throughthe disc files.
If you are burning your own MP3 discs, it isimportant to understand how the systemreads the structures you create. Whilevarious files may be present, (files withextensions other than mp3), only files withthe .mp3 extension are played; other filesare ignored by the system. This enablesyou to use the same MP3 disc for a varietyof tasks on your work computer, homecomputer and your in-vehicle system.
In track mode, the system displays andplays the structure as if it were only onelevel deep (all .mp3 files play, regardlessof being in a specific folder). In foldermode, the system only plays the .mp3 filesin the current folder.
AUDIO UNIT - VEHICLES WITH:
AM/FM
WARNING
Driving while distracted can result inloss of vehicle control, crash andinjury. We strongly recommend thatyou use extreme caution when using anydevice that may take your focus off theroad. Your primary responsibility is the safeoperation of your vehicle. We recommendagainst the use of any hand-held devicewhile driving and encourage the use ofvoice-operated systems when possible.Make sure you are aware of all applicablelocal laws that may affect the use ofelectronic devices while driving.
311
Super Duty (), enUSA
Audio SystemE163157
Page 315 of 470
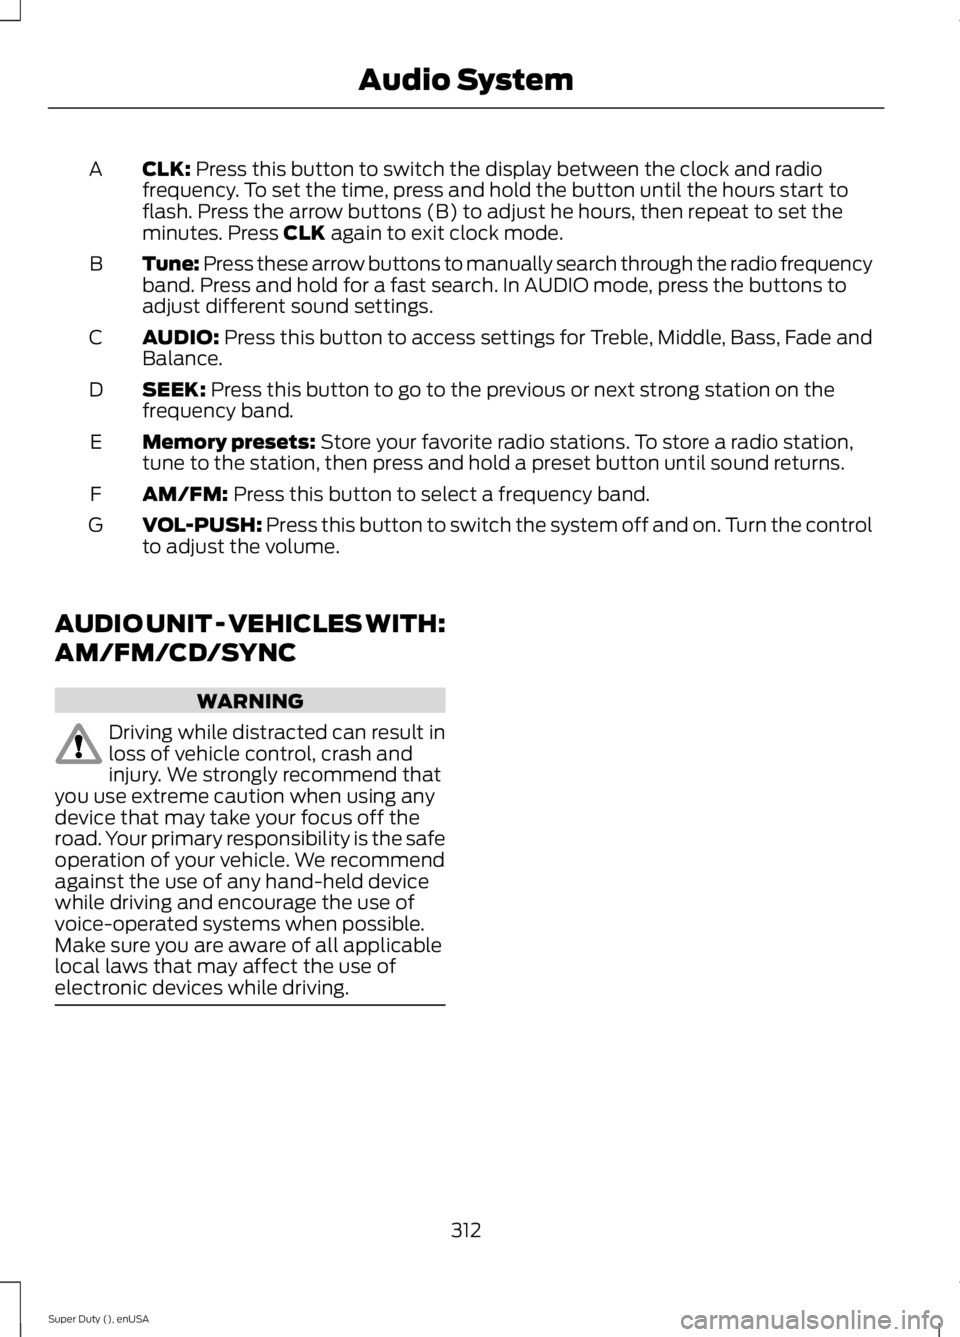
CLK: Press this button to switch the display between the clock and radiofrequency. To set the time, press and hold the button until the hours start toflash. Press the arrow buttons (B) to adjust he hours, then repeat to set theminutes. Press CLK again to exit clock mode.
A
Tune: Press these arrow buttons to manually search through the radio frequencyband. Press and hold for a fast search. In AUDIO mode, press the buttons toadjust different sound settings.
B
AUDIO: Press this button to access settings for Treble, Middle, Bass, Fade andBalance.C
SEEK: Press this button to go to the previous or next strong station on thefrequency band.D
Memory presets: Store your favorite radio stations. To store a radio station,tune to the station, then press and hold a preset button until sound returns.E
AM/FM: Press this button to select a frequency band.F
VOL-PUSH: Press this button to switch the system off and on. Turn the controlto adjust the volume.G
AUDIO UNIT - VEHICLES WITH:
AM/FM/CD/SYNC
WARNING
Driving while distracted can result inloss of vehicle control, crash andinjury. We strongly recommend thatyou use extreme caution when using anydevice that may take your focus off theroad. Your primary responsibility is the safeoperation of your vehicle. We recommendagainst the use of any hand-held devicewhile driving and encourage the use ofvoice-operated systems when possible.Make sure you are aware of all applicablelocal laws that may affect the use ofelectronic devices while driving.
312
Super Duty (), enUSA
Audio System
Page 318 of 470
AUDIO UNIT - VEHICLES WITH:
SONY AM/FM/CD
WARNING
Driving while distracted can result inloss of vehicle control, crash andinjury. We strongly recommend thatyou use extreme caution when using anydevice that may take your focus off theroad. Your primary responsibility is the safeoperation of your vehicle. We recommendagainst the use of any hand-held devicewhile driving and encourage the use ofvoice-operated systems when possible.Make sure you are aware of all applicablelocal laws that may affect the use ofelectronic devices while driving.
Note:The MyFord Touch system controlsmost of the audio features. See MyFordTouch™ (page 359).
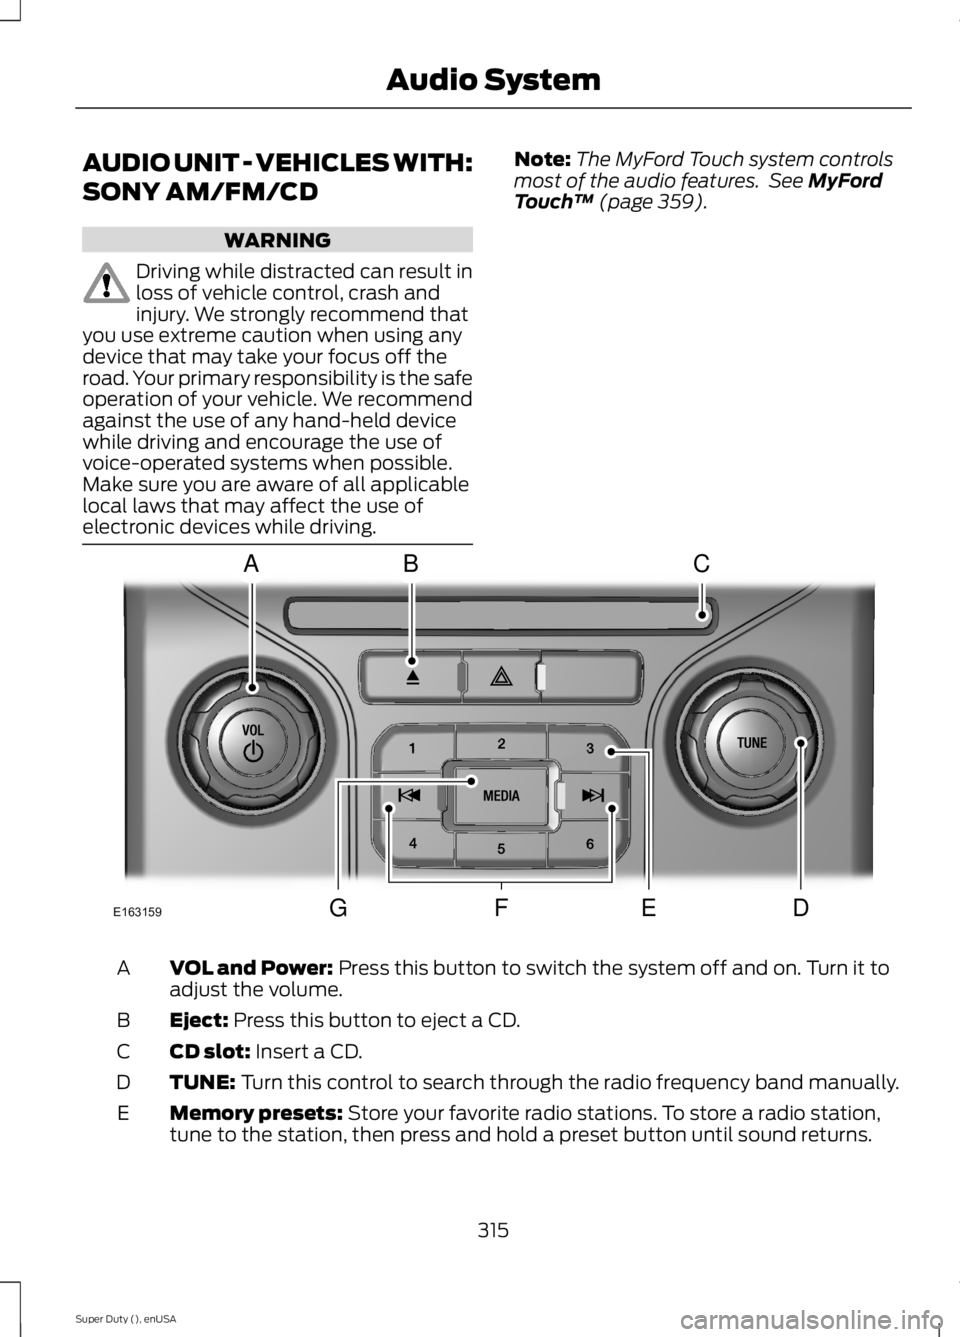
VOL and Power: Press this button to switch the system off and on. Turn it toadjust the volume.A
Eject: Press this button to eject a CD.B
CD slot: Insert a CD.C
TUNE: Turn this control to search through the radio frequency band manually.D
Memory presets: Store your favorite radio stations. To store a radio station,tune to the station, then press and hold a preset button until sound returns.E
315
Super Duty (), enUSA
Audio SystemE163159
ABC
DFEG
Page 324 of 470
AUDIO INPUT JACK
WARNINGS
Driving while distracted can result inloss of vehicle control, crash andinjury. We strongly recommend thatyou use extreme caution when using anydevice that may take your focus off theroad. Your primary responsibility is the safeoperation of your vehicle. We recommendagainst the use of any hand-held devicewhile driving and encourage the use ofvoice-operated systems when possible.Make sure you are aware of all applicablelocal laws that may affect the use ofelectronic devices while driving.
For safety reasons, do not connector adjust the settings on yourportable music player while yourvehicle is moving.
Store the portable music player in asecure location, such as the centerconsole or the glove box, when yourvehicle is moving. Hard objects maybecome projectiles in a collision or suddenstop, which may increase the risk of seriousinjury. The audio extension cable must belong enough to allow the portable musicplayer to be safely stored while yourvehicle is moving.
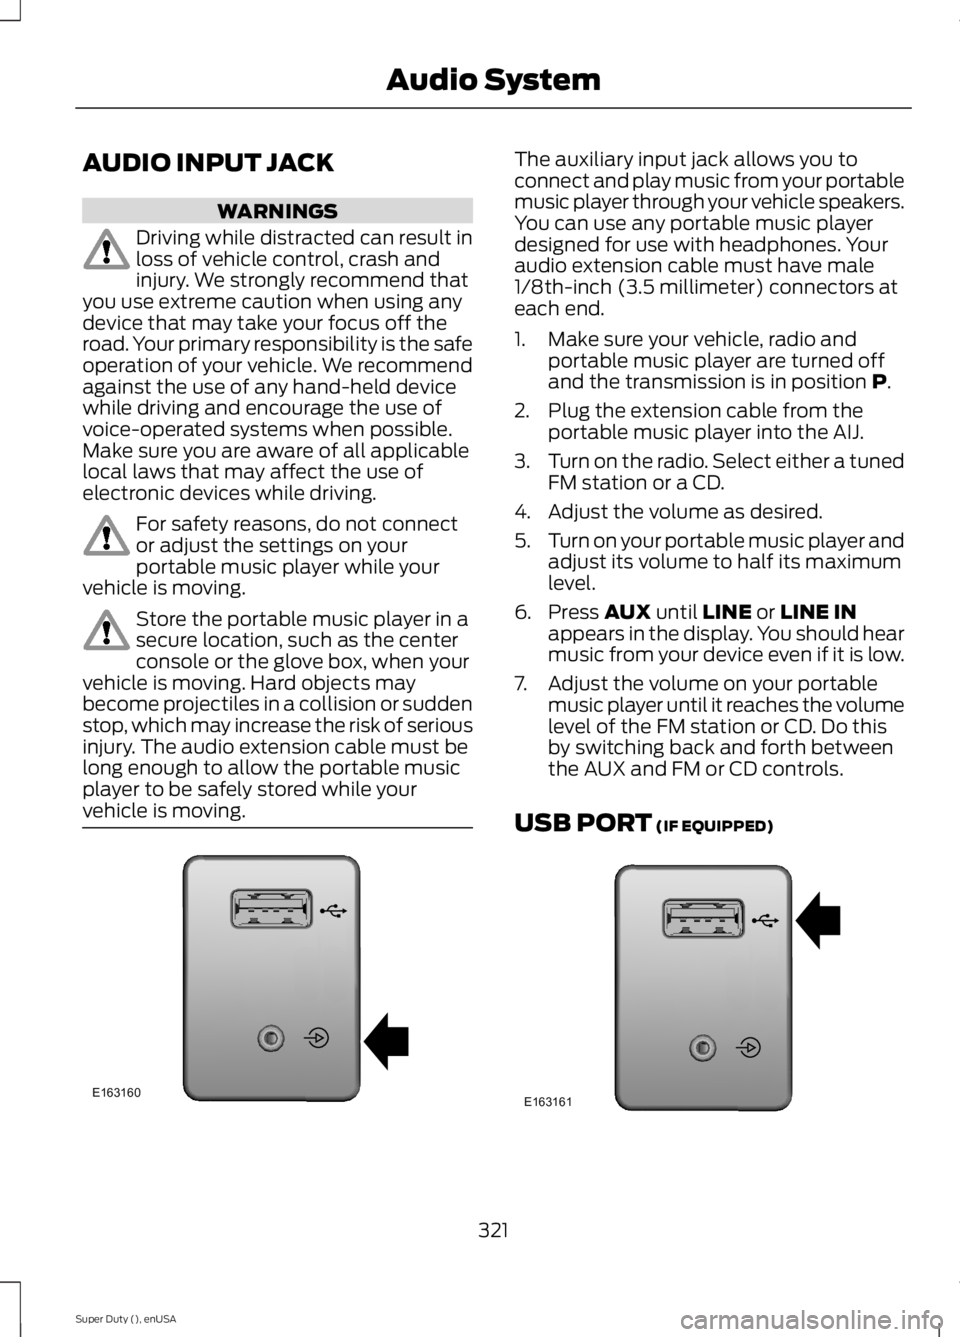
The auxiliary input jack allows you toconnect and play music from your portablemusic player through your vehicle speakers.You can use any portable music playerdesigned for use with headphones. Youraudio extension cable must have male1/8th-inch (3.5 millimeter) connectors ateach end.
1. Make sure your vehicle, radio andportable music player are turned offand the transmission is in position P.
2. Plug the extension cable from theportable music player into the AIJ.
3.Turn on the radio. Select either a tunedFM station or a CD.
4. Adjust the volume as desired.
5.Turn on your portable music player andadjust its volume to half its maximumlevel.
6. Press AUX until LINE or LINE INappears in the display. You should hearmusic from your device even if it is low.
7. Adjust the volume on your portablemusic player until it reaches the volumelevel of the FM station or CD. Do thisby switching back and forth betweenthe AUX and FM or CD controls.
USB PORT (IF EQUIPPED)
321
Super Duty (), enUSA
Audio SystemE163160 E163161