2015 FORD F SERIES MOTORHOME AND COMMERCIAL CHASSIS stop start
[x] Cancel search: stop startPage 4 of 144
Introduction
About This Manual...........................................3
Symbols Glossary.............................................3
California Proposition 65...............................5
Perchlorate..........................................................5
Ford Credit...........................................................5
Replacement PartsRecommendation........................................6
Special Notices.................................................6
Mobile CommunicationsEquipment.......................................................7
Export Unique Options...................................7
Steering Wheel
Adjusting the Steering Wheel......................8
Cruise Control....................................................8
Wipers and Washers
Windshield Wipers...........................................9
Windshield Washers........................................9
Lighting
Lighting Control...............................................10
Instrument Lighting Dimmer......................10
Daytime Running Lamps...............................11
Direction Indicators..........................................11
Instrument Cluster
Gauges.................................................................12
Warning Lamps and Indicators..................13
Audible Warnings and Indicators..............15
Information Displays
General Information.......................................16
Information Messages...................................17
Starting and Stopping theEngine
General Information......................................20
Ignition Switch................................................20
Starting a Gasoline Engine.........................20
Fuel and Refueling
Safety Precautions.........................................22
Fuel Quality......................................................23
Running Out of Fuel......................................23
Refueling...........................................................24
Fuel Consumption.........................................25
Emission Control System............................26
Transmission
Automatic Transmission.............................29
Brakes
General Information......................................33
Hints on Driving With Anti-LockBrakes.............................................................33
Parking Brake...................................................34
Cruise Control
Principle of Operation..................................35
Using Cruise Control.....................................35
Load Carrying
Load Limit.........................................................36
Towing
Towing a Trailer...............................................42
Recommended Towing Weights..............43
Essential Towing Checks............................44
Transporting the Vehicle..............................47
Towing the Vehicle on Four Wheels.......48
Driving Hints
Breaking-In.......................................................49
Economical Driving.......................................49
Driving Through Water.................................50
Roadside Emergencies
Roadside Assistance......................................51
1Motorhome (), enUSATable of Contents
Page 16 of 144
Yellow area
The transmission fluid is higher thannormal operating temperature. This canbe caused by special operation conditions(i.e. snowplowing, towing or off-road use).Operating the transmission for extendedperiods of time with the gauge in theyellow area may cause internaltransmission damage. Altering the severityof the driving conditions is recommendedto lower the transmission temperature intothe normal range.
Red area
The transmission fluid is overheating. Stopthe vehicle to allow the temperature toreturn to normal range.
If the gauge is operating in the yellow orred area, stop the vehicle and verify theairflow is not restricted such as snow ordebris blocking airflow through the grill. Ifthe gauge continues to show hightemperatures, see your authorized dealer.
Engine Coolant TemperatureGauge
WARNING
Never remove the coolant reservoircap while the engine is running or hot.
At normal operating temperature, theneedle will remain in the center section.
Note:Do not restart the engine until thecause of overheating has been resolved.
If the needle enters the red section, theengine is overheating. Stop the engine,switch the ignition off and determine thecause once the engine has cooled down.
Fuel Gauge
Switch the ignition on. The fuel gauge willindicate approximately how much fuel isleft in the fuel tank. The fuel gauge mayvary slightly when your vehicle is movingor on a gradient. The arrow adjacent to thefuel pump symbol indicates on which sideof the vehicle the fuel filler door is located.
WARNING LAMPS AND
INDICATORS
The following warning lamps andindicators will alert you to a vehiclecondition that may become serious. Somelamps will illuminate when you start yourvehicle to make sure they work. If anylamps remain on after starting your vehicle,refer to the respective system warninglamp for further information.
Note:Some warning indicators appear inthe information display and function thesame as a warning lamp but do not displaywhen you start your vehicle.
Anti-Lock Braking System
If it illuminates when you aredriving, this indicates amalfunction. You will continueto have the normal braking system(without ABS) unless the brake systemwarning lamp is also illuminated. Have thesystem checked by your authorized dealer.
Battery
If it illuminates while driving, itindicates a malfunction. Switchoff all unnecessary electricalequipment and have the system checkedby your authorized dealer immediately.
13Motorhome (), enUSAInstrument Cluster
Page 17 of 144
Brake System
Illuminates when you engage theparking brake with the ignitionon.
If it illuminates when you are driving, checkthat the parking brake is not engaged. Ifthe parking brake is not engaged, thisindicates low brake fluid level or a brakesystem malfunction. Have the systemchecked immediately by your authorizeddealer.
WARNING
Driving your vehicle with the warninglamp on is dangerous. A significantdecrease in braking performancemay occur. It will take you longer to stopyour vehicle. Have your vehicle checked byyour authorized dealer immediately. Drivingextended distances with the parking brakeengaged can cause brake failure and therisk of personal injury.
Brake Reserve System (If Equipped)
Illuminates to indicate normalhydromax booster reservesystem activation when theengine is off and the service brake pedal isapplied.
This light may also illuminate momentarilyif the engine is running and the driver turnsthe steering wheel fully in one directionwhile braking.
If the light remains on while the engine isrunning, this indicates inadequate hydraulicbooster pressure or reserve pump systemfailure. Stop the vehicle as soon aspossible and seek service immediately byyour authorized dealer.
Cruise Control (If Equipped)
Illuminates when you switch thisfeature on. See Using CruiseControl (page 35).
Direction Indicator
Illuminates when the left or rightturn signal or the hazard warningflasher is turned on. If theindicators stay on or flash faster, check fora burned out bulb.
Electronic Throttle Control
Illuminates when the engine hasdefaulted to a limp-homeoperation. See your authorizeddealer as soon as possible.
Fasten Safety Belt
It will illuminate and a chime willsound to remind you to fastenyour safety belt.
High Beam
Illuminates when you switch thehigh beam headlamps on. It willflash when you use theheadlamp flasher.
Service Engine Soon
If the service engine soonindicator light stays illuminatedafter the engine is started, itindicates that the On-Board Diagnostics(OBD-II) system has detected amalfunction of the vehicle emissionscontrol system. Refer to On-BoardDiagnostics (OBD-II) in the Fuel andRefueling chapter for more informationabout having your vehicle serviced. SeeEmission Control System (page 26).
14Motorhome (), enUSAInstrument ClusterE144522 E146190 E71340
Page 23 of 144
GENERAL INFORMATION
WARNINGS
Extended idling at high enginespeeds can produce very hightemperatures in the engine andexhaust system, creating the risk of fire orother damage.
Do not park, idle or drive your vehicleon dry grass or other dry groundcover. The emission system heats upthe engine compartment and exhaustsystem, creating the risk of fire.
Do not start the engine in a closedgarage or in other enclosed areas.Exhaust fumes can be toxic. Alwaysopen the garage door before you start theengine.
If you smell exhaust fumes insideyour vehicle, have your vehiclechecked by an authorized dealerimmediately. Do not drive your vehicle ifyou smell exhaust fumes.
If you disconnect the battery, your vehiclemay exhibit some unusual drivingcharacteristics for approximately 5 miles(8 kilometers) after you reconnect it. Thisis because the engine management systemmust realign itself with the engine. You candisregard any unusual drivingcharacteristics during this period.
The powertrain control system meets allCanadian interference-causing equipmentstandard requirements regulating theimpulse electrical field or radio noise.
When you start the engine, avoid pressingthe accelerator pedal before and duringoperation. Only use the accelerator pedalwhen you have difficulty starting theengine.
IGNITION SWITCH
A (accessory) - Allows the electricalaccessories, such as the radio, to operatewhile the engine is not running.
Note:Do not leave the ignition key in thisposition for too long. This could cause yourvehicle battery to lose charge.
B (lock) - Locks the gearshift lever andallows key removal.
C (off) - The ignition is off.
Note:When you switch the ignition off andleave your vehicle, do not leave your key inthe ignition. This could cause your vehiclebattery to lose charge.
D (on) - All electrical circuits areoperational and the warning lamps andindicators illuminate.
E (start) - Cranks the engine.
STARTING A GASOLINE
ENGINE
When you start the engine, the idle speedincreases, this helps to warm up theengine. If the engine idle speed does notslow down automatically, have yourvehicle checked by an authorized dealer.
20Motorhome (), enUSAStarting and Stopping the EngineE161572DECBA
Page 24 of 144
Before starting the engine check thefollowing:
•Make sure all occupants have fastenedtheir safety belts.
•Make sure the headlamps andelectrical accessories are off.
•Make sure the parking brake is on.
•Move the transmission selector leverto position P.
•Turn the ignition key to the on position.
Note:Do not touch the accelerator pedal.
1.Fully press the brake pedal.
2.Turn the key to the start position tostart the engine. Release the key whenthe engine starts.
Note:The engine may continue crankingfor up to 15 seconds or until it starts.
Note:If you cannot start the engine on thefirst try, wait for a short period and try again.
Failure to Start
If you cannot start the engine after threeattempts, wait 10 seconds and follow thisprocedure:
1.Fully press the brake pedal.
2.Fully press the accelerator pedal andhold it there.
3.Start the engine.
Stopping the Engine When YourVehicle is Stationary
1.Move the transmission selector leverto position P.
2.Turn the key to the off position.
3.Apply the parking brake.
Stopping the Engine When YourVehicle is Moving
WARNING
Switching off the engine when thevehicle is still moving will result in aloss of brake and steering assistance.The steering will not lock, but higher effortwill be required. When the ignition isswitched off, some electrical circuits,including air bags, warning lamps andindicators may also be off. If the ignitionwas turned off accidentally, you can shiftinto neutral (N) and re-start the engine.
1.Move the transmission selector leverto position N and use the brakes tobring your vehicle to a safe stop.
2.When your vehicle has stopped, movethe transmission selector lever toposition P and turn the key to the offposition.
3.Apply the parking brake.
Guarding Against Exhaust Fumes
WARNING
If you smell exhaust fumes insideyour vehicle, have your vehiclechecked by your authorized dealerimmediately. Do not drive your vehicle ifyou smell exhaust fumes. Carbonmonoxide is present in exhaust fumes.Take precautions to avoid its dangerouseffects.
Important Ventilating Information
If you stop your vehicle and the leave theengine idling for long periods of time, werecommend that you do one of thefollowing:
•Open the windows at least 1 inch (2.5centimeters)
•Set your climate control to outside air.
21Motorhome (), enUSAStarting and Stopping the Engine
Page 31 of 144
If the service engine soonindicator is on or the bulb doesnot work, you may need to havethe vehicle serviced. See On-BoardDiagnostics (OBD-II).
Your vehicle may not pass the I/M test ifthe service engine soon indicator is on ornot working properly (bulb is burned out),or if the OBD-II system has determinedthat some of the emission control systemshave not been properly checked. In thiscase, your vehicle is not ready for I/Mtesting.
If the vehicle’s engine or transmission hasjust been serviced, or the battery hasrecently run down or been replaced, theOBD-II system may indicate that thevehicle is not ready for I/M testing. Todetermine if the vehicle is ready for I/Mtesting, turn the ignition key to the onposition for 15 seconds without crankingthe engine. If the service engine soonindicator blinks eight times, it means thatthe vehicle is not ready for I/M testing; ifthe service engine soon indicator stays onsolid, it means that the vehicle is ready forI/M testing.
The OBD-II system monitors the emissioncontrol system during normal driving. Acomplete check may take several days. Ifthe vehicle is not ready for I/M testing, youmay need to perform the following drivingcycle consisting of mixed city and highwaydriving:
Drive on an expressway or highway for asteady 15 minutes, followed by 20 minutesof stop-and-go driving with at least four30-second idle periods.
Allow the vehicle to sit for at least eighthours without starting the engine. Then,start the engine and complete the abovedriving cycle. The engine must warm up toits normal operating temperature. Oncestarted, do not turn off the engine until theabove driving cycle is complete. If thevehicle is still not ready for I/M testing, youwill have to repeat the above driving cycle.
28Motorhome (), enUSAFuel and Refueling
Page 32 of 144
AUTOMATIC TRANSMISSION
WARNINGS
Always set the parking brake fullyand make sure the gearshift islatched in P (Park). Turn the ignitionto the off position and remove the keywhenever you leave your vehicle.
Do not apply the brake pedal andaccelerator pedal simultaneously.Applying both pedals simultaneouslyfor more than three seconds will limitengine rpm, which may result in difficultymaintaining speed in traffic and could leadto serious injury.
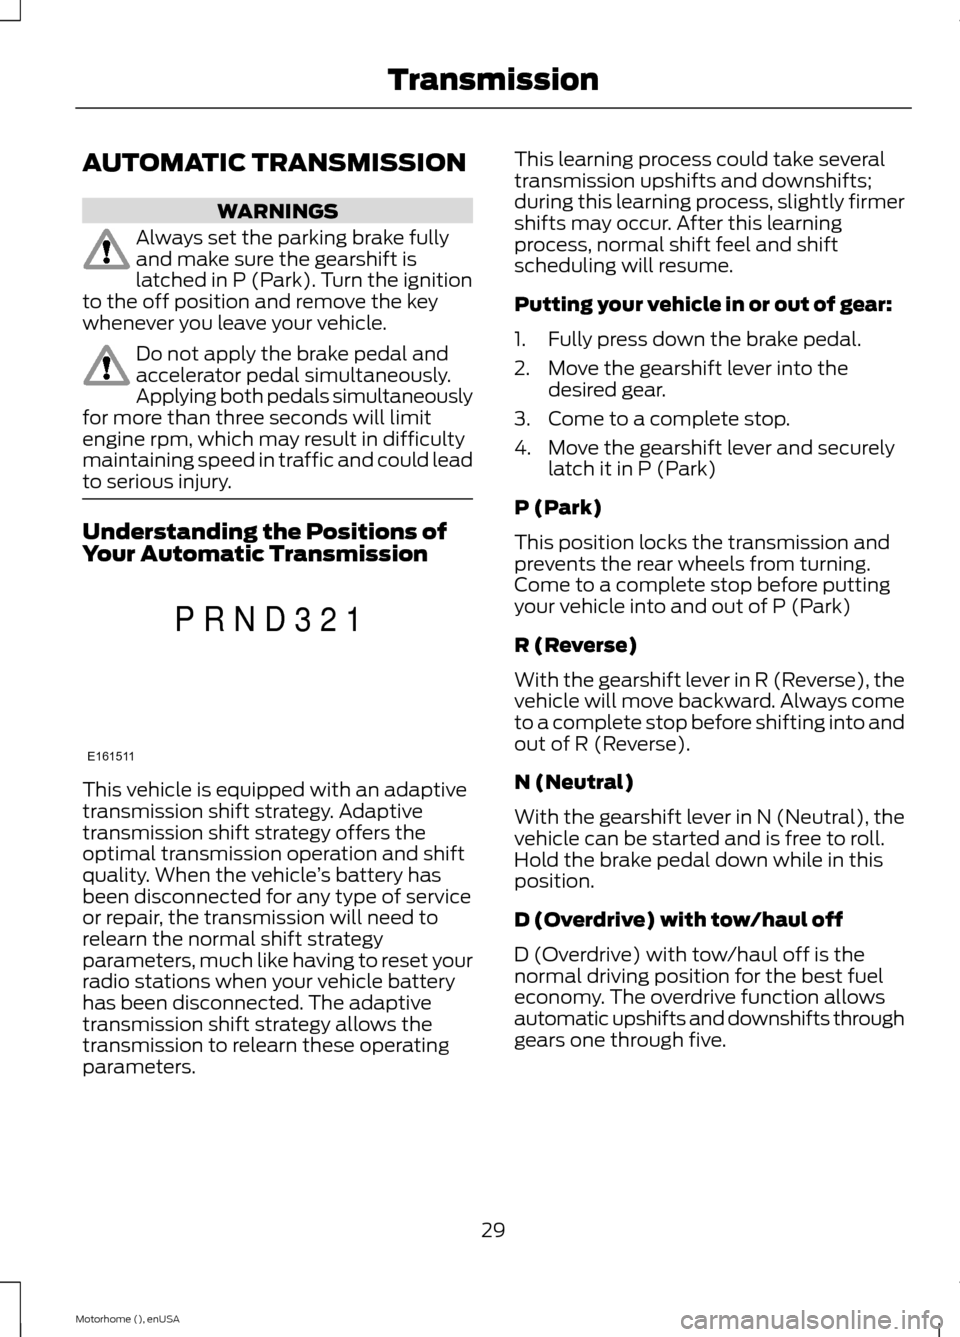
Understanding the Positions ofYour Automatic Transmission
This vehicle is equipped with an adaptivetransmission shift strategy. Adaptivetransmission shift strategy offers theoptimal transmission operation and shiftquality. When the vehicle’s battery hasbeen disconnected for any type of serviceor repair, the transmission will need torelearn the normal shift strategyparameters, much like having to reset yourradio stations when your vehicle batteryhas been disconnected. The adaptivetransmission shift strategy allows thetransmission to relearn these operatingparameters.
This learning process could take severaltransmission upshifts and downshifts;during this learning process, slightly firmershifts may occur. After this learningprocess, normal shift feel and shiftscheduling will resume.
Putting your vehicle in or out of gear:
1.Fully press down the brake pedal.
2.Move the gearshift lever into thedesired gear.
3.Come to a complete stop.
4.Move the gearshift lever and securelylatch it in P (Park)
P (Park)
This position locks the transmission andprevents the rear wheels from turning.Come to a complete stop before puttingyour vehicle into and out of P (Park)
R (Reverse)
With the gearshift lever in R (Reverse), thevehicle will move backward. Always cometo a complete stop before shifting into andout of R (Reverse).
N (Neutral)
With the gearshift lever in N (Neutral), thevehicle can be started and is free to roll.Hold the brake pedal down while in thisposition.
D (Overdrive) with tow/haul off
D (Overdrive) with tow/haul off is thenormal driving position for the best fueleconomy. The overdrive function allowsautomatic upshifts and downshifts throughgears one through five.
29Motorhome (), enUSATransmissionE161511PRND321
Page 49 of 144
Before Towing a Trailer
Practice turning, stopping andbacking up to get the feel of yourvehicle-trailer combination beforestarting on a trip. When turning,make wider turns so the trailerwheels clear curbs and otherobstacles.
When Towing a Trailer
•Do not drive faster than70 mph (113 km/h) during thefirst 500 mi (800 km).
•Do not make full-throttlestarts.
•Check your hitch, electricalconnections and trailer wheellug nuts thoroughly after youhave traveled 50 mi (80 km).
•When stopped in congested orheavy traffic during hotweather, place the gearshift inpark (P) to aid engine andtransmission cooling and tohelp air conditioningperformance.
•Switch off the speed controlwith heavy loads or in hillyterrain. The speed control mayturn off automatically whenyou are towing on long, steep
grades.
•Shift to a lower gear whendriving down a long or steephill. Do not apply the brakescontinuously, as they mayoverheat and become lesseffective.
•If your transmission is equippedwith a Grade Assist orTow/Haul feature, use thisfeature when towing. Thisprovides engine braking andhelps eliminate excessivetransmission shifting foroptimum fuel economy andtransmission cooling.
•Allow more distance forstopping with a trailerattached. Anticipate stops andbrake gradually.
•Avoid parking on a grade.However, if you must park on agrade:
1.Turn the steering wheel topoint your vehicle tires awayfrom traffic flow.
2.Set your vehicle parking brake.
3.Place the automatictransmission in park (P).
4.Place wheel chocks in the frontand back of the trailer wheels.(Chocks not included withvehicle.)
Launching or Retrieving a Boator Personal Watercraft (PWC)
Note:Disconnect the wiring to thetrailer before backing the trailerinto the water.
Note:Reconnect the wiring to thetrailer after removing the trailerfrom the water.
46Motorhome (), enUSATowing