2015 FORD F SERIES MOTORHOME AND COMMERCIAL CHASSIS warning
[x] Cancel search: warningPage 47 of 144
ESSENTIAL TOWING CHECKS
Follow these guidelines for safetowing:
•Do not tow a trailer until youdrive your vehicle at least1000 mi (1,600 km).
•Consult your local motorvehicle laws for towing a trailer.
•See the instructions includedwith towing accessories for theproper installation andadjustment specifications.
•Service your vehicle morefrequently if you tow a trailer.See your scheduledmaintenance information.
•If you use a rental trailer, followthe instructions the rentalagency gives you.
Another chapter of this manualcontains load specification termsfound on the tire label and SafetyCompliance label and instructionson calculating your vehicle's load.See Load Limit (page 36).
Remember to account for thetrailer tongue weight as part ofyour vehicle load when calculatingthe total vehicle weight.
Hitches
Do not use a hitch that eitherclamps onto the bumper orattaches to the axle.
Distribute the trailer load so10-15% of the total trailer weight
is on the tongue.
Weight-Distributing Hitches
WARNING
Do not adjust aweight-distributing hitch toany position where the rearbumper of the vehicle is higherthan it was before attaching thetrailer. Doing so will defeat thefunction of the weight-distributinghitch, which may causeunpredictable handling, and couldresult in serious personal injury.
When hooking-up a trailer using aweight-distributing hitch, alwaysuse the following procedure:
1.Park the loaded vehicle,without the trailer, on a levelsurface.
2.Measure the height to the topof your vehicle’s front wheelopening on the fender. This isH1.
3.Securely attach the loadedtrailer to your vehicle withoutthe weight-distributing barsconnected.
4.Measure the height to the topof your vehicle’s front wheelopening on the fender a secondtime. This is H2.
5.Install and adjust the tensionin the weight-distributing barsso that the height of yourvehicle’s front wheel openingon the fender is approximately
halfway between H1 and H2.
44Motorhome (), enUSATowing
Page 48 of 144
6.Check that the trailer is level orslightly nose down toward yourvehicle. If not, adjust the ballheight accordingly and repeatSteps 1-6.
7.Lock the bar tension adjusterin place.
8.Check that the trailer tonguesecurely attaches and locksonto the hitch.
9.Install safety chains, lightingand trailer brake controls asrequired by law or the trailermanufacturer.
Safety Chains
Note:Never attach safety chainsto the bumper.
Always connect the safety chains
to the hook retainers of yourvehicle hitch.
To connect the safety chains,cross them under the trailertongue and allow enough slack forturning tight corners. Do not allowthe chains to drag on the ground.
Trailer Brakes
WARNING
Do not connect a trailer'shydraulic brake systemdirectly to your vehicle's brakesystem. Your vehicle may not haveenough braking power and yourchances of having a collisiongreatly increase.
Electric brakes and manual,automatic or surge-type trailerbrakes are safe if you install themproperly and adjust them to themanufacturer's specifications. Thetrailer brakes must meet local andfederal regulations.
The rating for the tow vehicle'sbraking system operation is atthe gross vehicle weight rating,not the gross combined weightrating.
Separate functioning brakesystems are required for safecontrol of towed vehicles andtrailers weighing more than1500 pounds (680 kilograms)when loaded.
Trailer Lamps
WARNING
Never connect any trailerlamp wiring to the vehicle'stail lamp wiring; this may damagethe electrical system resulting infire. Contact your authorizeddealer as soon as possible forassistance in proper trailer towwiring installation. Additionalelectrical equipment may berequired.
Trailer lamps are required on mosttowed vehicles. Make sure allrunning lights, brake lights,direction indicators and hazardlights are working.
45Motorhome (), enUSATowing
Page 53 of 144
•Transmissions give their best fueleconomy when operated in the topcruise gear and with steady pressureon the gas pedal.
•Four-wheel-drive operation (ifequipped) is less fuel efficient thantwo-wheel-drive operation.
•Close the windows for high-speeddriving.
DRIVING THROUGH WATER
WARNING
Do not drive through flowing or deepwater as you may lose control of yourvehicle.
Note:Driving through standing water cancause vehicle damage.
Note:Engine damage can occur if waterenters the air filter.
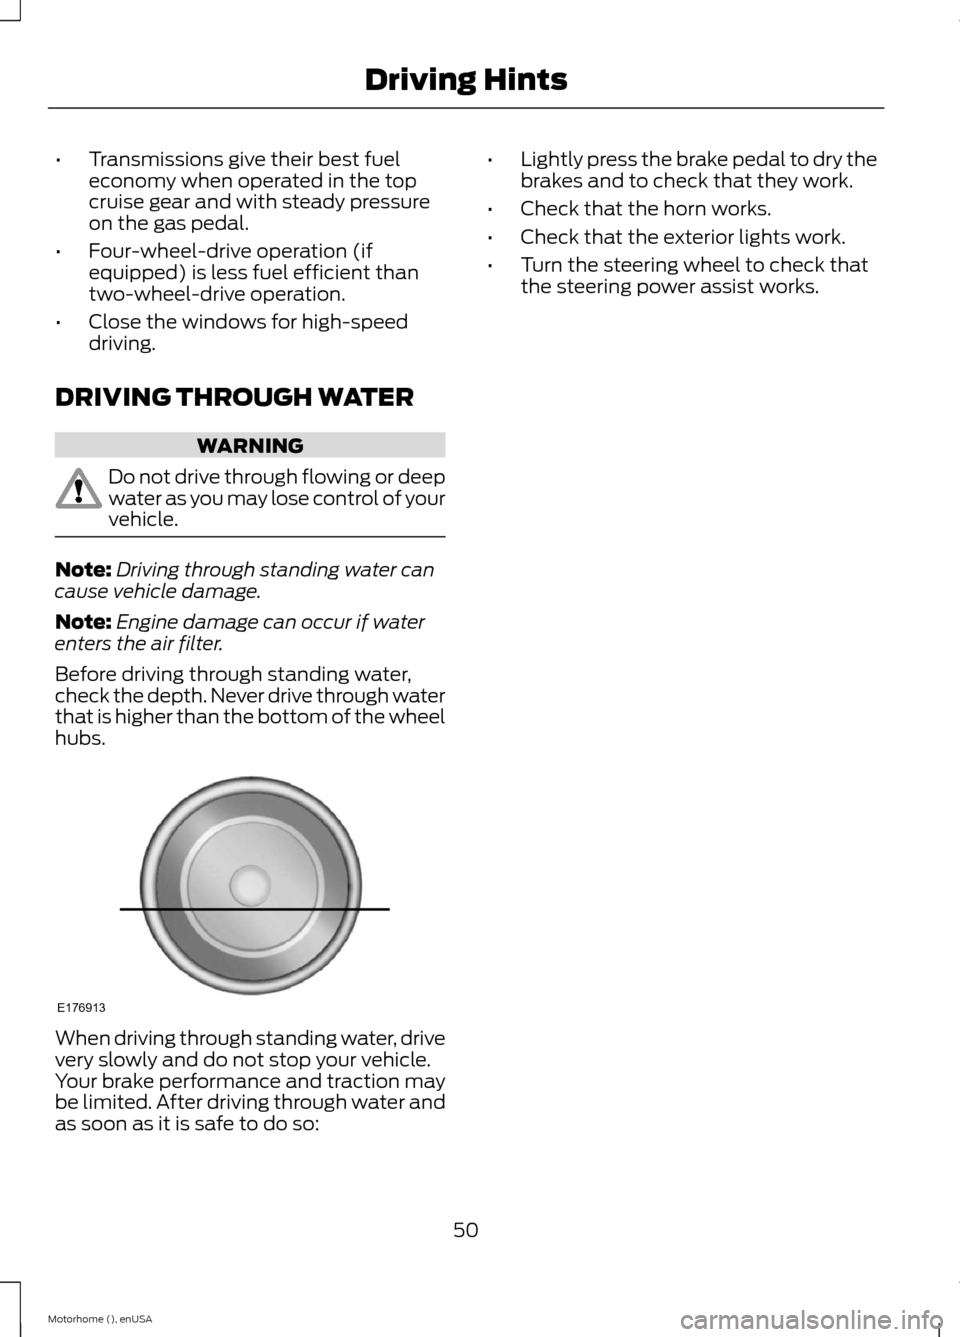
Before driving through standing water,check the depth. Never drive through waterthat is higher than the bottom of the wheelhubs.
When driving through standing water, drivevery slowly and do not stop your vehicle.Your brake performance and traction maybe limited. After driving through water andas soon as it is safe to do so:
•Lightly press the brake pedal to dry thebrakes and to check that they work.
•Check that the horn works.
•Check that the exterior lights work.
•Turn the steering wheel to check thatthe steering power assist works.
50Motorhome (), enUSADriving HintsE176913
Page 55 of 144
Canadian roadside coverage and benefitsmay differ from the U.S. coverage. If yourequire more information, please refer tothe coverage section of your warrantyguide, call us in Canada at1-800-665-2006, or visit our website atwww.ford.ca.
Sykes Assistance Services Corporationadministers the Roadside Assistanceprogram. You must receive coveredservices in Canada or the continentalUnited States. Coverage extends tovehicles that use public, non-seasonal,annually traveled roadways. RoadsideAssistance coverage does not extend tovehicles involved in cross-country driving,logging, autocross and any other form ofoff-road use. Well maintained roads andsurfaces help ensure safe travel for thesupplier, and allow their representativesto perform service as per the standardoperating procedures.
In Remote Locations
If our supplier cannot take your vehicle byroad to the nearest authorized dealership,transportation by rail or water may benecessary. The program covers a tow tothe dock or rail terminal and also to thedealership at the end of the trip.
For rail or water transportation, however,contact your authorized dealer to confirmif you are eligible for additional coveragebefore you authorize or pay for the service.
Call the Ford Roadside Assistance at1-800-665-2006 for additionalinformation.
HAZARD WARNING FLASHERS
Note:The hazard warning flashers willoperate when the ignition is in any positionor if the key is not in the ignition. If usedwhen the engine is not running, the batterywill lose charge. As a result, there may beinsufficient power to restart your engine.
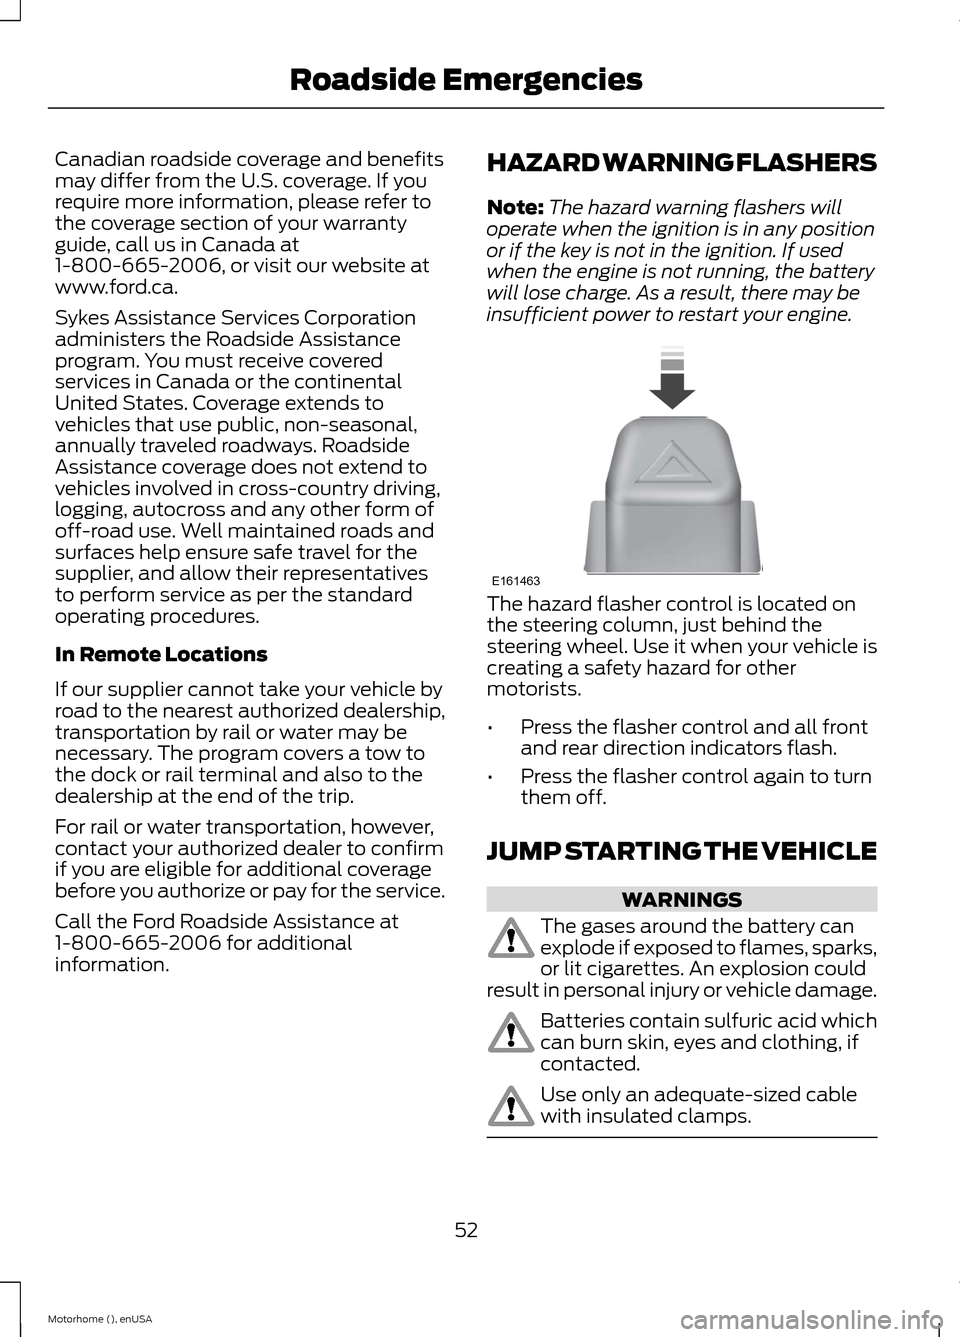
The hazard flasher control is located onthe steering column, just behind thesteering wheel. Use it when your vehicle iscreating a safety hazard for othermotorists.
•Press the flasher control and all frontand rear direction indicators flash.
•Press the flasher control again to turnthem off.
JUMP STARTING THE VEHICLE
WARNINGS
The gases around the battery canexplode if exposed to flames, sparks,or lit cigarettes. An explosion couldresult in personal injury or vehicle damage.
Batteries contain sulfuric acid whichcan burn skin, eyes and clothing, ifcontacted.
Use only an adequate-sized cablewith insulated clamps.
52Motorhome (), enUSARoadside EmergenciesE161463
Page 56 of 144
Preparing Your Vehicle
Note:Do not attempt to push-start yourautomatic transmission vehicle. Automatictransmissions do not have push-startcapability. Attempting to push-start avehicle with an automatic transmission maycause transmission damage.
Note:Use only a 12-volt supply to start yourvehicle.
Note:Do not disconnect the battery of thedisabled vehicle as this could damage thevehicle's electrical system.
Park the booster vehicle close to the hoodof the disabled vehicle, making sure thetwo vehicles do not touch. Turn allaccessories off.
Connecting the Jumper Cables
WARNING
Do not attach the cables to fuel lines,engine rocker covers, the intakemanifold or electrical componentsas grounding points. Stay clear of movingparts. To avoid reverse polarityconnections, make sure that you correctlyidentify the positive (+) and negative (-)terminals on both the disabled and boostervehicles before connecting the cables.
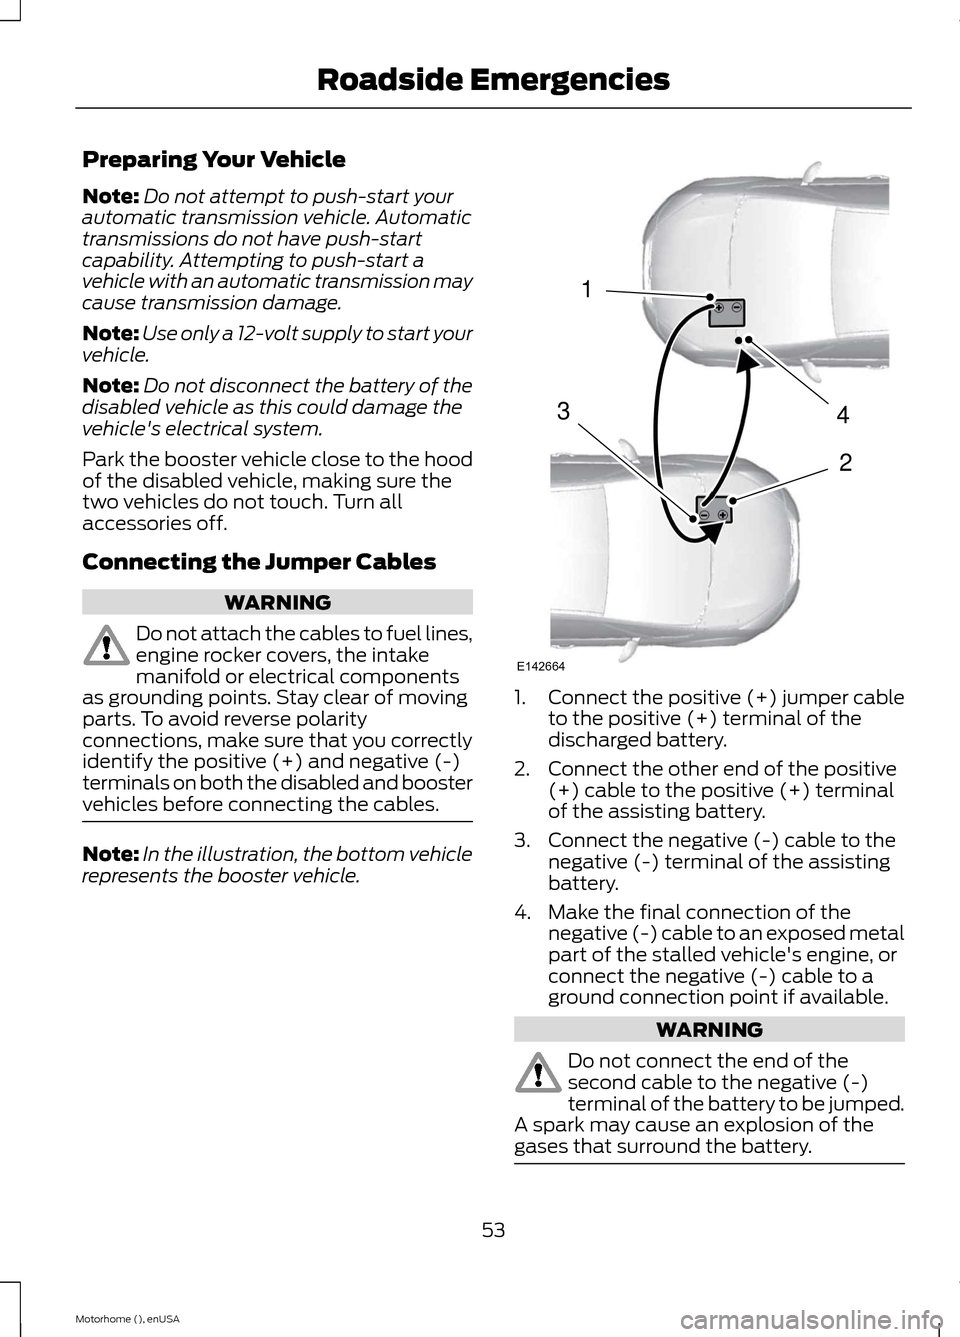
Note:In the illustration, the bottom vehiclerepresents the booster vehicle.
1.Connect the positive (+) jumper cableto the positive (+) terminal of thedischarged battery.
2.Connect the other end of the positive(+) cable to the positive (+) terminalof the assisting battery.
3.Connect the negative (-) cable to thenegative (-) terminal of the assistingbattery.
4.Make the final connection of thenegative (-) cable to an exposed metalpart of the stalled vehicle's engine, orconnect the negative (-) cable to aground connection point if available.
WARNING
Do not connect the end of thesecond cable to the negative (-)terminal of the battery to be jumped.A spark may cause an explosion of thegases that surround the battery.
53Motorhome (), enUSARoadside Emergencies4213E142664
Page 64 of 144
FUSE SPECIFICATION CHART
Power Distribution Box
WARNINGS
Always disconnect the battery beforeservicing high current fuses.
To reduce risk of electrical shock,always replace the cover to thepower distribution box beforereconnecting the battery or refilling fluidreservoirs.
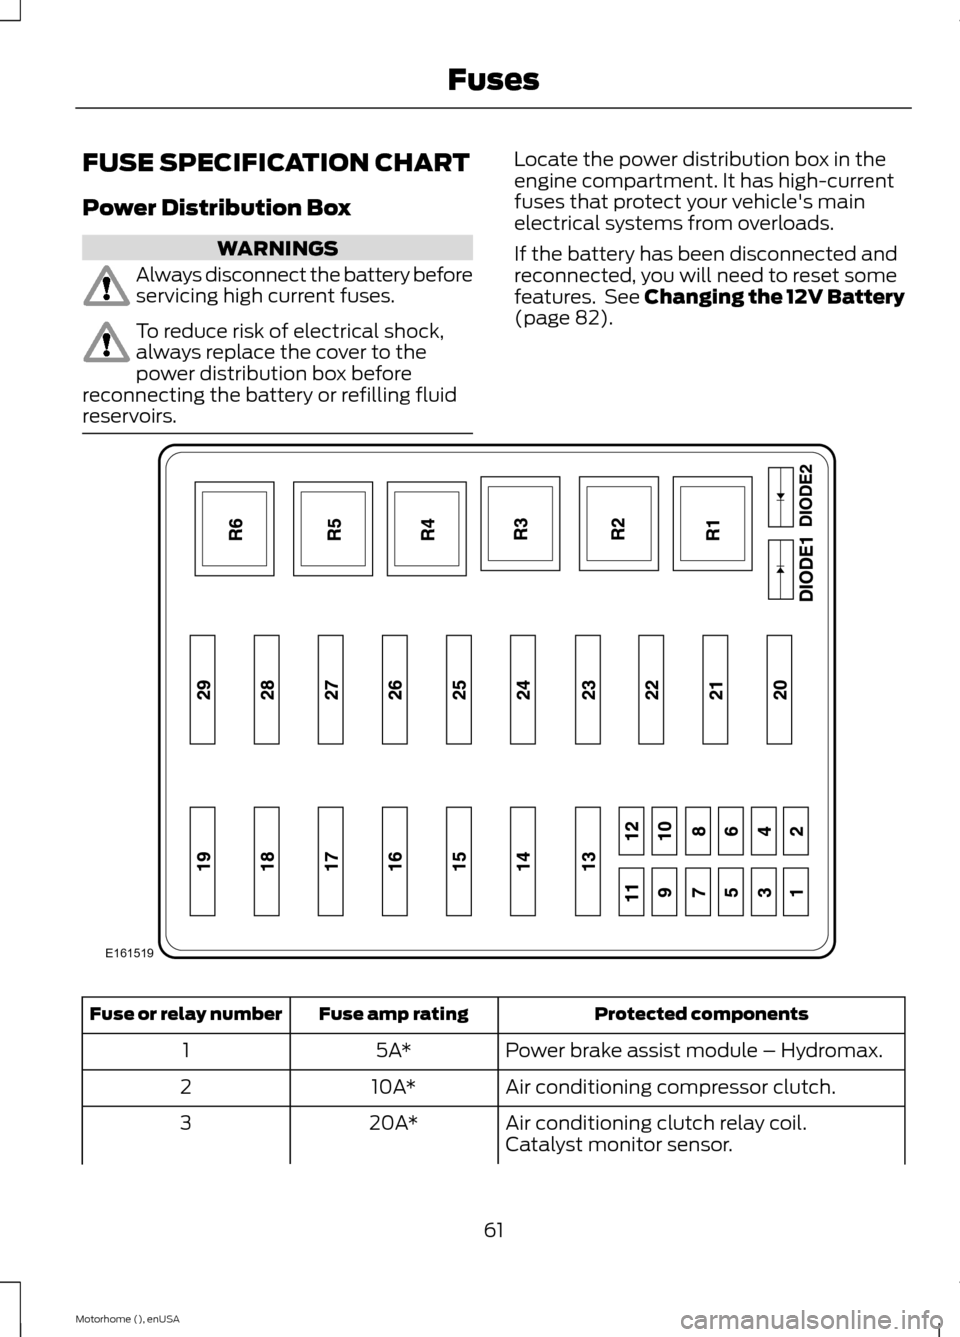
Locate the power distribution box in theengine compartment. It has high-currentfuses that protect your vehicle's mainelectrical systems from overloads.
If the battery has been disconnected andreconnected, you will need to reset somefeatures. See Changing the 12V Battery(page 82).
Protected componentsFuse amp ratingFuse or relay number
Power brake assist module – Hydromax.5A*1
Air conditioning compressor clutch.10A*2
Air conditioning clutch relay coil.20A*3Catalyst monitor sensor.
61Motorhome (), enUSAFusesE161519
Page 73 of 144
Protected componentsFuse amp ratingFuse or relay number
Right-hand direction indicator.—Relay 3
Trailer tow right-hand direction indicator.—Relay 4
Left-hand direction indicator.—Relay 5
Trailer tow left-hand direction indicator.—Relay 6
Not used.—Relay 7
Not used.—Relay 8
Not used.—Relay 9
Not used.—Diode 1
Not used.—Diode 2
Not used.—Diode 3
CHANGING A FUSE
Fuses
WARNING
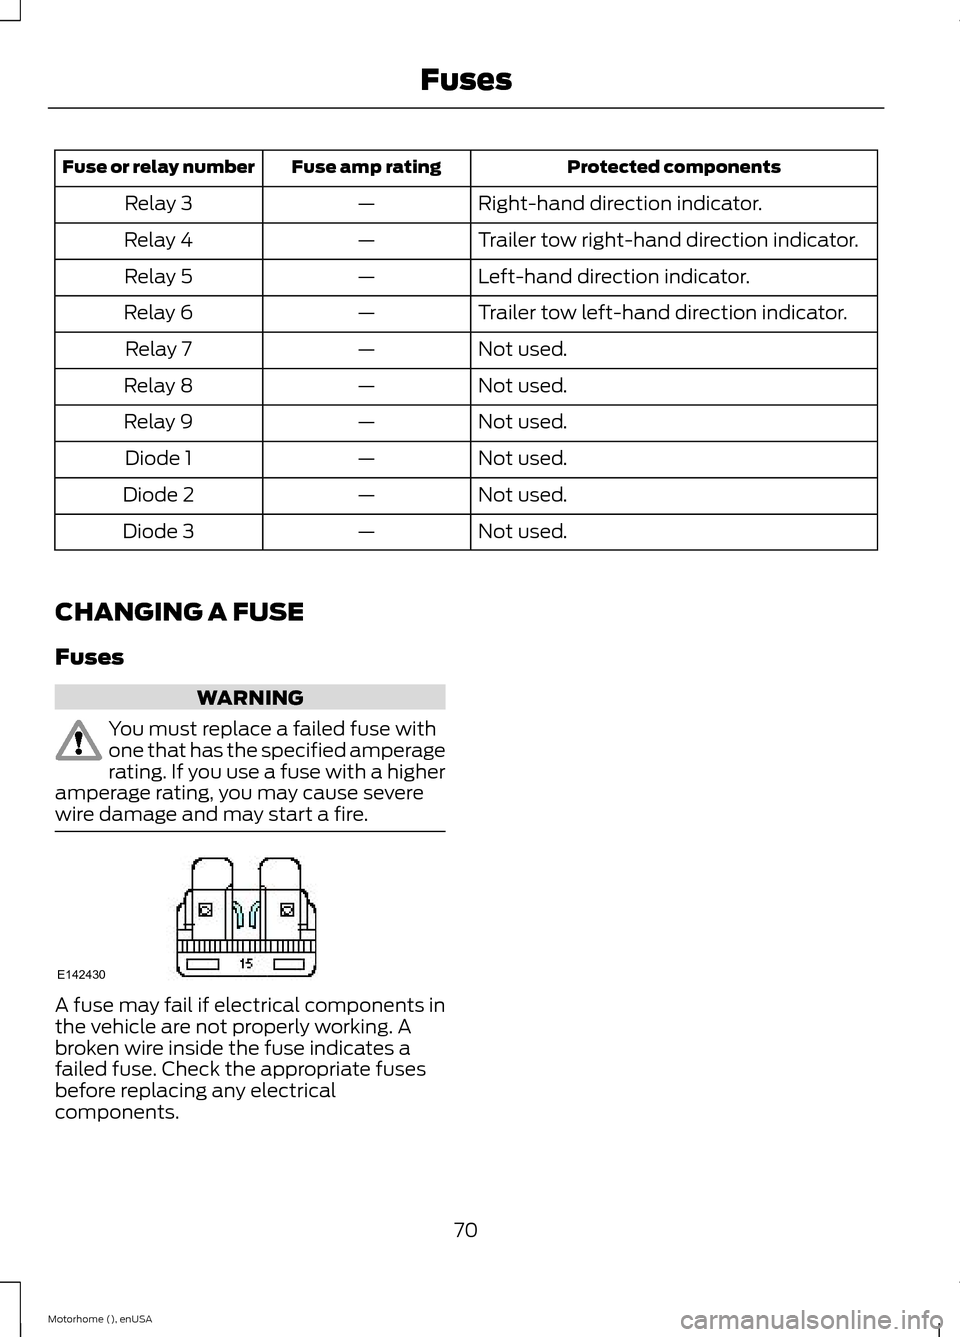
You must replace a failed fuse withone that has the specified amperagerating. If you use a fuse with a higheramperage rating, you may cause severewire damage and may start a fire.
A fuse may fail if electrical components inthe vehicle are not properly working. Abroken wire inside the fuse indicates afailed fuse. Check the appropriate fusesbefore replacing any electricalcomponents.
70Motorhome (), enUSAFusesE142430
Page 74 of 144
GENERAL INFORMATION
Have your vehicle serviced regularly to helpmaintain its roadworthiness and resalevalue. There is a large network ofauthorized dealers that are there to helpyou with their professional servicingexpertise. We believe that their speciallytrained technicians are best qualified toservice your vehicle properly and expertly.They are supported by a wide range ofhighly specialized tools developedspecifically for servicing your vehicle.
To help you service your vehicle, weprovide scheduled maintenanceinformation which makes tracking routineservice easy. See ScheduledMaintenance (page 121).
If your vehicle requires professional service,an authorized dealer can provide thenecessary parts and service. Check yourwarranty information to find out whichparts and services are covered.
Use only recommended fuels, lubricants,fluids and service parts conforming tospecifications. Motorcraft® parts aredesigned and built to provide the bestperformance in your vehicle.
Precautions
•Do not work on a hot engine.
•Make sure that nothing gets caught inmoving parts.
•Do not work on a vehicle with theengine running in an enclosed space,unless you are sure you have enoughventilation.
•Keep all open flames and other burningmaterial (such as cigarettes) awayfrom the battery and all fuel relatedparts.
Working with the Engine Off
1.Set the parking brake and shift to park(P).
2.Switch off the engine.
3.Block the wheels.
Working with the Engine On
WARNING
To reduce the risk of vehicle damageand/or personal burn injuries, do notstart your engine with the air cleanerremoved and do not remove it while theengine is running.
1.Set the parking brake and shift to park(P).
2.Block the wheels
71Motorhome (), enUSAMaintenance