2015 FORD EXPLORER instrument cluster
[x] Cancel search: instrument clusterPage 208 of 596
Grade assist:
•Provides additional grade (engine) braking and extends
lower gear operation on uphill climbs for hilly terrain or
mountainous areas.
•Provides additional engine braking through the automatic transmission
shift strategy which reacts to vehicle inputs (vehicle acceleration,
accelerator pedal, brake pedal and vehicle speed).
•Allows the transmission to select gears that will provide the desired
engine braking based on the vehicle inputs mentioned above. This will
increase engine RPM during engine braking.
•The grade assist lamp in the instrument cluster is illuminated.
Grade assist is designed to aid the driver with optimal gear selection in
hilly terrain or mountainous areas but is not intended for normal operation.
It is recommended that you return to O/D (overdrive mode) on flat terrain
to provide the best fuel economy and transmission function.
Press the transmission control switch again to return to normal D
(Drive) position (with O/D).
•The grade assist lamp in the instrument cluster will not be illuminated.
•The transmission will operate in gears one through six.
L (Low)
•Provides maximum engine braking.
•Will downshift to the lowest available gear for the current vehicle
speed; allows for first gear when vehicle reaches slower speeds.
•Is not intended for use under extended or normal driving co nditions
and results in lower fuel economy.
M (Manual) (if equipped)
Moving the gearshift lever to M (Manual):
•
Provides additional grade (engine) braking and extends lower gear
operation to enhance performance for uphill climbs, hilly terrain or
mountainous areas. This will increase engine RPM during engine braking.
•Provides additional lower gear operation through the automatic
transmission shift strategy which reacts to vehicle inputs (vehicle
acceleration, accelerator pedal, brake pedal and vehicle speed).
•Gears are selected more quickly and at higher engine speeds.
Note:The system will stay in M (Manual) until the gear shift lever is
moved into another gear for example P (park) or D (Drive).
Transmission207
2015 Explorer(exp)
Owners Guide gf, 2nd Printing, September 2014
USA(fus)
Page 210 of 596
Upshift to the recommended shift speeds according to the following
chart.
Upshifts when accelerating (recommended for best fuel economy)
Shift from:
1 - 2 15 mph (24 km/h)
2 - 3 25 mph (40 km/h)
3 - 4 40 mph (64 km/h)
4 - 5 45 mph (72 km/h)
5 - 6 50 mph (80 km/h)
The information display in the instrument cluster will show the current
selected gear you are in.
In order to prevent the engine from running at too low an RPM, which
may cause it to stall, SelectShift will automatically make some downshifts
even if it has determined that you have not downshifted in time.
Although the SelectShift will make some downshifts for you, it will still
allow you to downshift at any time as long as the SelectShift determines
that the engine will not be damaged from over-revving.
Note:Engine damage may occur if excessive engine revving is held
without shifting.
Brake-shift interlock
WARNING:Do not drive your vehicle until you verify that the
brakelamps are working.
WARNING:When doing this procedure, you will be taking the
vehicle out of park which means the vehicle can roll freely. To
avoid unwanted vehicle movement, always fully set the parking brake
prior to doing this procedure. Use wheel chocks if appropriate.
WARNING:If the parking brake is fully released, but the brake
warning lamp remains illuminated, the brakes may not be
working properly. See your authorized dealer.
Use the BSI lever to move the gearshift lever from the park position in the
event of an electrical malfunction or if your vehicle has a dead battery.
Transmission209
2015 Explorer(exp)
Owners Guide gf, 2nd Printing, September 2014
USA(fus)
Page 220 of 596
GENERAL INFORMATION
Note:Occasional brake noise is normal. If a metal-to-metal, continuous
grinding or continuous squeal sound is present, the brake linings may be
worn out. Have them inspected by an authorized dealer. If your vehicle
has continuous vibration or shudder in the steering wheel while braking,
have your vehicle inspected by an authorized dealer.
Note:Brake dust may accumulate on the wheels, even under normal
driving conditions. Some dust is inevitable as the brakes wear and does
not contribute to brake noise. See theVehicle Carechapter for wheel
cleaning instructions.
See theInstrument Clusterchapter for information on the
brake system warning light.
Wet brakes result in reduced braking efficiency. Gently press the brake
pedal a few times when driving from a car wash or standing water to dry
the brakes.
Brake Over Accelerator
In the event the accelerator pedal becomes stuck or entrapped, apply
steady and firm pressure to the brake pedal to slow your vehicle and
reduce engine power. If you experience this condition, apply the brakes
and bring your vehicle to a safe stop. Turn the engine off, shift to park
(P) and apply the parking brake. Inspect the accelerator pedal and the
area around it for any items or debris that may be obstructing its
movement. If none are found and the condition persists, have your
vehicle towed to the nearest authorized dealer.
Brake Assist
Brake assist detects when you brake heavily by measuring the rate at
which you press the brake pedal. It provides maximum braking efficiency
as long as you press the pedal. Brake assist can reduce stopping
distances in critical situations.
Brakes219
2015 Explorer(exp)
Owners Guide gf, 2nd Printing, September 2014
USA(fus)
Page 228 of 596
To enable hill descent control and set the descent speed, do the
following:
1. Press and release the hill descent button located in the
center of the terrain management control. A light in the
control will illuminate and chime will sound when this feature
is activated.
2. To increase descent speed, press the accelerator pedal until the
desired speed is reached. To decrease descent speed, press the brake
pedal until the desired speed is reached.
Whether accelerating or decelerating, once the desired descent speed is
reached, remove your feet from the pedals and the chosen vehicle speed
will be maintained.
Note:Noise from the ABS pump motor may be observed during hill
descent control operation. This is a normal characteristic of the ABS and
should be no reason for concern.
Hill descent modes
•At speeds below 20 mph (32 km/h): When the HDC button is pressed
and HDC is active, HILL DESCENT CONTROL ACTIVE will appear in
the message center for several seconds.
•At speeds below 20 mph (32 km/h): When the HDC button is pressed
and conditions are not correct for hill descent activation, the HDC
system will be enabled, the light on the button will be on solid and
HILL DESCENT CONTROL READY will be displayed in the message
center for several seconds.
•At speeds above 20 mph (32 km/h): When the HDC button is pressed,
the HDC system will be enabled, the light on the button will be
illuminated, and FOR HILL CNTRL, 20 MPH OR LESS will be
displayed in the message center for several seconds.
•For HDC to enable, the vehicle must be in a drive gear or (R)
Reverse. If the vehicle is in P (Park) or N (Neutral) and the HDC
button is pressed, FOR HILL CNTRL, SELECT GEAR will be displayed
in the message center for several seconds.
Refer toWarning lamps and indicatorsin theInstrument Cluster
chapter for hill descent control messages.
Terrain Response227
2015 Explorer(exp)
Owners Guide gf, 2nd Printing, September 2014
USA(fus)
Page 240 of 596
PRINCIPLES OF OPERATION
Cruise control lets you maintain a set speed without keeping your foot
on the accelerator pedal.
USING CRUISE CONTROL
WARNING:Do not use cruise control in heavy traffic, on
winding roads or when the road surface is slippery. This could
result in loss of vehicle control, serious injury or death.
WARNING:When you are going downhill, your vehicle speed
may increase above the set speed. The system will not apply the
brakes. Change down a gear to assist the system in maintaining the set
speed. Failure to do so could result in loss of vehicle control, serious
injury or death.
Note:Cruise control will disengage if your vehicle speed decreases more
than 10 mph (16 km/h) below your set speed while driving uphill.
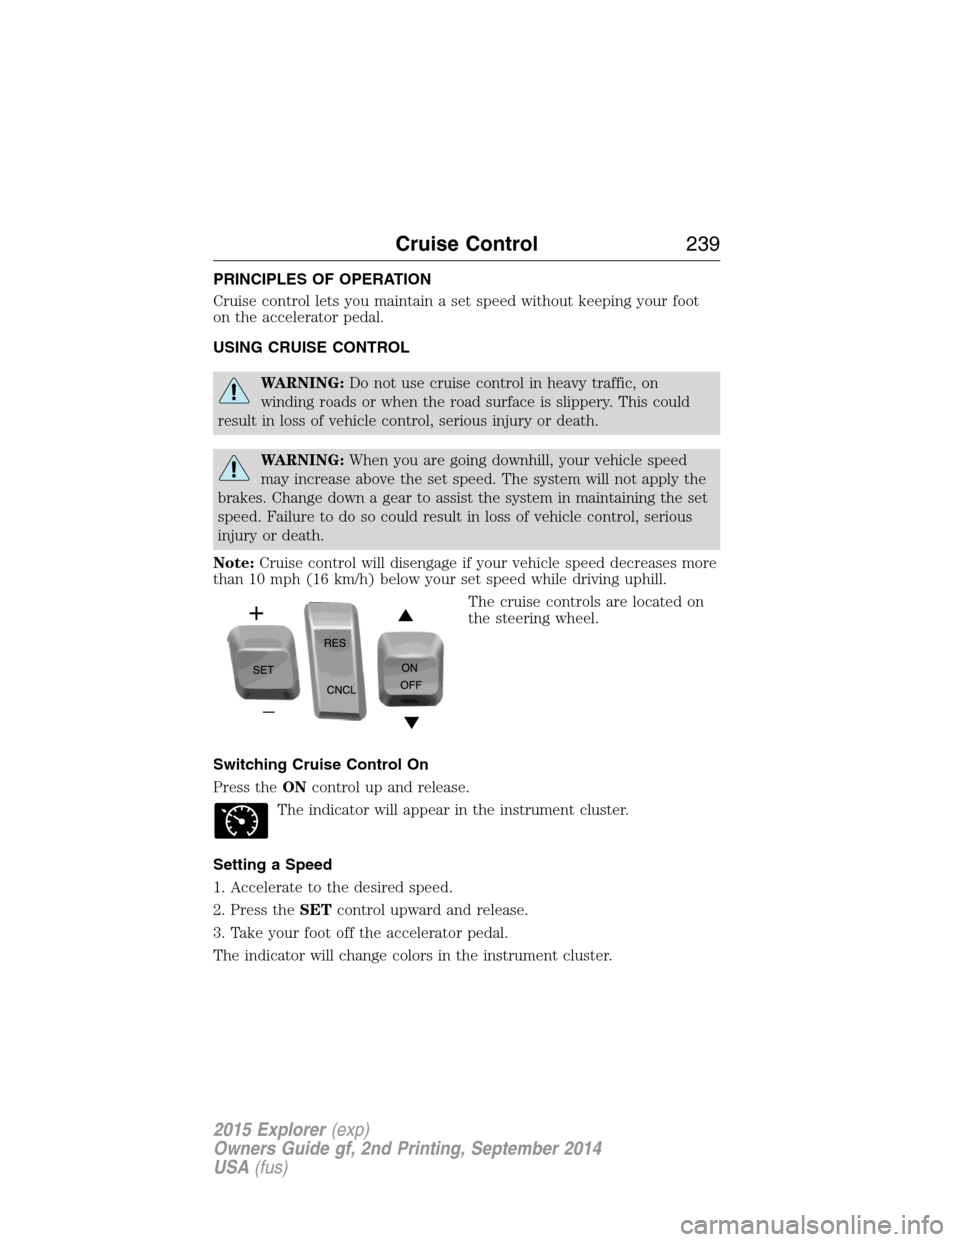
The cruise controls are located on
the steering wheel.
Switching Cruise Control On
Press theONcontrol up and release.
The indicator will appear in the instrument cluster.
Setting a Speed
1. Accelerate to the desired speed.
2. Press theSETcontrol upward and release.
3. Take your foot off the accelerator pedal.
The indicator will change colors in the instrument cluster.
Cruise Control239
2015 Explorer(exp)
Owners Guide gf, 2nd Printing, September 2014
USA(fus)
Page 251 of 596
LANE KEEPING SYSTEM (IF EQUIPPED)
WARNING:The system is designed to aid the driver. It is not
intended to replace the driver’s attention and judgment. The
driver is still responsible to drive with due care and attention.
The system notifies you to stay in your lane through the steering system
and the instrument cluster display when the front camera detects an
unintentional drift out of your lane is likely to occur. The system
automatically detects and tracks the road lane markings using a camera
that is mounted behind the interior rear view mirror.
Note:The system works above 40 mph (64 km/h).
Note:The system works as long as one lane marking can be detected by
the camera.
Note:If the camera is blocked or if the windshield is damaged, the
system may not function.
Note:When Aid mode is on and the system detects no driver steering
activity for a short period after system activation, the system alerts the
driver to keep their hands on the steering wheel. The system may detect
a light touch or grip on the steering wheel as hands-off driving.
Switching the System On and Off
Press the button located on the turn signal lever to switch the
system on or off.
Note:The system on/off setting is stored until it is manual changed,
unless a MyKey® is detected. If a MyKey® is detected, the system is
defaulted to on and the mode is set to Alert.
Note:If a MyKey® is detected, pressing the button will not affect the
on/off status of the system. Only the Mode and Intensity settings can be
changed when a MyKey® is present.
System Settings
The system has one standard feature setting and one optional setting
menu available. To view or adjust the settings, refer to theInformation
Displayschapter. The last-known selection for each of these settings is
stored by the system. You do not need to readjust your settings each
time you turn on the system.
250Driving Aids
2015 Explorer(exp)
Owners Guide gf, 2nd Printing, September 2014
USA(fus)
Page 253 of 596
System Display
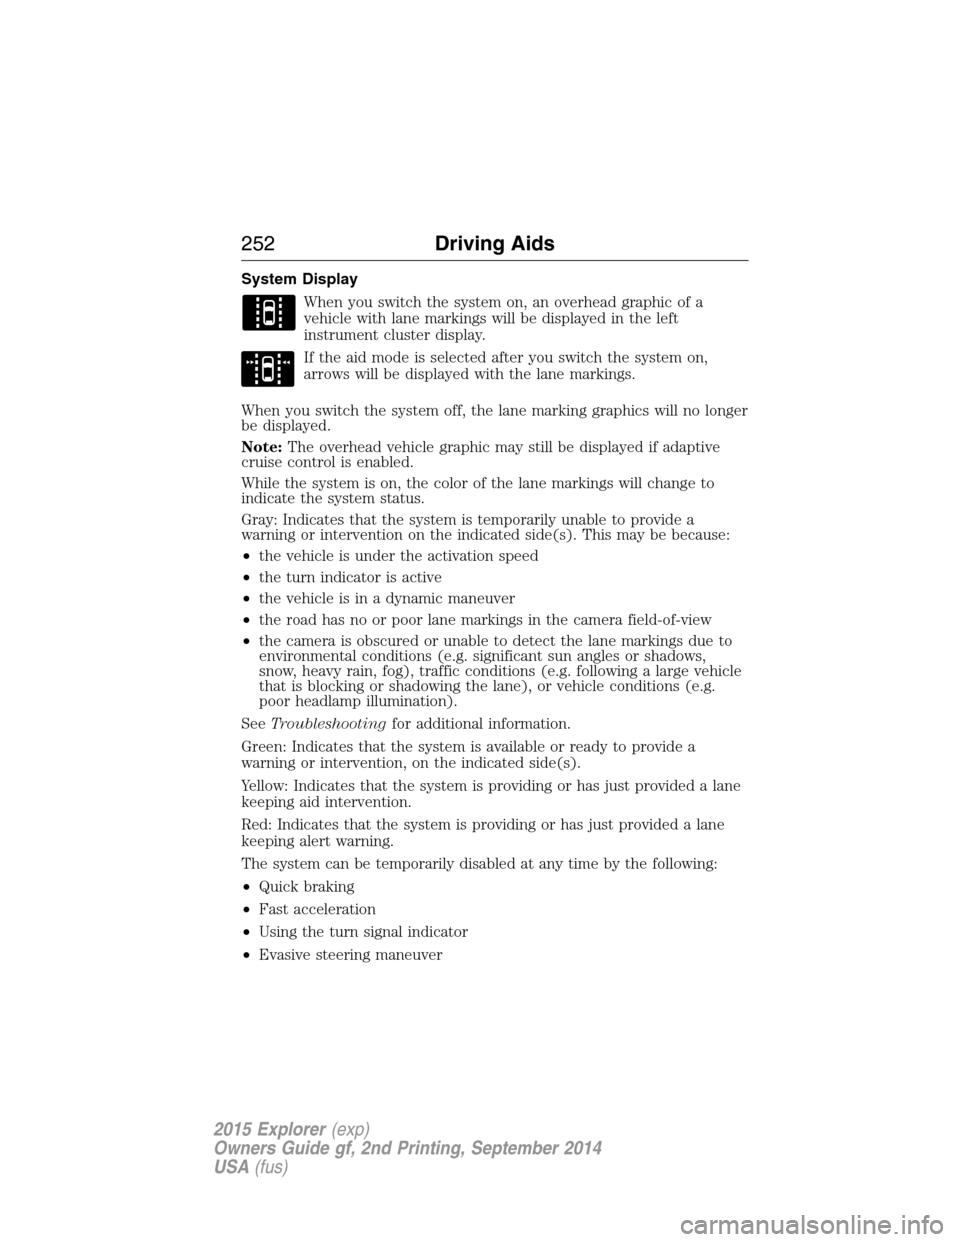
When you switch the system on, an overhead graphic of a
vehicle with lane markings will be displayed in the left
instrument cluster display.
If the aid mode is selected after you switch the system on,
arrows will be displayed with the lane markings.
When you switch the system off, the lane marking graphics will no longer
be displayed.
Note:The overhead vehicle graphic may still be displayed if adaptive
cruise control is enabled.
While the system is on, the color of the lane markings will change to
indicate the system status.
Gray: Indicates that the system is temporarily unable to provide a
warning or intervention on the indicated side(s). This may be because:
•the vehicle is under the activation speed
•the turn indicator is active
•the vehicle is in a dynamic maneuver
•the road has no or poor lane markings in the camera field-of-view
•the camera is obscured or unable to detect the lane markings due to
environmental conditions (e.g. significant sun angles or shadows,
snow, heavy rain, fog), traffic conditions (e.g. following a large vehicle
that is blocking or shadowing the lane), or vehicle conditions (e.g.
poor headlamp illumination).
SeeTroubleshootingfor additional information.
Green: Indicates that the system is available or ready to provide a
warning or intervention, on the indicated side(s).
Yellow: Indicates that the system is providing or has just provided a lane
keeping aid intervention.
Red: Indicates that the system is providing or has just provided a lane
keeping alert warning.
The system can be temporarily disabled at any time by the following:
•Quick braking
•Fast acceleration
•Using the turn signal indicator
•Evasive steering maneuver
252Driving Aids
2015 Explorer(exp)
Owners Guide gf, 2nd Printing, September 2014
USA(fus)
Page 308 of 596

Fuse or relay
numberFuse amp
ratingProtected components
5 20A Amplifier
6 5A Not used (spare)
7 7.5A Memory seat module logic feed
8 10A Not used (spare)
9 10A 4-inch radio display, Power
liftgate logic, Electronic finish
panel, SYNC
10 10A Run/accessory relay (wipers, rear
washer), Rain sensor
11 10A Instrument cluster, Heads-up
display
12 15A Interior courtesy lamps (overhead
console, Second row, cargo),
Puddle lamps, Console bin LED,
Backlighting
13 15A Right turn lamps, Right trailer tow
turn/stop lamps
14 15A Left turn lamps, Left trailer tow
turn/stop lamps
15 15A Reverse lamps, Stop lamps,
High-mounted stop lamp
16 10A Low beam headlamps (right)
17 10A Low beam headlamps (left)
18 10A Keypad illumination, Brake shift
interlock, Start button run
indicator, Passive anti-theft
system, Powertrain control
module wake-up, Rear seat power
enable
19 20A Memory seat power
20 20A Locks
21 10A Intelligent access, Keypad
Fuses307
2015 Explorer(exp)
Owners Guide gf, 2nd Printing, September 2014
USA(fus)