2015 FORD EXPLORER remove seats
[x] Cancel search: remove seatsPage 169 of 596
Third Row Seats
Third-Row Seat Access (Manual Seats)
WARNING:Before returning the seatback to its original position,
make sure that cargo or any objects are not trapped behind the
seatback. After returning the seatback to its original position, pull on
the seatback to make sure that it has fully latched. An unlatched seat
may become dangerous in the event of a sudden stop or crash.
WARNING:Do not adjust or release the seat floor latch while
vehicle is in motion. Do not operate the vehicle with seats in
tumbled position. Always latch the vehicle seat to the floor, whether the
seat is occupied or empty. If not latched or if the seat is tumbled, the
seat may cause injury during a sudden stop.
Note:Remove items from the second-row seat and make sure that no
bulky objects such as purses or briefcases are on the floor in front of the
second-row seats before tumbling them.
Note:For second-row bench seats, make sure the center safety belt is
unbuckled before folding the seatback.
Note:You may have to move the front-row seat forward to allow the
second-row seat to be fully tumbled.
Note:You may have to lower the center head restraint. SeeHead
Restraintsearlier.
Fold and tumble the second-row seat to access the third row.
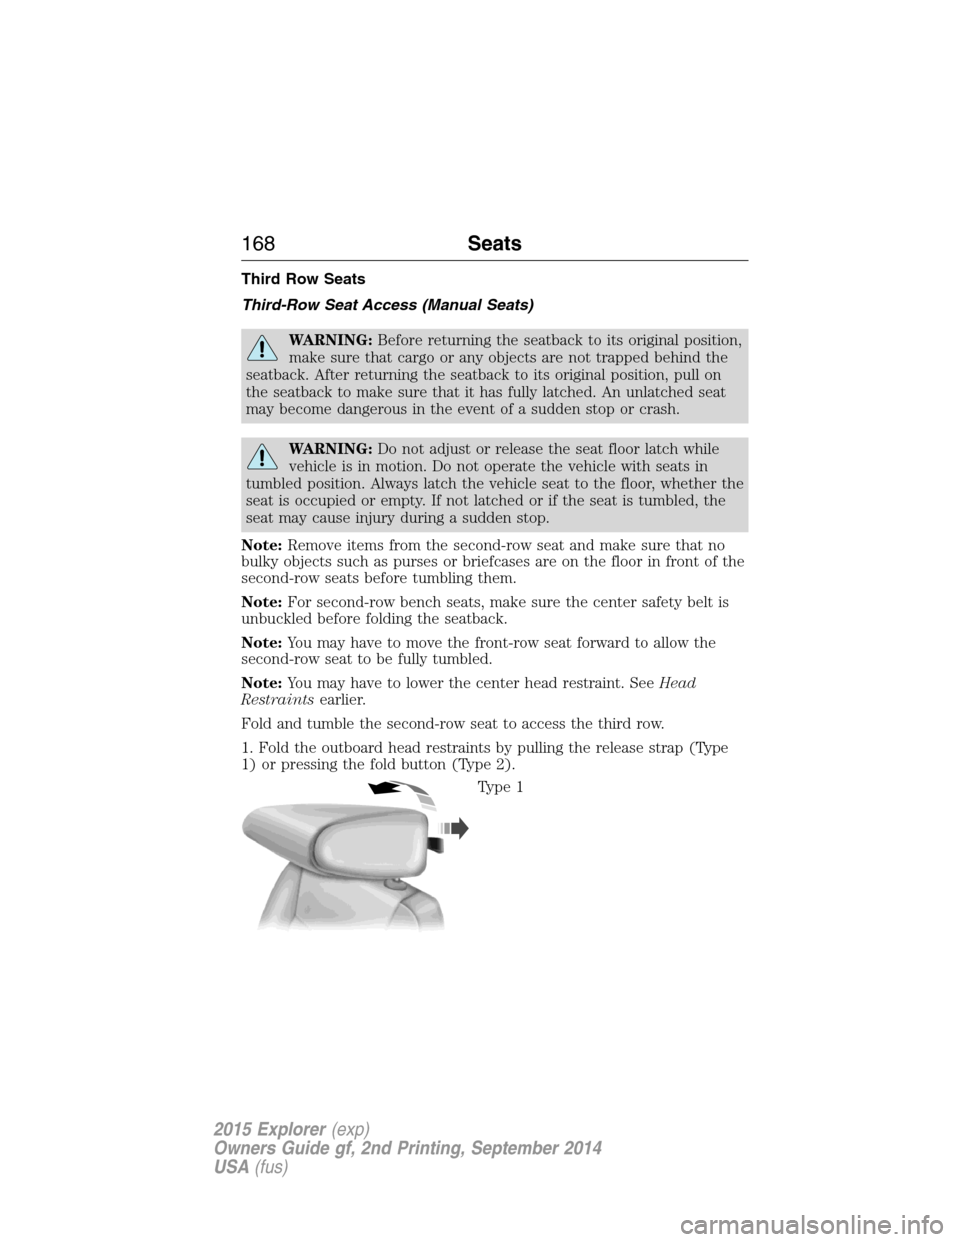
1. Fold the outboard head restraints by pulling the release strap (Type
1) or pressing the fold button (Type 2).
Type 1
168Seats
2015 Explorer(exp)
Owners Guide gf, 2nd Printing, September 2014
USA(fus)
Page 174 of 596
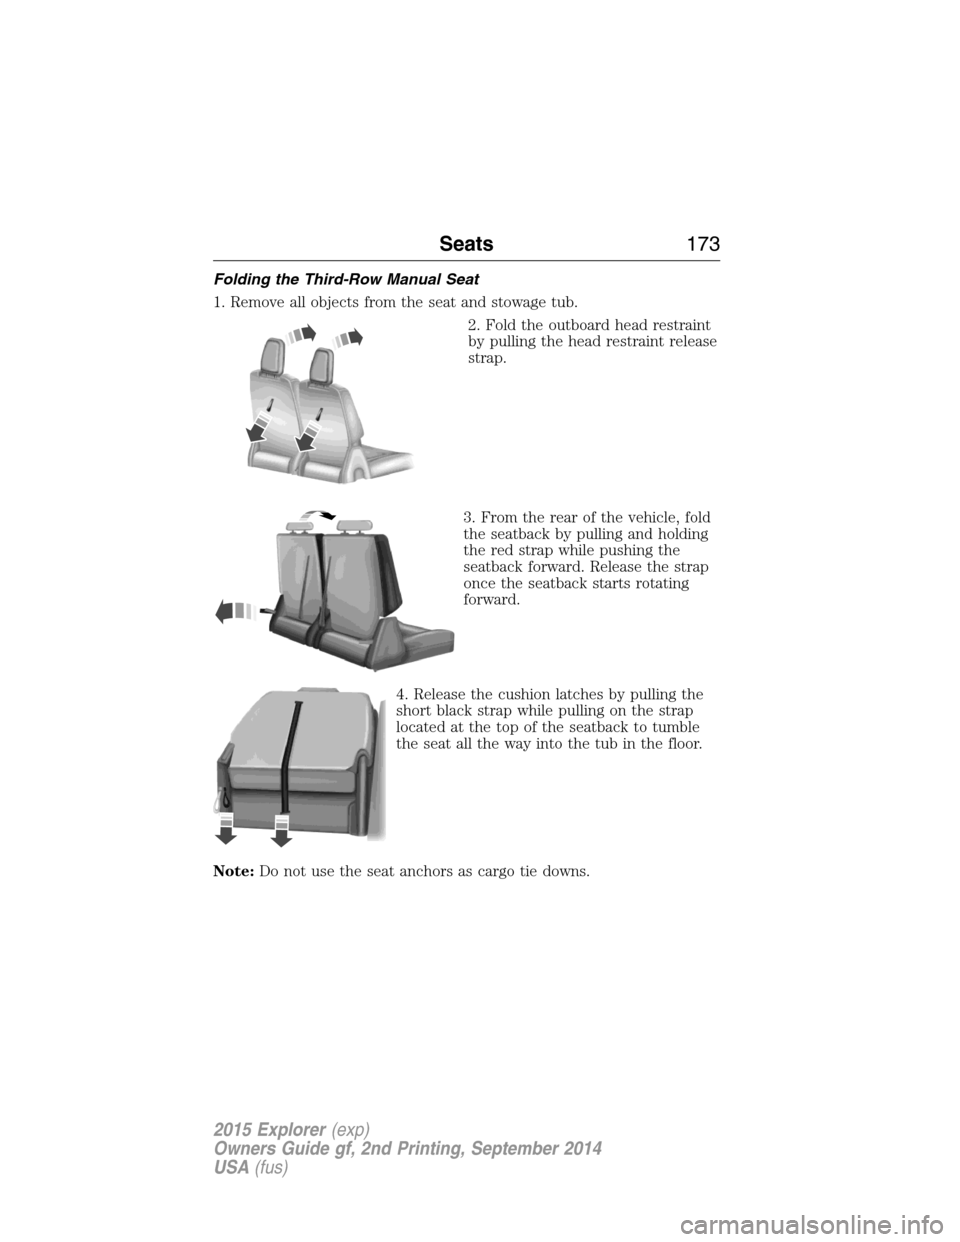
Folding the Third-Row Manual Seat
1. Remove all objects from the seat and stowage tub.
2. Fold the outboard head restraint
by pulling the head restraint release
strap.
3. From the rear of the vehicle, fold
the seatback by pulling and holding
the red strap while pushing the
seatback forward. Release the strap
once the seatback starts rotating
forward.
4. Release the cushion latches by pulling the
short black strap while pulling on the strap
located at the top of the seatback to tumble
the seat all the way into the tub in the floor.
Note:Do not use the seat anchors as cargo tie downs.
Seats173
2015 Explorer(exp)
Owners Guide gf, 2nd Printing, September 2014
USA(fus)
Page 175 of 596
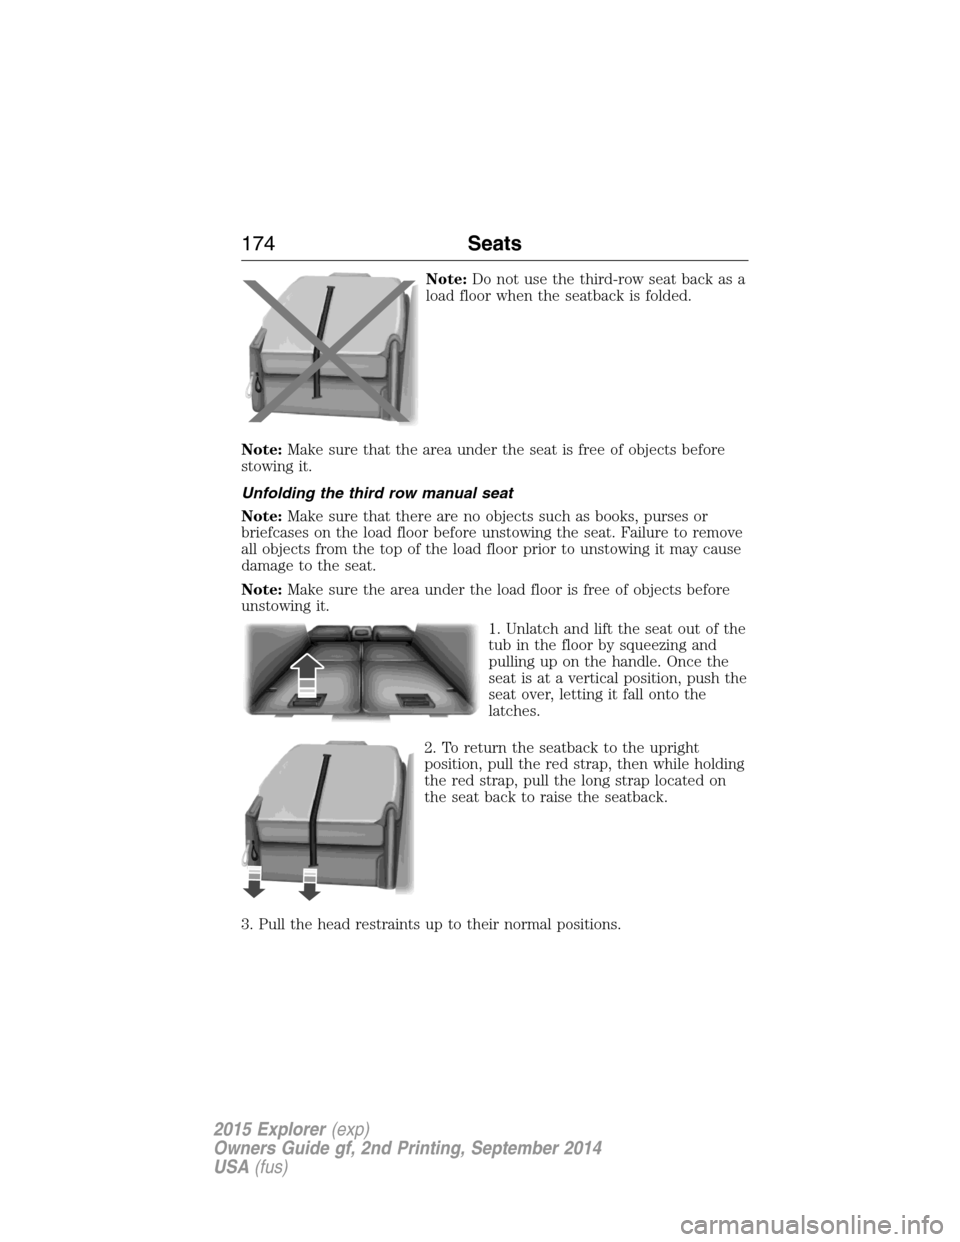
Note:Do not use the third-row seat back as a
load floor when the seatback is folded.
Note:Make sure that the area under the seat is free of objects before
stowing it.
Unfolding the third row manual seat
Note:Make sure that there are no objects such as books, purses or
briefcases on the load floor before unstowing the seat. Failure to remove
all objects from the top of the load floor prior to unstowing it may cause
damage to the seat.
Note:Make sure the area under the load floor is free of objects before
unstowing it.
1. Unlatch and lift the seat out of the
tub in the floor by squeezing and
pulling up on the handle. Once the
seat is at a vertical position, push the
seat over, letting it fall onto the
latches.
2. To return the seatback to the upright
position, pull the red strap, then while holding
the red strap, pull the long strap located on
the seat back to raise the seatback.
3. Pull the head restraints up to their normal positions.
174Seats
2015 Explorer(exp)
Owners Guide gf, 2nd Printing, September 2014
USA(fus)
Page 176 of 596
WARNING:Make sure seat is latched to vehicle floor by pushing
and pulling on the seat. If not latched, the seat may cause injury
during a sudden stop.
WARNING:Before returning the seatback to its original position,
make sure that cargo or any objects are not trapped behind the
seatback. After returning the seat back to its original position, pull on
the seatback to make sure that it has fully latched. An unlatched seat
may become dangerous in the event of a sudden stop or crash.
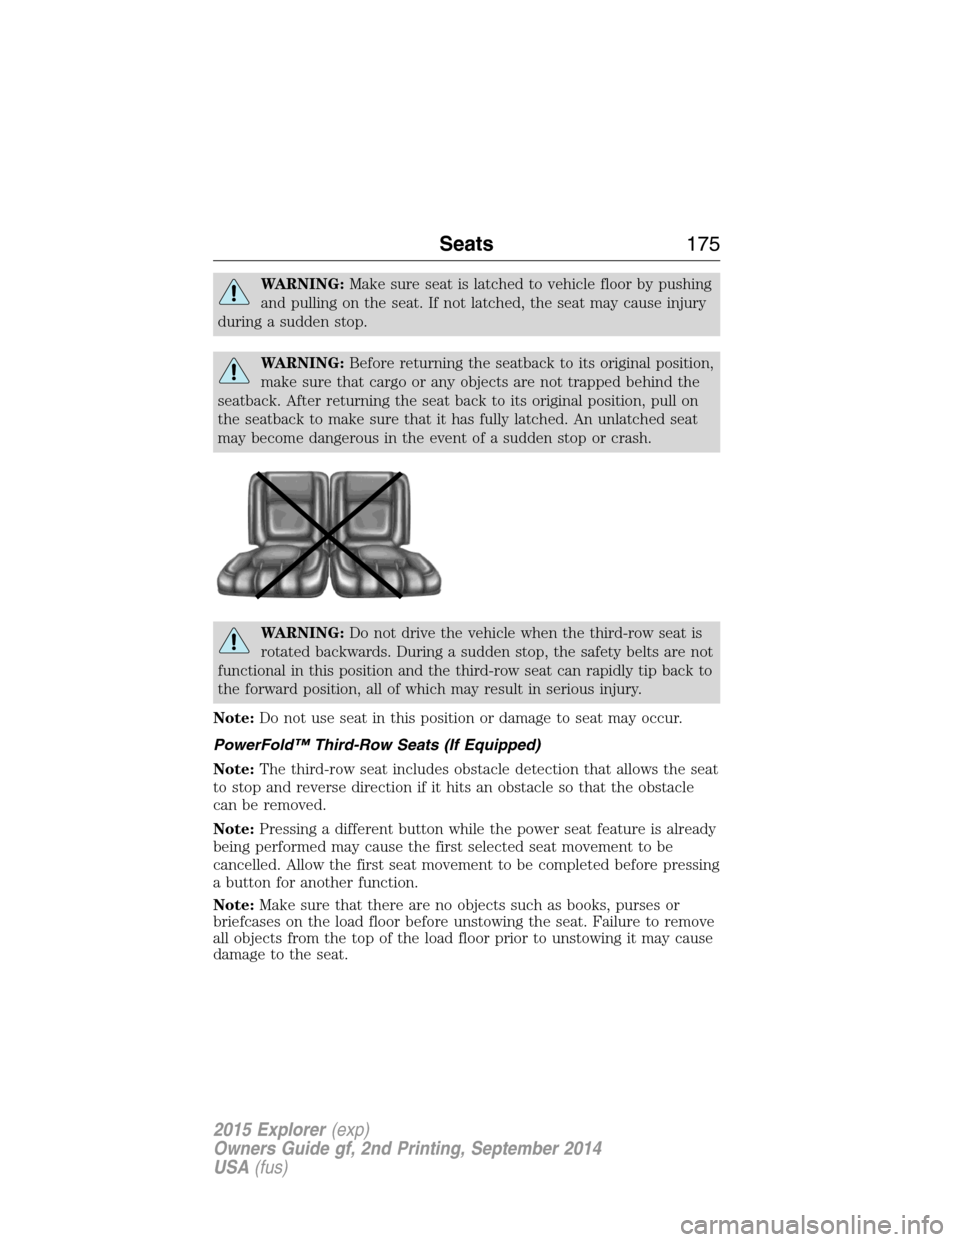
WARNING:Do not drive the vehicle when the third-row seat is
rotated backwards. During a sudden stop, the safety belts are not
functional in this position and the third-row seat can rapidly tip back to
the forward position, all of which may result in serious injury.
Note:Do not use seat in this position or damage to seat may occur.
PowerFold™ Third-Row Seats (If Equipped)
Note:The third-row seat includes obstacle detection that allows the seat
to stop and reverse direction if it hits an obstacle so that the obstacle
can be removed.
Note:Pressing a different button while the power seat feature is already
being performed may cause the first selected seat movement to be
cancelled. Allow the first seat movement to be completed before pressing
a button for another function.
Note:Make sure that there are no objects such as books, purses or
briefcases on the load floor before unstowing the seat. Failure to remove
all objects from the top of the load floor prior to unstowing it may cause
damage to the seat.
Seats175
2015 Explorer(exp)
Owners Guide gf, 2nd Printing, September 2014
USA(fus)
Page 177 of 596
Note:In order to allow the seat to complete the stowed position, do not
place objects under the seat before stowing. Remove all objects from the
seat and stowage tub.
Note:In the unlikely event that the third-row power seat stops
prematurely or travels to an unexpected position, press the FOLD button
(C) to reset the seat and return it to a normal position.
These seats feature a power one-touch operation that allows you fold
and stow the seats.
•The power fold seats work only when the transmission is in park (P)
and the liftgate is open.
•If the ignition is off and the feature is still running, the battery saver
will turn it off after 10 minutes. Press unlock on the remote entry key
transmitter to reactivate the power seats or unlock it with the keyless
entry keypad. See theKeys and Remote Controlchapter.
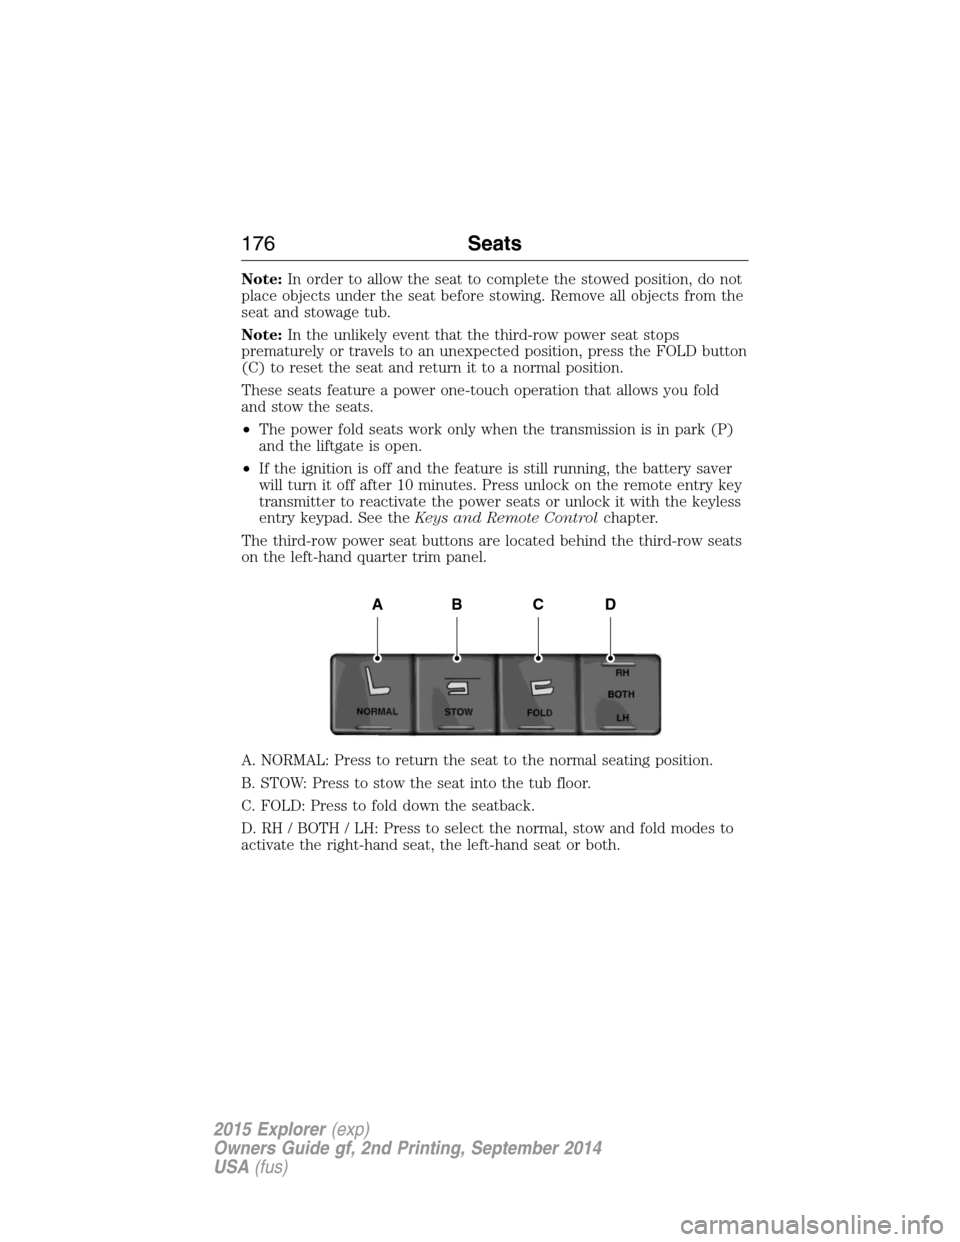
The third-row power seat buttons are located behind the third-row seats
on the left-hand quarter trim panel.
A. NORMAL: Press to return the seat to the normal seating position.
B. STOW: Press to stow the seat into the tub floor.
C. FOLD: Press to fold down the seatback.
D. RH / BOTH / LH: Press to select the normal, stow and fold modes to
activate the right-hand seat, the left-hand seat or both.
ABCD
176Seats
2015 Explorer(exp)
Owners Guide gf, 2nd Printing, September 2014
USA(fus)
Page 346 of 596
CLEANING THE INTERIOR
WARNING:Do not use cleaning solvents, bleach or dye on the
vehicle’s safety belts, as these actions may weaken the belt
webbing.
WARNING:On vehicles equipped with seat-mounted airbags, do
not use chemical solvents or strong detergents. Such products
could contaminate the side airbag system and affect performance of the
side airbag in a collision.
For fabric, carpets, cloth seats, safety belts and seats equipped with side
airbags:
•Remove dust and loose dirt with a vacuum cleaner.
•Apply a layer of high quality foam cleaner designed for automotive
interiors, such as Motorcraft Carpet and Upholstery Cleaner, to the
dry stained area(s) of the item you are cleaning and let it soak in for
one minute.
•If grease or tar is present on the material, spot-clean the area first
with Motorcraft Spot and Stain Remover. In Canada, use Motorcraft
Multi-Purpose Cleaner.
•If a ring forms on the fabric after spot cleaning, clean the entire area
immediately (but do not oversaturate) or the ring can set.
•Do not use household cleaning products or glass cleaners, which can
stain and discolor the fabric and affect the flame retardant abilities of
the seat materials.
CLEANING THE INSTRUMENT PANEL AND INSTRUMENT
CLUSTER LENS
WARNING:Do not use chemical solvents or strong detergents
when cleaning the steering wheel or instrument panel to avoid
contamination of the airbag system.
Note:Follow the same procedure as cleaning leather seats for cleaning
leather instrument panels and leather interior trim surfaces. See
Cleaning Leather Seatsin this chapter.
Clean the instrument panel and cluster lens with a clean, damp, white,
cotton cloth, then use a clean and dry, white, cotton cloth to dry these
areas.
Vehicle Care345
2015 Explorer(exp)
Owners Guide gf, 2nd Printing, September 2014
USA(fus)
Page 347 of 596
•Avoid cleaners or polishes that increase the gloss of the upper portion
of the instrument panel. The dull finish in this area helps protect the
driver from undesirable windshield reflection.
•Be certain to wash or wipe your hands clean if you have been in
contact with certain products, such as insect repellent and suntan
lotion, in order to avoid possible damage to the interior painted
surfaces.
•Do not use household or glass cleaners as these may damage the
finish of the instrument panel, interior trim and cluster lens.
•Do not allow air fresheners and hand sanitizers to spill on interior
surfaces. If a spill occurs, wipe off immediately. Damage may not be
covered by your warranty.
If a staining liquid like coffee or juice has been spilled on the instrument
panel or on interior trim surfaces, clean as follows:
1. Wipe up spilled liquid using a clean, white, cotton cloth.
2. Use Motorcraft Premium Leather and Vinyl Cleaner or a commercially
available leather cleaning product for automotive interiors. Test any
cleaner or stain remover on an inconspicuous area.
3. Alternatively, wipe the surface with a damp, clean, white, cotton cloth
and a mild soap and water solution. Dry the area with a clean, soft cloth.
4. If necessary, apply more soap and water solution or cleaning product
to a clean, white, cotton cloth and press the cloth onto the soiled area.
Allow this to set at room temperature for 30 minutes.
5. Remove the soaked cloth, then with a clean, damp cloth, use a rubbing
motion for 60 seconds on the soiled area.
6. Following this, wipe area dry with a clean, white, cotton cloth.
CLEANING LEATHER SEATS (IF EQUIPPED)
Note:Follow the same procedure as cleaning leather seats for cleaning
leather instrument panels and leather interior trim surfaces.
For routine cleaning, wipe the surface with a soft, damp cloth and a mild
soap and water solution. Dry the area with a clean, soft cloth.
For cleaning and removing spots and stains such as dye transfer, use
Motorcraft Premium Leather and Vinyl Cleaner or a commercially
available leather cleaning product for automotive interiors.
Note:Test any cleaner or stain remover on an inconspicuous area.
346Vehicle Care
2015 Explorer(exp)
Owners Guide gf, 2nd Printing, September 2014
USA(fus)
Page 348 of 596
You should:
•Remove dust and loose dirt with a vacuum cleaner.
•Clean and treat spills and stains as soon as possible.
Do not use the following products as these may damage the leather:
•Oil and petroleum or silicone-based leather conditioners.
•Household cleaners.
•Alcohol solutions.
•Solvents or cleaners intended specifically for rubber, vinyl and
plastics.Motorcraft
Note:Do not use Motorcraft Premium Leather and Vinyl Cleaner ZC-56
on Lincoln Black Label, Presidential or Reserve Leathers because it can
damage these and other semi-aniline leather seating fabrics. It can also
damage surrounding microfiber accent surfaces. To clean Lincoln Black
Label, Presidential or Reserve Leather, first vacuum the seats to remove
loose dirt. Then wipe the leather with a clean soft cloth dampened with
lukewarm water and a mild soap. Wipe the leather again with a slightly
damp cloth to remove soap residue, and dry with a soft cloth. To
maintain the leather’s resiliency, it should be cleaned whenever soiled.
CLEANING THE ALLOY WHEELS
Note:Do not use chrome cleaner, metal cleaner or polish on wheels and
wheel covers.
A clearcoat paint finish coats aluminum wheels and wheel covers. In
order to maintain their condition:
•Clean weekly with Motorcraft Wheel and Tire Cleaner. Use a sponge to
remove heavy deposits of dirt and brake dust accumulation. Rinse
thoroughly with a strong stream of water when you have completed
the cleaning process.
•To remove tar and grease, use Motorcraft Bug and Tar Remover.
•Never apply any cleaning chemical to hot or warm wheel rims or
covers.
•Some automatic car washes may cause damage to the finish on your
wheel rims or covers.
•Industrial-strength (heavy-duty) cleaners, or cleaning chemicals, in
combination with brush agitation to remove brake dust and dirt, could
wear away the clearcoat finish over time.
Vehicle Care347
2015 Explorer(exp)
Owners Guide gf, 2nd Printing, September 2014
USA(fus)