2015 FORD EXPLORER brake
[x] Cancel search: brakePage 348 of 596
You should:
•Remove dust and loose dirt with a vacuum cleaner.
•Clean and treat spills and stains as soon as possible.
Do not use the following products as these may damage the leather:
•Oil and petroleum or silicone-based leather conditioners.
•Household cleaners.
•Alcohol solutions.
•Solvents or cleaners intended specifically for rubber, vinyl and
plastics.Motorcraft
Note:Do not use Motorcraft Premium Leather and Vinyl Cleaner ZC-56
on Lincoln Black Label, Presidential or Reserve Leathers because it can
damage these and other semi-aniline leather seating fabrics. It can also
damage surrounding microfiber accent surfaces. To clean Lincoln Black
Label, Presidential or Reserve Leather, first vacuum the seats to remove
loose dirt. Then wipe the leather with a clean soft cloth dampened with
lukewarm water and a mild soap. Wipe the leather again with a slightly
damp cloth to remove soap residue, and dry with a soft cloth. To
maintain the leather’s resiliency, it should be cleaned whenever soiled.
CLEANING THE ALLOY WHEELS
Note:Do not use chrome cleaner, metal cleaner or polish on wheels and
wheel covers.
A clearcoat paint finish coats aluminum wheels and wheel covers. In
order to maintain their condition:
•Clean weekly with Motorcraft Wheel and Tire Cleaner. Use a sponge to
remove heavy deposits of dirt and brake dust accumulation. Rinse
thoroughly with a strong stream of water when you have completed
the cleaning process.
•To remove tar and grease, use Motorcraft Bug and Tar Remover.
•Never apply any cleaning chemical to hot or warm wheel rims or
covers.
•Some automatic car washes may cause damage to the finish on your
wheel rims or covers.
•Industrial-strength (heavy-duty) cleaners, or cleaning chemicals, in
combination with brush agitation to remove brake dust and dirt, could
wear away the clearcoat finish over time.
Vehicle Care347
2015 Explorer(exp)
Owners Guide gf, 2nd Printing, September 2014
USA(fus)
Page 349 of 596
•Do not use hydrofluoric acid-based or high caustic-based wheel
cleaners, steel wool, fuels or strong household detergent.
•If you intend on parking your vehicle for an extended period after
cleaning the wheels with a wheel cleaner, drive your vehicle for a few
minutes before doing so. This reduces the risk of increased corrosion
of the brake discs.
VEHICLE STORAGE
If you plan on storing your vehicle for an extended period of time
(30 days or more), read the following maintenance recommendations to
make sure your vehicle stays in good operating condition.
All motor vehicles and their components were engineered and tested for
reliable, regular driving. Long-term storage under various conditions may
lead to component degradation or failure unless specific precautions are
taken to preserve the components.
General
•Store all vehicles in a dry, ventilated place.
•Protect from sunlight, if possible.
•If vehicles are stored outside, they require regular maintenance to
protect against rust and damage.
Body
•Wash vehicle thoroughly to remove dirt, grease, oil, tar or mud from
exterior surfaces, rear-wheel housing and underside of front fenders.
•Periodically wash vehicles stored in exposed locations.
•Touch up raw or primed metal to prevent rust.
•Cover chrome and stainless steel parts with a thick coat of auto wax
to prevent discoloration. Re-wax as necessary when the vehicle is
washed.
•Lubricate hood latch, all door latches and trunk lid hinges with a light
grade oil.
•Cover interior trim to prevent fading.
•Keep all rubber parts free from oil and solvents.
348Vehicle Care
2015 Explorer(exp)
Owners Guide gf, 2nd Printing, September 2014
USA(fus)
Page 350 of 596
Engine
•The engine oil and filter should be changed prior to storage, as used
engine oil contains contaminates that may cause engine damage.
•Start the engine every 15 days. Run at fast idle with the climate
controls set to defrost until it reaches normal operating temperature.
•With your foot on the brake, shift through all the gears while the
engine is running.
Fuel system
•Fill the fuel tank with high-quality fuel until the first automatic shutoff
of the fuel pump nozzle.
Cooling system
•Protect against freezing temperatures.
•When removing vehicle from storage, check coolant fluid level.
Confirm there are no cooling system leaks, and fluid is at the
recommended level.
Battery
•Check and recharge as necessary. Keep connections clean.
•If storing your vehicle for more than 30 days without recharging the
battery, it may be advisable to disconnect the battery cables to ensure
battery charge is maintained for quick starting.
Note:If battery cables are disconnected, it will be necessary to reset
memory features.
Brakes
•Make sure brakes and parking brake are fully released.
Tires
•Maintain recommended air pressure.
Miscellaneous
•Make sure all linkages, cables, levers and pins under vehicle are
covered with grease to prevent rust.
•Move vehicles at least 25 feet (8 meters) every 15 days to lubricate
working parts and prevent corrosion.
Vehicle Care349
2015 Explorer(exp)
Owners Guide gf, 2nd Printing, September 2014
USA(fus)
Page 351 of 596
Removing Vehicle from Storage
When your vehicle is ready to come out of storage, do the following:
•Wash your vehicle to remove any dirt or grease film build-up on
window surfaces.
•Check windshield wipers for any deterioration.
•Check under the hood for any foreign material that may have collected
during storage (mice/squirrel nests).
•Check the exhaust for any foreign material that may have collected
during storage.
•Check tire pressures and set tire inflation per the Tire Label.
•Check brake pedal operation. Drive the vehicle 15 feet (4.5 meters)
back and forth to remove rust build-up.
•Check fluid levels (including coolant, oil and gas) to make sure there
are no leaks and fluids are at recommended levels.
•If the battery was removed, clean the battery cable ends and inspect.
Contact your authorized dealer if you have any concerns or issues.
350Vehicle Care
2015 Explorer(exp)
Owners Guide gf, 2nd Printing, September 2014
USA(fus)
Page 376 of 596
CHANGING A ROAD WHEEL
WARNING:The use of tire sealant may damage your tire
pressure monitoring system and should only be used in roadside
emergencies. If you must use a sealant, the Ford Tire Mobility Kit
sealant should be used. The tire pressure monitoring system sensor and
valve stem on the wheel must be replaced by an authorized dealer after
use of the sealant.
WARNING:SeeTire Pressure Monitoring Systemin this
chapter for important information. If the tire pressure monitoring
sensor becomes damaged, it will no longer function.
Note:The tire pressure monitoring system indicator light will illuminate
when the spare tire is in use. To restore the full function of the
monitoring system, all road wheels equipped with tire pressure
monitoring sensors must be mounted on this vehicle.
If you get a flat tire while driving, do not apply the brake heavily.
Instead, gradually decrease your speed. Hold the steering wheel firmly
and slowly move to a safe place on the side of the road.
Have a flat serviced by an authorized dealer in order to prevent damage
to the system sensors. SeeTire Pressure Monitoring Systemearlier in
this chapter. Replace the spare tire with a road tire as soon as possible.
During repairing or replacing of the flat tire, have the authorized dealer
inspect the tire pressure monitoring system sensor for damage.
Dissimilar Spare Tire and Wheel Assembly Information
WARNING:Failure to follow these guidelines could result in an
increased risk of loss of vehicle control, injury or death.
If you have a dissimilar spare tire and wheel assembly, then it is intended
for temporary use only. This means that if you need to use it, you should
replace it as soon as possible with a road tire and wheel assembly that is
the same size and type as the road tires and wheels that were originally
provided by Ford. If the dissimilar spare tire or wheel is damaged, it
should be replaced rather than repaired.
A dissimilar spare tire and wheel assembly is defined as a spare tire or
wheel that is different in brand, size or appearance from the road tires
and wheels and can be one of three types:
1.T-type mini-spare:This spare tire begins with the letter T for tire
size and may have Temporary Use Only molded in the sidewall.
Wheels and Tires375
2015 Explorer(exp)
Owners Guide gf, 2nd Printing, September 2014
USA(fus)
Page 378 of 596
•Ground clearance and parking at curbs
•Winter weather driving capability
•Wet weather driving capability
•All-wheel driving capability (if applicable)
•Load leveling adjustment (if applicable)
When driving with the full-size dissimilar spare tire and wheel assembly,
additional caution should be given to:
•towing a trailer.
•driving vehicles equipped with a camper body.
•driving vehicles with a load on the cargo rack.
Drive cautiously when using a full-size dissimilar spare tire and wheel,
and seek service as soon as possible.
Tire Change Procedure
WARNING:When one of the front wheels is off the ground, the
transmission alone will not prevent the vehicle from moving or
slipping off the jack, even if the transmission is in park (P).
WARNING:To help prevent the vehicle from moving when you
change a tire, be sure to place the transmission in park (P), set
the parking brake and block (in both directions) the wheel that is
diagonally opposite (other side and end of the vehicle) to the tire being
changed.
WARNING:Never get underneath a vehicle that is supported
only by a jack. If the vehicle slips off the jack, you or someone
else could be seriously injured.
WARNING:Do not attempt to change a tire on the side of the
vehicle close to moving traffic. Pull far enough off the road to
avoid the danger of being hit when operating the jack or changing the
wheel.
Wheels and Tires377
2015 Explorer(exp)
Owners Guide gf, 2nd Printing, September 2014
USA(fus)
Page 379 of 596
WARNING:Always use the jack provided as original equipment
with your vehicle. If using a jack other than the one provided as
original equipment with your vehicle, make sure the jack capacity is
adequate for the vehicle weight, including any vehicle cargo or
modifications.
Note:Passengers should not remain in the vehicle when the vehicle is
being jacked.
Note:If the third-row seat is stowed in the floor, you will need to
unstow it (raised position) to access the spare tire and jack. SeeRear
Seatsin theSeatschapter for this procedure.
1. Park on a level surface, set the parking brake and activate the hazard
flashers.
2. Put the transmission in park (P) and turn the engine off.
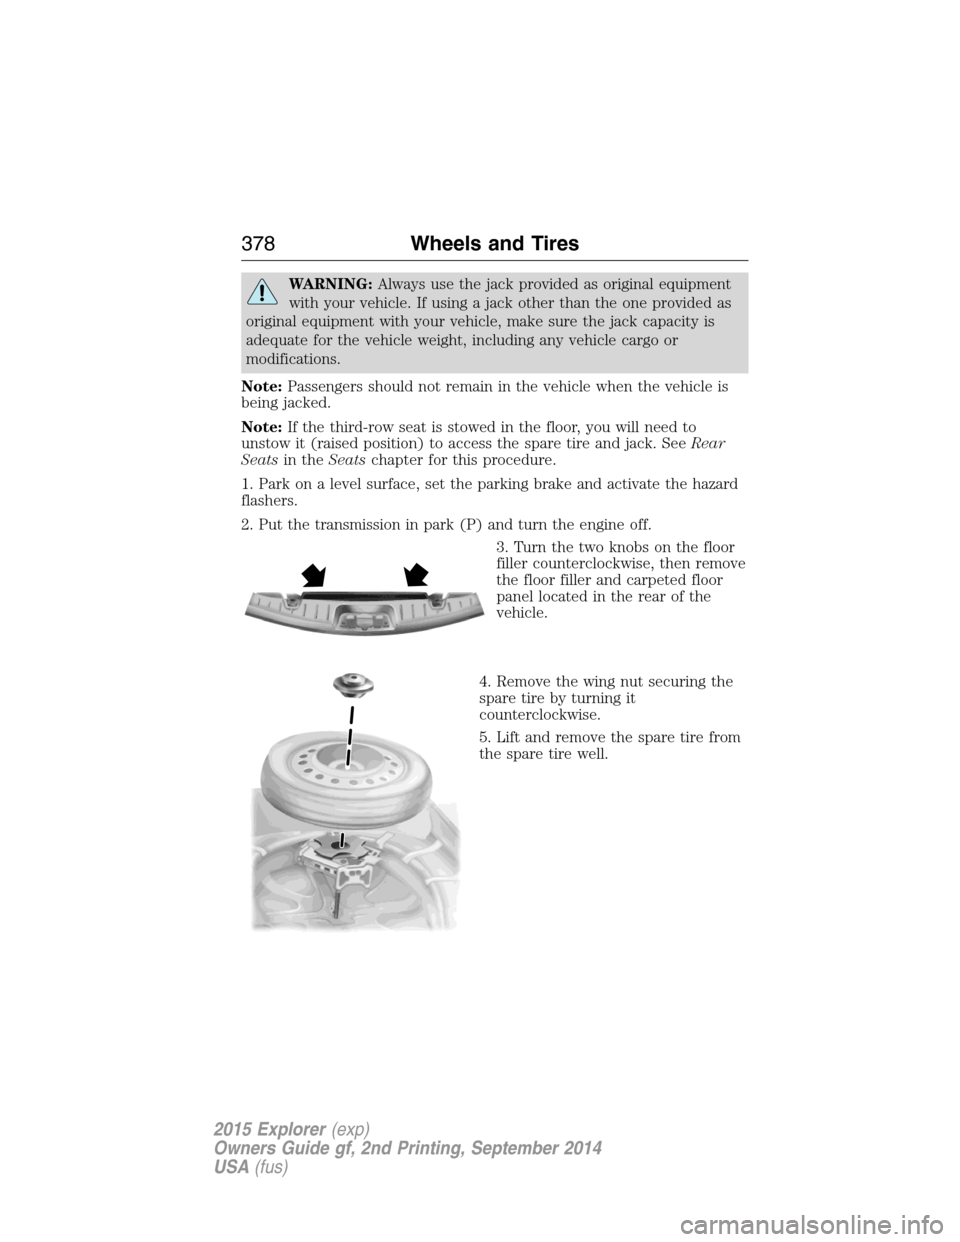
3. Turn the two knobs on the floor
filler counterclockwise, then remove
the floor filler and carpeted floor
panel located in the rear of the
vehicle.
4. Remove the wing nut securing the
spare tire by turning it
counterclockwise.
5. Lift and remove the spare tire from
the spare tire well.
378Wheels and Tires
2015 Explorer(exp)
Owners Guide gf, 2nd Printing, September 2014
USA(fus)
Page 383 of 596
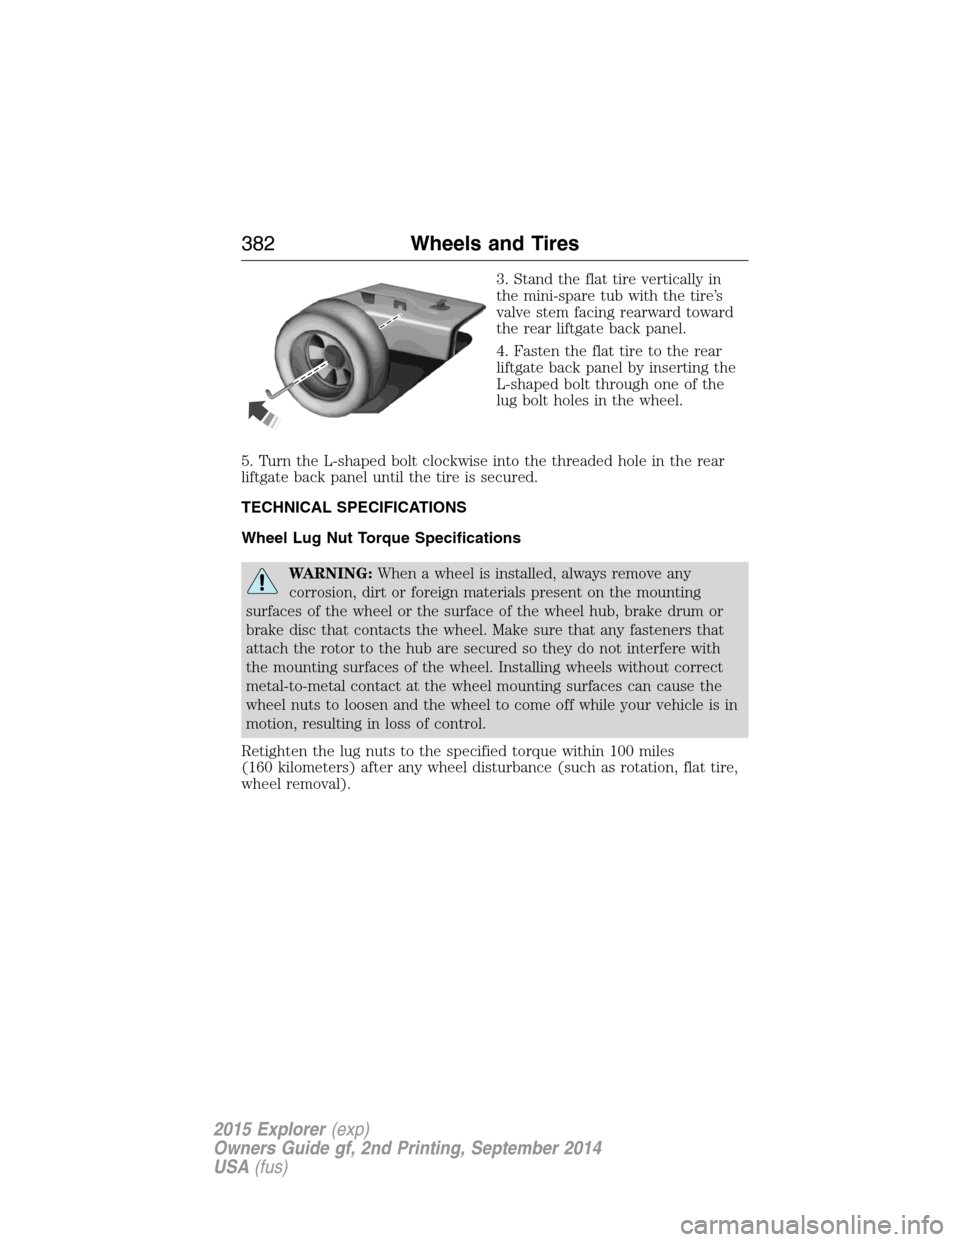
3. Stand the flat tire vertically in
the mini-spare tub with the tire’s
valve stem facing rearward toward
the rear liftgate back panel.
4. Fasten the flat tire to the rear
liftgate back panel by inserting the
L-shaped bolt through one of the
lug bolt holes in the wheel.
5. Turn the L-shaped bolt clockwise into the threaded hole in the rear
liftgate back panel until the tire is secured.
TECHNICAL SPECIFICATIONS
Wheel Lug Nut Torque Specifications
WARNING:When a wheel is installed, always remove any
corrosion, dirt or foreign materials present on the mounting
surfaces of the wheel or the surface of the wheel hub, brake drum or
brake disc that contacts the wheel. Make sure that any fasteners that
attach the rotor to the hub are secured so they do not interfere with
the mounting surfaces of the wheel. Installing wheels without correct
metal-to-metal contact at the wheel mounting surfaces can cause the
wheel nuts to loosen and the wheel to come off while your vehicle is in
motion, resulting in loss of control.
Retighten the lug nuts to the specified torque within 100 miles
(160 kilometers) after any wheel disturbance (such as rotation, flat tire,
wheel removal).
382Wheels and Tires
2015 Explorer(exp)
Owners Guide gf, 2nd Printing, September 2014
USA(fus)