2015 FORD EXPEDITION fog light
[x] Cancel search: fog lightPage 3 of 564
Locks 69
Locking and unlocking..................................69
SecuriCode™ keyless entry keypad.........................77
Security 79
SecuriLock® passive anti-theft system.......................79
Anti-theft alarm.......................................82
Steering Wheel 83
Adjusting the steering wheel..............................83
Steering wheel controls.................................85
Pedals 89
Adjustable pedals......................................89
Wipers and Washers 90
Windshield wipers.....................................90
Rain-sensing wipers....................................90
Windshield washers....................................91
Rear-window wiper and washer............................91
Lighting 92
Lighting control.......................................92
Autolamps...........................................93
Instrument lighting dimmer...............................94
Daytime running lamps..................................94
Front fog lamps.......................................94
Directionindicators ....................................95
Interior lamps........................................95
Windows and Mirrors 97
Power windows.......................................97
Exteriormirrors.......................................98
Interiormirrors ......................................100
Sunvisors ..........................................102
Moonroof...........................................102
2Table of Contents
2015 Expedition(exd)
Owners Guide gf, 1st Printing, July 2014
USA(fus)
Page 94 of 564
AUTOLAMPS
WARNING:The daytime running lamps system does not activate
the rear lamps and may not provide adequate lighting during low
visibility driving conditions. Also, the autolamps switch position may not
activate the headlamps in all low visibility conditions, such as daytime
fog. Always ensure that your headlamps are switched to auto or on, as
appropriate, during all low visibility conditions. Failure to do so may
result in a collision.
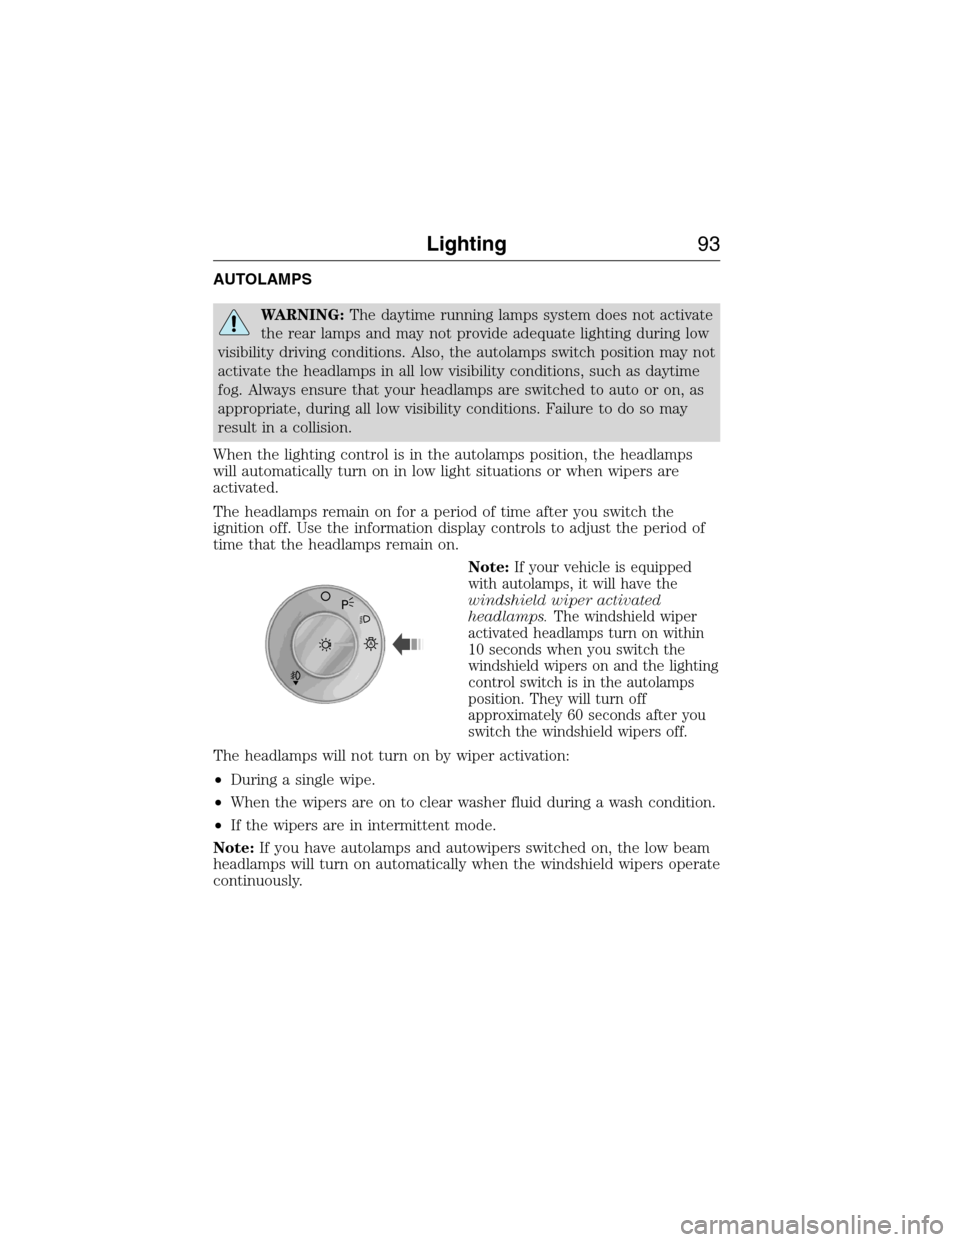
When the lighting control is in the autolamps position, the headlamps
will automatically turn on in low light situations or when wipers are
activated.
The headlamps remain on for a period of time after you switch the
ignition off. Use the information display controls to adjust the period of
time that the headlamps remain on.
Note:
If your vehicle is equipped
with autolamps, it will have the
windshield wiper activated
headlamps.The windshield wiper
activated headlamps turn on within
10 seconds when you switch the
windshield wipers on and the lighting
control switch is in the autolamps
position. They will turn off
approximately 60 seconds after you
switch the windshield wipers off.
The headlamps will not turn on by wiper activation:
•During a single wipe.
•When the wipers are on to clear washer fluid during a wash condition.
•If the wipers are in intermittent mode.
Note:If you have autolamps and autowipers switched on, the low beam
headlamps will turn on automatically when the windshield wipers operate
continuously.
A
Lighting93
2015 Expedition(exd)
Owners Guide gf, 1st Printing, July 2014
USA(fus)
Page 95 of 564
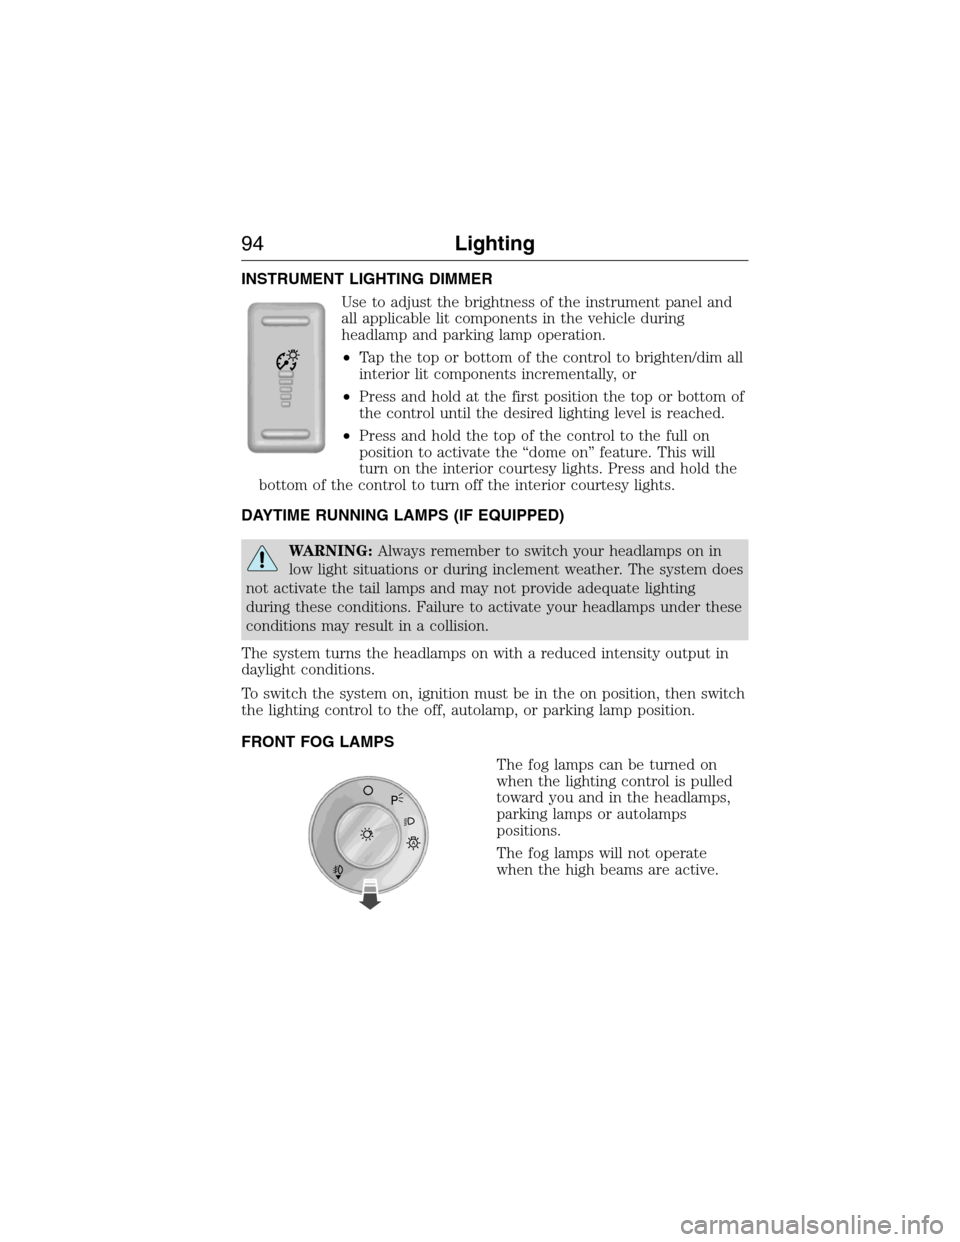
INSTRUMENT LIGHTING DIMMER
Use to adjust the brightness of the instrument panel and
all applicable lit components in the vehicle during
headlamp and parking lamp operation.
•Tap the top or bottom of the control to brighten/dim all
interior lit components incrementally, or
•Press and hold at the first position the top or bottom of
the control until the desired lighting level is reached.
•Press and hold the top of the control to the full on
position to activate the “dome on” feature. This will
turn on the interior courtesy lights. Press and hold the
bottom of the control to turn off the interior courtesy lights.
DAYTIME RUNNING LAMPS (IF EQUIPPED)
WARNING:Always remember to switch your headlamps on in
low light situations or during inclement weather. The system does
not activate the tail lamps and may not provide adequate lighting
during these conditions. Failure to activate your headlamps under these
conditions may result in a collision.
The system turns the headlamps on with a reduced intensity output in
daylight conditions.
To switch the system on, ignition must be in the on position, then switch
the lighting control to the off, autolamp, or parking lamp position.
FRONT FOG LAMPS
The fog lamps can be turned on
when the lighting control is pulled
toward you and in the headlamps,
parking lamps or autolamps
positions.
The fog lamps will not operate
when the high beams are active.
A
94Lighting
2015 Expedition(exd)
Owners Guide gf, 1st Printing, July 2014
USA(fus)
Page 109 of 564
Cruise Control
It will illuminate when you switch this feature on.
Direction Indicator
Illuminates when the left or right turn signal or the hazard
warning flasher is switched on. If the indicators stay on or flash
faster, check for a burned out bulb.
Door Ajar
Displays when the ignition is on and any door is not completely
closed.
Engine Coolant Temperature
Illuminates when the engine coolant temperature is high. Stop
the vehicle as soon as possible, switch off the engine and let
cool.
Engine Oil
If it illuminates with the engine running or when you are
driving, this indicates a malfunction. Stop your vehicle as soon
as it is safe to do so and switch the engine off. Check the
engine oil level.
Note:Do not resume your journey if it illuminates despite the level
being correct. Have the system checked by your authorized dealer.
Fasten Safety belt
It will illuminate and a chime will sound to remind you to fasten
your safety belt.
Front Airbag
If it fails to illuminate on startup, continues to flash or remains
on, it indicates a malfunction. Have the system checked by your
authorized dealer. A chime will sound when there is a
malfunction in the indicator light.
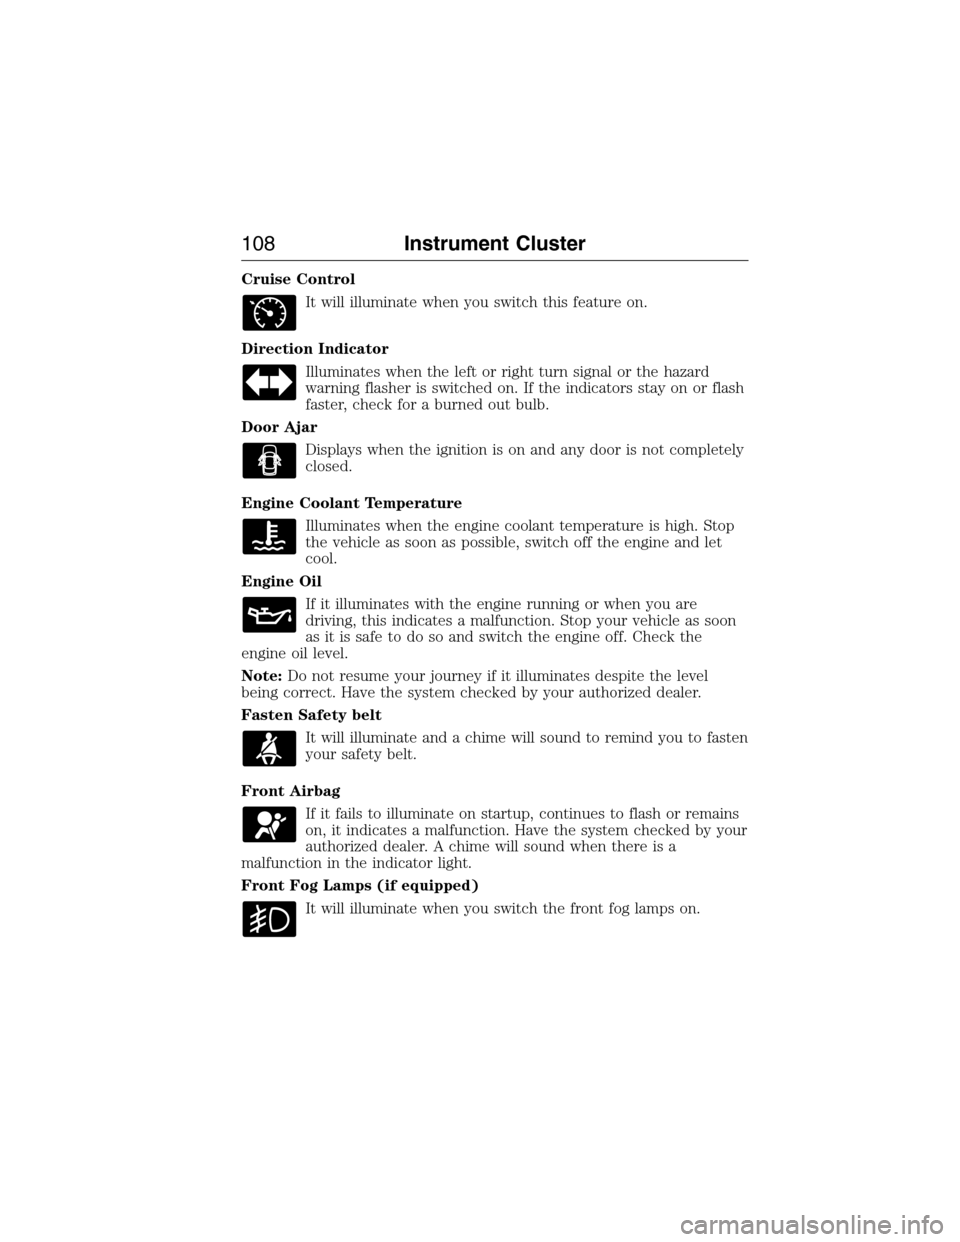
Front Fog Lamps (if equipped)
It will illuminate when you switch the front fog lamps on.
108Instrument Cluster
2015 Expedition(exd)
Owners Guide gf, 1st Printing, July 2014
USA(fus)
Page 138 of 564
F.REAR (temperature control):Press to turn on the auxiliary climate
control system and to set the desired rear temperature with the front
control. The rear temperature is the same as the front temperature when
only the center rear temperature light (REAR) is lit. The rear
temperature is different from the front temperature when more than one
rear temperature light (REAR) is lit.
G.Heated rear window:Turns the heated rear window on and off. See
Heated windows and mirrorslater in this chapter for more
information.
H.Recirculated air:Press the button to switch between outside air and
recirculated air. When you select recirculated air, the air currently in the
passenger compartment recirculates. This may reduce the time needed
to cool the interior (when used withA/C)and may reduce unwanted
odors from entering your vehicle.
Note:Recirculated air may turn off automatically (or be prevented
from turning on) in all airflow modes exceptMAX A/Cto reduce risk
of fogging.
I.A/C:Press the button to switch the air conditioning compressor on or
off. Use air conditioning with recirculated air to improve cooling
performance and efficiency.
Climate Control137
2015 Expedition(exd)
Owners Guide gf, 1st Printing, July 2014
USA(fus)
Page 144 of 564
GENERAL OPERATING TIPS
General Hints
Note:Prolonged use of recirculated air may cause the windows to fog
up.
Note:You may feel a small amount of air from the footwell air vents
regardless of the air distribution setting.
Note:To reduce humidity build-up inside your vehicle, do not drive with
the system switched off or with recirculated air always switched on.
Note:Do not place objects under the front seats as this may interfere
with the airflow to the rear seats.
Note:Remove any snow, ice or leaves from the air intake area at the
base of the windshield.
Note:To improve the time to reach comfort in hot weather, drive with
the windows slightly open for 2-3 minutes after start-up or until your
vehicle airs out.
Manual Climate Control
Note:To reduce fogging of the windshield during humid weather, adjust
the air distribution control to the windshield air vents position.
Automatic Climate Control
Note:Adjusting the settings when your vehicle interior is extremely hot
or cold is not necessary. The system automatically adjusts to heat or cool
the cabin to your selected temperature as quickly as possible. For the
system to function efficiently, the instrument panel and side air vents
should be fully open.
Note:If you selectAUTOduring cold outside temperatures, the system
directs airflow to the windshield and side window vents. In addition, the
fan may run at a slower speed until the engine warms up.
Note:If you selectAUTOduring hot outside temperatures, or when the
inside of the vehicle is hot, the system automatically uses recirculated air
to maximize interior cooling. When the interior reaches the selected
temperature, the system automatically switches to using outside air.
Climate Control143
2015 Expedition(exd)
Owners Guide gf, 1st Printing, July 2014
USA(fus)
Page 311 of 564
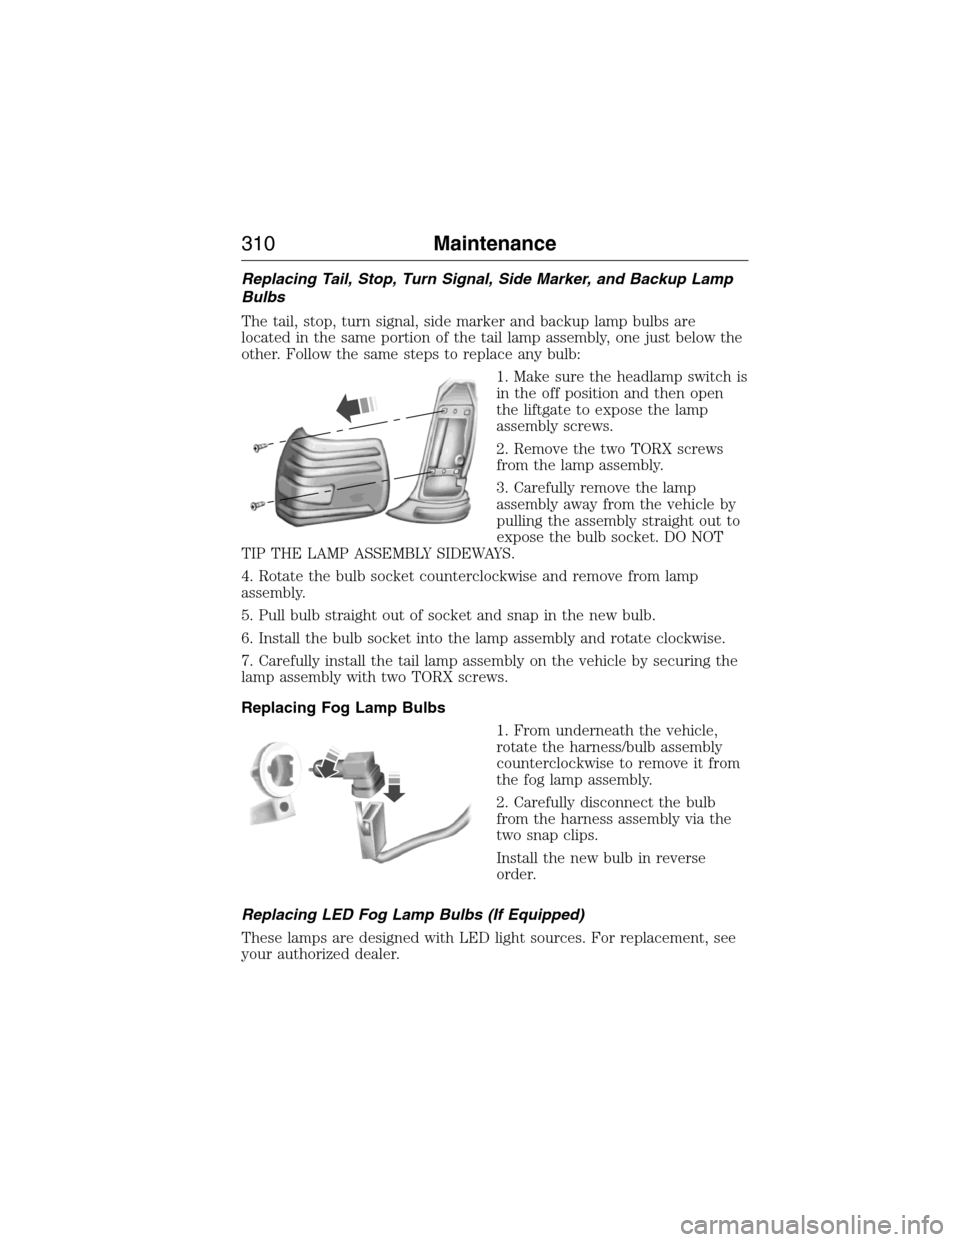
Replacing Tail, Stop, Turn Signal, Side Marker, and Backup Lamp
Bulbs
The tail, stop, turn signal, side marker and backup lamp bulbs are
located in the same portion of the tail lamp assembly, one just below the
other. Follow the same steps to replace any bulb:
1. Make sure the headlamp switch is
in the off position and then open
the liftgate to expose the lamp
assembly screws.
2. Remove the two TORX screws
from the lamp assembly.
3. Carefully remove the lamp
assembly away from the vehicle by
pulling the assembly straight out to
expose the bulb socket. DO NOT
TIP THE LAMP ASSEMBLY SIDEWAYS.
4. Rotate the bulb socket counterclockwise and remove from lamp
assembly.
5. Pull bulb straight out of socket and snap in the new bulb.
6. Install the bulb socket into the lamp assembly and rotate clockwise.
7. Carefully install the tail lamp assembly on the vehicle by securing the
lamp assembly with two TORX screws.
Replacing Fog Lamp Bulbs
1. From underneath the vehicle,
rotate the harness/bulb assembly
counterclockwise to remove it from
the fog lamp assembly.
2. Carefully disconnect the bulb
from the harness assembly via the
two snap clips.
Install the new bulb in reverse
order.
Replacing LED Fog Lamp Bulbs (If Equipped)
These lamps are designed with LED light sources. For replacement, see
your authorized dealer.
310Maintenance
2015 Expedition(exd)
Owners Guide gf, 1st Printing, July 2014
USA(fus)
Page 313 of 564
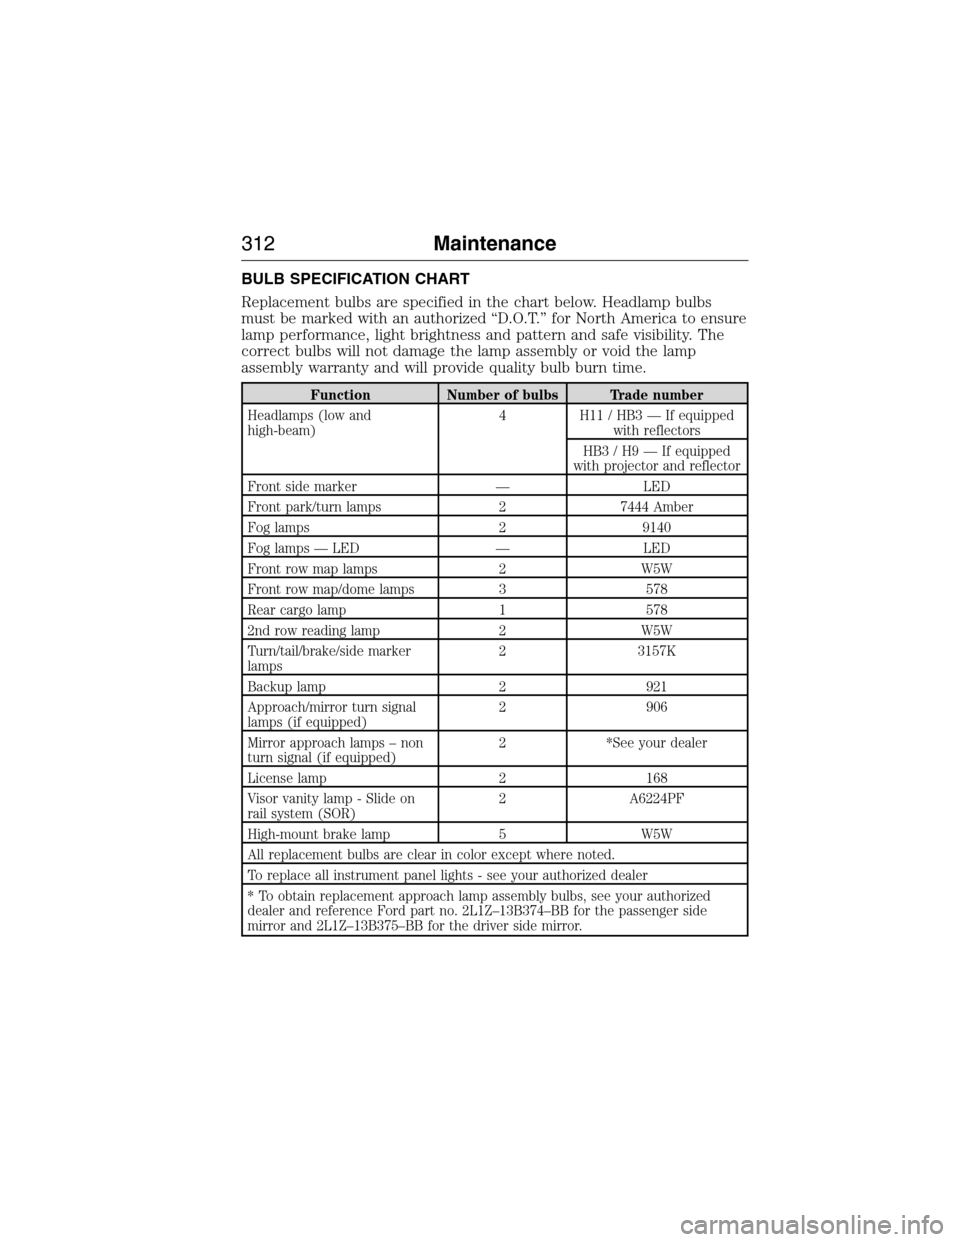
BULB SPECIFICATION CHART
Replacement bulbs are specified in the chart below. Headlamp bulbs
must be marked with an authorized “D.O.T.” for North America to ensure
lamp performance, light brightness and pattern and safe visibility. The
correct bulbs will not damage the lamp assembly or void the lamp
assembly warranty and will provide quality bulb burn time.
Function Number of bulbs Trade number
Headlamps (low and
high-beam)4 H11 / HB3 — If equipped
with reflectors
HB3 / H9 — If equipped
with projector and reflector
Front side marker — LED
Front park/turn lamps 2 7444 Amber
Fog lamps 2 9140
Fog lamps — LED — LED
Front row map lamps 2 W5W
Front row map/dome lamps 3 578
Rear cargo lamp 1 578
2nd row reading lamp 2 W5W
Turn/tail/brake/side marker
lamps2 3157K
Backup lamp 2 921
Approach/mirror turn signal
lamps (if equipped)2 906
Mirror approach lamps – non
turn signal (if equipped)2 *See your dealer
License lamp 2 168
Visor vanity lamp - Slide on
rail system (SOR)2 A6224PF
High-mount brake lamp 5 W5W
All replacement bulbs are clear in color except where noted.
To replace all instrument panel lights - see your authorized dealer
* To obtain replacement approach lamp assembly bulbs, see your authorized
dealer and reference Ford part no. 2L1Z–13B374–BB for the passenger side
mirror and 2L1Z–13B375–BB for the driver side mirror.
312Maintenance
2015 Expedition(exd)
Owners Guide gf, 1st Printing, July 2014
USA(fus)