Page 63 of 564
PRINCIPLES OF OPERATION
MyKey allows you to program keys with restricted driving modes to
promote good driving habits. All but one of the keys programmed to the
vehicle can be activated with these restricted modes.
Any keys that have not been programmed are referred to as
administrator keys or admin keys. These can be used to:
•Create a MyKey.
•Program configurable MyKey settings.
•Clear all MyKey features.
When you have programmed a MyKey, you can access the following
information using the information display:
•How many admin keys and MyKeys are programmed to your vehicle.
•The total distance your vehicle has traveled using a MyKey.
Note:All MyKeys are programmed to the same settings. You cannot
program them individually.
Note:For vehicles with intelligent access (push-button start), when both
a MyKey and an admin transmitter are present, the admin transmitter
will be recognized to start the vehicle.
Non-configurable Settings
The following settings cannot be changed by an admin key user:
•Belt-Minder. You cannot disable this feature. The audio system will
mute when the front seat occupants’ safety belts are not fastened.
•Early low fuel. The low-fuel warning activates earlier, giving the
MyKey user more time to refuel.
•Driver assist features, if equipped on your vehicle, are forced on:
traction control, parking aid, blind spot information system (BLIS)
with cross traffic alert, lane departure warning and the forward
collision warning system.
Configurable Settings
With an admin key, you can configure certain MyKey settings when you
first create a MyKey and before you recycle the key or restart the
vehicle. You can also change the settings afterward with an admin key.
•A vehicle speed limit can be set. Warnings will be shown in the display
followed by an audible tone when your vehicle reaches the set speed.
You cannot override the set speed by fully depressing the accelerator
pedal or by setting cruise control.
•Various vehicle speed minders can be set. Once you select a speed, it
will be shown in the display, followed by an audible tone when the
preselected vehicle speed is exceeded.
62MyKey
2015 Expedition(exd)
Owners Guide gf, 1st Printing, July 2014
USA(fus)
Page 74 of 564
LIFTGATE
WARNING:Do not allow people to travel in any area of your
vehicle that does not have seats and safety belts. Riding in a
cargo area, inside or outside of the vehicle, is extremely dangerous. In a
crash, people riding in these areas are more likely to be seriously
injured or killed. Make sure everyone in your vehicle is in a seat and
using a safety belt correctly. Failure to follow this warning could result
in serious personal injury or death.
Manual Liftgate
WARNING:Make sure to close and latch the liftgate to prevent
drawing exhaust fumes into your vehicle. This will also prevent
passengers and cargo from falling out. If you must drive with the
liftgate open, keep the vents or windows open so outside air comes into
your vehicle. Failure to follow this warning could result in serious
personal injury.
Note:Be careful when opening or closing the liftgate in a garage or
other enclosed area to avoid damaging the liftgate.
Note:Do not hang anything (bike rack, etc.) from the spoiler, glass or
liftgate. This could damage the liftgate and its components.
Note:Do not leave the liftgate open while driving. This could damage
the liftgate and its components.
The liftgate area is only intended for cargo, not passengers.
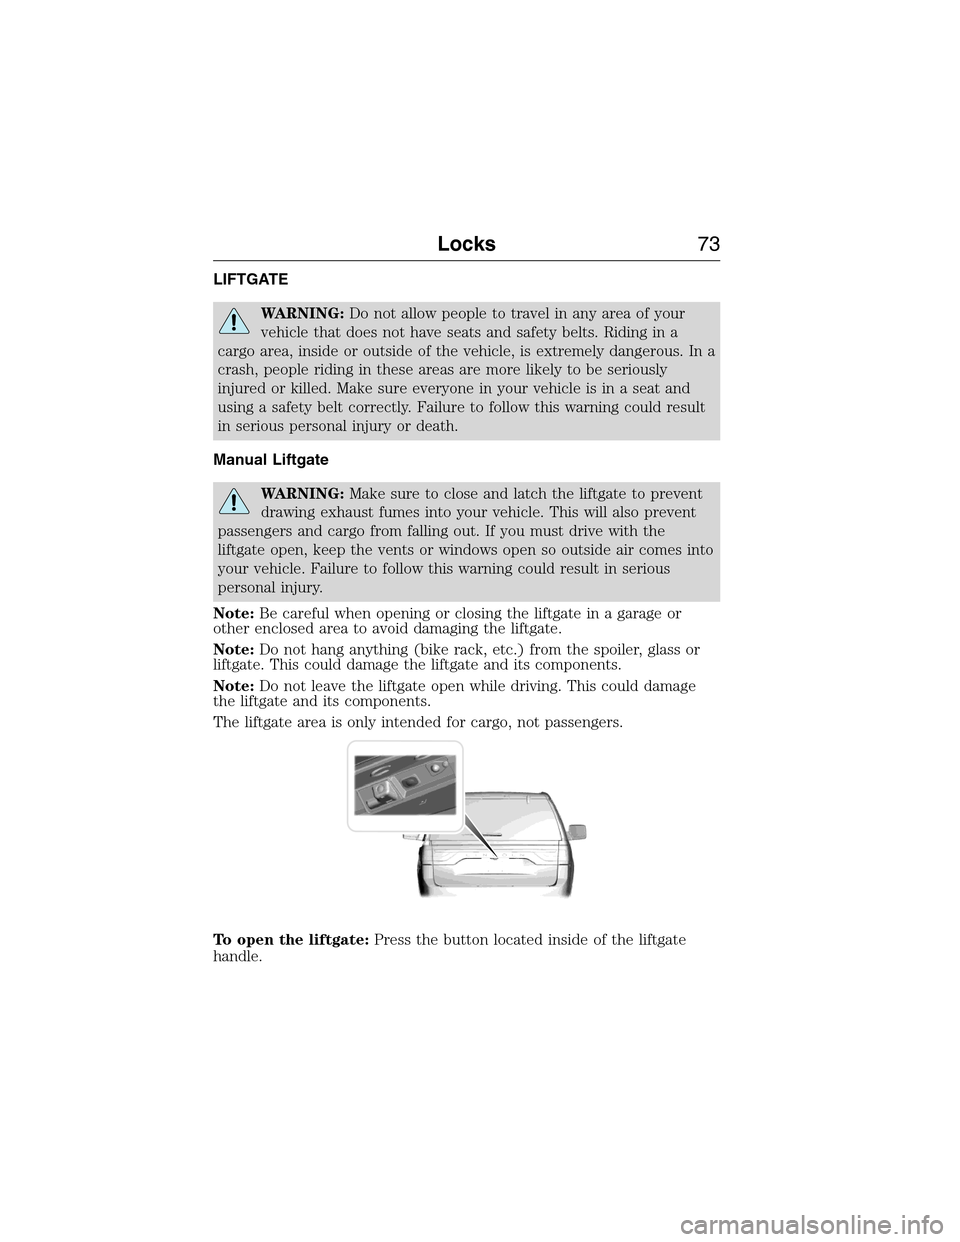
To open the liftgate:Press the button located inside of the liftgate
handle.
Locks73
2015 Expedition(exd)
Owners Guide gf, 1st Printing, July 2014
USA(fus)
Page 75 of 564
Power Liftgate (If Equipped)
WARNING:Make sure all persons are clear of the power liftgate
area before using the power liftgate control.
WARNING:Keep keys out of the reach of children. Do not allow
children to operate the power liftgate, or to play near an open or
moving power liftgate.
Note:Cycling the ignition while the liftgate is power closing and is near
the latch may cause the liftgate to reverse to full open position. Make
sure you close the liftgate before operating or moving the vehicle,
especially in an enclosure, such as a garage or a parking structure. You
could damage the liftgate or its components.
Note:Do not drive with the liftgate open without first disabling the
power function and securing the liftgate to the vehicle.
Note:In case of operation in extreme cold -40°F (-40°C), or on extreme
inclines, manual operation of the liftgate is suggested.
You can enable or disable the power liftgate using the information
display. The remote control and instrument panel button still operates
the liftgate regardless of the setting.
Opening and Closing the Power Liftgate
Note:You can reverse the liftgate movement direction with a second
press of the instrument panel button or the button on the liftgate, or a
second double press of the transmitter button.
The liftgate only operates with the vehicle inP.
Three tones sound as the liftgate begins to power close. A single tone
indicates a problem with the close request, caused by any of the
following:
•The ignition is on and the transmission is not inP.
•The battery voltage is below the minimum operating voltage
•The vehicle speed is at or above 3 mph (5 km/h)
74Locks
2015 Expedition(exd)
Owners Guide gf, 1st Printing, July 2014
USA(fus)
Page 76 of 564
If the liftgate reverses and starts to close after an open request, a fast
continuous tone indicates excessive load on the gate or a possible strut
failure. Have the system checked by an authorized dealer if you still have
a fast tone after removing the load.
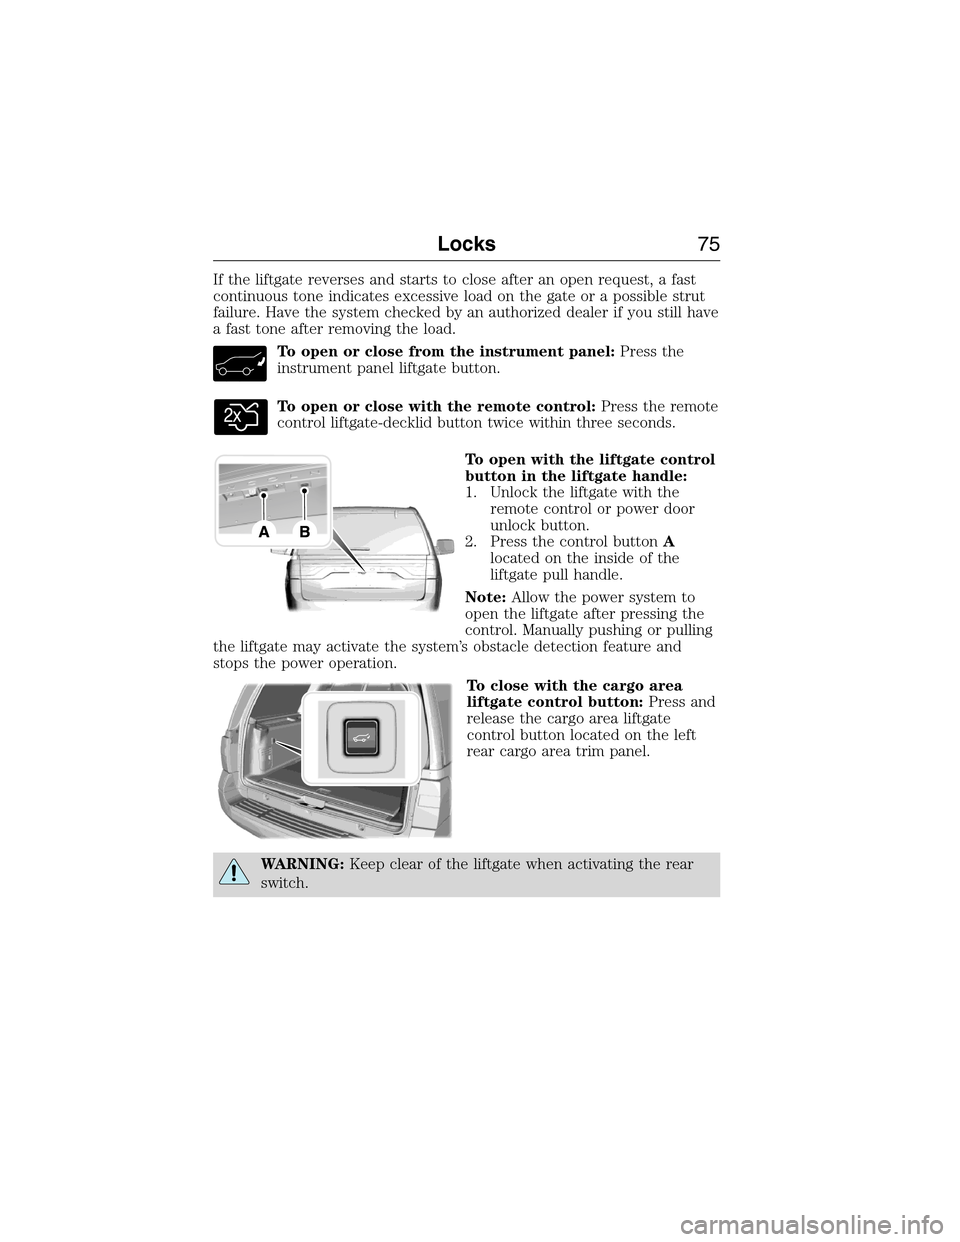
To open or close from the instrument panel:Press the
instrument panel liftgate button.
To open or close with the remote control:Press the remote
control liftgate-decklid button twice within three seconds.
To open with the liftgate control
button in the liftgate handle:
1. Unlock the liftgate with the
remote control or power door
unlock button.
2. Press the control buttonA
located on the inside of the
liftgate pull handle.
Note:Allow the power system to
open the liftgate after pressing the
control. Manually pushing or pulling
the liftgate may activate the system’s obstacle detection feature and
stops the power operation.
To close with the cargo area
liftgate control button:Press and
release the cargo area liftgate
control button located on the left
rear cargo area trim panel.
WARNING:Keep clear of the liftgate when activating the rear
switch.
E187797
Locks75
2015 Expedition(exd)
Owners Guide gf, 1st Printing, July 2014
USA(fus)
Page 77 of 564
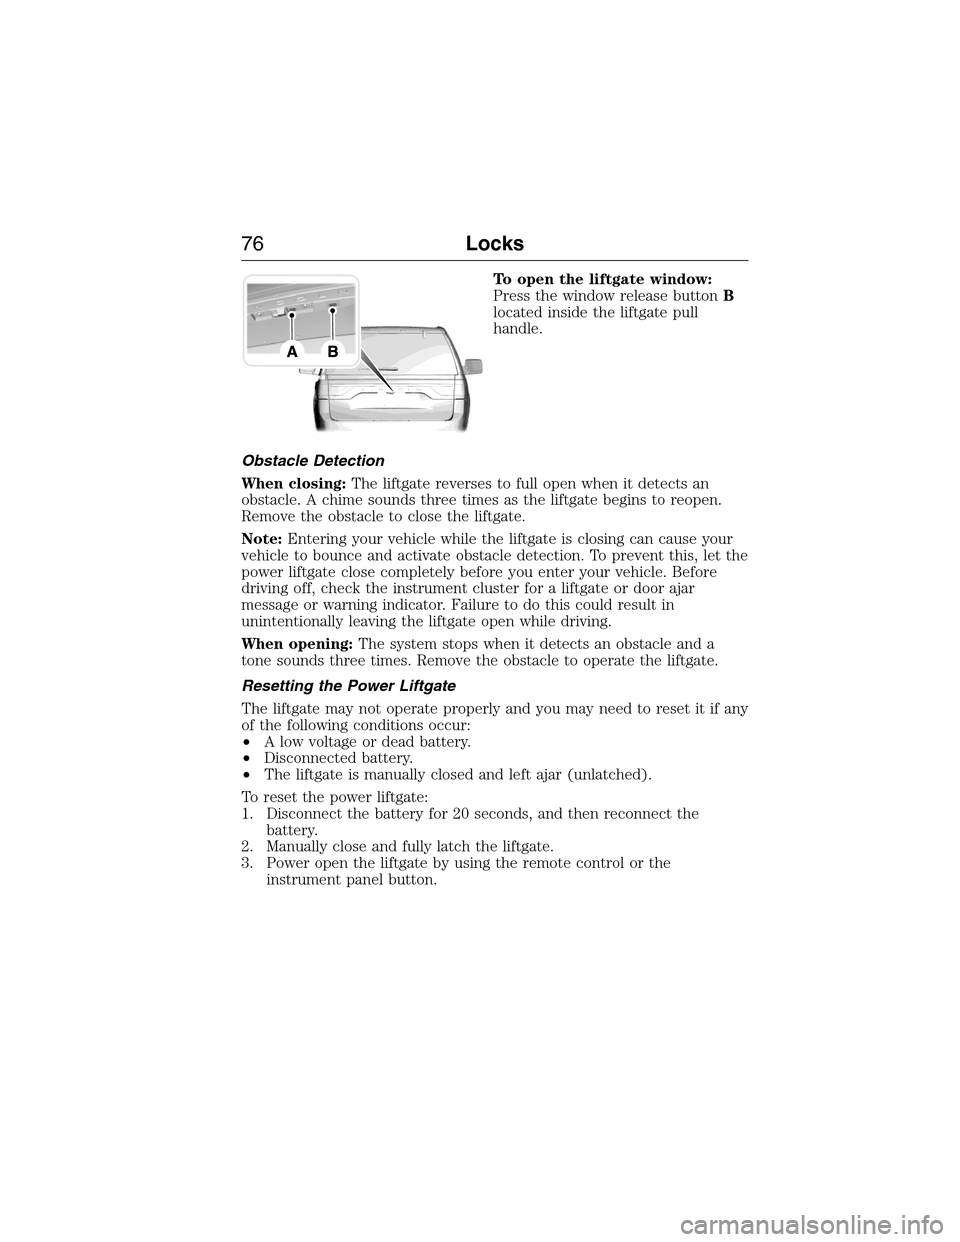
To open the liftgate window:
Press the window release buttonB
located inside the liftgate pull
handle.
Obstacle Detection
When closing:The liftgate reverses to full open when it detects an
obstacle. A chime sounds three times as the liftgate begins to reopen.
Remove the obstacle to close the liftgate.
Note:Entering your vehicle while the liftgate is closing can cause your
vehicle to bounce and activate obstacle detection. To prevent this, let the
power liftgate close completely before you enter your vehicle. Before
driving off, check the instrument cluster for a liftgate or door ajar
message or warning indicator. Failure to do this could result in
unintentionally leaving the liftgate open while driving.
When opening:The system stops when it detects an obstacle and a
tone sounds three times. Remove the obstacle to operate the liftgate.
Resetting the Power Liftgate
The liftgate may not operate properly and you may need to reset it if any
of the following conditions occur:
•A low voltage or dead battery.
•Disconnected battery.
•The liftgate is manually closed and left ajar (unlatched).
To reset the power liftgate:
1. Disconnect the battery for 20 seconds, and then reconnect the
battery.
2. Manually close and fully latch the liftgate.
3. Power open the liftgate by using the remote control or the
instrument panel button.
76Locks
2015 Expedition(exd)
Owners Guide gf, 1st Printing, July 2014
USA(fus)
Page 84 of 564
ADJUSTING THE STEERING WHEEL
WARNING:Do not adjust the steering wheel when your vehicle
is moving.
Note:Make sure that you are sitting in the correct position. Refer to
Sitting in the Correct Positionin theSeatschapter.
Manual Adjust Steering Wheel (If Equipped)
1. Unlock the steering wheel.
Note:The telescopic adjustment is
an optional feature.
2. Adjust the steering wheel to the
desired position.
3. Lock the steering wheel.
Steering Wheel83
2015 Expedition(exd)
Owners Guide gf, 1st Printing, July 2014
USA(fus)
Page 90 of 564
ADJUSTABLE PEDALS (IF EQUIPPED)
WARNING:Never use the controls when your feet are on the
accelerator or brake pedals, especially when the vehicle is
moving.
Note:Adjust the pedals only when your vehicle is in park (P).
Depending on your vehicle and equipment level, the shape and location
of your power-adjustable pedal control can vary.
•If your control is vertical, then it is to the left of the steering column
and on the instrument panel.
•If your control is horizontal, then it is on the left side of the steering
column.
The Vertical Control
A. Closer.
B. Farther.
The Horizontal Control
A. Farther.
B. Closer.
Both horizontal and vertical controls operate the same way:
1. Press and hold A to move the pedals away from you.
2. Press and hold B to move the pedals closer to you
You can save and recall the pedal positions with the memory feature (if
equipped). Refer to theSeatschapter.
A
B
AB
Pedals89
2015 Expedition(exd)
Owners Guide gf, 1st Printing, July 2014
USA(fus)
Page 94 of 564
AUTOLAMPS
WARNING:The daytime running lamps system does not activate
the rear lamps and may not provide adequate lighting during low
visibility driving conditions. Also, the autolamps switch position may not
activate the headlamps in all low visibility conditions, such as daytime
fog. Always ensure that your headlamps are switched to auto or on, as
appropriate, during all low visibility conditions. Failure to do so may
result in a collision.
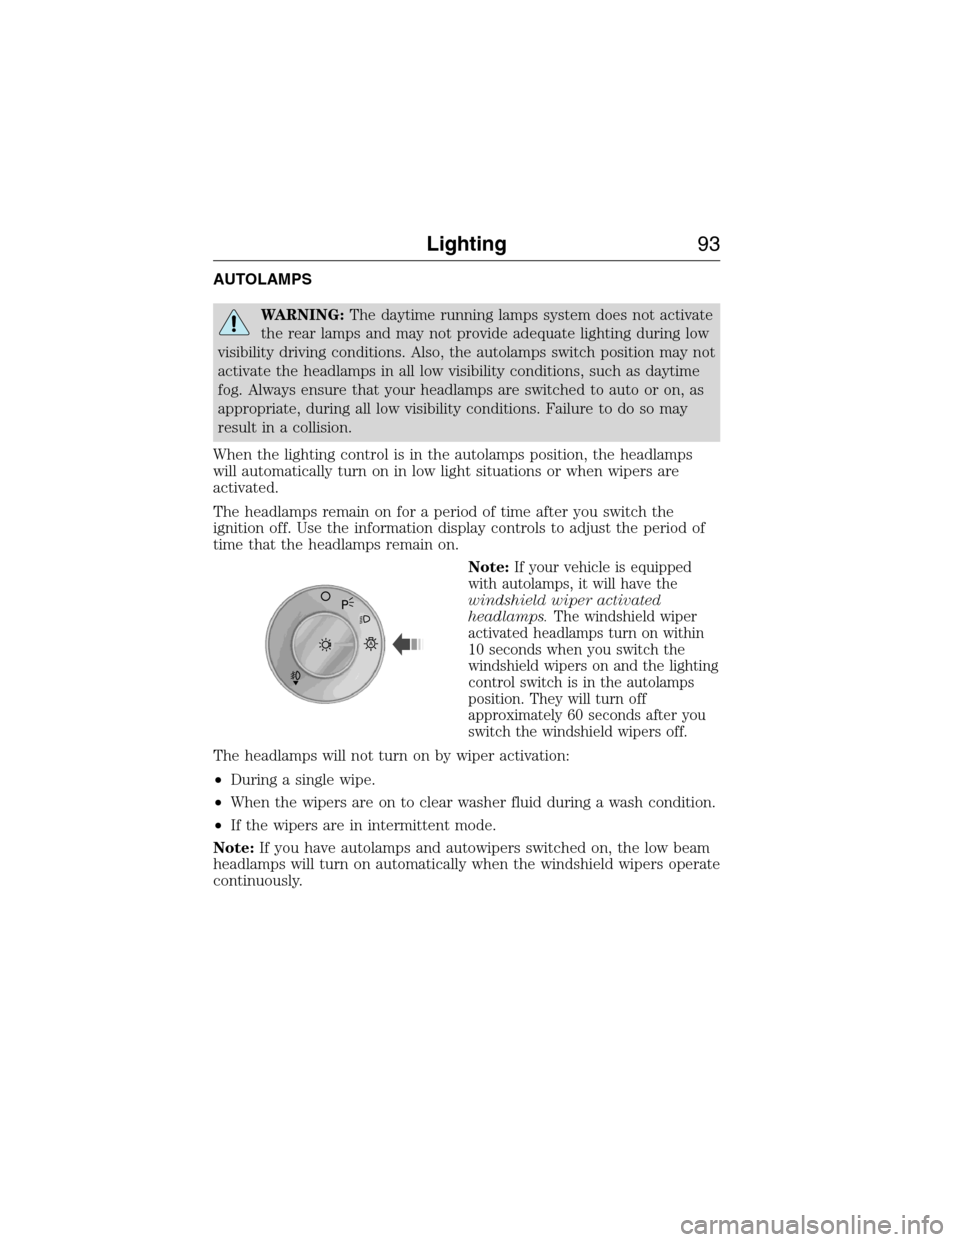
When the lighting control is in the autolamps position, the headlamps
will automatically turn on in low light situations or when wipers are
activated.
The headlamps remain on for a period of time after you switch the
ignition off. Use the information display controls to adjust the period of
time that the headlamps remain on.
Note:
If your vehicle is equipped
with autolamps, it will have the
windshield wiper activated
headlamps.The windshield wiper
activated headlamps turn on within
10 seconds when you switch the
windshield wipers on and the lighting
control switch is in the autolamps
position. They will turn off
approximately 60 seconds after you
switch the windshield wipers off.
The headlamps will not turn on by wiper activation:
•During a single wipe.
•When the wipers are on to clear washer fluid during a wash condition.
•If the wipers are in intermittent mode.
Note:If you have autolamps and autowipers switched on, the low beam
headlamps will turn on automatically when the windshield wipers operate
continuously.
A
Lighting93
2015 Expedition(exd)
Owners Guide gf, 1st Printing, July 2014
USA(fus)