2015 FORD EXPEDITION battery
[x] Cancel search: batteryPage 75 of 564
Power Liftgate (If Equipped)
WARNING:Make sure all persons are clear of the power liftgate
area before using the power liftgate control.
WARNING:Keep keys out of the reach of children. Do not allow
children to operate the power liftgate, or to play near an open or
moving power liftgate.
Note:Cycling the ignition while the liftgate is power closing and is near
the latch may cause the liftgate to reverse to full open position. Make
sure you close the liftgate before operating or moving the vehicle,
especially in an enclosure, such as a garage or a parking structure. You
could damage the liftgate or its components.
Note:Do not drive with the liftgate open without first disabling the
power function and securing the liftgate to the vehicle.
Note:In case of operation in extreme cold -40°F (-40°C), or on extreme
inclines, manual operation of the liftgate is suggested.
You can enable or disable the power liftgate using the information
display. The remote control and instrument panel button still operates
the liftgate regardless of the setting.
Opening and Closing the Power Liftgate
Note:You can reverse the liftgate movement direction with a second
press of the instrument panel button or the button on the liftgate, or a
second double press of the transmitter button.
The liftgate only operates with the vehicle inP.
Three tones sound as the liftgate begins to power close. A single tone
indicates a problem with the close request, caused by any of the
following:
•The ignition is on and the transmission is not inP.
•The battery voltage is below the minimum operating voltage
•The vehicle speed is at or above 3 mph (5 km/h)
74Locks
2015 Expedition(exd)
Owners Guide gf, 1st Printing, July 2014
USA(fus)
Page 77 of 564
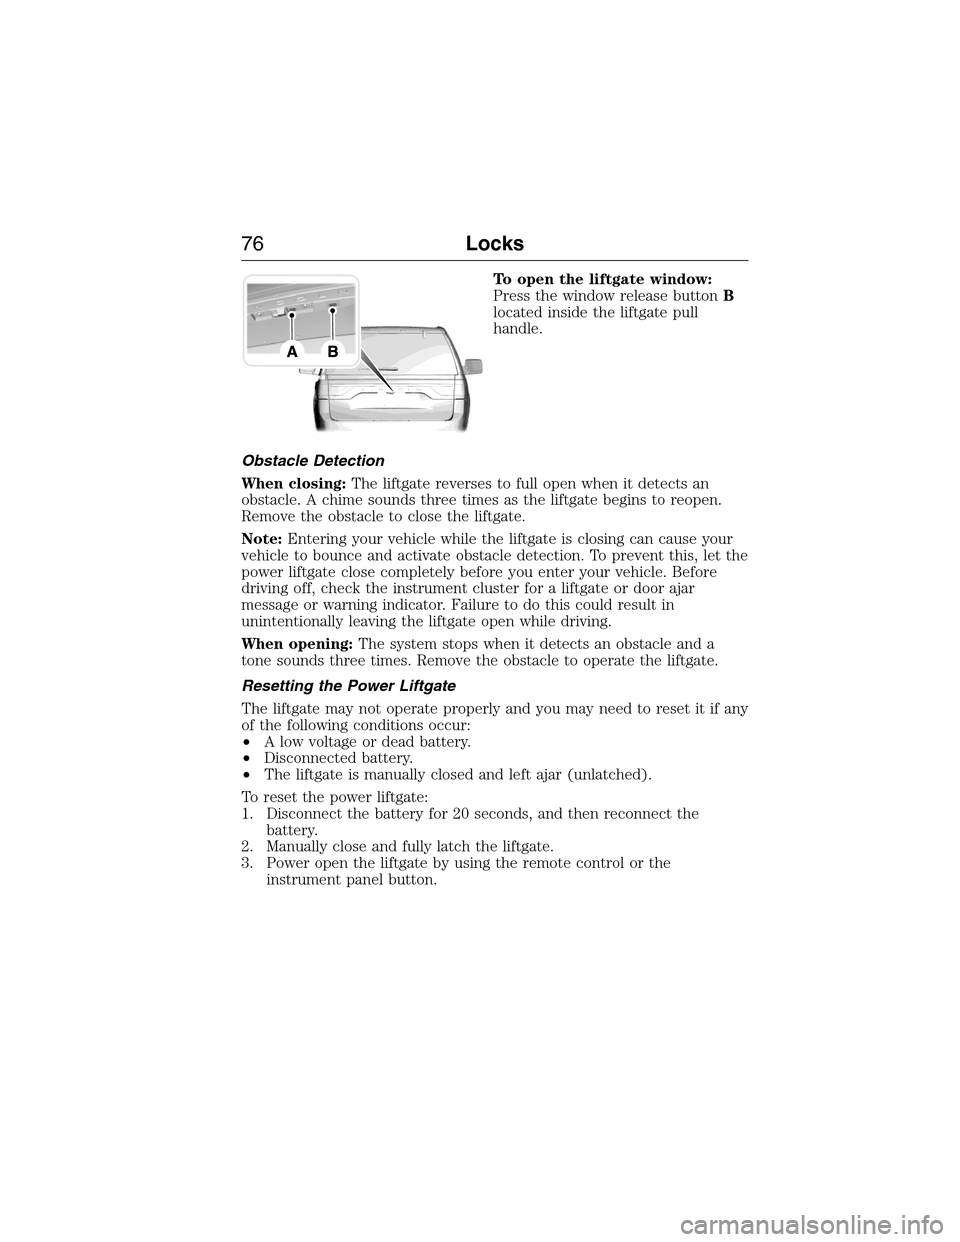
To open the liftgate window:
Press the window release buttonB
located inside the liftgate pull
handle.
Obstacle Detection
When closing:The liftgate reverses to full open when it detects an
obstacle. A chime sounds three times as the liftgate begins to reopen.
Remove the obstacle to close the liftgate.
Note:Entering your vehicle while the liftgate is closing can cause your
vehicle to bounce and activate obstacle detection. To prevent this, let the
power liftgate close completely before you enter your vehicle. Before
driving off, check the instrument cluster for a liftgate or door ajar
message or warning indicator. Failure to do this could result in
unintentionally leaving the liftgate open while driving.
When opening:The system stops when it detects an obstacle and a
tone sounds three times. Remove the obstacle to operate the liftgate.
Resetting the Power Liftgate
The liftgate may not operate properly and you may need to reset it if any
of the following conditions occur:
•A low voltage or dead battery.
•Disconnected battery.
•The liftgate is manually closed and left ajar (unlatched).
To reset the power liftgate:
1. Disconnect the battery for 20 seconds, and then reconnect the
battery.
2. Manually close and fully latch the liftgate.
3. Power open the liftgate by using the remote control or the
instrument panel button.
76Locks
2015 Expedition(exd)
Owners Guide gf, 1st Printing, July 2014
USA(fus)
Page 97 of 564
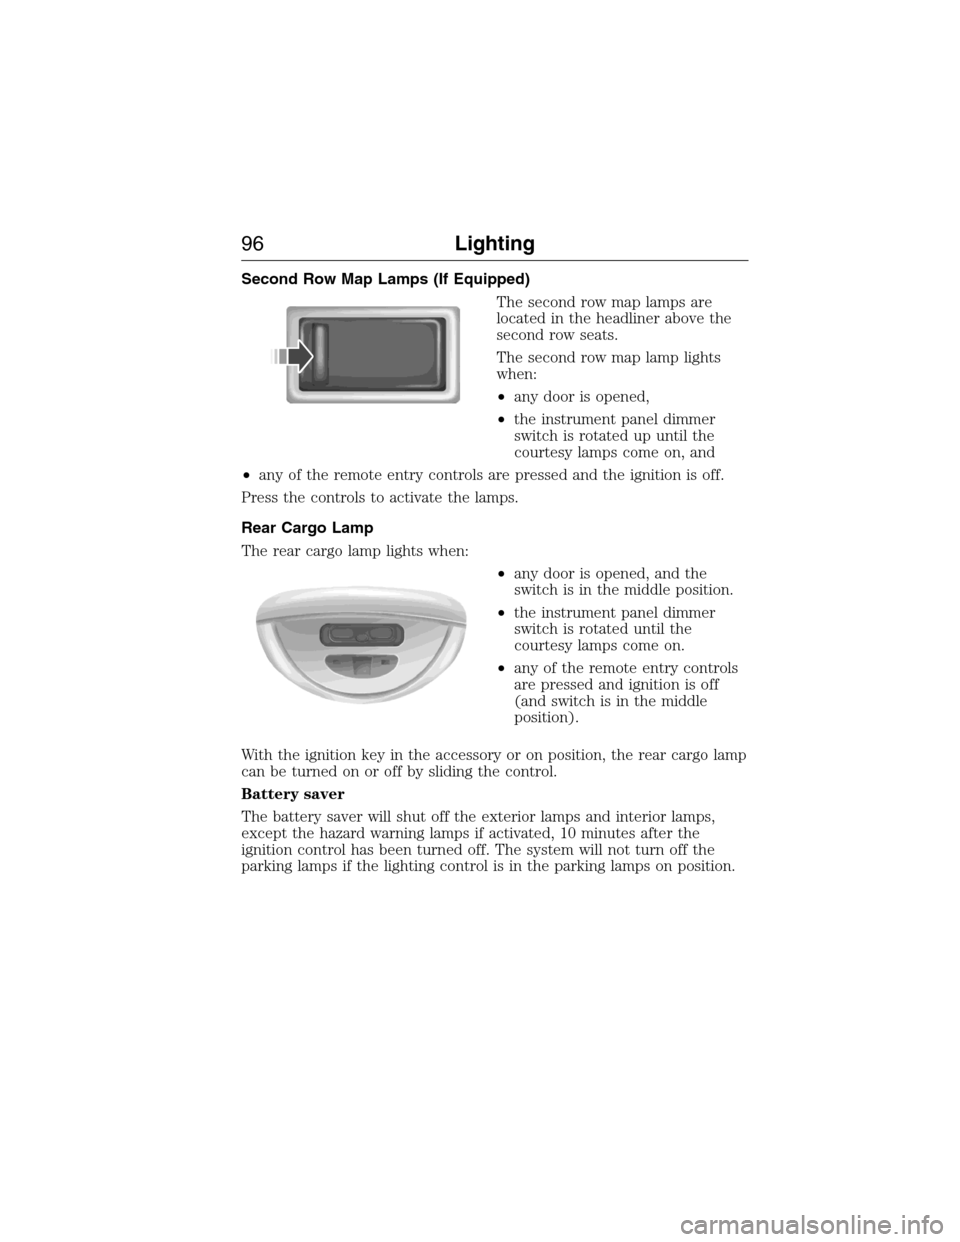
Second Row Map Lamps (If Equipped)
The second row map lamps are
located in the headliner above the
second row seats.
The second row map lamp lights
when:
•any door is opened,
•the instrument panel dimmer
switch is rotated up until the
courtesy lamps come on, and
•any of the remote entry controls are pressed and the ignition is off.
Press the controls to activate the lamps.
Rear Cargo Lamp
The rear cargo lamp lights when:
•any door is opened, and the
switch is in the middle position.
•the instrument panel dimmer
switch is rotated until the
courtesy lamps come on.
•any of the remote entry controls
are pressed and ignition is off
(and switch is in the middle
position).
With the ignition key in the accessory or on position, the rear cargo lamp
can be turned on or off by sliding the control.
Battery saver
The battery saver will shut off the exterior lamps and interior lamps,
except the hazard warning lamps if activated, 10 minutes after the
ignition control has been turned off. The system will not turn off the
parking lamps if the lighting control is in the parking lamps on position.
96Lighting
2015 Expedition(exd)
Owners Guide gf, 1st Printing, July 2014
USA(fus)
Page 108 of 564
WARNING LAMPS AND INDICATORS
The following warning lamps and indicators will alert you to a vehicle
condition that may become serious. Some lamps will illuminate when you
start your vehicle to make sure they work. If any lamps remain on after
starting your vehicle, refer to the respective system warning lamp for
further information.
Note:Some warning indicators appear in the information display and
function the same as a warning lamp but do not display when you start
your vehicle.
Anti-Lock Braking System
If it illuminates when you are driving, this indicates a
malfunction. You will continue to have the normal braking
system (without ABS) unless the brake warning lamp is also
illuminated. Have the system checked by your authorized dealer.
Battery
If it illuminates while driving, it indicates a malfunction. Switch
off all unnecessary electrical equipment and have the system
checked by your authorized dealer
Brake System
It will illuminate when the parking brake is engaged and the
ignition is on.
If it illuminates when you are driving, check that the parking
brake is not engaged. If the parking brake is not engaged, this indicates
low brake fluid level or a brake system malfunction. Have the system
checked immediately by your authorized dealer.
WARNING:Driving a vehicle with the brake system warning
light on is dangerous. A significant decrease in braking
performance may occur. It will take you longer to stop the vehicle.
Have the vehicle checked by your authorized dealer as soon as possible.
Driving extended distances with the parking brake engaged can cause
brake failure and the risk of personal injury.
Instrument Cluster107
2015 Expedition(exd)
Owners Guide gf, 1st Printing, July 2014
USA(fus)
Page 127 of 564

Battery and Charging System
MessagesAction / Description
Check Charging System Stop your vehicle as soon as it is
safetodosoandswitchoffthe
ignition. Contact your authorized
dealer.
Turn Power Off to Save Battery Displays to warn of a low 12–volt
battery condition. Turn off all
unneeded electrical accessories.
Contact your authorized dealer.
Low Battery Features Temporarily
Turned OffDisplays to warn of a low 12–volt
battery condition. Turn off all
unneeded electrical accessories.
Blind Spot Information System
MessagesAction / Description
Blind Spot Not Available Sensor
BlockedDisplays when the blind spot
information system/cross traffic
alert system sensors are blocked.
Driver can typically clean the
sensor to resolve.
Blind Spot System Fault Displays when a fault with the
blind spot information system has
occurred. Contact your authorized
dealer as soon as possible.
Cross Traffic Not Available Sensor
BlockedDisplays when the blind spot
information system/cross traffic
alert system sensors are blocked.
Driver can typically clean the
sensor to resolve.
Cross Traffic System Fault Displays when a fault with the
cross traffic alert system has
occurred. Contact your authorized
dealer as soon as possible.
126Information Displays
2015 Expedition(exd)
Owners Guide gf, 1st Printing, July 2014
USA(fus)
Page 135 of 564
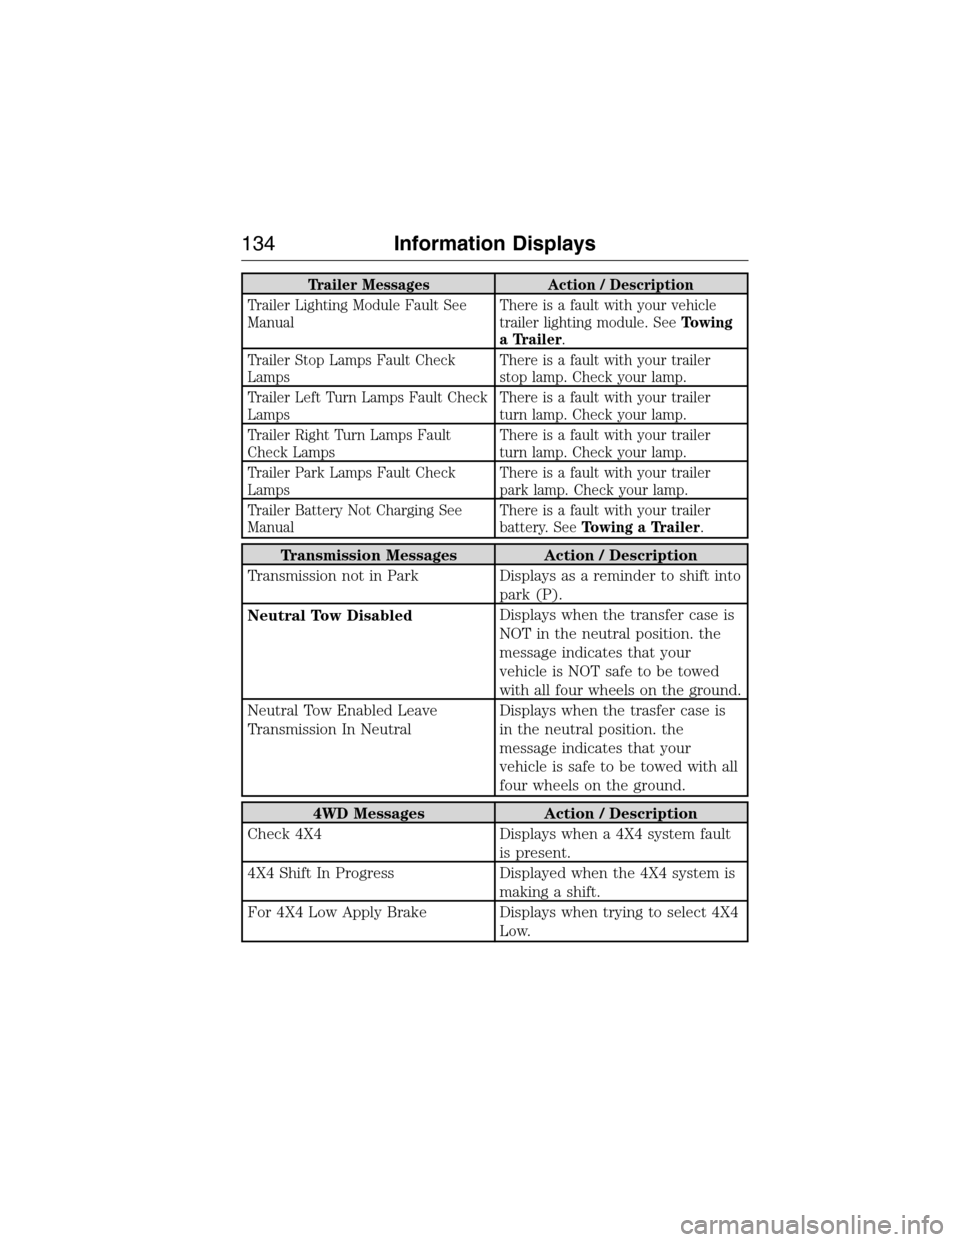
Trailer Messages Action / Description
Trailer Lighting Module Fault See
ManualThere is a fault with your vehicle
trailer lighting module. SeeTowing
a Trailer.
Trailer Stop Lamps Fault Check
LampsThere is a fault with your trailer
stop lamp. Check your lamp.
Trailer Left Turn Lamps Fault Check
LampsThere is a fault with your trailer
turn lamp. Check your lamp.
Trailer Right Turn Lamps Fault
Check LampsThere is a fault with your trailer
turn lamp. Check your lamp.
Trailer Park Lamps Fault Check
LampsThere is a fault with your trailer
park lamp. Check your lamp.
Trailer Battery Not Charging See
ManualThere is a fault with your trailer
battery. SeeTowing a Trailer.
Transmission Messages Action / Description
Transmission not in Park Displays as a reminder to shift into
park (P).
Neutral Tow DisabledDisplays when the transfer case is
NOT in the neutral position. the
message indicates that your
vehicle is NOT safe to be towed
with all four wheels on the ground.
Neutral Tow Enabled Leave
Transmission In NeutralDisplays when the trasfer case is
in the neutral position. the
message indicates that your
vehicle is safe to be towed with all
four wheels on the ground.
4WD Messages Action / Description
Check 4X4 Displays when a 4X4 system fault
is present.
4X4 Shift In Progress Displayed when the 4X4 system is
making a shift.
For 4X4 Low Apply Brake Displays when trying to select 4X4
Low.
134Information Displays
2015 Expedition(exd)
Owners Guide gf, 1st Printing, July 2014
USA(fus)
Page 168 of 564

PowerFold™ Third-Row Seat (If Equipped)
Note:The power fold down seats will operate for 10 minutes after the
ignition switch is in off. The transmission must be in park (P) and the
liftgate, or liftgate glass must be open. Similar to the battery saver
feature, the power third row seat will be disabled 10 minutes after
turning the vehicle off.
Note:Be sure that the head restraints are folded down before powering
the third row seat down.
The control buttons are located on
the right-hand rear quarter trim
panel (accessible from the liftgate
area).
Press B to lower the desired
seatback. Press A to return the
seatback to its original position.
If the power third row seat is disabled after 10 minutes, you can enable
the seat by:
•Opening any door.
•Pressing the unlock button on the key fob.
•Pressing any keyless entry keypad button.
•Turning the ignition key.
B
AA
B
UP
FOLDUP
FOLD
Seats167
2015 Expedition(exd)
Owners Guide gf, 1st Printing, July 2014
USA(fus)
Page 170 of 564
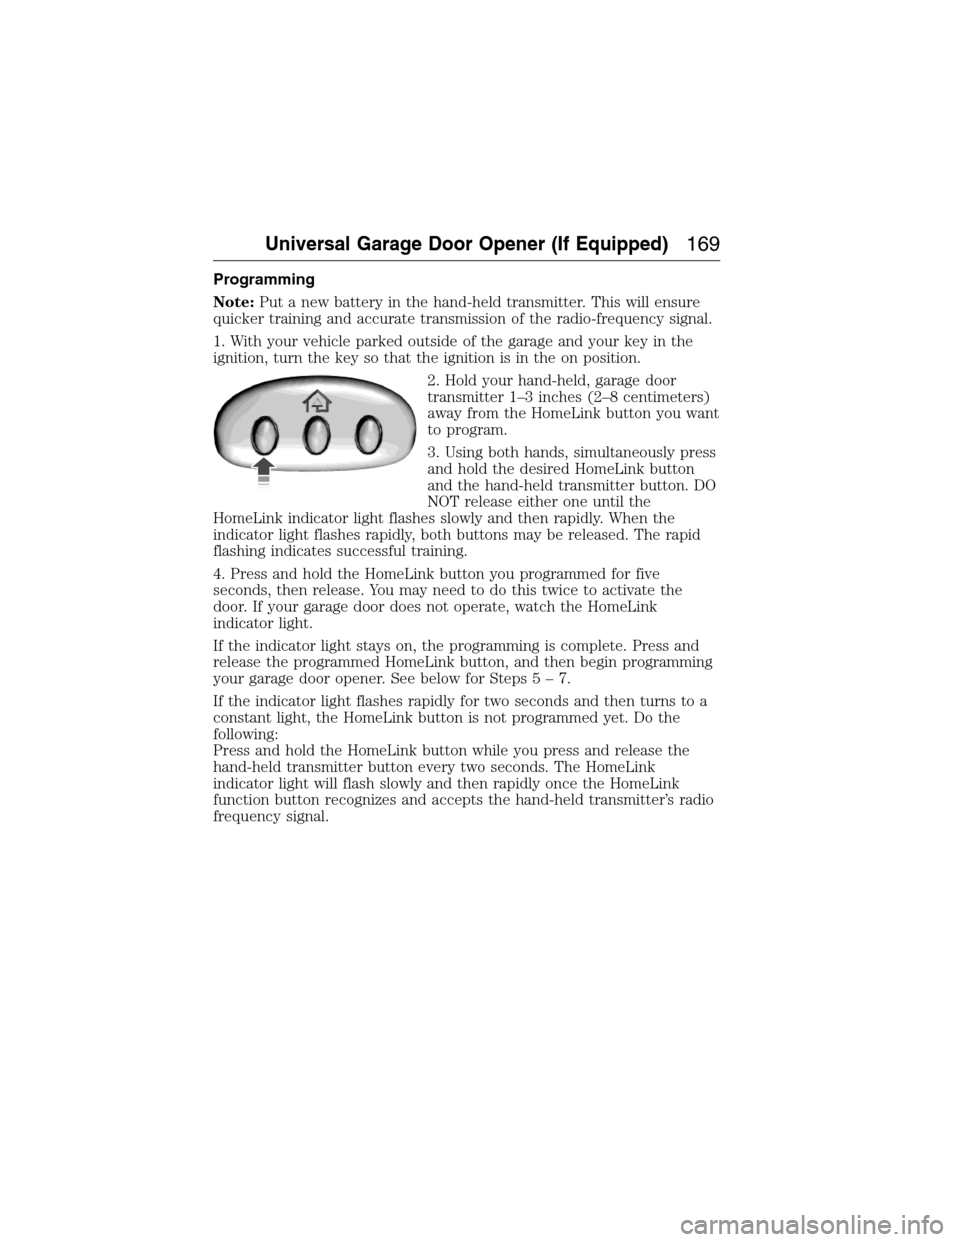
Programming
Note:Put a new battery in the hand-held transmitter. This will ensure
quicker training and accurate transmission of the radio-frequency signal.
1. With your vehicle parked outside of the garage and your key in the
ignition, turn the key so that the ignition is in the on position.
2. Hold your hand-held, garage door
transmitter 1–3 inches (2–8 centimeters)
away from the HomeLink button you want
to program.
3. Using both hands, simultaneously press
and hold the desired HomeLink button
and the hand-held transmitter button. DO
NOT release either one until the
HomeLink indicator light flashes slowly and then rapidly. When the
indicator light flashes rapidly, both buttons may be released. The rapid
flashing indicates successful training.
4. Press and hold the HomeLink button you programmed for five
seconds, then release. You may need to do this twice to activate the
door. If your garage door does not operate, watch the HomeLink
indicator light.
If the indicator light stays on, the programming is complete. Press and
release the programmed HomeLink button, and then begin programming
your garage door opener. See below for Steps5–7.
If the indicator light flashes rapidly for two seconds and then turns to a
constant light, the HomeLink button is not programmed yet. Do the
following:
Press and hold the HomeLink button while you press and release the
hand-held transmitter button every two seconds. The HomeLink
indicator light will flash slowly and then rapidly once the HomeLink
function button recognizes and accepts the hand-held transmitter’s radio
frequency signal.
Universal Garage Door Opener (If Equipped)169
2015 Expedition(exd)
Owners Guide gf, 1st Printing, July 2014
USA(fus)