Page 249 of 469

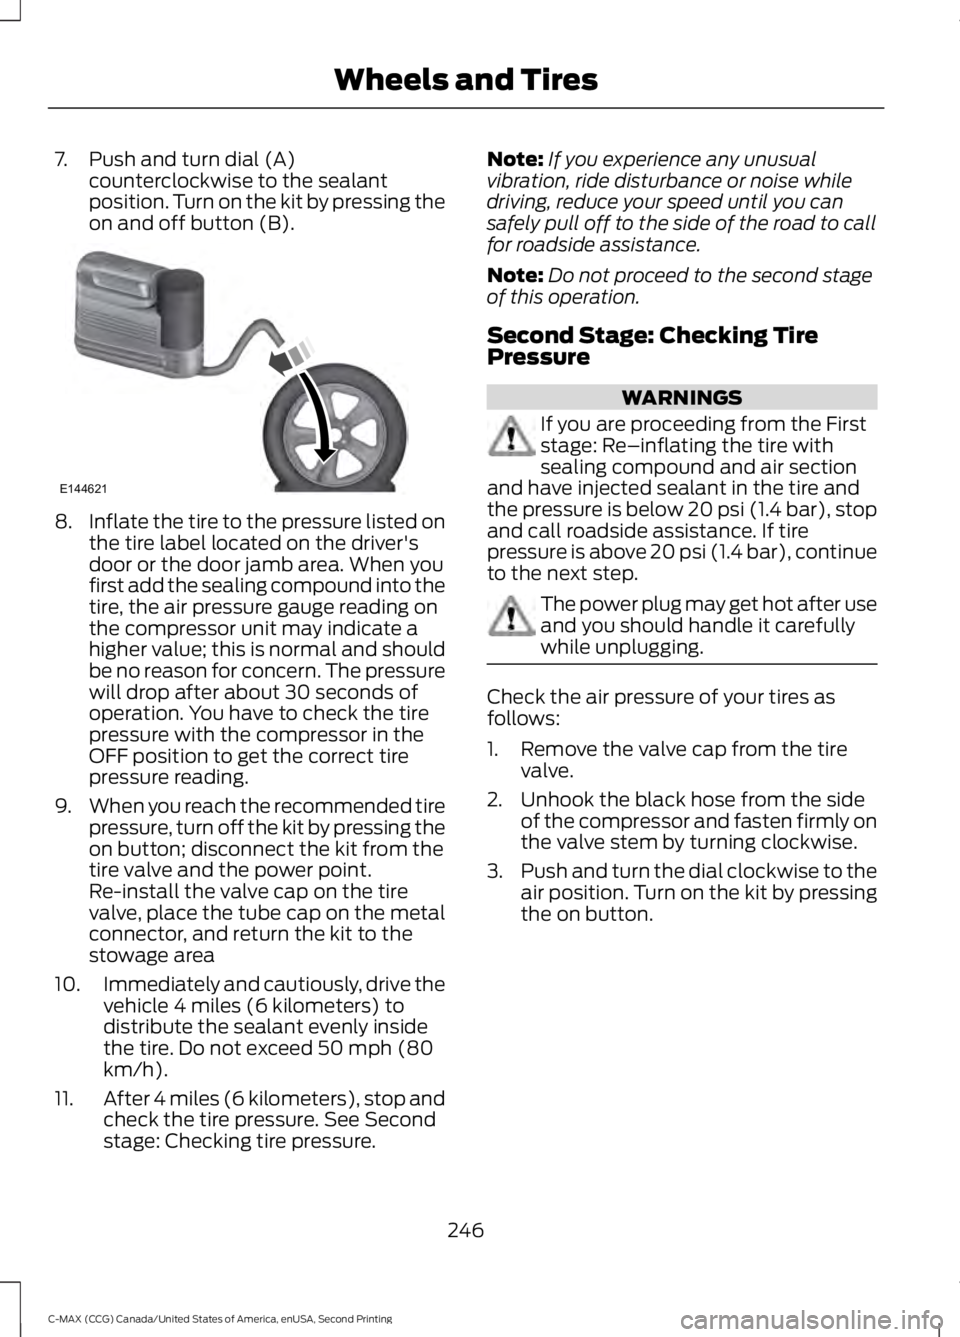
7. Push and turn dial (A)
counterclockwise to the sealant
position. Turn on the kit by pressing the
on and off button (B). 8.
Inflate the tire to the pressure listed on
the tire label located on the driver's
door or the door jamb area. When you
first add the sealing compound into the
tire, the air pressure gauge reading on
the compressor unit may indicate a
higher value; this is normal and should
be no reason for concern. The pressure
will drop after about 30 seconds of
operation. You have to check the tire
pressure with the compressor in the
OFF position to get the correct tire
pressure reading.
9. When you reach the recommended tire
pressure, turn off the kit by pressing the
on button; disconnect the kit from the
tire valve and the power point.
Re-install the valve cap on the tire
valve, place the tube cap on the metal
connector, and return the kit to the
stowage area
10. Immediately and cautiously, drive the
vehicle 4 miles (6 kilometers) to
distribute the sealant evenly inside
the tire. Do not exceed 50 mph (80
km/h).
11. After 4 miles (6 kilometers), stop and
check the tire pressure. See Second
stage: Checking tire pressure. Note:
If you experience any unusual
vibration, ride disturbance or noise while
driving, reduce your speed until you can
safely pull off to the side of the road to call
for roadside assistance.
Note: Do not proceed to the second stage
of this operation.
Second Stage: Checking Tire
Pressure WARNINGS
If you are proceeding from the First
stage: Re–inflating the tire with
sealing compound and air section
and have injected sealant in the tire and
the pressure is below 20 psi (1.4 bar), stop
and call roadside assistance. If tire
pressure is above 20 psi (1.4 bar), continue
to the next step. The power plug may get hot after use
and you should handle it carefully
while unplugging.
Check the air pressure of your tires as
follows:
1. Remove the valve cap from the tire
valve.
2. Unhook the black hose from the side of the compressor and fasten firmly on
the valve stem by turning clockwise.
3. Push and turn the dial clockwise to the
air position. Turn on the kit by pressing
the on button.
246
C-MAX (CCG) Canada/United States of America, enUSA, Second Printing Wheels and TiresE144621
Page 255 of 469

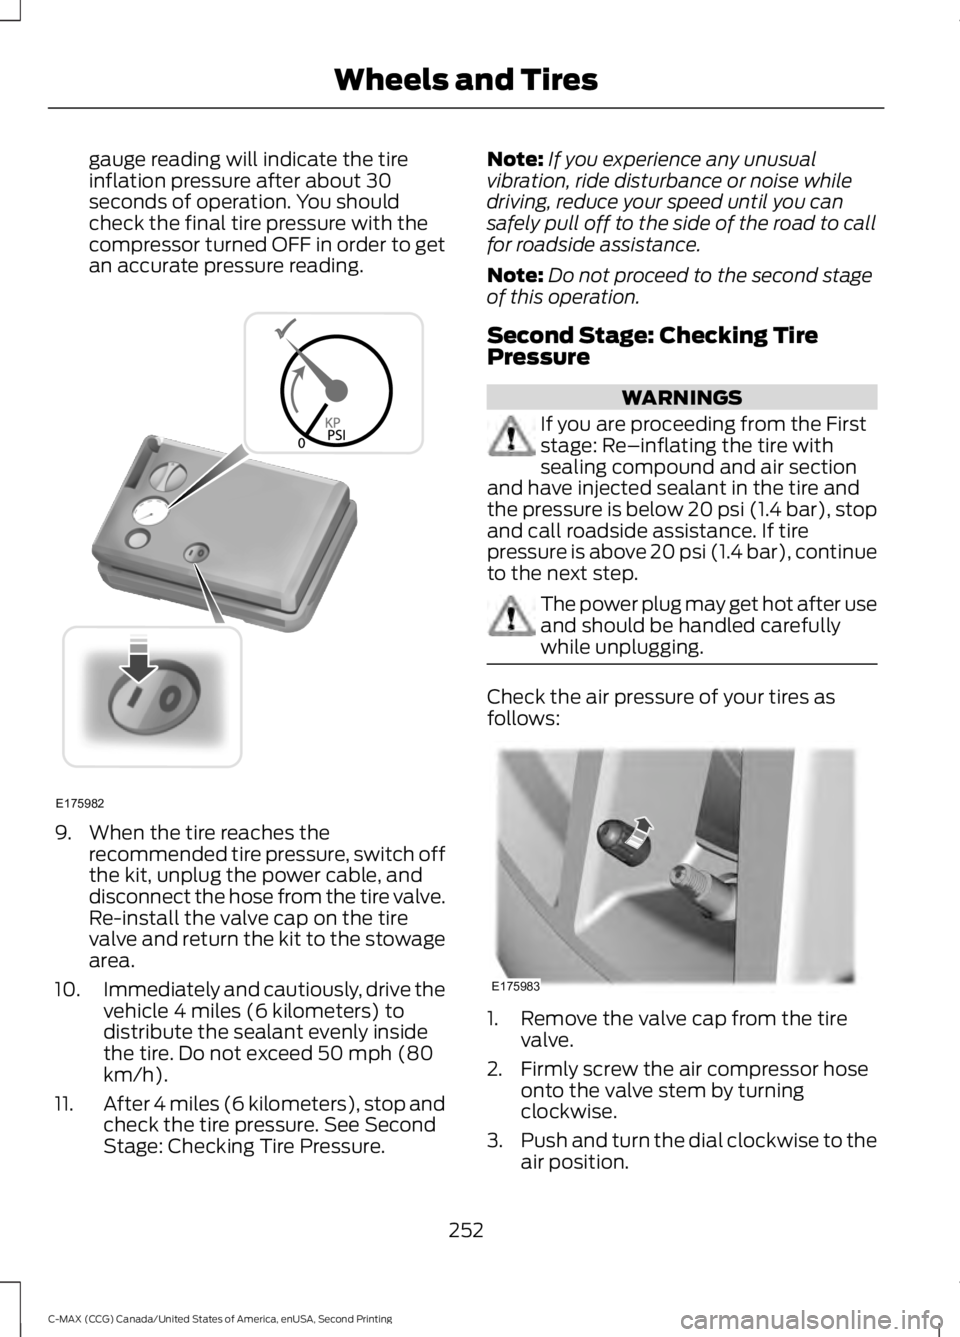
gauge reading will indicate the tire
inflation pressure after about 30
seconds of operation. You should
check the final tire pressure with the
compressor turned OFF in order to get
an accurate pressure reading.
9. When the tire reaches the
recommended tire pressure, switch off
the kit, unplug the power cable, and
disconnect the hose from the tire valve.
Re-install the valve cap on the tire
valve and return the kit to the stowage
area.
10. Immediately and cautiously, drive the
vehicle 4 miles (6 kilometers) to
distribute the sealant evenly inside
the tire. Do not exceed 50 mph (80
km/h).
11. After 4 miles (6 kilometers), stop and
check the tire pressure. See Second
Stage: Checking Tire Pressure. Note:
If you experience any unusual
vibration, ride disturbance or noise while
driving, reduce your speed until you can
safely pull off to the side of the road to call
for roadside assistance.
Note: Do not proceed to the second stage
of this operation.
Second Stage: Checking Tire
Pressure WARNINGS
If you are proceeding from the First
stage: Re–inflating the tire with
sealing compound and air section
and have injected sealant in the tire and
the pressure is below 20 psi (1.4 bar), stop
and call roadside assistance. If tire
pressure is above 20 psi (1.4 bar), continue
to the next step. The power plug may get hot after use
and should be handled carefully
while unplugging.
Check the air pressure of your tires as
follows:
1. Remove the valve cap from the tire
valve.
2. Firmly screw the air compressor hose onto the valve stem by turning
clockwise.
3. Push and turn the dial clockwise to the
air position.
252
C-MAX (CCG) Canada/United States of America, enUSA, Second Printing Wheels and TiresE175982 E175983
Page 409 of 469

2D city maps show detailed outlines of
buildings, visible land use and land
elements and detailed railway
infrastructure for the most essential cities
around the globe. These maps also contain
features, such as town blocks, building
footprints and railways.
3D landmarks appear as clear, visible
objects that are typically recognizable and
have a certain tourist value. The 3D
landmarks appear in 3D map mode only.
Coverage varies, and improves with
updated map releases.
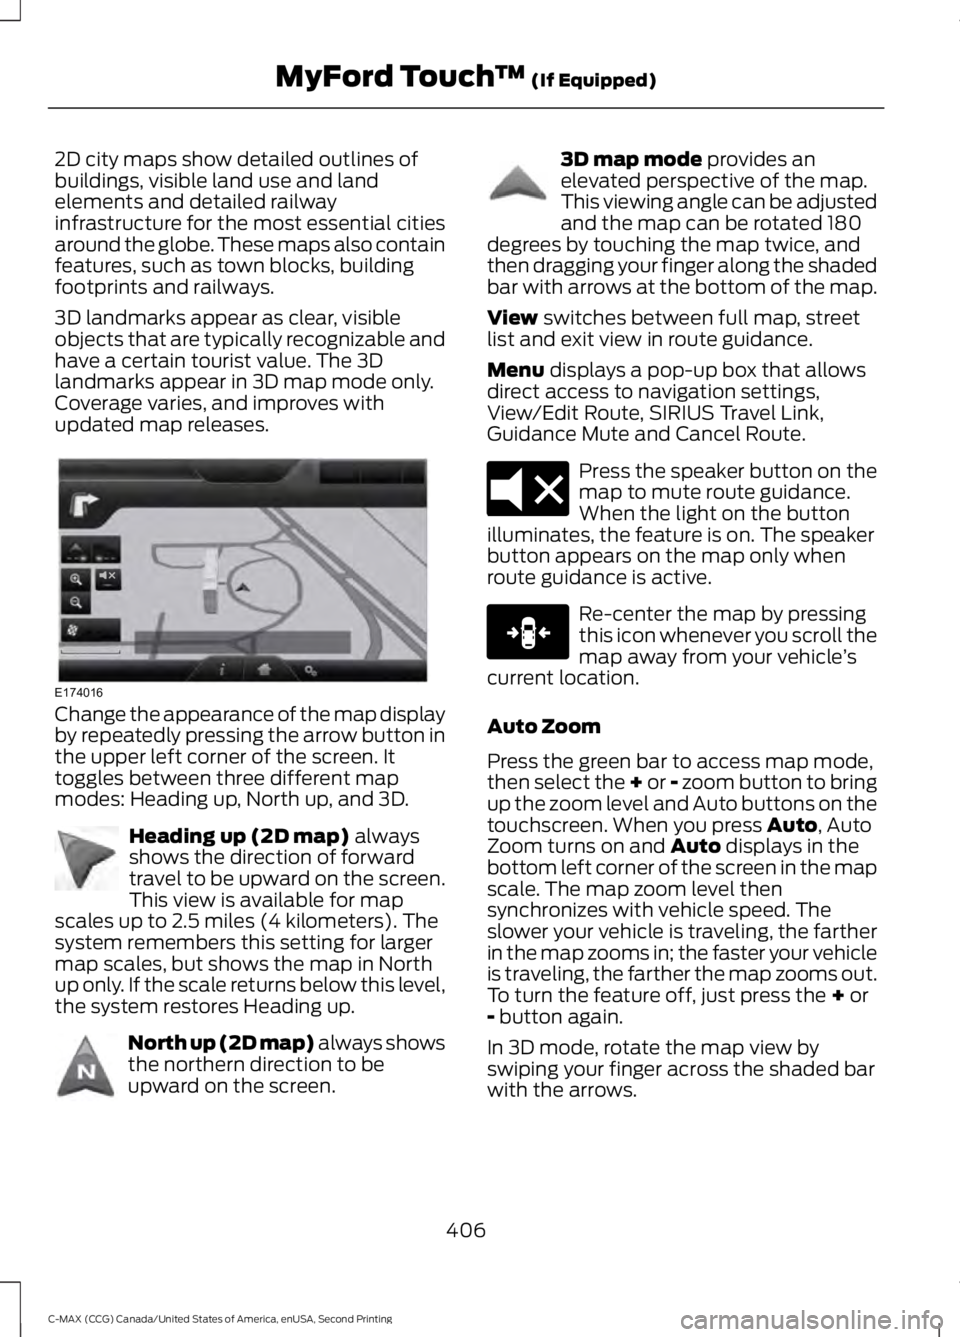
Change the appearance of the map display
by repeatedly pressing the arrow button in
the upper left corner of the screen. It
toggles between three different map
modes: Heading up, North up, and 3D.
Heading up (2D map) always
shows the direction of forward
travel to be upward on the screen.
This view is available for map
scales up to 2.5 miles (4 kilometers). The
system remembers this setting for larger
map scales, but shows the map in North
up only. If the scale returns below this level,
the system restores Heading up. North up (2D map) always shows
the northern direction to be
upward on the screen. 3D map mode
provides an
elevated perspective of the map.
This viewing angle can be adjusted
and the map can be rotated 180
degrees by touching the map twice, and
then dragging your finger along the shaded
bar with arrows at the bottom of the map.
View
switches between full map, street
list and exit view in route guidance.
Menu
displays a pop-up box that allows
direct access to navigation settings,
View/Edit Route, SIRIUS Travel Link,
Guidance Mute and Cancel Route. Press the speaker button on the
map to mute route guidance.
When the light on the button
illuminates, the feature is on. The speaker
button appears on the map only when
route guidance is active. Re-center the map by pressing
this icon whenever you scroll the
map away from your vehicle
’s
current location.
Auto Zoom
Press the green bar to access map mode,
then select the + or - zoom button to bring
up the zoom level and Auto buttons on the
touchscreen. When you press
Auto, Auto
Zoom turns on and Auto displays in the
bottom left corner of the screen in the map
scale. The map zoom level then
synchronizes with vehicle speed. The
slower your vehicle is traveling, the farther
in the map zooms in; the faster your vehicle
is traveling, the farther the map zooms out.
To turn the feature off, just press the
+ or
- button again.
In 3D mode, rotate the map view by
swiping your finger across the shaded bar
with the arrows.
406
C-MAX (CCG) Canada/United States of America, enUSA, Second Printing MyFord Touch
™
(If Equipped)E174016 E142642 E142643 E142644 E174017 E146188