Page 176 of 438
As an added safety feature, your vehicle has been
equipped with a Tire Pressure Monitoring System
(TPMS) that illuminates a low tire pressure telltale when
one or more of your tires is significantly under-inflated.
Accordingly, when the low tire pressure telltale illumi-
nates, you should stop and check your tires as soon as
possible, and inflate them to the proper pressure. Driving
on a significantly under-inflated tire causes the tire to
overheat and can lead to tire failure. Under-inflation also
reduces fuel efficiency and tire tread life, and may affect
the vehicles handling and stopping ability.
Please note that the TPMS is not a substitute for proper
tire maintenance, and it is the driver ’s responsibility to
maintain correct tire pressure, even if under-inflation has
not reached the level to trigger illumination of the TPMS
low tire pressure telltale.
Your vehicle has also been equipped with a TPMS
malfunction indicator to indicate when the system is not
operating properly. The TPMS malfunction indicator is
combined with the low tire pressure telltale. When the
system detects a malfunction, the telltale will flash for
approximately one minute and then remain continuously
illuminated. This sequence will continue upon subse-
quent vehicle start-ups as long as the malfunction exists.
When the malfunction indicator is illuminated, the sys-
tem may not be able to detect or signal low tire pressure
as intended. TPMS malfunctions may occur for a variety
of reasons, including the installation of replacement or
alternate tires or wheels on the vehicle that prevent the
TPMS from functioning properly. Always check the
TPMS malfunction telltale after replacing one or more
tires or wheels on your vehicle, to ensure that the
replacement or alternate tires and wheels allow the TPMS
to continue to function properly.
174 UNDERSTANDING YOUR INSTRUMENT PANEL
Page 189 of 438
Hill Start Assist
This function is used when starting a vehicle from a stop
on a hill. Hill Start Assist maintains the same level of
brake pressure the driver applied for a short period of
time after the foot has been removed from the brake
pedal.
Proceed as follows to switch this function on or off:
1. Briefly push and release theMENUbutton. “On” or
“Off” will flash on the display (according to previous
setting).
2. Push and release the UPor DOWNbutton for
setting.
3. Briefly push and release theMENUbutton to go back
to the menu screen, or push and hold the button
(approximately one second) to go back to the main
screen without storing the settings.
Exit Menu
This function closes the initial menu screen.
Briefly push and release theMENUbutton to go back to
the main screen.
Push and release thebutton to return to the first
menu option (Speed Beep).
Push and release thebutton to return to the last
menu option (Daylights).
Uconnect® RADIOS
For detailed information about your Uconnect® radio,
refer to your Uconnect® supplement Manual.
iPod®/USB/MEDIA PLAYER CONTROL
This feature allows an iPod® or external USB device to be
plugged into the AUX Jack or USB port.
4
UNDERSTANDING YOUR INSTRUMENT PANEL 187
Page 210 of 438
Selecting the footwell/windshield or only windshield dis-
tribution activates the climate control system compressor
(LED on A/C button on) and the air recirculation is set to
#outside air#intake (LED on the recirculation button off ).
This logic guarantees optimum visibility at the windows.
It is, however, always possible to manage air recirculation
and the climate control system compressor manually.
Rear Window Defrosting
Push the Rear Defrost button to activate heated rear
window defrosting.
The effective activation of the function is indicated by the
rear defrost warning light on the instrument panel
switching ON.
This function switches OFF automatically after about 20
minutes or when the engine is turned OFF. It is not
switched on automatically the next time the engine is
started.
If equipped, push the rear defrost button to activate
defrosting of door mirrors and heated rear window.
NOTE:Do not affix stickers to the inside of the heated
rear window over the heating filaments, to avoid damage
that might cause them to stop working properly.
Switching Off The Climate Control System
Push the On/Off button.
With climate control system off:
•air recirculation is on, thus isolating the passenger
compartment from the outside;
•the compressor is off;
•the fan is off;
•the heated rear window can be activated / deacti-
vated.
208 UNDERSTANDING YOUR INSTRUMENT PANEL
Page 227 of 438

Turn the ignition switch to the AVV/ACC (START)
position and release it when the engine starts. If the
engine fails to start within 10 seconds, turn the ignition
switch to the STOP (OFF/LOCK) position, wait 10 to 15
seconds, then repeat the “Normal Starting” procedure.
Cold Weather Operation
To prevent possible engine damage while starting at low
temperatures, this vehicle will inhibit engine cranking
when the ambient temperature is less than –22° F (–30° C)
and the oil temperature sensor reading indicates an
engine block heater has not been used. An externally
powered electric engine block heater is available as a
factory installed option.
The message “plug in engine heater” will be displayed in
the instrument cluster when the ambient temperature is
below 5° F (–15° C) at the time the engine is shut off as a
reminder to avoid possible crank delays at the next cold
start.
NOTE:Use of the recommended SAE 5W-40 Synthetic oil
and adhering to the prescribed oil change intervals is
important to prevent engine damage and ensure satisfac-
tory starting in cold conditions.
Extended Park Starting
NOTE:Extended Park condition occurs when the vehicle
has not been started or driven for at least 35 days.
1. Install a battery charger or jumper cables to the battery
to ensure a full battery charge during the crank cycle.
2. Cycle the ignition in the START position and release it
when the engine starts.
3. If the engine fails to start within ten seconds, cycle the
ignition to the STOP (OFF/LOCK) position, wait five
seconds to allow the starter to cool, then repeat the
Extended Park Starting procedure.
5
STARTING AND OPERATING 225
Page 230 of 438

For most city driving you will find it easier to use only
the lower gears. For steady highway driving with light
accelerations, sixth gear is recommended.
Never drive with your foot resting on the clutch pedal, or
try to hold the vehicle on a hill with the clutch pedal
partially engaged. This will cause abnormal wear on the
clutch.
To shift into REVERSE, pull up on the ring just below the
gear shift knob and then move into the REVERSE (R)
position.
Never shift into REVERSE until the vehicle has come to a
complete stop.
NOTE:During cold weather, until the transmission lu-
bricant is warm, you may experience slightly higher shift
efforts. This is normal and not harmful to the transmis-
sion.
Downshifting
Proper downshifting will improve fuel economy and
prolong engine life.
CAUTION!
If you skip a gear while downshifting or downshift
at too high of a vehicle speed, these conditions may
cause the engine to overspeed if too low of a gear is
selected and the clutch pedal is released. Damage to
the clutch and the transmission can result from
skipping a gear while downshifting or downshifting
at too high of a vehicle speed even if the clutch pedal
is held pressed (i.e., not released).
To maintain a safe speed and prolong brake life, shift
down to second or first when descending a steep grade.
228 STARTING AND OPERATING
Page 231 of 438

When turning a corner, or driving up a steep grade,
downshift early so that the engine will not be overbur-
dened.
AUTOMATIC TRANSMISSION — IF EQUIPPED
CAUTION!
Damage to the transmission may occur if the follow-
ing precautions are not observed:
•Shift into or out of PARK or REVERSE only after
the vehicle has come to a complete stop.
•Do not shift between PARK, REVERSE, NEU-
TRAL, or DRIVE when the engine is above idle
speed.
•Before shifting into any gear, make sure your foot
is firmly pressing the brake pedal.
NOTE:You must press and hold the brake pedal while
shifting out of PARK.
WARNING!
•It is dangerous to shift out of PARK or NEUTRAL
if the engine speed is higher than idle speed. If
your foot is not firmly pressing the brake pedal, the
vehicle could accelerate quickly forward or in re-
verse. You could lose control of the vehicle and hit
someone or something. Only shift into gear when
the engine is idling normally and your foot is
firmly pressing the brake pedal.
(Continued)
5
STARTING AND OPERATING 229
Page 234 of 438
This transmission is programmed to prevent shifting
from REVERSE to DRIVE or DRIVE to REVERSE, if
vehicle speed is above 6 mph (10 km/h). This safety
feature helps protect your transmission from damage.
Only shift from DRIVE to PARK or REVERSE when the
accelerator pedal is released and the vehicle is stopped.
Be sure to keep your foot on the brake pedal when
shifting between these gears.
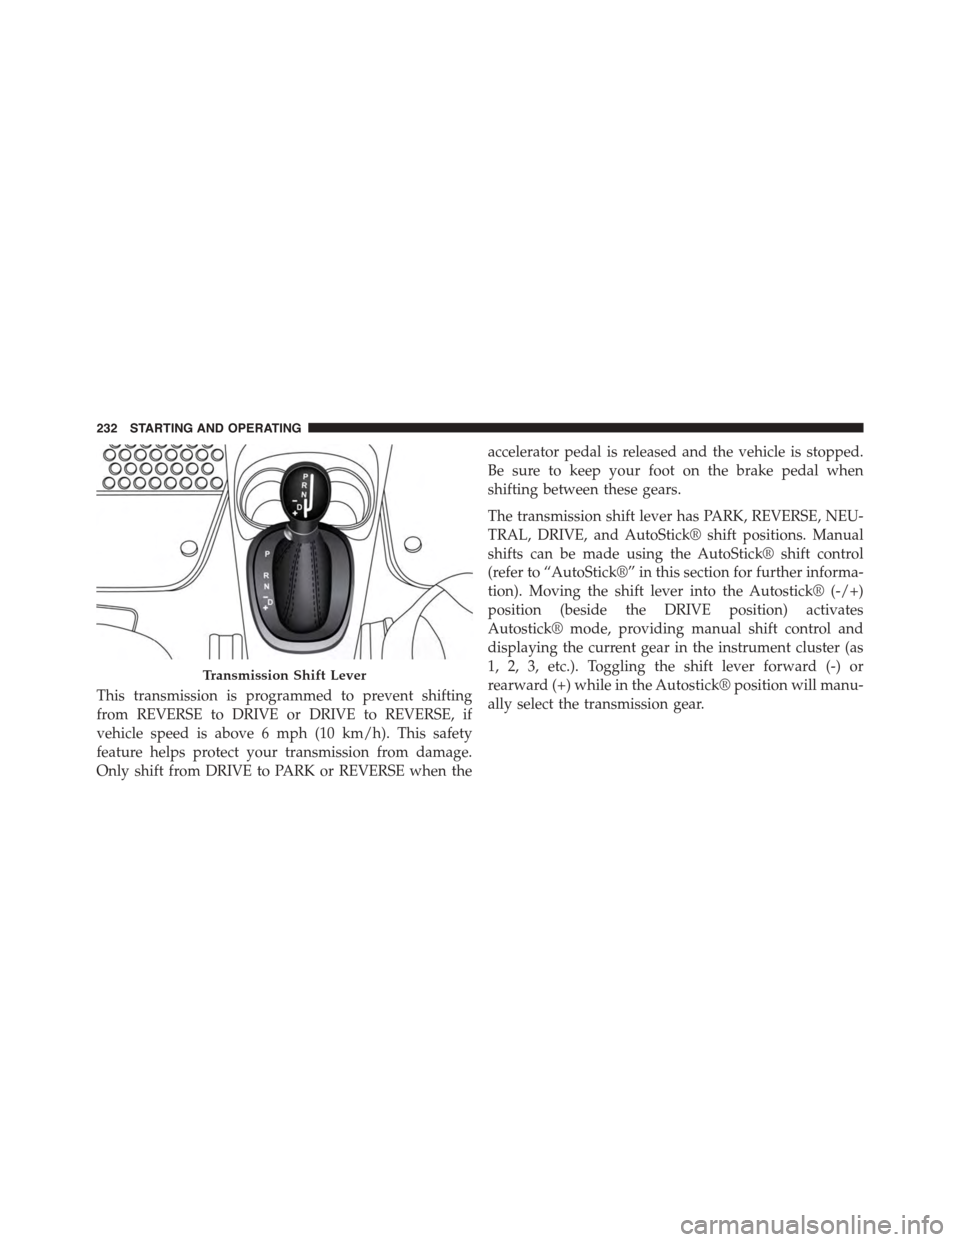
The transmission shift lever has PARK, REVERSE, NEU-
TRAL, DRIVE, and AutoStick® shift positions. Manual
shifts can be made using the AutoStick® shift control
(refer to “AutoStick®” in this section for further informa-
tion). Moving the shift lever into the Autostick® (-/+)
position (beside the DRIVE position) activates
Autostick® mode, providing manual shift control and
displaying the current gear in the instrument cluster (as
1, 2, 3, etc.). Toggling the shift lever forward (-) or
rearward (+) while in the Autostick® position will manu-
ally select the transmission gear.
Transmission Shift Lever
232 STARTING AND OPERATING
Page 238 of 438
CAUTION!
•Before moving the shift lever out of PARK, you
must turn the ignition switch from the LOCK/OFF
position to the ON/RUN position, and also press
the brake pedal. Otherwise, damage to the shift
lever could result.
•DO NOT race the engine when shifting from
PARK or NEUTRAL into another gear range, as this
can damage the drivetrain.
The following indicators should be used to ensure that
you have engaged the transmission into the PARK posi-
tion:
•When shifting into PARK, press the lock button on the
shift lever and firmly move the lever all the way
forward until it stops and is fully seated.
•Look at the transmission gear position display and
verify that it indicates the PARK position.
•With brake pedal released, verify that the shift lever
will not move out of PARK.
REVERSE (R)
This range is for moving the vehicle backward. Shift into
REVERSE only after the vehicle has come to a complete
stop.
NEUTRAL (N)
Use this range when the vehicle is standing for prolonged
periods with the engine running. The engine may be
started in this range. Apply the parking brake and shift
the transmission into PARK if you must leave the vehicle.
236 STARTING AND OPERATING