Page 177 of 438

CAUTION!
The TPMS has been optimized for the original
equipment tires and wheels. TPMS pressures and
warning have been established for the tire size
equipped on your vehicle. Undesirable system opera-
tion or sensor damage may result when using re-
placement equipment that is not of the same size,
type, and/or style. Aftermarket wheels can cause
sensor damage. Using aftermarket tire sealants may
cause the Tire Pressure Monitoring System (TPMS)
sensor to become inoperable. After using an after-
market tire sealant it is recommended that you take
your vehicle to an authorized dealership to have your
sensor function checked.
21. Glow Plug Light — If Equipped
This vehicle will inhibit engine cranking when the
ambient temperature is less than –22° F (–30° C)
and the oil temperature sensor reading indicates an
engine block heater has not been used. The Glow Plug
light will flash during in cold weather for up to 10
seconds.
If equipped with a block heater harness the message
#Plug In Engine Heater#, will be displayed in the instru-
ment cluster when the ambient temperature is below 5°F
(-15° C) at the time the engine is shut off as a reminder to
avoid possible crank delays at the next cold start.
22. Odometer / Trip Odometer / Electronic Vehicle Infor-
mation Center (EVIC) Display Area
This display indicates the total distance the vehicle has
been driven.
4
UNDERSTANDING YOUR INSTRUMENT PANEL 175
Page 178 of 438

U.S. Federal regulations require that upon transfer of
vehicle ownership, the seller certify to the purchaser the
correct mileage that the vehicle has been driven. If your
odometer needs to be repaired or serviced, the repair
technician should leave the odometer reading the same
as it was before the repair or service. If s/he cannot do so,
then the odometer must be set at zero, and a sticker must
be placed in the door jamb stating what the mileage was
before the repair or service. It is a good idea for you to
make a record of the odometer reading before the repair/
service, so that you can be sure that it is properly reset, or
that the door jamb sticker is accurate if the odometer
must be reset at zero.
NOTE:If the vehicle is equipped with the Electronic
Vehicle Information Center (EVIC) in the instrument
cluster, all warnings including “door” and “gate” and
“Change Engine Oil” will only be displayed in the EVIC
display. For additional information, refer to “Electronic
Vehicle Information Center (EVIC).”
23. Fuel Door Location Reminder
The fuel door reminder indicates that the fuel filler door
is located on the right side of the vehicle.
24. Electronic Throttle Control (ETC) Light
This light informs you of a problem with the
Electronic Throttle Control (ETC) system. If a
problem is detected, the light will come on
while the engine is running. Cycle the ignition
key when the vehicle has completely stopped and the
shift lever is placed in the NEUTRAL position. The light
should turn off. If the light remains lit with the engine
running, your vehicle will usually be drivable; however,
see an authorized dealer for service as soon as possible. If
the light is flashing when the engine is running, imme-
diate service is required and you may experience reduced
performance, an elevated/rough idle or engine stall and
your vehicle may require towing. The light will come on
when the ignition is first turned to ON/RUN and remain
176 UNDERSTANDING YOUR INSTRUMENT PANEL
Page 179 of 438

on briefly as a bulb check. If the light does not come on
during starting, have the system checked by an autho-
rized dealer.
25. Anti-Lock Brake (ABS) Light
This light monitors the Anti-Lock Brake System
(ABS). The light will turn on when the ignition
switch is turned to the ON/RUN position and
may stay on for as long as four seconds.
If the ABS light remains on or turns on while driving, it
indicates that the Anti-Lock portion of the brake system
is not functioning and that service is required. However,
the conventional brake system will continue to operate
normally if the BRAKE warning light is not on.
If the ABS light is on, the brake system should be serviced
as soon as possible to restore the benefits of Anti-Lock
brakes. If the ABS light does not turn on when the
ignition switch is turned to the ON/RUN position, have
the light inspected by an authorized dealer.
ELECTRONIC VEHICLE INFORMATION CENTER
(EVIC)
The Electronic Vehicle Information Center (EVIC) fea-
tures a driver-interactive display that is located in the
instrument cluster.
The EVIC consists of the following:
•System Status
•Vehicle Information Warning Message Displays
•Personal Settings (Customer-Programmable Features)
•Outside Temperature Display
•Trip Computer Functions
EVIC Screen
The EVIC will display the following:
•Time
4
UNDERSTANDING YOUR INSTRUMENT PANEL 177
Page 183 of 438
2. Fully push the accelerator pedal slowly, three times
within 10 seconds.
3. Turn the ignition switch to the OFF/LOCK position.
NOTE:If the indicator message illuminates when you
start the vehicle, the oil change indicator system did not
reset. If necessary, repeat this procedure.
Trip Computer
The Trip Computer is located in the instrument cluster. It
features a driver-interactive display (displays informa-
tion such as; trip information, range, fuel consumption,
average speed and travel time).
Trip Button
TheTRIPbutton, located on the right steering column
stalk, can be used to display and to reset the previously
described values.
•A short button push displays the different values.
•A long button push resets the system and then starts a
new trip.
4
UNDERSTANDING YOUR INSTRUMENT PANEL 181
Page 227 of 438

Turn the ignition switch to the AVV/ACC (START)
position and release it when the engine starts. If the
engine fails to start within 10 seconds, turn the ignition
switch to the STOP (OFF/LOCK) position, wait 10 to 15
seconds, then repeat the “Normal Starting” procedure.
Cold Weather Operation
To prevent possible engine damage while starting at low
temperatures, this vehicle will inhibit engine cranking
when the ambient temperature is less than –22° F (–30° C)
and the oil temperature sensor reading indicates an
engine block heater has not been used. An externally
powered electric engine block heater is available as a
factory installed option.
The message “plug in engine heater” will be displayed in
the instrument cluster when the ambient temperature is
below 5° F (–15° C) at the time the engine is shut off as a
reminder to avoid possible crank delays at the next cold
start.
NOTE:Use of the recommended SAE 5W-40 Synthetic oil
and adhering to the prescribed oil change intervals is
important to prevent engine damage and ensure satisfac-
tory starting in cold conditions.
Extended Park Starting
NOTE:Extended Park condition occurs when the vehicle
has not been started or driven for at least 35 days.
1. Install a battery charger or jumper cables to the battery
to ensure a full battery charge during the crank cycle.
2. Cycle the ignition in the START position and release it
when the engine starts.
3. If the engine fails to start within ten seconds, cycle the
ignition to the STOP (OFF/LOCK) position, wait five
seconds to allow the starter to cool, then repeat the
Extended Park Starting procedure.
5
STARTING AND OPERATING 225
Page 233 of 438

Key Ignition Park Interlock
This vehicle is equipped with a Key Ignition Park Inter-
lock which requires the transmission to be in PARK
before the ignition switch can be turned to the LOCK/
OFF (key removal) position. The key can only be re-
moved from the ignition when the ignition is in the
LOCK/OFF position, and once removed, the transmis-
sion is locked in PARK.
Brake/Transmission Shift Interlock System
This vehicle is equipped with a Brake Transmission Shift
Interlock System (BTSI) that holds the shift lever in PARK
unless the brakes are applied. To shift the transmission
out of PARK, the ignition switch must be turned to the
ON/RUN position (engine running or not), and the
brake pedal (and the lock button on the shift lever) must
be pressed.
Six-Speed Euro Twin Clutch Transmission — If
Equipped
The transmission gear position display (located in the
instrument cluster) indicates the transmission gear range.
You must press the brake pedal and the lock button on
the shift lever to move the shift lever out of PARK (refer
to “Brake/Transmission Shift Interlock System” in this
section). To drive, press the lock button on the front of the
shift lever and move the shift lever from PARK or
NEUTRAL to the DRIVE position.
The electronically-controlled transmission provides a
precise shift schedule. The transmission electronics are
self-calibrating; therefore, the first few shifts on a new
vehicle may be somewhat abrupt. This is a normal
condition, and precision shifts will develop within a few
hundred miles (kilometers).
5
STARTING AND OPERATING 231
Page 234 of 438

This transmission is programmed to prevent shifting
from REVERSE to DRIVE or DRIVE to REVERSE, if
vehicle speed is above 6 mph (10 km/h). This safety
feature helps protect your transmission from damage.
Only shift from DRIVE to PARK or REVERSE when the
accelerator pedal is released and the vehicle is stopped.
Be sure to keep your foot on the brake pedal when
shifting between these gears.
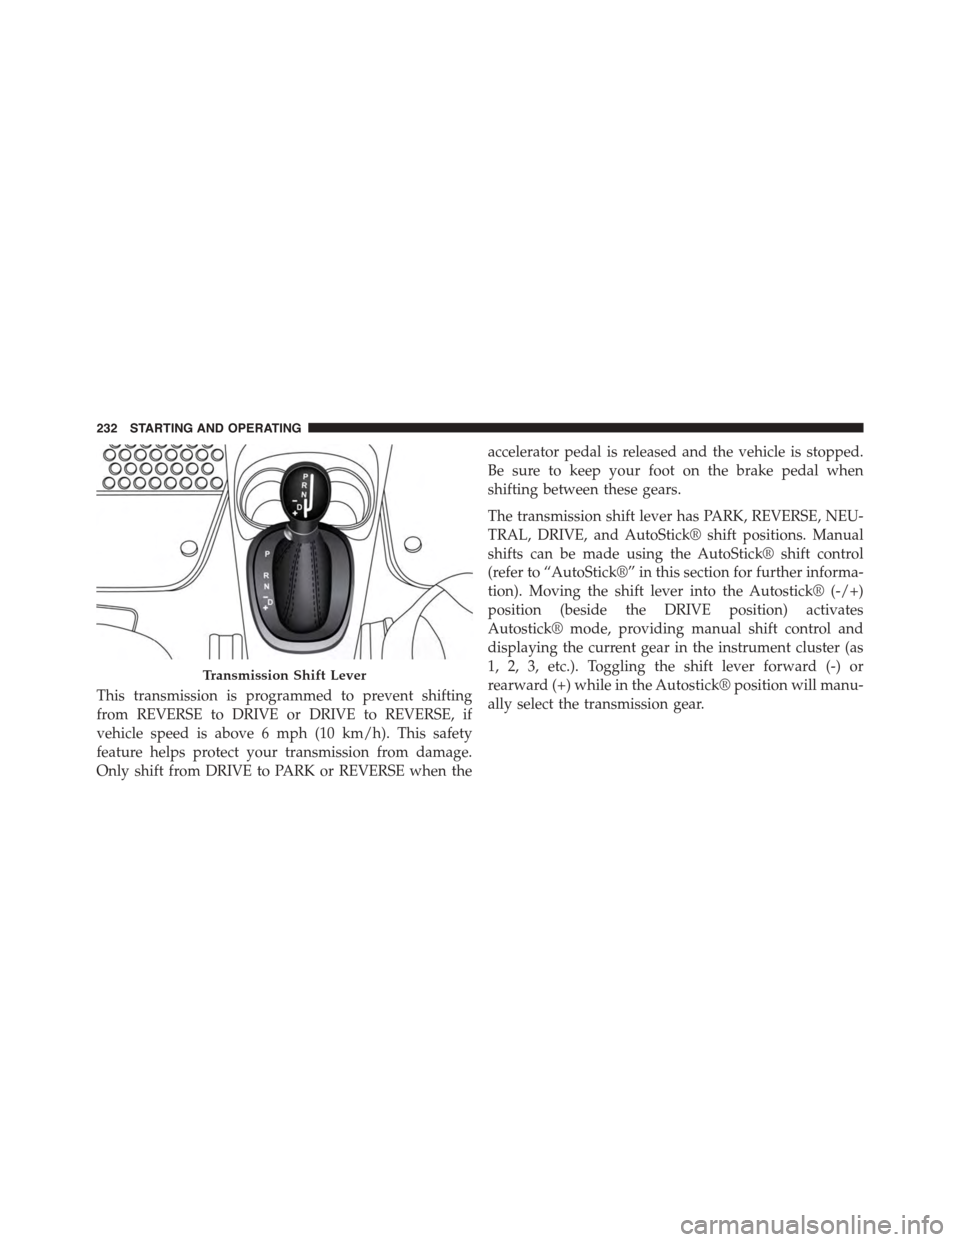
The transmission shift lever has PARK, REVERSE, NEU-
TRAL, DRIVE, and AutoStick® shift positions. Manual
shifts can be made using the AutoStick® shift control
(refer to “AutoStick®” in this section for further informa-
tion). Moving the shift lever into the Autostick® (-/+)
position (beside the DRIVE position) activates
Autostick® mode, providing manual shift control and
displaying the current gear in the instrument cluster (as
1, 2, 3, etc.). Toggling the shift lever forward (-) or
rearward (+) while in the Autostick® position will manu-
ally select the transmission gear.
Transmission Shift Lever
232 STARTING AND OPERATING
Page 235 of 438

NOTE:If the shift lever cannot be moved to the PARK,
REVERSE, or NEUTRAL position (when pushed for-
ward) it is probably in the AutoStick (+/-) position
(beside the DRIVE position). In AutoStick mode, the
transmission gear (1, 2, 3, etc.) is displayed in the
instrument cluster. Move the shift lever to the right (into
the DRIVE [D] position) for access to PARK, REVERSE,
and NEUTRAL.
Gear Ranges
DO NOT race the engine when shifting from PARK or
NEUTRAL into another gear range.
NOTE:After selecting any gear range, wait a moment to
allow the selected gear to engage before accelerating.
This is especially important when the engine is cold.
PARK (P)
This range supplements the parking brake by locking the
transmission. The engine can be started in this range.
Never attempt to use PARK while the vehicle is in
motion. Apply the parking brake when leaving the
vehicle in this range.
When parking on a level surface, you may shift the
transmission into PARK first, and then apply the parking
brake.
When parking on a hill, apply the parking brake before
shifting the transmission to PARK, otherwise the load on
the transmission locking mechanism may make it diffi-
cult to move the shift lever out of PARK. As an added
precaution, turn the front wheels toward the curb on a
downhill grade and away from the curb on an uphill
grade.
5
STARTING AND OPERATING 233