2015 DODGE CHARGER ECO mode
[x] Cancel search: ECO modePage 237 of 638
2.Place the hand-held transmitter 1 to 3 inches (3 to 8 cm)
away from the HomeLink® button you wish to program
while keeping the HomeLink® indicator light in view.
3. Push and hold the HomeLink® button you want to
program while you push and hold the hand-held
transmitter button.
4. Continue to hold both buttons and observe the indi-
cator light. The HomeLink® indicator will flash slowly
and then rapidly after HomeLink® has received the
frequency signal from the hand-held transmitter. Re-
lease both buttons after the indicator light changes
from slow to rapid.
5. At the garage door opener motor (in the garage),
locate the “LEARN” or “TRAINING” button. This can
usually be found where the hanging antenna wire is
attached to the garage door opener/device motor.
Firmly push and release the “LEARN” or “TRAIN-
ING” button. On some garage door openers/devices
there may be a light that blinks when the garage door
opener/device is in the LEARN/TRAIN mode.
NOTE:You have 30 seconds in which to initiate the next
step after the LEARN button has been pushed.
6. Return to the vehicle and push the programmed
HomeLink® button twice (holding the button for two
seconds each time). If the garage door opener/device
activates, programming is complete.
NOTE:If the garage door opener/device does not acti-
vate, push the button a third time (for two seconds) to
complete the training.
To program the remaining two HomeLink® buttons,
repeat each step for each remaining button. DO NOT
erase the channels.
3
UNDERSTANDING THE FEATURES OF YOUR VEHICLE 235
Page 243 of 638

POWER SUNROOF — IF EQUIPPED
The power sunroof switch is located between the sun
visors on the overhead console.
WARNING!
•Never leave children unattended in a vehicle, or
with access to an unlocked vehicle. Never leave the
Key Fob in or near the vehicle, or in a location
accessible to children. Do not leave the ignition of
a vehicle equipped with Keyless Enter-N-Go™ in
the ACC or ON/RUN mode. Occupants, particu-
larly unattended children, can become entrapped
by the power sunroof while operating the power
sunroof switch. Such entrapment may result in
serious injury or death.
•In a collision, there is a greater risk of being thrown
from a vehicle with an open sunroof. You could
also be seriously injured or killed. Always fasten
your seat belt properly and make sure all passen-
gers are also properly secured.
(Continued)
Power Sunroof Switch
3
UNDERSTANDING THE FEATURES OF YOUR VEHICLE 241
Page 244 of 638
WARNING!(Continued)
•Do not allow small children to operate the sunroof.
Never allow your fingers, other body parts, or any
object, to project through the sunroof opening.
Injury may result.
Opening Sunroof — Express
Push the switch rearward and release it within one-half
second. The sunroof and sunshade will open automati-
cally from any position. The sunroof and sunshade will
open fully and stop automatically. This is called “Express
Open”. During Express Open operation, any movement
of the sunroof switch will stop the sunroof.
Opening Sunroof — Manual Mode
To open the sunroof, push and hold the switch rearward
to full open. Any release of the switch will stop the
movement. The sunroof and sunshade will remain in a
partially opened condition until the switch is pushed and
held rearward again.
Closing Sunroof — Express
Push the switch forward and release it within one-half
second and the sunroof will close automatically from any
position. The sunroof will close fully and stop automati-
cally. This is called “Express Close”. During Express
Close operation, any movement of the switch will stop
the sunroof.
Closing Sunroof — Manual Mode
To close the sunroof, push and hold the switch in the
forward position. Any release of the switch will stop the
movement and the sunroof will remain in a partially
closed condition until the switch is pushed and held
forward again.
242 UNDERSTANDING THE FEATURES OF YOUR VEHICLE
Page 270 of 638
9. Electronic Stability Control (ESC) OFF Indicator
Light — If Equipped
This light indicates the Electronic Stability Con-
trol (ESC) is off.
With Drive Modes, the ESC OFF indicator will
be lit any time the Traction modes is set to Sport, Track,
or Full OFF.
10. Speedometer
Indicates vehicle speed.
11. Electronic Stability Control (ESC) Activation/
Malfunction Indicator Light
The “ESC Activation/Malfunction Indicator
Light” in the instrument cluster will come on
when the ignition is placed in the ON/RUN
position. It should go out with the engine
running. If the “ESC Activation/Malfunction Indicator
Light” comes on continuously with the engine running, a
malfunction has been detected in the ESC system. If this
light remains on after several ignition cycles, and the
vehicle has been driven several miles (kilometers) at
speeds greater than 30 mph (48 km/h), see your autho-
rized dealer as soon as possible to have the problem
diagnosed and corrected.
NOTE:
•The “ESC Off Indicator Light” and the “ESC
Activation/Malfunction Indicator Light” will come
on momentarily each time the ignition is placed in
the ON/RUN position.
•Each time the ignition is placed in the ON/RUN
position, the ESC system will be ON, even if it was
turned off previously.
•The ESC system will make buzzing or clicking
sounds when it is active. This is normal; the sounds
will stop when ESC becomes inactive following the
maneuver that caused the ESC activation.
268 UNDERSTANDING YOUR INSTRUMENT PANEL
Page 295 of 638
Buttons On The Faceplate
Buttons on the faceplate are located below the Uconnect®
system in the center of the instrument panel. In addition,
there is a Scroll/Enter control knob located on the right
side. Turn the control knob to scroll through menus and
change settings (i.e., 30, 60, 90), push the center of the
control knob one or more times to select or change a
setting (i.e., ON, OFF).
Your Uconnect® system may also have a Screen Off and
Back buttons on the faceplate.
Push the Screen Off button on the faceplate to turn off the
Uconnect® screen. Push the Screen Off button on the
faceplate a second time to turn the screen on.
Push the Back button on the faceplate to exit out of a
Menu or certain option on the Uconnect® system.
Buttons On The Touchscreen
Buttons on the touchscreen are accessible on the
Uconnect® touchscreen.
Customer Programmable Features — Uconnect®
5.0 Settings
Push the + MORE button on the faceplate and then press
the “Settings” button on the touchscreen to display the
menu setting screen. In this mode the Uconnect® system
allows you to access programmable features that may be
equipped such as Display, Units, Voice, Clock, Safety/
Assistance, Lights, Doors & Locks, Auto-On Comfort &
Remote Start, Engine Off Options, Compass Settings,
Audio, Phone/Bluetooth®, SiriusXM Setup, Restore Set-
tings, Clear Personal Data and System Information.
NOTE:Only one touchscreen area may be selected at a
time.
4
UNDERSTANDING YOUR INSTRUMENT PANEL 293
Page 301 of 638

NOTE:If your vehicle has experienced any damage in
the area where the sensor is located, even if the fascia is
not damaged, the sensor may have become misaligned.
Take your vehicle to an authorized dealer to verify sensor
alignment. Having a sensor that is misaligned will result
in the BSM not operating to specification.
•ParkView® Backup Camera Active Guidelines
Your vehicle may be equipped with the ParkView® Rear
Back Up Camera Active Guidelines that allows you to see
active guidelines over the ParkView Back up camera
display whenever the shift lever/gear selector is put into
REVERSE. The image will be displayed on the radio
touchscreen display along with a caution note to “check
entire surroundings” across the top of the screen. After
five seconds, this note will disappear. To enable or
disable, press the “ParkView® Backup Camera Active
Guidelines” button on the touchscreen, and select “On”
or “Off.” Press the back arrow/Done button on the
touchscreen to return to the previous menu.
•ParkView® Backup Camera Delay
When the vehicle is shifted out of REVERSE (with camera
delay turned OFF), the rear camera mode is exited and
the navigation or audio screen appears again. When the
vehicle is shifted out of REVERSE (with camera delay
turned ON), the rear view image with dynamic grid lines
will be displayed for up to 10 seconds after shifting out of
“REVERSE” unless the forward vehicle speed exceeds
8 mph (12 km/h), the transmission is shifted into PARK
or the ignition is switched to the OFF position. To set the
ParkView® Backup Camera Delay press the “Controls”
button on the touchscreen, the “settings” button on the
touchscreen, then the “Safety & Assistance” button on the
touchscreen. Press the “Parkview Backup camera Delay”
button on the touchscreen and select from “ON” or
“OFF.”
4
UNDERSTANDING YOUR INSTRUMENT PANEL 299
Page 321 of 638
NOTE:If your vehicle has experienced any damage in
the area where the sensor is located, even if the fascia is
not damaged, the sensor may have become misaligned.
Take your vehicle to an authorized dealer to verify sensor
alignment. Having a sensor that is misaligned will result
in the BSM not operating to specification.
•ParkView® Backup Camera Active Guidelines
Your vehicle may be equipped with the ParkView® Rear
Back Up Camera Active Guidelines that allows you to see
active guidelines over the ParkView Back up camera
display whenever the shift lever is put into REVERSE.
The image will be displayed on the radio touchscreen
display along with a caution note to “check entire sur-
roundings” across the top of the screen. After five sec-
onds, this note will disappear. To make your selection,
press the “ParkView Backup Camera Active Guidelines”
button on the touchscreen, until a check-mark appears
next to setting, indicating that the setting had been
selected. Press the back arrow button on the touchscreen
to return to the previous menu.
•ParkView® Backup Camera Delay
When the vehicle is shifted out of REVERSE (with camera
delay turned OFF), the rear camera mode is exited and
the navigation or audio screen appears again. When the
vehicle is shifted out of REVERSE (with camera delay
turned ON), the rear view image with dynamic grid lines
will be displayed for up to 10 seconds after shifting out of
“REVERSE” unless the forward vehicle speed exceeds
8 mph (12 km/h), the transmission is shifted into
“PARK” or the ignition is switched to the OFF position.
To set the ParkView® Backup Camera Delay press the
“Controls” button on the touchscreen, the “settings”
button on the touchscreen, then the “Safety & Driving
Assistance” button on the touchscreen. Press the
“Parkview Backup Camera Delay” button on the touch-
screen to turn the ParkView® Delay ON or OFF.
4
UNDERSTANDING YOUR INSTRUMENT PANEL 319
Page 342 of 638
Launch Mode
WARNING!
Launch Mode is intended for off-highway or off-road
use only and should not be used on any public
roadways. It is recommended that this feature be
used in a controlled environment, and within the
limits of the law. The capabilities of the vehicle as
measured by the performance pages must never be
exploited in a reckless or dangerous manner, which
can jeopardize the user ’s safety or the safety of
others. Only a safe, attentive, and skillful driver can
prevent accidents.This vehicle is equipped with a Launch Control system
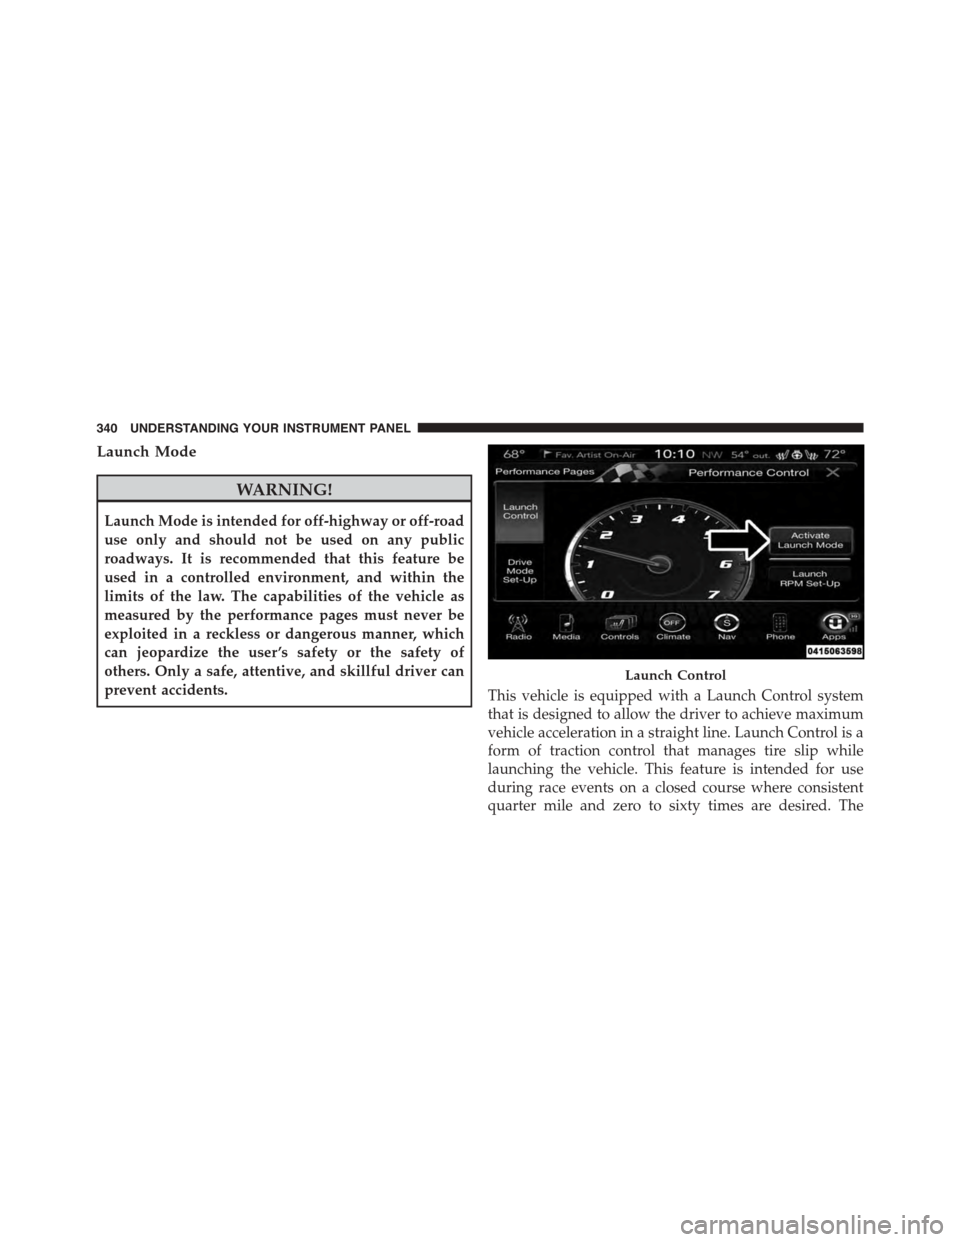
that is designed to allow the driver to achieve maximum
vehicle acceleration in a straight line. Launch Control is a
form of traction control that manages tire slip while
launching the vehicle. This feature is intended for use
during race events on a closed course where consistent
quarter mile and zero to sixty times are desired. The
Launch Control
340 UNDERSTANDING YOUR INSTRUMENT PANEL