Page 124 of 220
NAVIGATION
Press the “Nav” button on the touchscreen in the menu bar to access the Navigation
system.
Changing The Navigation Voice Prompt Volume
1. Press the “Settings” button on the touchscreen.
2. In the Settings menu, press the “Guidance” button on the touchscreen.
3. In the Guidance menu, adjust the Nav Volume by pressing the + or – Nav Volume
Adjustment buttons on the touchscreen.
Finding Points Of Interest (POI)
From the main Navigation menu, press the “Where To?” button on the touchscreen, then
press the “Points” of Interest button on the touchscreen.
•SelectaCategoryandthenasubcategory,ifnecessary.
•Selectyourdestinationandpressthe“Yes”buttononthetouchscreen.
Uconnect® 8.4AN Navigation
1—FindADestination2—ViewMap3—Information4—Emergency
5—RepeatRouteGuidancePrompt6—DetourARoute7—StopARoute8—NavigationSettings
ELECTRONICS
122
Page 133 of 220

PROGRAMMABLE FEATURES
Uconnect® Customer Programmable Features
The Uconnect®system allows you to access Customer Programmable feature settings
such as Display, Clock, Safety/Assistance, Lights, Doors & Locks, Auto-On Comfort &
Remote Start, Engine Off Operation, Compass Settings, Audio, Trailer Brake,
Phone/Bluetooth®,SuspensionandSiriusXMSetupandSystemInformationthrough
buttons on the touchscreen.
NOTE:
If equipped with the Super Track Pak option please refer to the “Drive Mode Supplement”
within your Owners Information Kit for further descriptions of these modes.
•Pushthe“Controls”buttonlocatednearthebottomofthetouchscreen,thenpushthe
“Settings” button on the touchscreen to access the Settings screen. When making a
selection, scroll up or down until the preferred setting is highlighted, then press and
release the preferred setting until a check-mark appears next to the setting, showing
that setting has been selected. The following feature settings are available:
•Display•EngineOffOptions
•Units•Audio
•Voice•Phone/Bluetooth®
•Clock•SiriusXMSetup
•Safety&DrivingAssistance•RestoreSettings
•Lights•ClearPersonalData
•Doors&Locks•SystemInformation
•Auto-OnComfort&RemoteStart •Compass(5.0RadioOnly)
Refer to “Uconnect Settings/Customer Programmable Features” found within “Under-
standing Your Instrument Panel” located in your Owner's Manual on the DVD for further
information.
ELECTRONICS
131
Page 134 of 220

UNIVERSAL GARAGE DOOR OPENER (HomeLink®)
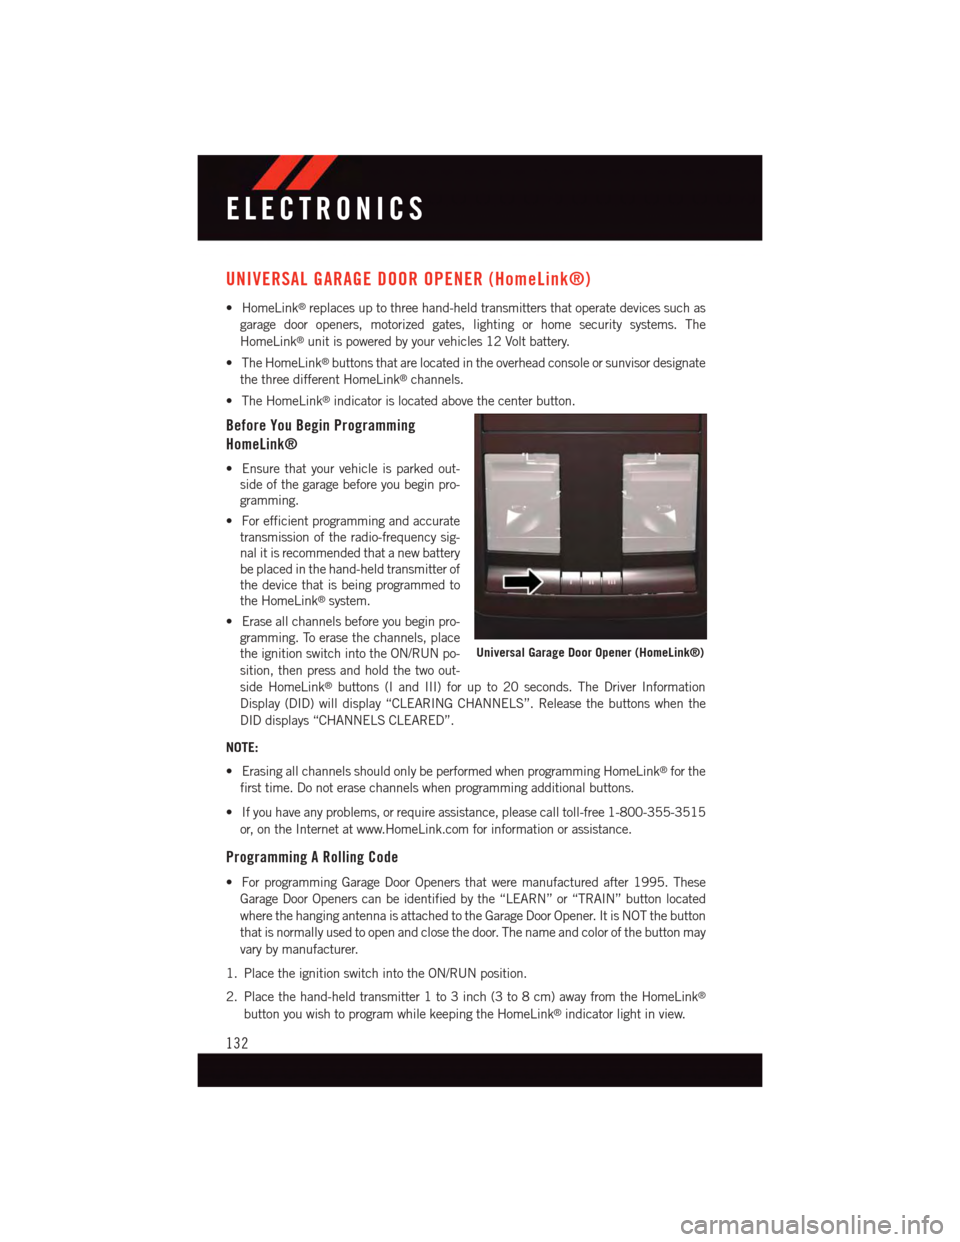
•HomeLink®replaces up to three hand-held transmitters that operate devices such as
garage door openers, motorized gates, lighting or home security systems. The
HomeLink®unit is powered by your vehicles 12 Volt battery.
•TheHomeLink®buttons that are located in the overhead console or sunvisor designate
the three different HomeLink®channels.
•TheHomeLink®indicator is located above the center button.
Before You Begin Programming
HomeLink®
•Ensurethatyourvehicleisparkedout-
side of the garage before you begin pro-
gramming.
•Forefficientprogrammingandaccurate
transmission of the radio-frequency sig-
nal it is recommended that a new battery
be placed in the hand-held transmitter of
the device that is being programmed to
the HomeLink®system.
•Eraseallchannelsbeforeyoubeginpro-
gramming. To erase the channels, place
the ignition switch into the ON/RUN po-
sition, then press and hold the two out-
side HomeLink®buttons (I and III) for up to 20 seconds. The Driver Information
Display (DID) will display “CLEARING CHANNELS”. Release the buttons when the
DID displays “CHANNELS CLEARED”.
NOTE:
•ErasingallchannelsshouldonlybeperformedwhenprogrammingHomeLink®for the
first time. Do not erase channels when programming additional buttons.
•Ifyouhaveanyproblems,orrequireassistance,pleasecalltoll-free1-800-355-3515
or, on the Internet at www.HomeLink.com for information or assistance.
Programming A Rolling Code
•ForprogrammingGarageDoorOpenersthatweremanufacturedafter1995.These
Garage Door Openers can be identified by the “LEARN” or “TRAIN” button located
where the hanging antenna is attached to the Garage Door Opener. It is NOT the button
that is normally used to open and close the door. The name and color of the button may
vary by manufacturer.
1. Place the ignition switch into the ON/RUN position.
2. Place the hand-held transmitter 1 to 3 inch (3 to 8 cm) away from the HomeLink®
button you wish to program while keeping the HomeLink®indicator light in view.
Universal Garage Door Opener (HomeLink®)
ELECTRONICS
132
Page 135 of 220

3. Simultaneously push and hold both the Homelink®button you want to program and
the hand-held transmitter button.
4. Continue to hold buttons until the DID display changes from “CHANNEL # TRAIN-
ING” to “CHANNEL # TRAINED”, then release both buttons.
NOTE:
If the DID displays “DID NOT TRAIN” repeat from Step 2.
5. At the garage door opener motor (in the garage), locate the “LEARN” or “TRAINING”
button. This can usually be found where the hanging antenna wire is attached to the
garage door opener motor. Firmly push and release the “LEARN” or “TRAINING”
button.
NOTE:
Yo u h a v e 3 0 s e c o n d s i n w h i c h t o i n i t i a t e t h e n e x t s t e p a f t e r t h e L E A R N b u t t o n h a s b e e n
pushed.
6. Return to the vehicle and push the programmed HomeLink®button twice (holding the
button for two seconds each time). The DID will display “CHANNEL # TRANSMIT”. If
the garage door opener/device activates, programming is complete.
NOTE:
If the device does not activate, push the button a third time (for two seconds) to complete
the training.
7. To program the remaining two HomeLink®buttons, repeat each step for each
remaining button. DO NOT erase the channels.
Programming A Non-Rolling Code
•ForprogrammingGarageDoorOpenersmanufacturedbefore1995.
1. Turn the ignition switch to the ON/RUN position.
2. Place the hand-held transmitter 1 to 3 inch (3 to 8 cm) away from the HomeLink®
button you wish to program while keeping the HomeLink®indicator light in view.
3. Simultaneously push and hold both the HomeLink®button you want to program and
the hand-held transmitter button.
4. Continue to hold buttons until the DID display changes from “CHANNEL # TRAIN-
ING” to “CHANNEL # TRAINED”, then release both buttons.
5. Push and hold the programmed HomeLink®button and observe the indicator light.
NOTE:
•IftheDIDdisplays“DIDNOTTRAIN”repeatfromStep2.
•ToprogramthetworemainingHomeLink®buttons, repeat each step for each remain-
ing button. DO NOT erase the channels.
ELECTRONICS
133
Page 141 of 220

SRT PERFORMANCE FEATURES
Driver Information Display (DID)
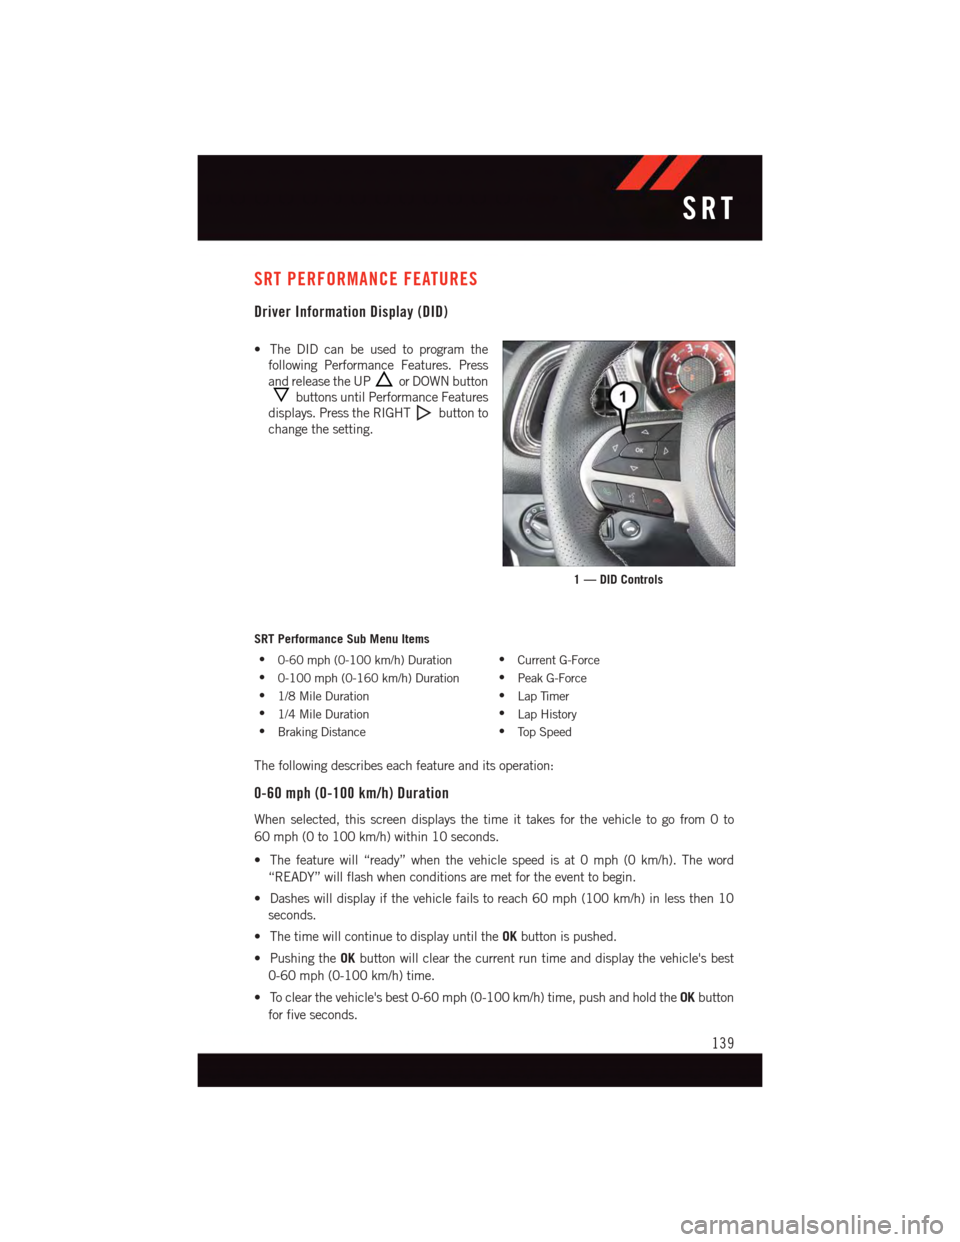
•TheDIDcanbeusedtoprogramthe
following Performance Features. Press
and release the UPor DOWN button
buttons until Performance Features
displays. Press the RIGHTbutton to
change the setting.
SRT Performance Sub Menu Items
•0-60 mph (0-100 km/h) Duration•Current G-Force
•0-100 mph (0-160 km/h) Duration•Peak G-Force
•1/8 Mile Duration•Lap Timer
•1/4 Mile Duration•Lap History
•Braking Distance•To p S p e e d
The following describes each feature and its operation:
0-60 mph (0-100 km/h) Duration
When selected, this screen displays the time it takes for the vehicle to go from 0 to
60 mph (0 to 100 km/h) within 10 seconds.
•Thefeaturewill“ready”whenthevehiclespeedisat0mph(0km/h).Theword
“READY” will flash when conditions are met for the event to begin.
•Dasheswilldisplayifthevehiclefailstoreach60mph(100km/h)inlessthen10
seconds.
•ThetimewillcontinuetodisplayuntiltheOKbutton is pushed.
•PushingtheOKbutton will clear the current run time and display the vehicle's best
0-60 mph (0-100 km/h) time.
•Toclearthevehicle'sbest0-60mph(0-100km/h)time,pushandholdtheOKbutton
for five seconds.
1 — DID Controls
SRT
139
Page:
< prev 1-8 9-16 17-24