2015 DODGE CHALLENGER center console
[x] Cancel search: center consolePage 55 of 220

7. Uconnect®8.4 Radio pg. 82
8. Back Button
9. Tune/Scroll Knob – Browse/Enter Button
10. Power Outlet pg. 134
11. AUX/SD Card/USB Port (Located In Center Console) pg. 73
ELECTRONICS
53
Page 90 of 220
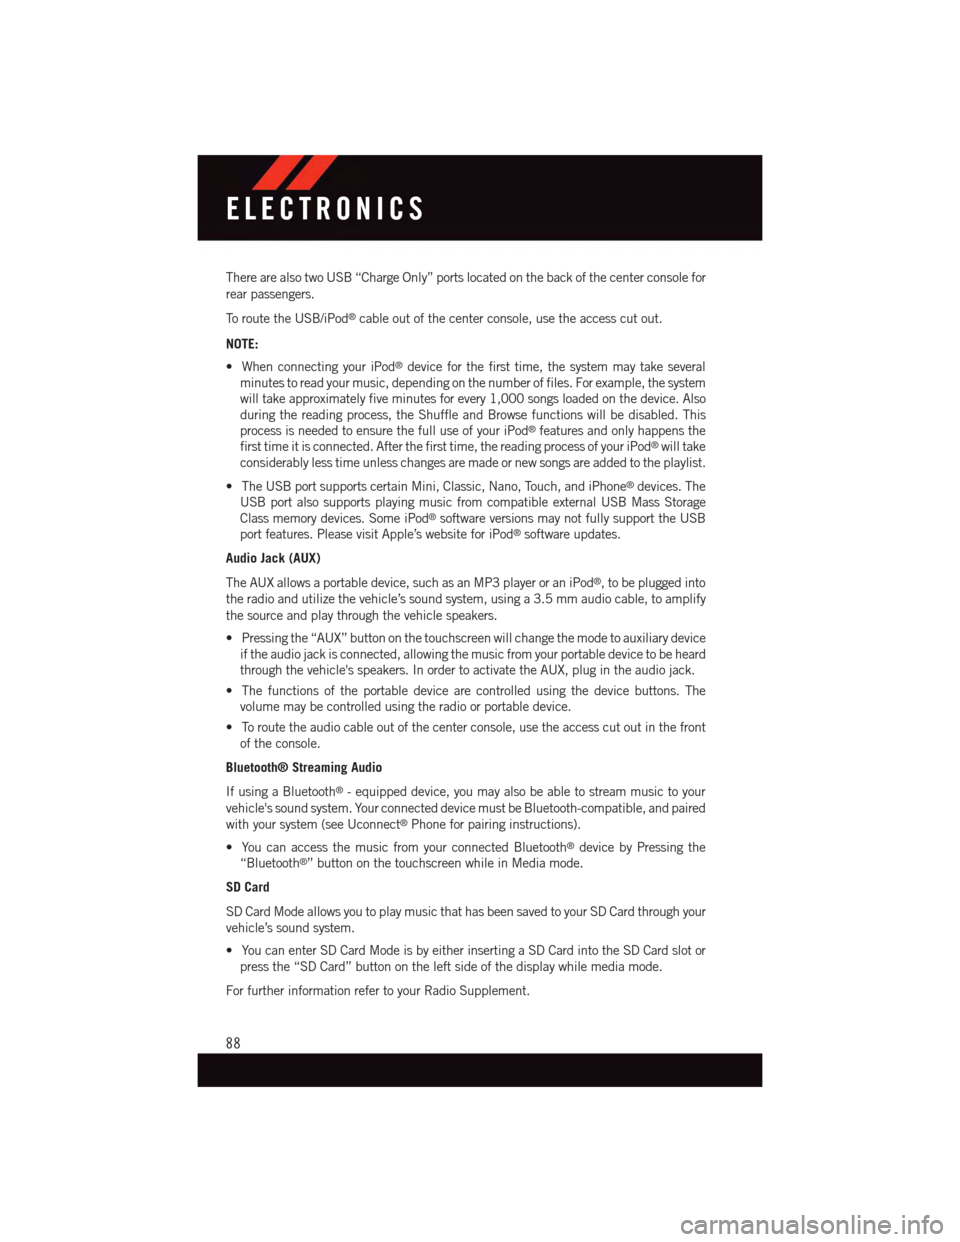
There are also two USB “Charge Only” ports located on the back of the center console for
rear passengers.
To r o u t e t h e U S B / i P o d®cable out of the center console, use the access cut out.
NOTE:
•WhenconnectingyouriPod®device for the first time, the system may take several
minutes to read your music, depending on the number of files. For example, the system
will take approximately five minutes for every 1,000 songs loaded on the device. Also
during the reading process, the Shuffle and Browse functions will be disabled. This
process is needed to ensure the full use of your iPod®features and only happens the
first time it is connected. After the first time, the reading process of your iPod®will take
considerably less time unless changes are made or new songs are added to the playlist.
•TheUSBportsupportscertainMini,Classic,Nano,Touch,andiPhone®devices. The
USB port also supports playing music from compatible external USB Mass Storage
Class memory devices. Some iPod®software versions may not fully support the USB
port features. Please visit Apple’s website for iPod®software updates.
Audio Jack (AUX)
The AUX allows a portable device, such as an MP3 player or an iPod®,tobepluggedinto
the radio and utilize the vehicle’s sound system, using a 3.5 mm audio cable, to amplify
the source and play through the vehicle speakers.
•Pressingthe“AUX”buttononthetouchscreenwillchangethemodetoauxiliarydevice
if the audio jack is connected, allowing the music from your portable device to be heard
through the vehicle's speakers. In order to activate the AUX, plug in the audio jack.
•Thefunctionsoftheportabledevicearecontrolledusingthedevicebuttons.The
volume may be controlled using the radio or portable device.
•Toroutetheaudiocableoutofthecenterconsole,usetheaccesscutoutinthefront
of the console.
Bluetooth® Streaming Audio
If using a Bluetooth®-equippeddevice,youmayalsobeabletostreammusictoyour
vehicle's sound system. Your connected device must be Bluetooth-compatible, and paired
with your system (see Uconnect®Phone for pairing instructions).
•YoucanaccessthemusicfromyourconnectedBluetooth®device by Pressing the
“Bluetooth®”buttononthetouchscreenwhileinMediamode.
SD Card
SD Card Mode allows you to play music that has been saved to your SD Card through your
vehicle’s sound system.
•YoucanenterSDCardModeisbyeitherinsertingaSDCardintotheSDCardslotor
press the “SD Card” button on the left side of the display while media mode.
For further information refer to your Radio Supplement.
ELECTRONICS
88
Page 122 of 220
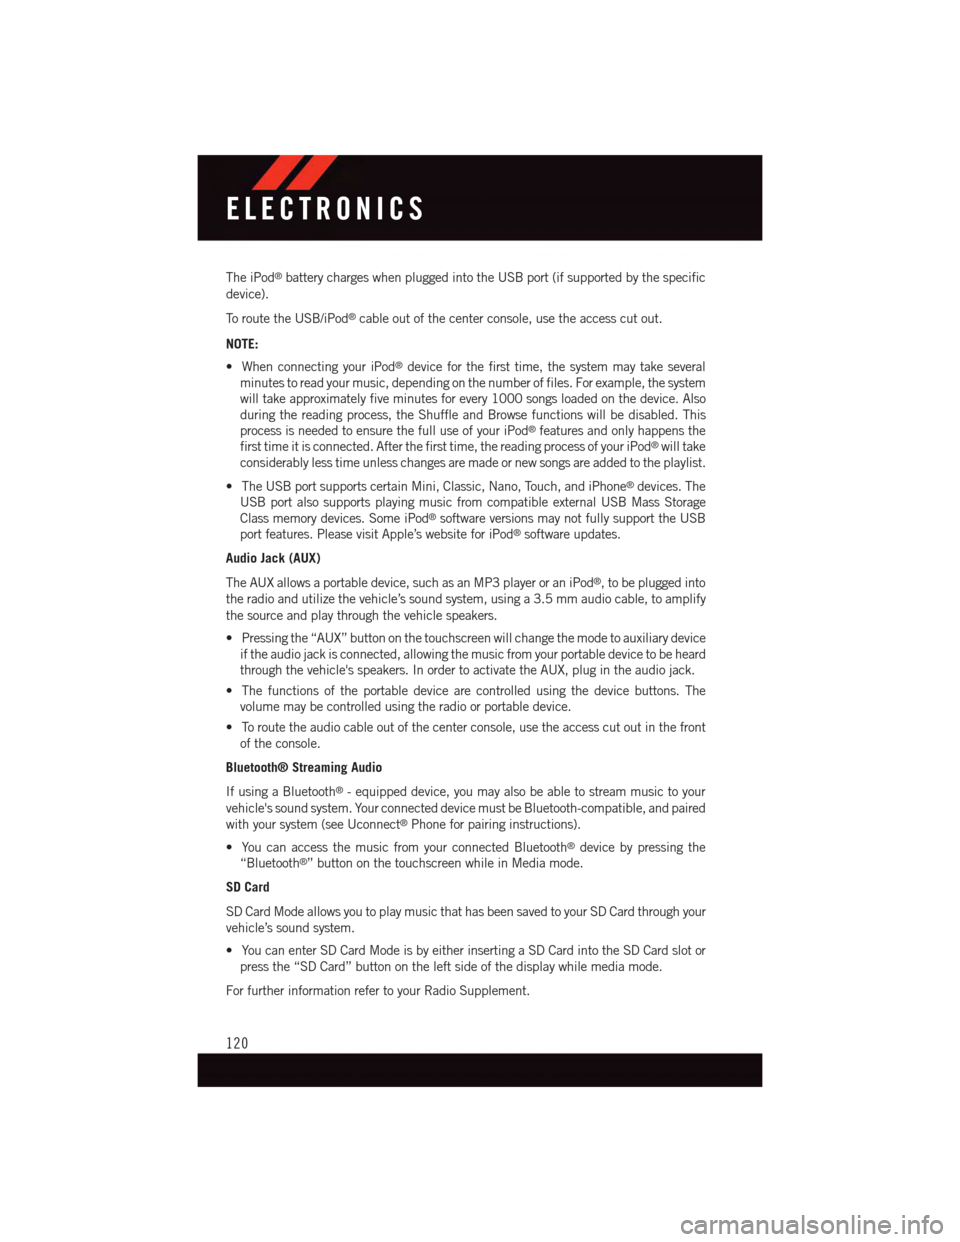
The iPod®battery charges when plugged into the USB port (if supported by the specific
device).
To r o u t e t h e U S B / i P o d®cable out of the center console, use the access cut out.
NOTE:
•WhenconnectingyouriPod®device for the first time, the system may take several
minutes to read your music, depending on the number of files. For example, the system
will take approximately five minutes for every 1000 songs loaded on the device. Also
during the reading process, the Shuffle and Browse functions will be disabled. This
process is needed to ensure the full use of your iPod®features and only happens the
first time it is connected. After the first time, the reading process of your iPod®will take
considerably less time unless changes are made or new songs are added to the playlist.
•TheUSBportsupportscertainMini,Classic,Nano,Touch,andiPhone®devices. The
USB port also supports playing music from compatible external USB Mass Storage
Class memory devices. Some iPod®software versions may not fully support the USB
port features. Please visit Apple’s website for iPod®software updates.
Audio Jack (AUX)
The AUX allows a portable device, such as an MP3 player or an iPod®,tobepluggedinto
the radio and utilize the vehicle’s sound system, using a 3.5 mm audio cable, to amplify
the source and play through the vehicle speakers.
•Pressingthe“AUX”buttononthetouchscreenwillchangethemodetoauxiliarydevice
if the audio jack is connected, allowing the music from your portable device to be heard
through the vehicle's speakers. In order to activate the AUX, plug in the audio jack.
•Thefunctionsoftheportabledevicearecontrolledusingthedevicebuttons.The
volume may be controlled using the radio or portable device.
•Toroutetheaudiocableoutofthecenterconsole,usetheaccesscutoutinthefront
of the console.
Bluetooth® Streaming Audio
If using a Bluetooth®-equippeddevice,youmayalsobeabletostreammusictoyour
vehicle's sound system. Your connected device must be Bluetooth-compatible, and paired
with your system (see Uconnect®Phone for pairing instructions).
•YoucanaccessthemusicfromyourconnectedBluetooth®device by pressing the
“Bluetooth®”buttononthetouchscreenwhileinMediamode.
SD Card
SD Card Mode allows you to play music that has been saved to your SD Card through your
vehicle’s sound system.
•YoucanenterSDCardModeisbyeitherinsertingaSDCardintotheSDCardslotor
press the “SD Card” button on the left side of the display while media mode.
For further information refer to your Radio Supplement.
ELECTRONICS
120
Page 134 of 220
UNIVERSAL GARAGE DOOR OPENER (HomeLink®)
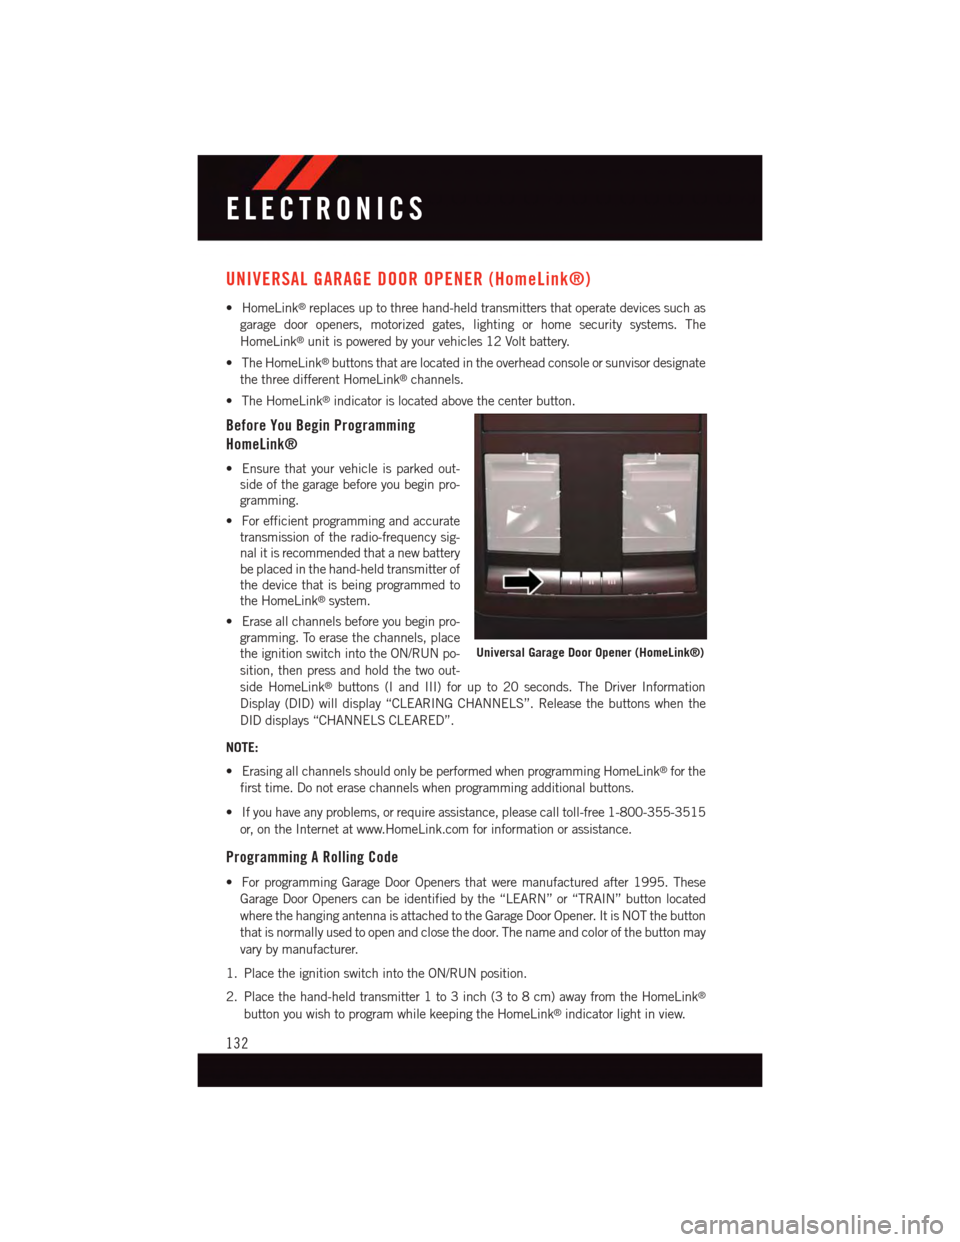
•HomeLink®replaces up to three hand-held transmitters that operate devices such as
garage door openers, motorized gates, lighting or home security systems. The
HomeLink®unit is powered by your vehicles 12 Volt battery.
•TheHomeLink®buttons that are located in the overhead console or sunvisor designate
the three different HomeLink®channels.
•TheHomeLink®indicator is located above the center button.
Before You Begin Programming
HomeLink®
•Ensurethatyourvehicleisparkedout-
side of the garage before you begin pro-
gramming.
•Forefficientprogrammingandaccurate
transmission of the radio-frequency sig-
nal it is recommended that a new battery
be placed in the hand-held transmitter of
the device that is being programmed to
the HomeLink®system.
•Eraseallchannelsbeforeyoubeginpro-
gramming. To erase the channels, place
the ignition switch into the ON/RUN po-
sition, then press and hold the two out-
side HomeLink®buttons (I and III) for up to 20 seconds. The Driver Information
Display (DID) will display “CLEARING CHANNELS”. Release the buttons when the
DID displays “CHANNELS CLEARED”.
NOTE:
•ErasingallchannelsshouldonlybeperformedwhenprogrammingHomeLink®for the
first time. Do not erase channels when programming additional buttons.
•Ifyouhaveanyproblems,orrequireassistance,pleasecalltoll-free1-800-355-3515
or, on the Internet at www.HomeLink.com for information or assistance.
Programming A Rolling Code
•ForprogrammingGarageDoorOpenersthatweremanufacturedafter1995.These
Garage Door Openers can be identified by the “LEARN” or “TRAIN” button located
where the hanging antenna is attached to the Garage Door Opener. It is NOT the button
that is normally used to open and close the door. The name and color of the button may
vary by manufacturer.
1. Place the ignition switch into the ON/RUN position.
2. Place the hand-held transmitter 1 to 3 inch (3 to 8 cm) away from the HomeLink®
button you wish to program while keeping the HomeLink®indicator light in view.
Universal Garage Door Opener (HomeLink®)
ELECTRONICS
132
Page 136 of 220
Using HomeLink®
To o p e r a t e , p u s h a n d r e l e a s e t h e p r o g r a m m e d H o m e L i n k®button. Activation will now
occur for the programmed device (e.g., garage door opener, gate operator, security system,
entry door lock, home/office lighting, etc.). The hand-held transmitter of the device may
also be used at any time.
WARNING!
•Yourmotorizeddoororgatewillopenandclosewhileyouareprogrammingthe
universal transceiver. Do not program the transceiver if people or pets are in the
path of the door or gate.
•Donotrunyourvehicleinaclosedgarageorconfinedareawhileprogrammingthe
transceiver. Exhaust gas from your vehicle contains Carbon Monoxide (CO) which is
odorless and colorless. Carbon Monoxide is poisonous when inhaled and can cause
you and others to be severely injured or killed.
POWER OUTLETS
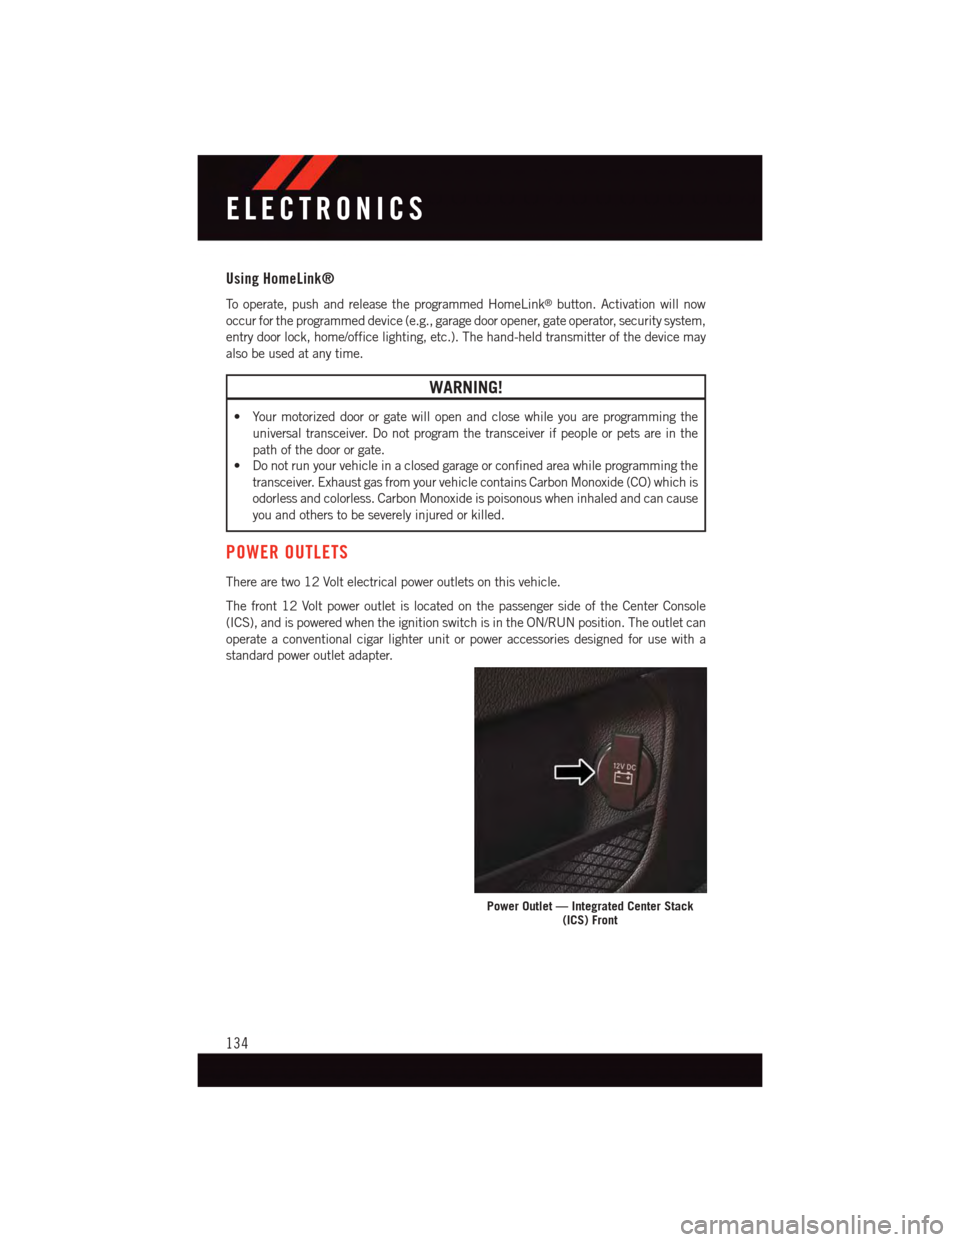
There are two 12 Volt electrical power outlets on this vehicle.
The front 12 Volt power outlet is located on the passenger side of the Center Console
(ICS), and is powered when the ignition switch is in the ON/RUN position. The outlet can
operate a conventional cigar lighter unit or power accessories designed for use with a
standard power outlet adapter.
Power Outlet — Integrated Center Stack(ICS) Front
ELECTRONICS
134
Page 137 of 220

The center console 12 Volt power outlet is powered directly from the battery (power
available at all times). Items plugged into this outlet may discharge the battery and/or
prevent the engine from starting.
NOTE:
•Donotexceedthemaximumpowerof
160 Watts (13 Amps) at 12 Volts. If the
160 Watt (13 Amp) power rating is ex-
ceeded, the fuse protecting the system
will need to be replaced.
•Poweroutletsaredesignedforaccessory
plugs only. Do not insert any other object
in the power outlet as this will damage
the outlet and blow the fuse. Improper
use of the power outlet can cause dam-
age not covered by your new vehicle
warranty.
Power Outlet — Center Console
Power Outlet Fuses
1—#12Fuse20AYellowCigarLighterIntegratedCenterStack2—#38Fuse20AYellowPowerOutletCenterConsole
ELECTRONICS
135
Page 170 of 220
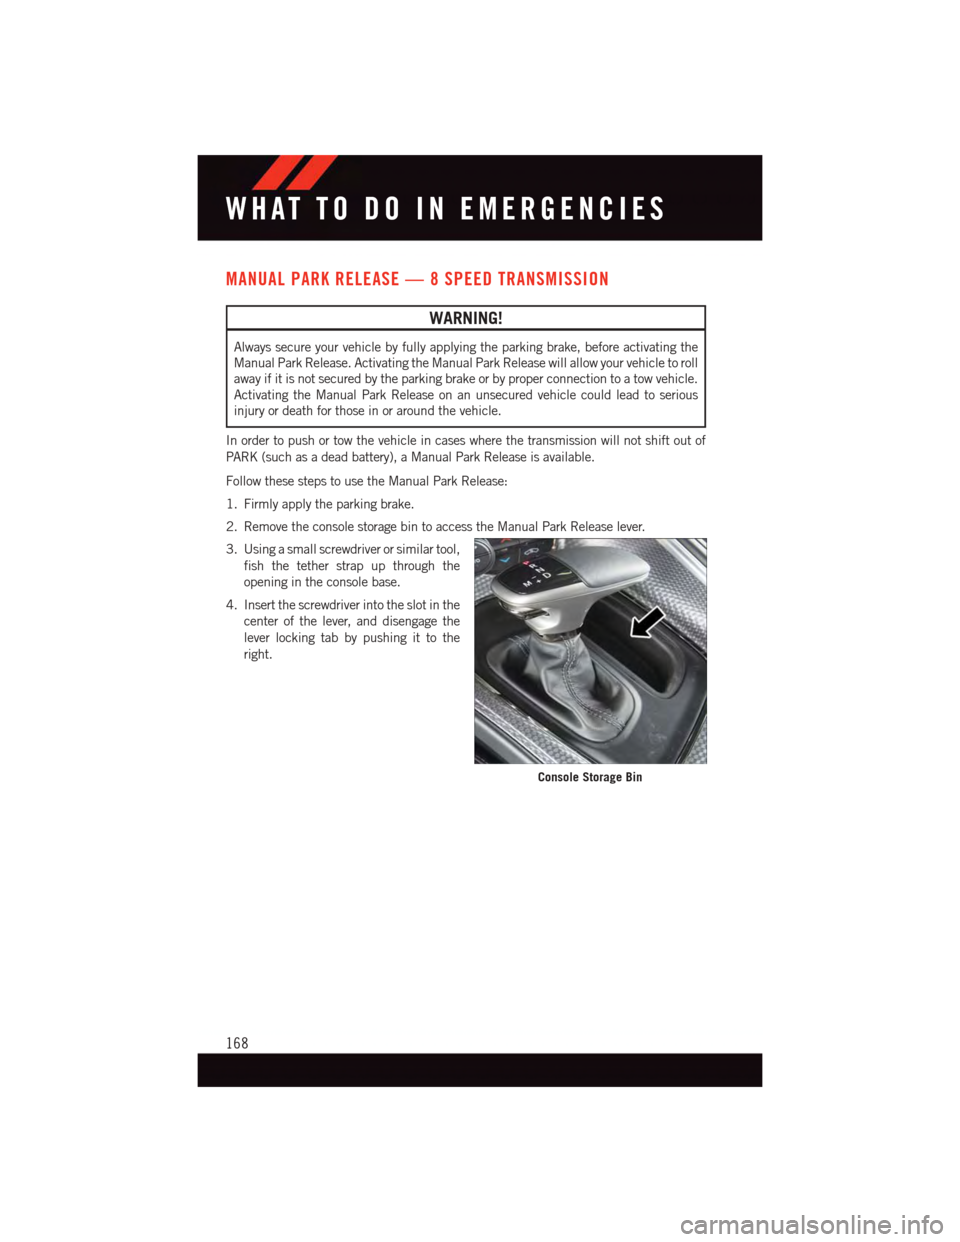
MANUAL PARK RELEASE — 8 SPEED TRANSMISSION
WARNING!
Always secure your vehicle by fully applying the parking brake, before activating the
Manual Park Release. Activating the Manual Park Release will allow your vehicle to roll
away if it is not secured by the parking brake or by proper connection to a tow vehicle.
Activating the Manual Park Release on an unsecured vehicle could lead to serious
injury or death for those in or around the vehicle.
In order to push or tow the vehicle in cases where the transmission will not shift out of
PA R K ( s u c h a s a d e a d b a t t e r y ) , a M a n u a l P a r k R e l e a s e i s a v a i l a b l e .
Follow these steps to use the Manual Park Release:
1. Firmly apply the parking brake.
2. Remove the console storage bin to access the Manual Park Release lever.
3. Using a small screwdriver or similar tool,
fish the tether strap up through the
opening in the console base.
4. Insert the screwdriver into the slot in the
center of the lever, and disengage the
lever locking tab by pushing it to the
right.
Console Storage Bin
WHAT TO DO IN EMERGENCIES
168
Page 202 of 220
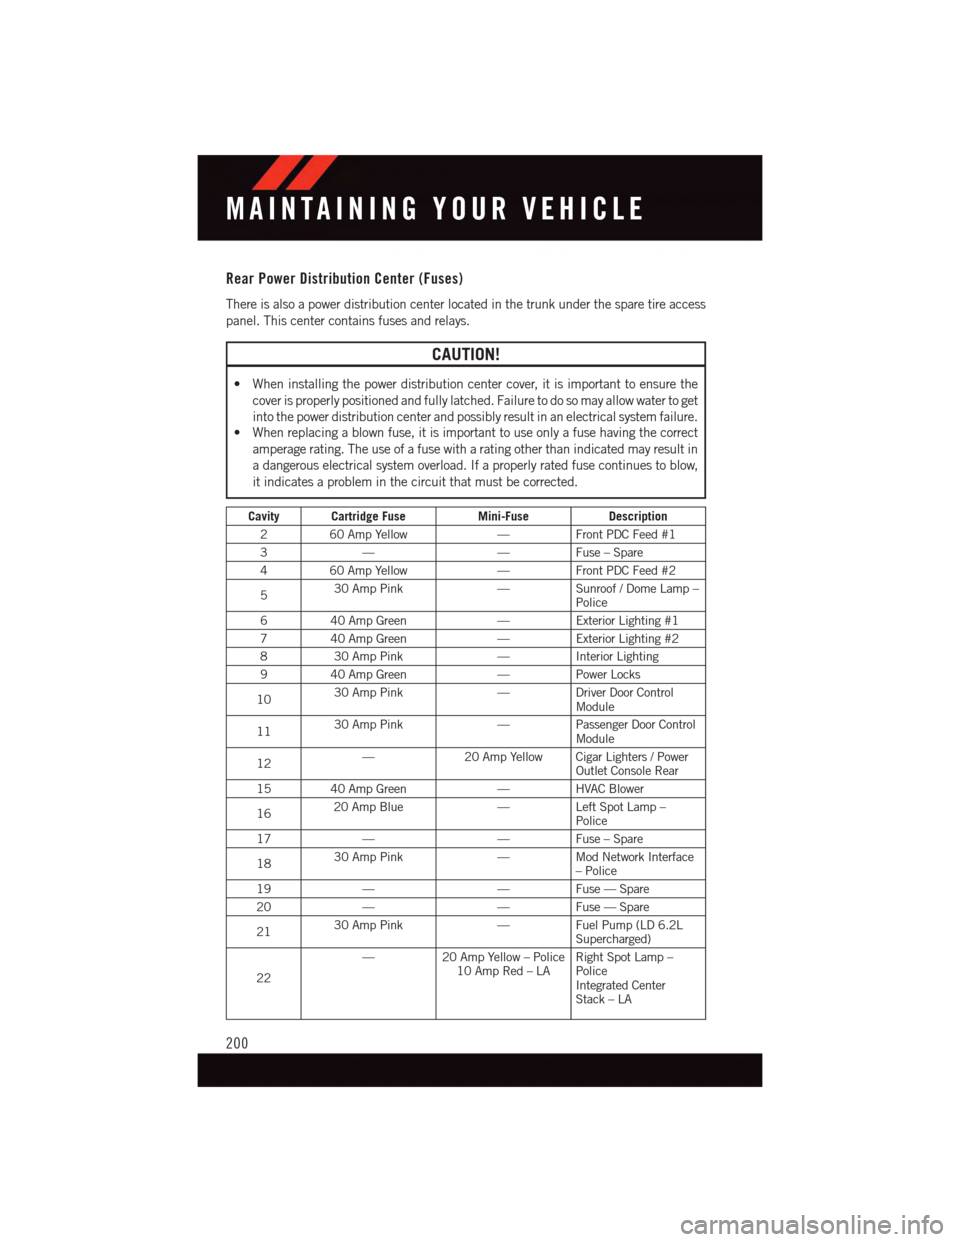
Rear Power Distribution Center (Fuses)
There is also a power distribution center located in the trunk under the spare tire access
panel. This center contains fuses and relays.
CAUTION!
•Wheninstallingthepowerdistributioncentercover,itisimportanttoensurethe
cover is properly positioned and fully latched. Failure to do so may allow water to get
into the power distribution center and possibly result in an electrical system failure.•Whenreplacingablownfuse,itisimportanttouseonlyafusehavingthecorrect
amperage rating. The use of a fuse with a rating other than indicated may result in
adangerouselectricalsystemoverload.Ifaproperlyratedfusecontinuestoblow,
it indicates a problem in the circuit that must be corrected.
Cavity Cartridge FuseMini-FuseDescription
260AmpYellow—Front PDC Feed #1
3——Fuse – Spare
460AmpYellow—Front PDC Feed #2
530 Amp Pink—Sunroof / Dome Lamp –Police
640 Amp Green—Exterior Lighting #1
740 Amp Green—Exterior Lighting #2
830 Amp Pink—Interior Lighting
940 Amp Green—Power Locks
1030 Amp Pink—Driver Door ControlModule
1130 Amp Pink—Passenger Door ControlModule
12—20 Amp Yellow Cigar Lighters / PowerOutlet Console Rear
15 40 Amp Green—HVAC Blower
1620 Amp Blue—Left Spot Lamp –Police
17——Fuse – Spare
1830 Amp Pink—Mod Network Interface–Police
19——Fuse — Spare
20——Fuse — Spare
2130 Amp Pink—Fuel Pump (LD 6.2LSupercharged)
22
—20 Amp Yellow – Police10 Amp Red – LARight Spot Lamp –PoliceIntegrated CenterStack – LA
MAINTAINING YOUR VEHICLE
200