2015 CHEVROLET ORLANDO CD player
[x] Cancel search: CD playerPage 155 of 372
Black plate (13,1)Chevrolet Orlando Owner Manual - 2013 - CRC - 6/5/12
Infotainment System 7-13
Audio Players
CD Player
The CD player can play audio CDs
and MP3 CDs.
The CD player will not play
8 cm (3 in) CDs.
Care of CDs
Sound quality can be reduced due
to disc quality, recording method,
quality of the music recorded, and
how the disc has been handled.
Handle discs carefully and store
them in their original cases or other
protective cases away from direct
sunlight and dust. If the bottom
surface of a disc is damaged, the
disc may not play properly or at all.
Do not touch the bottom surface of
a disc while handling it; this could
damage the surface. Pick up discs
by grasping the outer edges or the
edge of the hole and the outer edge.
If the bottom surface of a disc is
dirty, take a soft lint-free cloth,
or dampen a clean soft cloth in amild neutral detergent solution
mixed with water, and clean it. Wipe
the disc from the center to the
outer edge.
Care of the CD Player
Do not add a label to a disc, as it
could get caught in the CD player.
If a label is needed, label the top of
the recorded disc with a
marking pen.
Do not use disc lens cleaners
because they could contaminate the
lens of the disc optics and damage
the CD player.
Notice:
If a label is added to a
CD, more than one CD is inserted
into the slot at a time, or an
attempt is made to play scratched
or damaged CDs, the CD player
could be damaged. While using
the CD player, use only CDs in
good condition without any label,
load one CD at a time, and keep
the CD player and the loading slot
free of foreign materials, liquids,
and debris.
Control Buttons
The buttons used to control the CD
player are:
CD/AUX: Press to use the CD
player.
lorg: Press to select tracks or
to fast forward or rewind within a
track.
INFO: Press to display additional
information about the current track
that may be available.
MENU: Turn to enter the menu.
SELECT: Press to select an item.
Y(Eject):Press to eject the disc.
Inserting a CD
With the printed side facing up,
insert a disc into the CD slot until it
is drawn in.
Removing a CD
PressY.
The disc is pushed out of the
CD slot.
Page 156 of 372
Black plate (14,1)Chevrolet Orlando Owner Manual - 2013 - CRC - 6/5/12
7-14 Infotainment System
If the disc is not removed after it is
ejected, it is pulled back in after a
few seconds.
Playing a CD or MP3 CD
Press the CD/AUX button if there is
a disc in the player; it begins
playing.
Information about the disc and
current track is shown on the
display depending on the data
stored.
Selecting a CD Track
Using the control buttons:
.Pressgorlto select the
previous or next track.
Using the CD Menu:
1. Turn the MENU knob.
2. Select Tracks list.
3. Select the track. Playing Tracks in Random Order
Turn the MENU knob and then set
Shuffle Songs to On.
Fast Forward and Rewind
Press and hold
lorgto fast
forward or rewind within the current
track.
Selecting an MP3 Track
Using the control buttons:
.Pressgorlto select the
previous or next track.
Using the CD Menu:
1. Turn the MENU knob.
2. Select Playlists/Folders.
3. Select the playlist or folder.
4. Select the track. Searching for MP3 Tracks
The search feature may take some
time to display the information after
reading the disc due to the amount
of information stored on the disc.
FM automatically plays while the
disc is being read.
Tracks can be searched by:
.Playlists
.Artists
.Albums
.Song Titles
.Genres
.Folder View
To search for tracks:
1. Turn the MENU knob.
2. Select Search.
3. Select: Playlists, Artists, Albums, Song Titles, Genres,
or Folder View.
4. Select the track.
Page 157 of 372
Black plate (15,1)Chevrolet Orlando Owner Manual - 2013 - CRC - 6/5/12
Infotainment System 7-15
Auxiliary Devices
The optional AUX input allows
portable devices to connect to the
vehicle using the 3.5 mm (1/8 in)
auxiliary jack or USB port.
Portable devices are controlled by
using the menu system described in
Operation on page 7‑4.
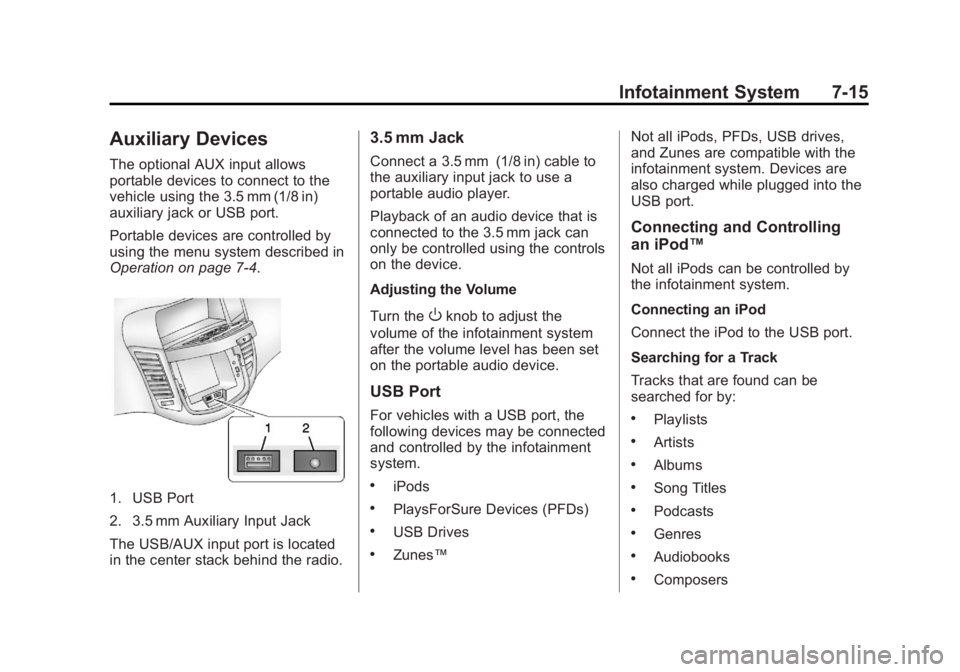
1. USB Port
2. 3.5 mm Auxiliary Input Jack
The USB/AUX input port is located
in the center stack behind the radio.
3.5 mm Jack
Connect a 3.5 mm (1/8 in) cable to
the auxiliary input jack to use a
portable audio player.
Playback of an audio device that is
connected to the 3.5 mm jack can
only be controlled using the controls
on the device.
Adjusting the Volume
Turn the
Oknob to adjust the
volume of the infotainment system
after the volume level has been set
on the portable audio device.
USB Port
For vehicles with a USB port, the
following devices may be connected
and controlled by the infotainment
system.
.iPods
.PlaysForSure Devices (PFDs)
.USB Drives
.Zunes™ Not all iPods, PFDs, USB drives,
and Zunes are compatible with the
infotainment system. Devices are
also charged while plugged into the
USB port.
Connecting and Controlling
an iPod™
Not all iPods can be controlled by
the infotainment system.
Connecting an iPod
Connect the iPod to the USB port.
Searching for a Track
Tracks that are found can be
searched for by:
.Playlists
.Artists
.Albums
.Song Titles
.Podcasts
.Genres
.Audiobooks
.Composers
Page 161 of 372
Black plate (19,1)Chevrolet Orlando Owner Manual - 2013 - CRC - 6/5/12
Infotainment System 7-19
$/i(End Call/Mute):Press to
end a call, reject a call, or cancel an
operation.
Infotainment System Controls
For information about how to
navigate the menu system using the
infotainment controls, see Operation
on page 7‑4.
5\>(Phone): Press to enter the
Phone main menu.
Voice Recognition
The voice recognition system uses
commands to control the system
and dial phone numbers.
Noise: The system may not
recognize voice commands if there
is too much background noise.
When to Speak: A tone sounds to
indicate that the system is ready for
a voice command. Wait for the tone
and then speak.
How to Speak: Speak clearly in a
calm and natural voice.
Audio System
When using the Bluetooth system,
sound comes through the vehicle's
front audio system speakers and
overrides the audio system. Use the
VOL/
Oknob during a call to
change the volume level. The
adjusted volume level remains in
memory for later calls. The system
maintains a minimum volume level.
Other Information
The Bluetooth®word mark and
logos are owned by the Bluetooth®
SIG, Inc. and any use of such marks
by General Motors is under license.
Other trademarks and trade names
are those of their respective owners.
See Radio Frequency Statement on
page 13‑15 for information
regarding Part 15 of the Federal
Communications Commission (FCC)
rules and Industry Canada
Standards RSS-GEN/210/220/310.
Bluetooth (Infotainment
Controls)
For information about how to
navigate the menu system using the
infotainment controls, see Operation
on page 7‑4.
Pairing
A Bluetooth-enabled cell phone
must be paired to the Bluetooth
system and then connected to the
vehicle before it can be used. See
your cell phone manufacturer's user
guide for Bluetooth functions before
pairing the cell phone. If a Bluetooth
phone is not connected, calls will be
made using OnStar Hands-Free
Calling, if available. See OnStar
Overview on page 14‑1 for more
information.
Pairing Information
.A Bluetooth phone with MP3
capability cannot be paired to
the vehicle as a phone and an
MP3 player at the same time.
Page 165 of 372
Black plate (23,1)Chevrolet Orlando Owner Manual - 2013 - CRC - 6/5/12
Infotainment System 7-23
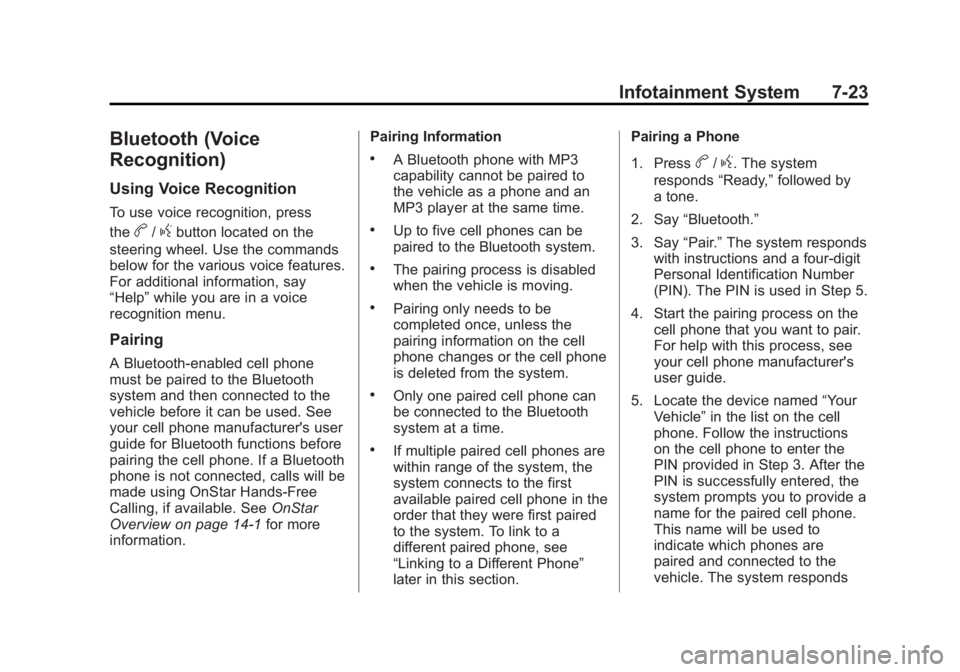
Bluetooth (Voice
Recognition)
Using Voice Recognition
To use voice recognition, press
the
b/gbutton located on the
steering wheel. Use the commands
below for the various voice features.
For additional information, say
“Help” while you are in a voice
recognition menu.
Pairing
A Bluetooth-enabled cell phone
must be paired to the Bluetooth
system and then connected to the
vehicle before it can be used. See
your cell phone manufacturer's user
guide for Bluetooth functions before
pairing the cell phone. If a Bluetooth
phone is not connected, calls will be
made using OnStar Hands-Free
Calling, if available. See OnStar
Overview on page 14‑1 for more
information. Pairing Information
.A Bluetooth phone with MP3
capability cannot be paired to
the vehicle as a phone and an
MP3 player at the same time.
.Up to five cell phones can be
paired to the Bluetooth system.
.The pairing process is disabled
when the vehicle is moving.
.Pairing only needs to be
completed once, unless the
pairing information on the cell
phone changes or the cell phone
is deleted from the system.
.Only one paired cell phone can
be connected to the Bluetooth
system at a time.
.If multiple paired cell phones are
within range of the system, the
system connects to the first
available paired cell phone in the
order that they were first paired
to the system. To link to a
different paired phone, see
“Linking to a Different Phone”
later in this section.Pairing a Phone
1. Press
b/g. The system
responds “Ready,”followed by
a tone.
2. Say “Bluetooth.”
3. Say “Pair.”The system responds
with instructions and a four-digit
Personal Identification Number
(PIN). The PIN is used in Step 5.
4. Start the pairing process on the cell phone that you want to pair.
For help with this process, see
your cell phone manufacturer's
user guide.
5. Locate the device named “Your
Vehicle” in the list on the cell
phone. Follow the instructions
on the cell phone to enter the
PIN provided in Step 3. After the
PIN is successfully entered, the
system prompts you to provide a
name for the paired cell phone.
This name will be used to
indicate which phones are
paired and connected to the
vehicle. The system responds
Page 361 of 372
Black plate (1,1)Chevrolet Orlando Owner Manual - 2013 - CRC - 6/5/12
INDEX i-1
A
Accessories andModifications . . . . . . . . . . . . . . . . . 10-3
Accessory Power . . . . . . . . . . . . . . 9-18
Add-On Electrical Equipment . . . . . . . . . . . . . . . . . . . 9-47
Additional Information
OnStar
®. . . . . . . . . . . . . . . . . . . . . . 14-5
Air Cleaner/Filter, Engine . . . . . 10-11
Air Conditioning . . . . . . . . . . . . . . . . 8-3
Air Vents . . . . . . . . . . . . . . . . . . . . . . . 8-6
Airbag System Check . . . . . . . . . . . . . . . . . . . . . . . . 3-31
How Does an AirbagRestrain? . . . . . . . . . . . . . . . . . . . 3-28
What Makes an Airbag
Inflate? . . . . . . . . . . . . . . . . . . . . . . 3-28
What Will You See after an Airbag Inflates? . . . . . . . . . . . . . 3-29
When Should an Airbag
Inflate? . . . . . . . . . . . . . . . . . . . . . . 3-27
Where Are the Airbags? . . . . . . 3-26 Airbags
Adding Equipment to the
Vehicle . . . . . . . . . . . . . . . . . . . . . . 3-30
Readiness Light . . . . . . . . . . . . . . 5-11
Servicing Airbag-Equipped Vehicles . . . . . . . . . . . . . . . . . . . . . 3-30
System Check . . . . . . . . . . . . . . . . 3-24
Alarm Vehicle Security . . . . . . . . . . . . . . . 2-9
AM-FM Radio . . . . . . . . . . . . . . . . . . . 7-7
Antenna Multi-band . . . . . . . . . . . . . . . . . . . . 7-12
Satellite Radio . . . . . . . . . . . . . . . . 7-12
Antilock Brake System (ABS) . . . . . . . . . . . . . . . . 9-26
Warning Light . . . . . . . . . . . . . . . . . 5-15
Appearance Care Exterior . . . . . . . . . . . . . . . . . . . . . 10-78
Interior . . . . . . . . . . . . . . . . . . . . . . 10-82
Armrest Front Seat . . . . . . . . . . . . . . . . . . . . . 3-6
Ashtrays . . . . . . . . . . . . . . . . . . . . . . . . 5-7
Assistance Program, Roadside . . . . . . . . . . . . . . . . . . . . . 13-5
Audio Players . . . . . . . . . . . . . . . . . 7-13
CD . . . . . . . . . . . . . . . . . . . . . . . . . . . 7-13 Audio System
Radio Reception . . . . . . . . . . . . . . 7-12
Theft-Deterrent Feature . . . . . . . . 7-2
Automatic Climate Control System . . . . . . . . 8-3
Door Locks . . . . . . . . . . . . . . . . . . . . 2-7
Headlamp System . . . . . . . . . . . . . 6-3
Transmission . . . . . . . . . . . . . . . . . 9-21
Transmission Fluid . . . . . . . . . 10-10
Automatic Transmission Manual Mode . . . . . . . . . . . . . . . . . 9-23
Shift Lock Control
Function Check . . . . . . . . . . . 10-22
Auxiliary Devices . . . . . . . . . . . . . . . . . . . . . . . 7-15
B
Battery . . . . . . . . . . . . . . . . . . . . . . . 10-21Jump Starting . . . . . . . . . . . . . . . 10-73
Power Protection . . . . . . . . . . . . . . 6-7
Voltage and ChargingMessages . . . . . . . . . . . . . . . . . . . 5-25
Blade Replacement, Wiper . . . 10-23
Bluetooth . . . . . . . . . . 7-18, 7-19, 7-23
Brake
System Warning Light . . . . . . . . 5-14
Page 362 of 372
Black plate (2,1)Chevrolet Orlando Owner Manual - 2013 - CRC - 6/5/12
i-2 INDEX
Brakes . . . . . . . . . . . . . . . . . . . . . . . . 10-19Antilock . . . . . . . . . . . . . . . . . . . . . . . 9-26
Assist . . . . . . . . . . . . . . . . . . . . . . . . . 9-27
Fluid . . . . . . . . . . . . . . . . . . . . . . . . 10-20
Parking . . . . . . . . . . . . . . . . . . . . . . . 9-27
System Messages . . . . . . . . . . . . 5-25
Braking . . . . . . . . . . . . . . . . . . . . . . . . . 9-3
Break-In, New Vehicle . . . . . . . . . 9-13
Bulb Replacement . . . . . . . . . . . . 10-30
Back-up Lamps . . . . . . . . . . . . . 10-29
Fog Lamps . . . . . . . . . . . . . . . . . 10-27
Halogen Bulbs . . . . . . . . . . . . . . 10-25
Headlamp Aiming . . . . . . . . . . . 10-25
Headlamps . . . . . . . . . . . . . . . . . 10-25
Headlamps, Front TurnSignal, Sidemarker, and
Parking Lamps . . . . . . . . . . . . 10-25
License Plate Lamps . . . . . . . 10-29
Taillamps, Turn Signal, Sidemarker, and
Stoplamps . . . . . . . . . . . . . . . . 10-27
Buying New Tires . . . . . . . . . . . . . 10-51C
Calibration . . . . . . . . . . . . . . . . . . . . . . 5-5
California Fuel Requirements . . . . . . . . . . . 9-38
Perchlorate MaterialsRequirements . . . . . . . . . . . . . . . 10-3
Warning . . . . . . . . . . . . . . . . . . . . . . 10-3
Camera, Rear Vision . . . . . . . . . . 9-35
Capacities and Specifications . . . . . . . . . . . . . . . . 12-2
Carbon Monoxide
Engine Exhaust . . . . . . . . . . . . . . . 9-20
Liftgate . . . . . . . . . . . . . . . . . . . . . . . . 2-8
Winter Driving . . . . . . . . . . . . . . . . . 9-7
Cargo Cover . . . . . . . . . . . . . . . . . . . . . . . . . . 4-2
Management System . . . . . . . . . . 4-4
Cautions, Danger, and Warnings . . . . . . . . . . . . . . . . . . . . . . . . iv
CD Player . . . . . . . . . . . . . . . . . . . . . 7-13
Center Console Storage . . . . . . . . 4-2
Chains, Tire . . . . . . . . . . . . . . . . . . 10-56
Charging System Light . . . . . . . . 5-11 Check
Engine Light . . . . . . . . . . . . . . . . . . 5-12
Ignition
Transmission Lock . . . . . . . . 10-23
Child Restraints Infants and YoungChildren . . . . . . . . . . . . . . . . . . . . . 3-34
Lower Anchors and Tethers for Children . . . . . . . . . 3-39
Older Children . . . . . . . . . . . . . . . . 3-32
Securing . . . . . . . . . . . . . . . . 3-44, 3-46
Systems . . . . . . . . . . . . . . . . . . . . . . 3-36
Child-View Mirror . . . . . . . . . . . . . . 2-13
Cigarette Lighter . . . . . . . . . . . . . . . . 5-6
Circuit Breakers . . . . . . . . . . . . . . 10-31
Cleaning Exterior Care . . . . . . . . . . . . . . . 10-78
Interior Care . . . . . . . . . . . . . . . . 10-82
Climate Control Systems . . . . . . . 8-1 Air Conditioning . . . . . . . . . . . . . . . 8-1
Automatic . . . . . . . . . . . . . . . . . . . . . . 8-3
Heating . . . . . . . . . . . . . . . . . . . . . . . . 8-1
Clock . . . . . . . . . . . . . . . . . . . . . . . . . . . 5-5
Cluster, Instrument . . . . . . . . . . . . . 5-8
Clutch, Hydraulic . . . . . . . . . . . . . 10-11
Collision Damage Repair . . . . . . 13-9