2015 CHEVROLET MALIBU center console
[x] Cancel search: center consolePage 22 of 399
Black plate (15,1)Chevrolet Malibu Owner Manual (GMNA-Localizing-U.S./Canada/Mexico-
7575972) - 2015 - crc - 4/1/14
In Brief 1-15
Vehicle Features
Infotainment System
See the infotainment manual for
information on the radio, audio
players, phone, navigation system,
and voice or speech recognition.
It also includes information on
settings.
Radio(s)
VOL/O:Press to turn the system
on and off. Turn to increase or
decrease the volume.
RADIO/BAND: Press to choose
between FM, AM, or SiriusXM
®,
if equipped.
TUNE/MENU: Turn to select radio
stations. Press to select a menu.
©SEEK¨: Press to seek the
previous or next station or track.
INFO: Press to show available
information about the current station
or track. See
Overview on page 7-2.
Satellite Radio
If equipped, vehicles with a
SiriusXM®satellite radio tuner and a
valid SiriusXM satellite radio
subscription can receive SiriusXM
programming.
SiriusXM Satellite Radio
Service
SiriusXM is a satellite radio service
based in the 48 contiguous United
States and 10 Canadian provinces.
SiriusXM satellite radio has a wide
variety of programming and
commercial-free music, coast to
coast, and in digital-quality sound.
A fee is required to receive the
SiriusXM service.
Refer to:
.www.siriusxm.com or call
1-866-635-2349 (U.S.).
.www.xmradio.ca or call
1-877-209-0079 (Canada).
See Satellite Radio on page 7-10.
Portable Audio Devices
This vehicle may have a 3.5 mm
(1/8 in) auxiliary input and a USB
port in the center console. External
devices such as iPods
®, laptop
computers, MP3 players, and USB
storage devices may be connected.
See Auxiliary Devices on page 7-14.
Bluetooth®
The Bluetooth®system allows users
with a Bluetooth-enabled mobile
phone to make and receive
hands-free calls using the vehicle
audio system and controls.
The Bluetooth-enabled mobile
phone must be paired with the
in-vehicle Bluetooth system before it
can be used in the vehicle. Not all
phones will support all functions.
See Bluetooth (Infotainment
Controls) on page 7-21 orBluetooth
(Voice Recognition) on page 7-24 or
Bluetooth (Overview) on page 7-19.
Page 25 of 399
Black plate (18,1)Chevrolet Malibu Owner Manual (GMNA-Localizing-U.S./Canada/Mexico-
7575972) - 2015 - crc - 4/1/14
1-18 In Brief
Parking Assist
If equipped, this system uses
sensors on the rear bumper to
assist with parking and avoiding
objects while in R (Reverse).
It operates at speeds less than
8 km/h (5 mph). Rear Parking Assist
(RPA) uses audible beeps to
provide distance and system
information.
Keep the sensors on the vehicle's
rear bumper clean to ensure proper
operation.
SeeParking Assist on page 9-36.
Power Outlets
The accessory power outlets can be
used to plug in electrical equipment,
such as a cell phone or MP3 player.
There are two accessory power
outlets: one on the center stack
below the climate control and one
under the armrest inside the center
console storage. Open the protective cover to use the
accessory power outlet.
See
Power Outlets on page 5-5.
Universal Remote System
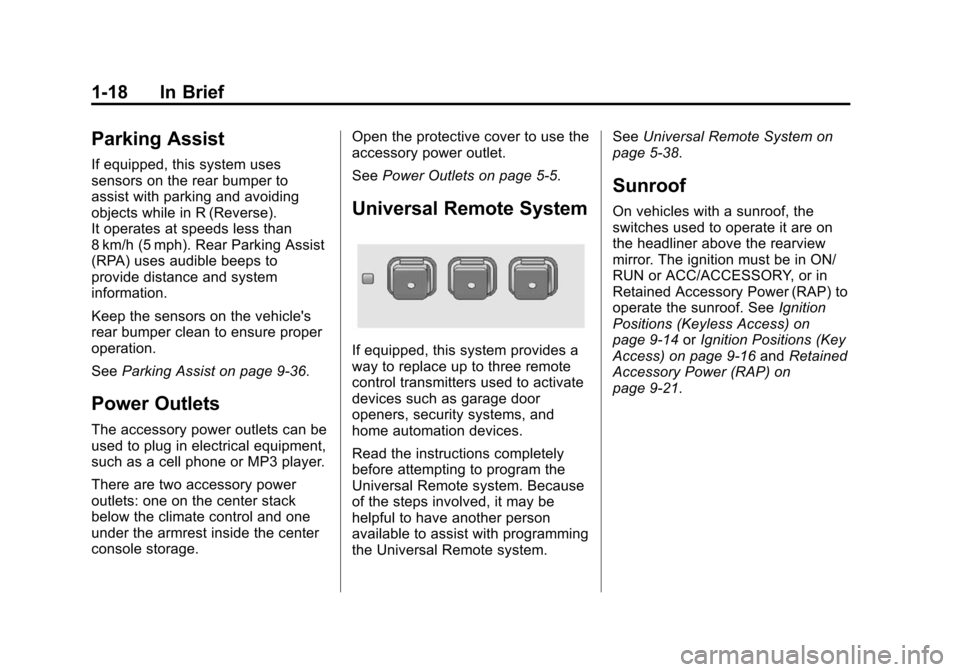
If equipped, this system provides a
way to replace up to three remote
control transmitters used to activate
devices such as garage door
openers, security systems, and
home automation devices.
Read the instructions completely
before attempting to program the
Universal Remote system. Because
of the steps involved, it may be
helpful to have another person
available to assist with programming
the Universal Remote system. See
Universal Remote System on
page 5-38.
Sunroof
On vehicles with a sunroof, the
switches used to operate it are on
the headliner above the rearview
mirror. The ignition must be in ON/
RUN or ACC/ACCESSORY, or in
Retained Accessory Power (RAP) to
operate the sunroof. See Ignition
Positions (Keyless Access) on
page 9-14 orIgnition Positions (Key
Access) on page 9-16 andRetained
Accessory Power (RAP) on
page 9-21.
Page 35 of 399
Black plate (6,1)Chevrolet Malibu Owner Manual (GMNA-Localizing-U.S./Canada/Mexico-
7575972) - 2015 - crc - 4/1/14
2-6 Keys, Doors, and Windows
Programming with a Recognized
Transmitter (Key Vehicles Only)
To program a new key:
1. Insert the original, alreadyprogrammed key in the ignition
and turn to the key to the ON/
RUN position.
2. Turn the key to LOCK/OFF, and remove the key.
3. Insert the new key to be programmed and turn it to the
ON/RUN position within
five seconds.
The security light will turn off
once the key has been
programmed.
4. Repeat Steps 1–3 if additional keys are to be programmed.
If a key is lost or damaged, see your
dealer to have a new key made. Programming without a
Recognized Transmitter (Key
Vehicles Only)
U.S. owners are permitted to
program a new key to their vehicle
when a recognized key is not
available. Canadian regulations
require that Canadian owners see
their dealer for programming new
keys when a recognized key is not
available.
If there are no currently recognized
keys available, follow this procedure
to program the first key.
This procedure will take
approximately 30 minutes to
complete for the first key. The
vehicle must be off and all of the
keys you wish to program must be
with you.
1. Insert the new vehicle key into
the ignition.
2. Turn to ON/RUN. The security light will come on.
3. Wait 10 minutes until the security light turns off. 4. Turn the ignition to LOCK/OFF.
5. Repeat Steps 2–4 two more
times. After the third time, turn to
ON/RUN; the key is learned and
all previously known keys will no
longer work with the vehicle.
Remaining keys can be learned by
following the procedure in
“Programming with a Recognized
Transmitter (Key Vehicles Only).”
Programming with a Recognized
Transmitter (Keyless Access
Vehicles Only)
A new transmitter can be
programmed to the vehicle when
there is one recognized transmitter.
To program, the vehicle must be off
and all of the transmitters, both
currently recognized and new, must
be with you.
1. Place the recognized transmitter(s) in the transmitter
pocket. The transmitter pocket is
inside the center console
storage area.
Page 37 of 399
Black plate (8,1)Chevrolet Malibu Owner Manual (GMNA-Localizing-U.S./Canada/Mexico-
7575972) - 2015 - crc - 4/1/14
2-8 Keys, Doors, and Windows
3. Repeat Step 2 two additionaltimes. After the third time, all
previously known transmitters
will no longer work with the
vehicle. Remaining transmitters
can be relearned during the next
steps.
The DIC display should now
show READY FOR REMOTE
# 1.
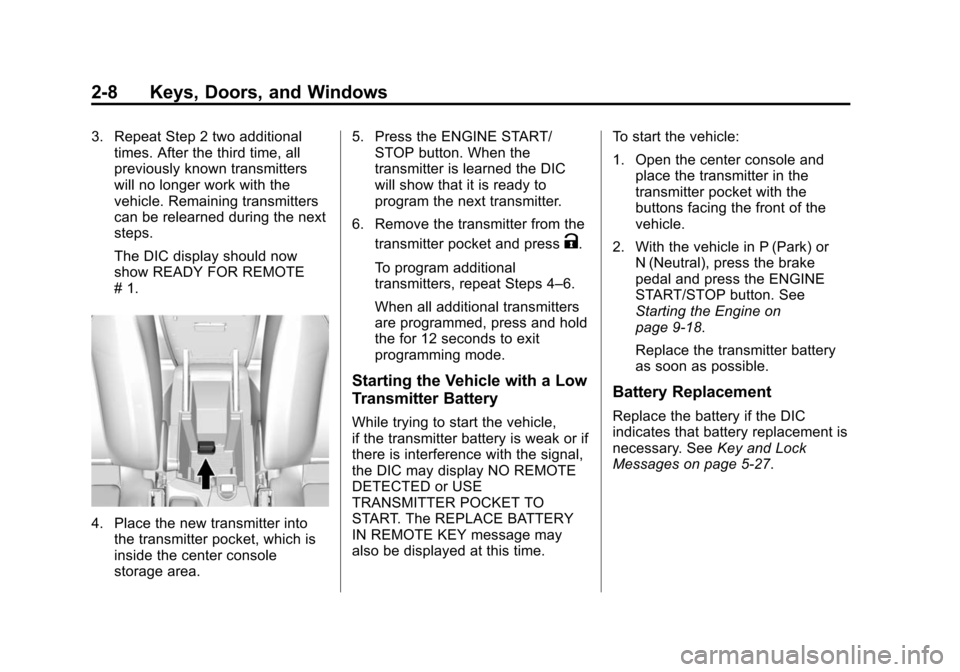
4. Place the new transmitter intothe transmitter pocket, which is
inside the center console
storage area. 5. Press the ENGINE START/
STOP button. When the
transmitter is learned the DIC
will show that it is ready to
program the next transmitter.
6. Remove the transmitter from the transmitter pocket and press
K.
To program additional
transmitters, repeat Steps 4–6.
When all additional transmitters
are programmed, press and hold
the for 12 seconds to exit
programming mode.
Starting the Vehicle with a Low
Transmitter Battery
While trying to start the vehicle,
if the transmitter battery is weak or if
there is interference with the signal,
the DIC may display NO REMOTE
DETECTED or USE
TRANSMITTER POCKET TO
START. The REPLACE BATTERY
IN REMOTE KEY message may
also be displayed at this time. To start the vehicle:
1. Open the center console and
place the transmitter in the
transmitter pocket with the
buttons facing the front of the
vehicle.
2. With the vehicle in P (Park) or N (Neutral), press the brake
pedal and press the ENGINE
START/STOP button. See
Starting the Engine on
page 9-18.
Replace the transmitter battery
as soon as possible.
Battery Replacement
Replace the battery if the DIC
indicates that battery replacement is
necessary. See Key and Lock
Messages on page 5-27.
Page 106 of 399
Black plate (1,1)Chevrolet Malibu Owner Manual (GMNA-Localizing-U.S./Canada/Mexico-
7575972) - 2015 - crc - 4/1/14
Storage 4-1
Storage
Storage Compartments
Storage Compartments . . . . . . . 4-1
Instrument Panel Storage . . . . . 4-1
Glove Box . . . . . . . . . . . . . . . . . . . . 4-1
Cupholders . . . . . . . . . . . . . . . . . . . 4-2
Center Console Storage . . . . . . 4-2
Additional Storage Features
Cargo Tie-Downs . . . . . . . . . . . . . 4-2
Convenience Net . . . . . . . . . . . . . 4-2
Storage
Compartments
{Warning
Do not store heavy or sharp
objects in storage compartments.
In a crash, these objects may
cause the cover to open and
could result in injury.
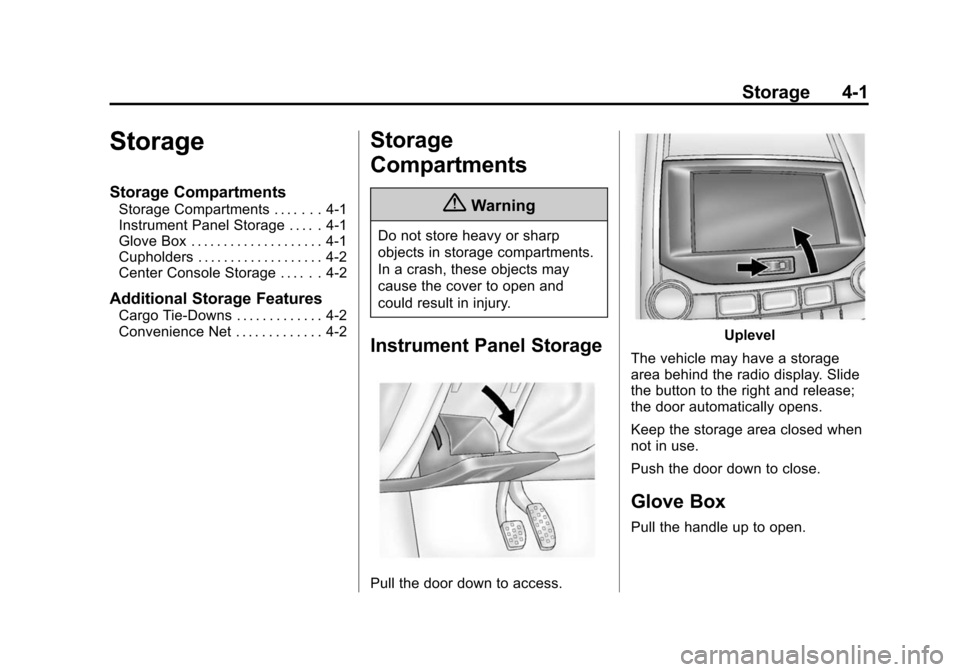
Instrument Panel Storage
Pull the door down to access.
Uplevel
The vehicle may have a storage
area behind the radio display. Slide
the button to the right and release;
the door automatically opens.
Keep the storage area closed when
not in use.
Push the door down to close.
Glove Box
Pull the handle up to open.
Page 107 of 399
Black plate (2,1)Chevrolet Malibu Owner Manual (GMNA-Localizing-U.S./Canada/Mexico-
7575972) - 2015 - crc - 4/1/14
4-2 Storage
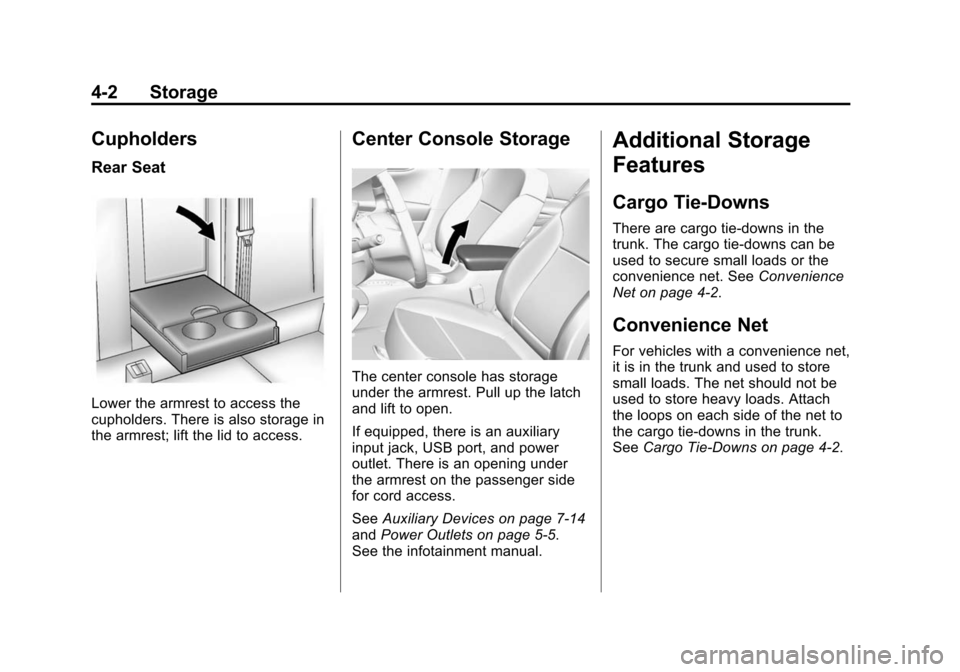
Cupholders
Rear Seat
Lower the armrest to access the
cupholders. There is also storage in
the armrest; lift the lid to access.
Center Console Storage
The center console has storage
under the armrest. Pull up the latch
and lift to open.
If equipped, there is an auxiliary
input jack, USB port, and power
outlet. There is an opening under
the armrest on the passenger side
for cord access.
SeeAuxiliary Devices on page 7-14
and Power Outlets on page 5-5.
See the infotainment manual.
Additional Storage
Features
Cargo Tie-Downs
There are cargo tie‐downs in the
trunk. The cargo tie‐downs can be
used to secure small loads or the
convenience net. See Convenience
Net on page 4-2.
Convenience Net
For vehicles with a convenience net,
it is in the trunk and used to store
small loads. The net should not be
used to store heavy loads. Attach
the loops on each side of the net to
the cargo tie-downs in the trunk.
See Cargo Tie-Downs on page 4-2.
Page 112 of 399
Black plate (5,1)Chevrolet Malibu Owner Manual (GMNA-Localizing-U.S./Canada/Mexico-
7575972) - 2015 - crc - 4/1/14
Instruments and Controls 5-5
2. Select Set Time.
3. Turn the TUNE/MENU knob toadjust the highlighted number.
4. Press the TUNE/MENU knob to select the next number.
5. To save the time and return to the Time Settings menu, press
the BACK
/button at any time
or press the TUNE/MENU knob
after adjusting the minutes.
Setting the 12/24 Hour Format
1. Press the CONFIG button and select Time Settings.
2. Highlight 12/24 Hour Format.
3. Press the TUNE/MENU knob to select the 12 hour or 24 hour
display format.
Setting the Clock (Radio with
Touchscreen)
To set the time:
1. Press the CONFIG button toenter the menu options. Turn the
TUNE/MENU knob to scroll
through the available setup features. Press the TUNE/MENU
knob or press the Time screen
button to display other options
within that feature.
2. Press + or −to increase or
decrease the Hours and Minutes
displayed on the clock.
To turn Auto Set on and off, press
the Auto Set button.
If auto timing is set, the time
displayed on the clock may not
update immediately when driving
into a new time zone.
12/24 HR Format: Press the 12 HR
screen button for standard time;
press the 24 HR screen button for
military time.
Day + or Day −:Press the Day +
or Day −display buttons to increase
or decrease the day.
Display: Press Display to turn the
display of the time on the screen on
or off.
Power Outlets
The accessory power outlets can be
used to plug in electrical equipment,
such as a cell phone or MP3 player.
There are two accessory power
outlets: one on the center stack
below the climate control system,
and one under the armrest inside
the center console storage.
The outlet is powered when the
ignition is in ON/RUN or ACC/
ACCESSORY, or until the driver
door is opened within 10 minutes of
turning off the vehicle. See Retained
Accessory Power (RAP) on
page 9-21.
Open the protective cover to use the
accessory power outlet.
Certain electrical accessories may
not be compatible with the
accessory power outlets and could
overload vehicle or adapter fuses.
If there is a problem, see your
dealer.
Page 113 of 399
Black plate (6,1)Chevrolet Malibu Owner Manual (GMNA-Localizing-U.S./Canada/Mexico-
7575972) - 2015 - crc - 4/1/14
5-6 Instruments and Controls
When adding electrical equipment,
be sure to follow the installation
instructions included with the
equipment. SeeAdd-On Electrical
Equipment on page 9-53.
{Caution
Hanging heavy equipment from
the power outlet can cause
damage not covered by the
vehicle warranty. The power
outlets are designed for
accessory power plugs only, such
as cell phone charge cords.
Power Outlet 120 Volt
Alternating Current
If equipped with this power outlet it
can be used to plug in electrical
equipment that uses a maximum
limit of 150 watts.
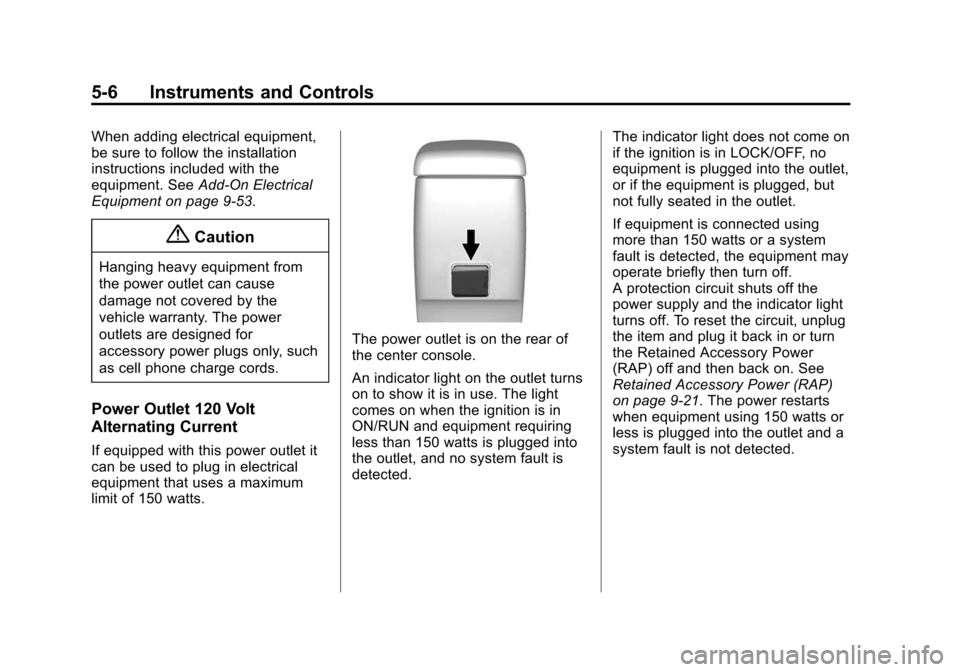
The power outlet is on the rear of
the center console.
An indicator light on the outlet turns
on to show it is in use. The light
comes on when the ignition is in
ON/RUN and equipment requiring
less than 150 watts is plugged into
the outlet, and no system fault is
detected. The indicator light does not come on
if the ignition is in LOCK/OFF, no
equipment is plugged into the outlet,
or if the equipment is plugged, but
not fully seated in the outlet.
If equipment is connected using
more than 150 watts or a system
fault is detected, the equipment may
operate briefly then turn off.
A protection circuit shuts off the
power supply and the indicator light
turns off. To reset the circuit, unplug
the item and plug it back in or turn
the Retained Accessory Power
(RAP) off and then back on. See
Retained Accessory Power (RAP)
on page 9-21. The power restarts
when equipment using 150 watts or
less is plugged into the outlet and a
system fault is not detected.