2015 BMW I8 climate settings
[x] Cancel search: climate settingsPage 34 of 224

iDriveVehicle features and options
This chapter describes all standard, country-
specific and optional features offered with the
series. It also describes features that are not
necessarily available in your car, e. g., due to
the selected options or country versions. This
also applies to safety-related functions and
systems. The respectively applicable country
provisions must be observed when using the
respective features and systems.
The concept
The iDrive combines the functions of many
switches. Thus, these functions can be oper‐
ated from a central location.
Using the iDrive during a trip
To avoid becoming distracted and pos‐
ing an unnecessary hazard to your vehicle's
occupants and to other traffic, never attempt
to use the controls or enter information unless
traffic and road conditions allow it.◀
Control elements at a glanceControl elements1Control Display2Controller with buttons and, depending on
the equipment version, with touchpadControl Display
Hints▷To clean the Control Display, follow the
care instructions.▷Do not place objects close to the Control
Display; otherwise, the Control Display can
be damaged.▷In the case of very high temperatures on
the Control Display, e.g. due to intense so‐
lar radiation, the brightness may be re‐
duced down to complete deactivation.
Once the temperature is reduced, e.g.
through shadow or climate control system,
the normal functions are re-established.
Switching on
1.Turn on operations.2.Press the controller.
Switch off
1. Press button.2."Turn off control display"
Controller
The buttons can be used to open the menus
directly. The controller can be used to select
menu items and enter the settings.
Some iDrive functions can be operated using
the touchpad on the controller.
Seite 18At a glanceiDrive18
Online Edition for Part no. 01 40 2 960 891 - II/15
Page 54 of 224
Opening and closingVehicle features and options
This chapter describes all standard, country-
specific and optional features offered with the
series. It also describes features that are not
necessarily available in your car, e. g., due to
the selected options or country versions. This
also applies to safety-related functions and
systems. The respectively applicable country
provisions must be observed when using the
respective features and systems.
Remote control/key General information
The vehicle is supplied with two remote con‐
trols with integrated key.
Every remote control holds a replaceable bat‐
tery.
You may set the key functions depending on
the optional features and country-specific ver‐
sion. For Settings, refer to page 46.
The vehicle stores personal settings for every
remote control. Personal Profile, refer to
page 39.
The remote controls hold information on re‐
quired maintenance. Service data in the re‐
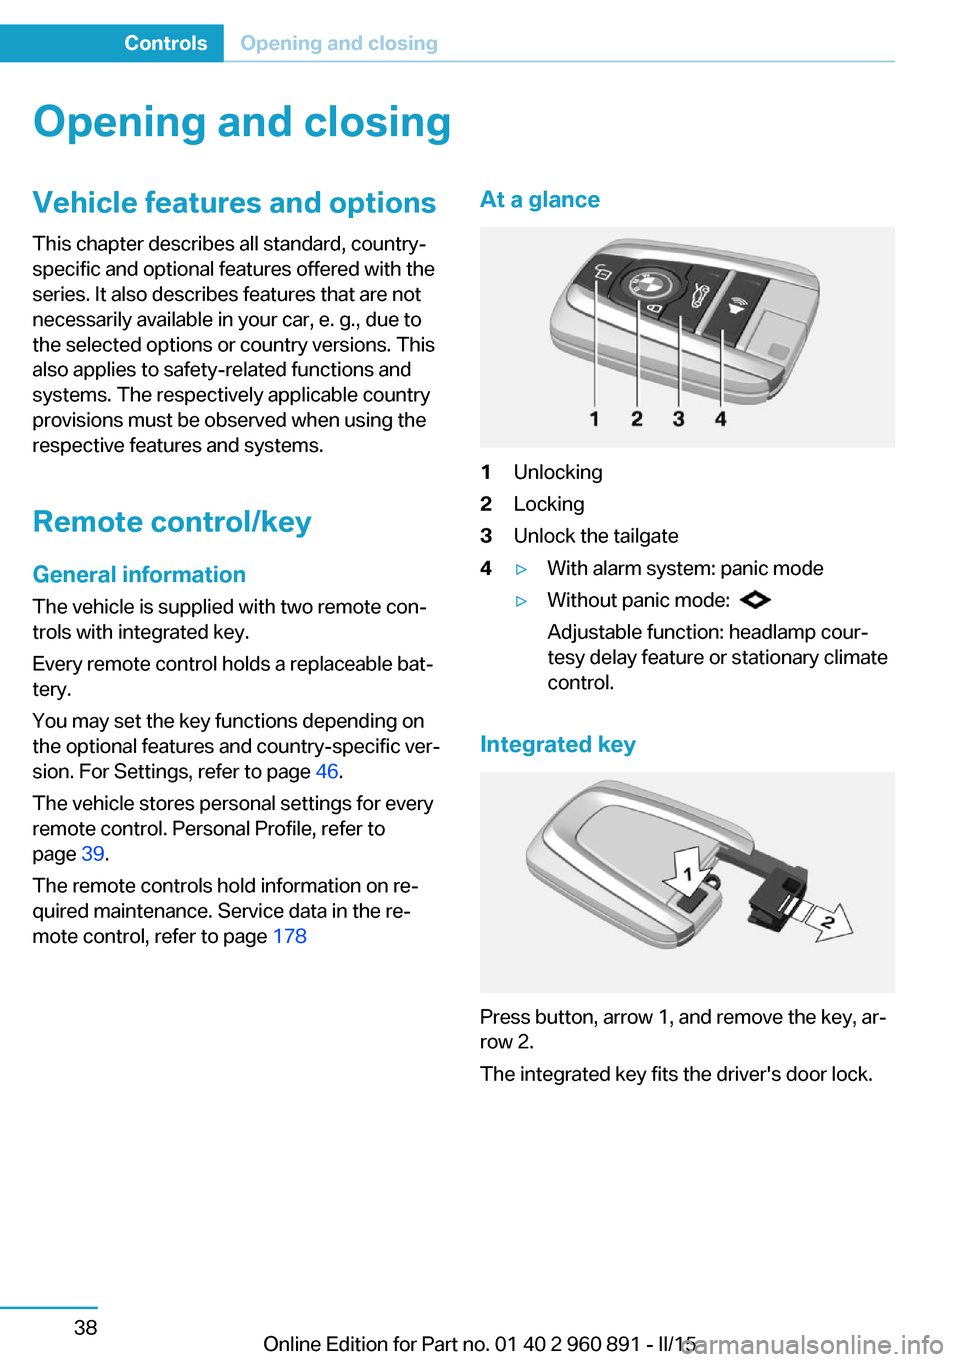
mote control, refer to page 178At a glance1Unlocking2Locking3Unlock the tailgate4▷With alarm system: panic mode▷Without panic mode:
Adjustable function: headlamp cour‐
tesy delay feature or stationary climate
control.
Integrated key
Press button, arrow 1, and remove the key, ar‐
row 2.
The integrated key fits the driver's door lock.
Seite 38ControlsOpening and closing38
Online Edition for Part no. 01 40 2 960 891 - II/15
Page 56 of 224

during unlocking. These settings are also re‐
stored, if the vehicle has been used in the
meantime by a person with a different remote
control.
Changes to the settings are automatically
saved in the personal profile.
Three personal profiles and a guest profile can
be created.
Adjusting
The settings for the following systems and
functions are saved in the active profile. The
scope of storable settings is country- and
equipment-dependable.▷Unlocking and locking.▷Lights.▷Climate control.▷Radio.▷Instrument cluster.▷Programmable memory buttons.▷Volumes, tone.▷Control Display.▷Navigation.▷Park Distance Control PDC.▷Head-up Display.▷Driving Dynamics Control.▷Intelligent Safety.
Profile management
Opening profiles Regardless of the remote control in use a dif‐
ferent profile may be activated.
1."Settings"2."Profiles"3.Select a profile.▷All settings stored in the called-up profile
are automatically applied.▷The called-up profile is assigned to the re‐
mote control being used at the time.▷If the profile is already assigned to a differ‐
ent remote control, this profile will apply to
both remote controls. It cannot be differen‐
tiated anymore between the settings for
the two remote controls.
Renaming profiles
A personal name can be assigned to every pro‐
file to avoid confusion between the profiles.
1."Settings"2."Profiles"3."Options"4."Rename current profile"
Resetting profiles
The settings of the active profile are reset to
their default values.
1."Settings"2."Profiles"3."Options"4."Reset current profile"
Exporting profiles
Most settings of the active profile can be ex‐
ported.
This can be helpful for securing and retrieving
personal settings, before delivering the vehicle
to a workshop, e.g. Profiles can be taken to an‐
other vehicle equipped with the Personal Pro‐
file function.
The following export options are available:
▷Via BMW Online.▷Via the USB port to a USB device.
Popular file systems for USB devices are
supported. FAT32 and exFAT are the rec‐
ommended formats for profile export.
Other formats may not support the export.1."Settings"2."Profiles"Seite 40ControlsOpening and closing40
Online Edition for Part no. 01 40 2 960 891 - II/15
Page 63 of 224
Tailgate
Depending on optional features and country
version, this setting is not offered in some
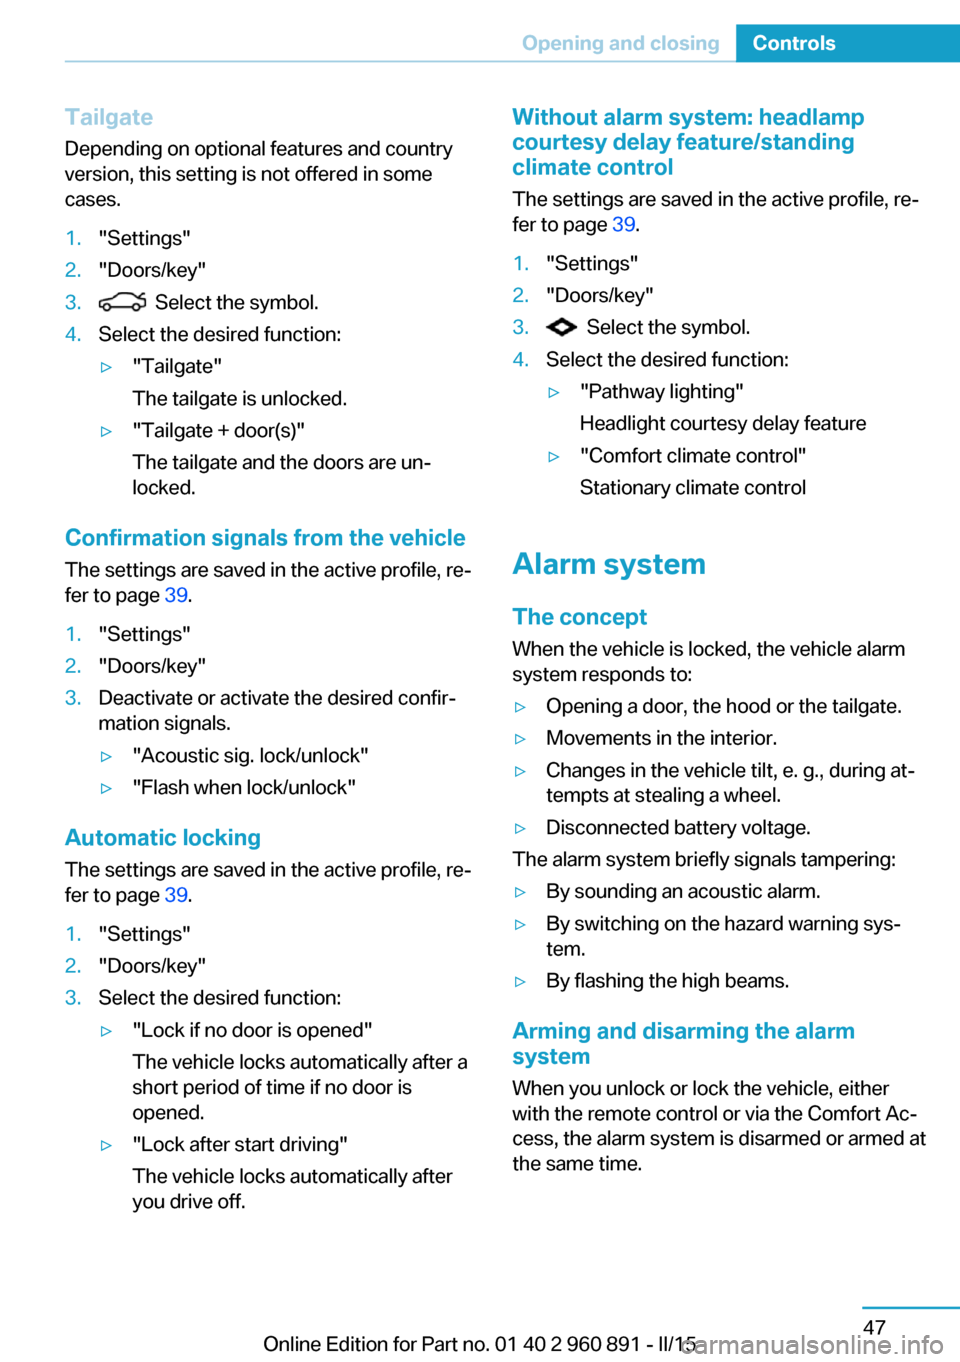
cases.1."Settings"2."Doors/key"3. Select the symbol.4.Select the desired function:▷"Tailgate"
The tailgate is unlocked.▷"Tailgate + door(s)"
The tailgate and the doors are un‐
locked.
Confirmation signals from the vehicle
The settings are saved in the active profile, re‐
fer to page 39.
1."Settings"2."Doors/key"3.Deactivate or activate the desired confir‐
mation signals.▷"Acoustic sig. lock/unlock"▷"Flash when lock/unlock"
Automatic locking
The settings are saved in the active profile, re‐fer to page 39.
1."Settings"2."Doors/key"3.Select the desired function:▷"Lock if no door is opened"
The vehicle locks automatically after a
short period of time if no door is
opened.▷"Lock after start driving"
The vehicle locks automatically after
you drive off.Without alarm system: headlamp
courtesy delay feature/standing
climate control
The settings are saved in the active profile, re‐
fer to page 39.1."Settings"2."Doors/key"3. Select the symbol.4.Select the desired function:▷"Pathway lighting"
Headlight courtesy delay feature▷"Comfort climate control"
Stationary climate control
Alarm system
The conceptWhen the vehicle is locked, the vehicle alarm
system responds to:
▷Opening a door, the hood or the tailgate.▷Movements in the interior.▷Changes in the vehicle tilt, e. g., during at‐
tempts at stealing a wheel.▷Disconnected battery voltage.
The alarm system briefly signals tampering:
▷By sounding an acoustic alarm.▷By switching on the hazard warning sys‐
tem.▷By flashing the high beams.
Arming and disarming the alarm
system
When you unlock or lock the vehicle, either
with the remote control or via the Comfort Ac‐
cess, the alarm system is disarmed or armed at
the same time.
Seite 47Opening and closingControls47
Online Edition for Part no. 01 40 2 960 891 - II/15
Page 141 of 224
HintsSufficient ventilation
When remaining in the vehicle for an ex‐
tended period of time, ensure sufficient exter‐
nal ventilation. Do not continuously use recir‐
culated-air mode; otherwise the air quality in
the interior continuously deteriorates and win‐
dow condensation increases.◀
Climate control functions in detail
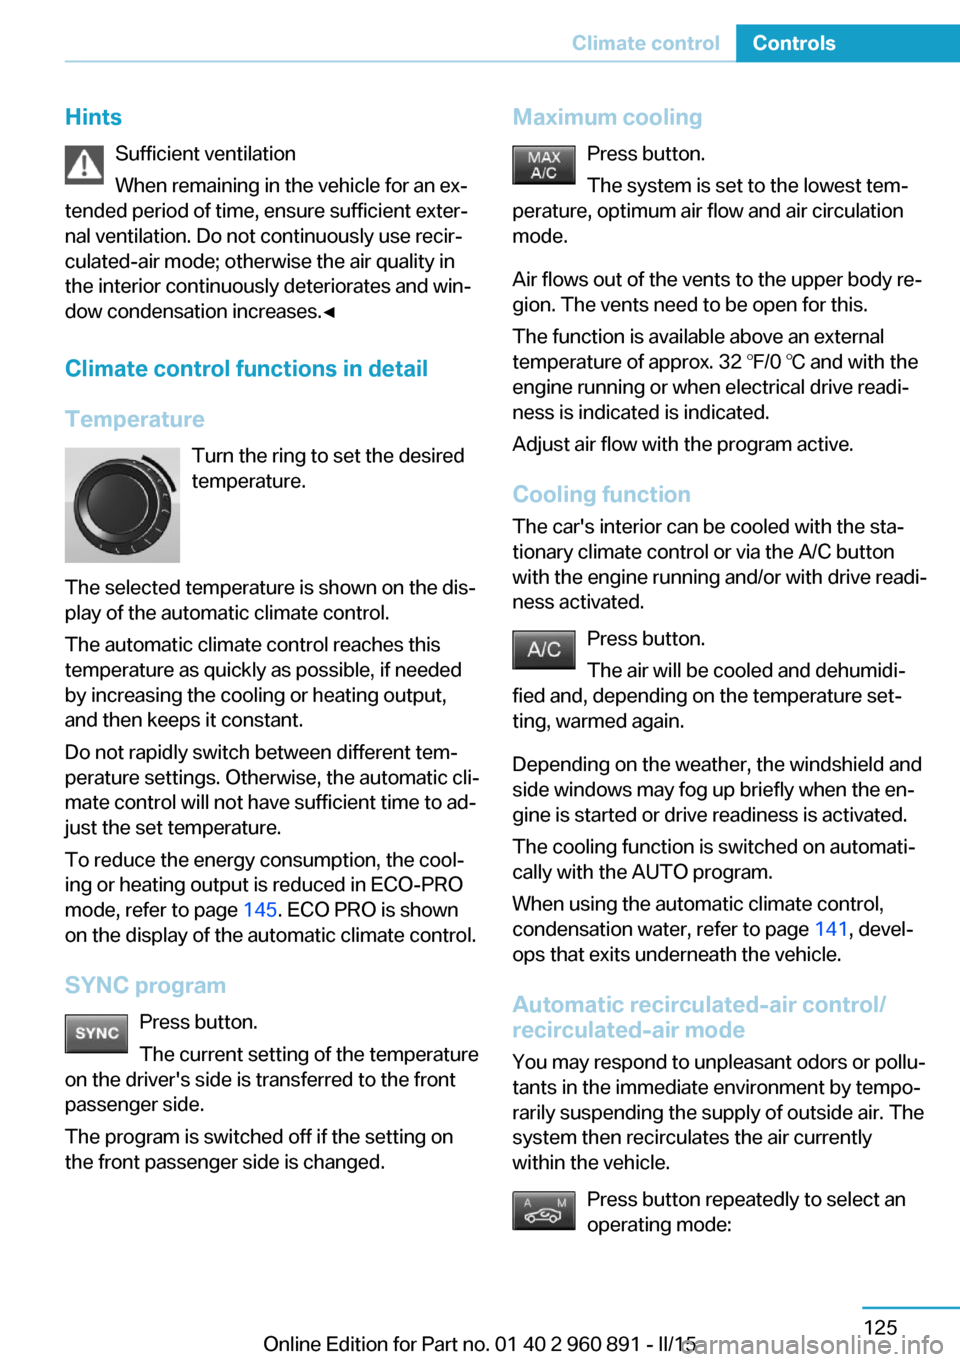
Temperature Turn the ring to set the desired
temperature.
The selected temperature is shown on the dis‐
play of the automatic climate control.
The automatic climate control reaches this
temperature as quickly as possible, if needed
by increasing the cooling or heating output,
and then keeps it constant.
Do not rapidly switch between different tem‐
perature settings. Otherwise, the automatic cli‐
mate control will not have sufficient time to ad‐
just the set temperature.
To reduce the energy consumption, the cool‐
ing or heating output is reduced in ECO-PRO
mode, refer to page 145. ECO PRO is shown
on the display of the automatic climate control.
SYNC program Press button.
The current setting of the temperature
on the driver's side is transferred to the front
passenger side.
The program is switched off if the setting on
the front passenger side is changed.Maximum cooling
Press button.
The system is set to the lowest tem‐
perature, optimum air flow and air circulation
mode.
Air flows out of the vents to the upper body re‐
gion. The vents need to be open for this.
The function is available above an external
temperature of approx. 32 ℉/0 ℃ and with the
engine running or when electrical drive readi‐
ness is indicated is indicated.
Adjust air flow with the program active.
Cooling function The car's interior can be cooled with the sta‐
tionary climate control or via the A/C button
with the engine running and/or with drive readi‐
ness activated.
Press button.
The air will be cooled and dehumidi‐
fied and, depending on the temperature set‐ ting, warmed again.
Depending on the weather, the windshield and
side windows may fog up briefly when the en‐
gine is started or drive readiness is activated.
The cooling function is switched on automati‐
cally with the AUTO program.
When using the automatic climate control,
condensation water, refer to page 141, devel‐
ops that exits underneath the vehicle.
Automatic recirculated-air control/
recirculated-air mode
You may respond to unpleasant odors or pollu‐tants in the immediate environment by tempo‐
rarily suspending the supply of outside air. The
system then recirculates the air currently
within the vehicle.
Press button repeatedly to select an
operating mode:Seite 125Climate controlControls125
Online Edition for Part no. 01 40 2 960 891 - II/15
Page 144 of 224
With the BMW i Remote App, refer to
page 128, the standing air conditioning can be
switched on.
The system switches off automatically after a
certain period of time.
If stationary climate control is used during the
charging process, less air conditioning ca‐
pacity will be required while driving. This opti‐
mizes the range.
Functional requirements▷When the departure time is preselected:
depends on internal, external and set tem‐
perature.▷Direct operation via iDrive: any external
temperature.▷Charging cable connected or high-voltage
battery sufficiently charged.▷Motor switched off and/or drive readiness
deactivated.▷The vents are open to allow air to flow out.
Switching on/off directly
On the Control Display:
1."Settings"2."Climate"3."Activate comfort climate control"
The symbol on the automatic climate con‐
trol flashes if the stationary climate control is
switched on.
Activate climate control at departuretime
The reel-on time is automatically determined
based on the temperature. The system
promptly switches on before the selected de‐
parture time.
On the Control Display:
1."Settings"2."Departure time"3."Departure 1:"4."Precondition for departure time"5.Set and activate Desired departure time,
refer to page 156.
The symbol on the automatic climate con‐
trol lights up when the departure time is acti‐
vated.
The symbol on the automatic climate con‐
trol flashes when the stationary climate control
has been switched on.
If drive readiness is switched off, changes can
be made on the Control Display. Departure
time can only be changed once. Scheduled de‐
parture times are not adjusted. Settings for cli‐
mate control and charging operation are also
applied for scheduled departure times.
Activating with BMW i Remote App
Using the BMW i Remote App, the system can
be directly switched on or via a preset depar‐
ture time.
Seite 128ControlsClimate control128
Online Edition for Part no. 01 40 2 960 891 - II/15
Page 161 of 224
Switch off any functions that
are not currently needed
Functions such as seat heating and the rear
window defroster require a lot of energy and
reduce the range, especially in city and stop-
and-go traffic.
Reel off these functions if they are not needed.
The ECO PRO driving program supports the
energy conserving use of comfort features.
These functions are automatically deactivated
partially or completely.
Have maintenance carried
out
Have vehicles maintained regularly to achieve
optimal vehicle efficiency and operating life.
The maintenance should be carried out by
your service center.
Also note the BMW Maintenance System, refer
to page 178.
ECO PRO
The concept
ECO PRO supports a driving style that saves
on fuel consumption. For this purpose, the en‐
gine control and comfort features, e. g. the cli‐
mate control output, are adjusted.
Under certain conditions the engine is auto‐
matically decoupled from the transmission in
the D selector lever position and the engine is
switched off. Selector lever position D remains
engaged.
At a glance
ECO PRO▷Reduce heat output or heating cycle for ex‐
terior mirror, rear window and seat heating.▷What reduces the the cooling and heating
output of the climate control system.
Activate ECO PRO
Press button repeatedly until ECO
PRO is displayed in the instrument
cluster.
Configuring ECO PRO
Via the Driving Dynamics Control
1.Activate ECO PRO.2."Configure ECO PRO"3.Configure the program.
Via the iDrive
1."Settings"2."ECO PRO mode"
Or
1."Settings"2."Driving mode"3."Configure ECO PRO"
Configure the program.
ECO PRO Tip
▷"Limit at:":
Adjust the ECO PRO speed.▷"ECO PRO speed warning":
The output is reduced once the set ECO
PRO speed is reached.
ECO PRO climate control
"ECO PRO climate control"
Climate control is set to be fuel-efficient.
By making a slight change to the set tempera‐
ture, or slowly adjusting the rate of heating or
cooling of the car's interior, fuel consumption
can be economized.
Seite 145Increase rangeDriving tips145
Online Edition for Part no. 01 40 2 960 891 - II/15
Page 171 of 224
4.Set rate begin. Turn the controller until the
desired time is set and press the controller.5.Set rate end. Turn the controller until the
desired time is set and press the controller.
Setting charging via a
Level 1 charging cable
Depending on the electrical mains, the vehicle
must be charged with a different charging cur‐
rent strength, refer to page 150.
1."Settings"2."Charging"3."AC charging power:"
Settings are stored. When you change charg‐
ing locations you also might need to change
the setting for charging.
Set the charge current strength at other
household sockets to "Low".
Stopping charging process The charging operation can be stopped at any
time by removing the charging cable and con‐
tinued at a later time by connecting the charg‐
ing cable in order to use other loads on the
power connection or to prevent simultaneous
high power from multiple loads.
The charging operation is interrupted when the
vehicle is unlocked and automatically resumed
after a brief time or when it is locked.
Continue charging operation If the charging operation is interrupted, e.g.,
through a temporary power failure, the charg‐
ing operation is automatically continued after
the interruption.
Terminating charging process
1.Removing the charging cable from the ve‐
hicle, refer to page 152.2.Stow the charging cable as required.3.Close the charging port flap.4.Lock vehicle if it is unlocked.Displays in the instrument
cluster
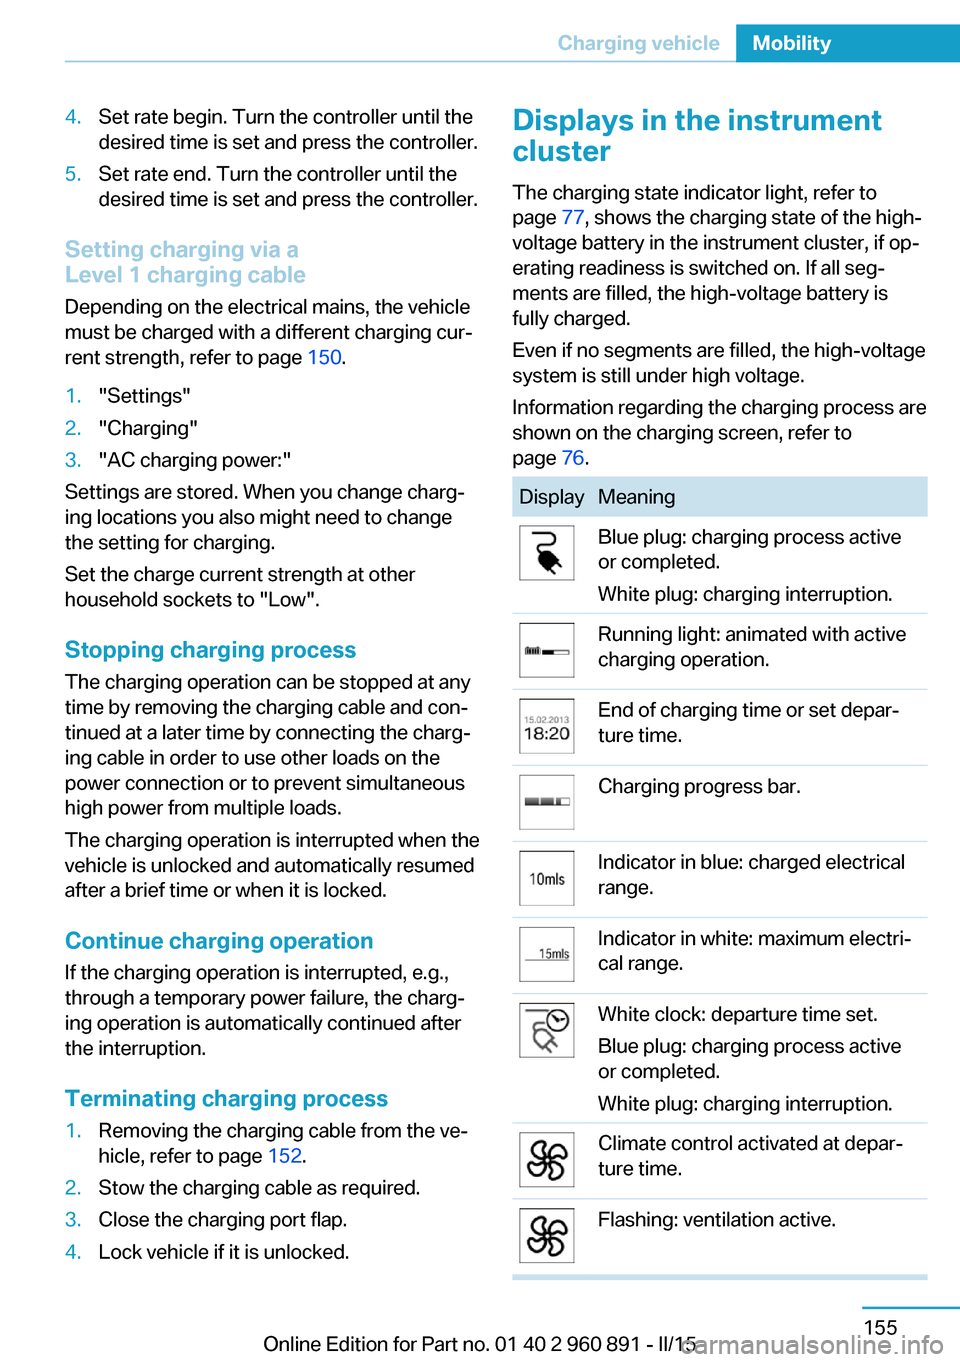
The charging state indicator light, refer to page 77, shows the charging state of the high-
voltage battery in the instrument cluster, if op‐
erating readiness is switched on. If all seg‐
ments are filled, the high-voltage battery is
fully charged.
Even if no segments are filled, the high-voltage
system is still under high voltage.
Information regarding the charging process are
shown on the charging screen, refer to
page 76.DisplayMeaningBlue plug: charging process active
or completed.
White plug: charging interruption.Running light: animated with active
charging operation.End of charging time or set depar‐
ture time.Charging progress bar.Indicator in blue: charged electrical
range.Indicator in white: maximum electri‐
cal range.White clock: departure time set.
Blue plug: charging process active
or completed.
White plug: charging interruption.Climate control activated at depar‐
ture time.Flashing: ventilation active.Seite 155Charging vehicleMobility155
Online Edition for Part no. 01 40 2 960 891 - II/15