2015 BMW I8 turn signal
[x] Cancel search: turn signalPage 103 of 224

Activating a list and adjusting the
setting
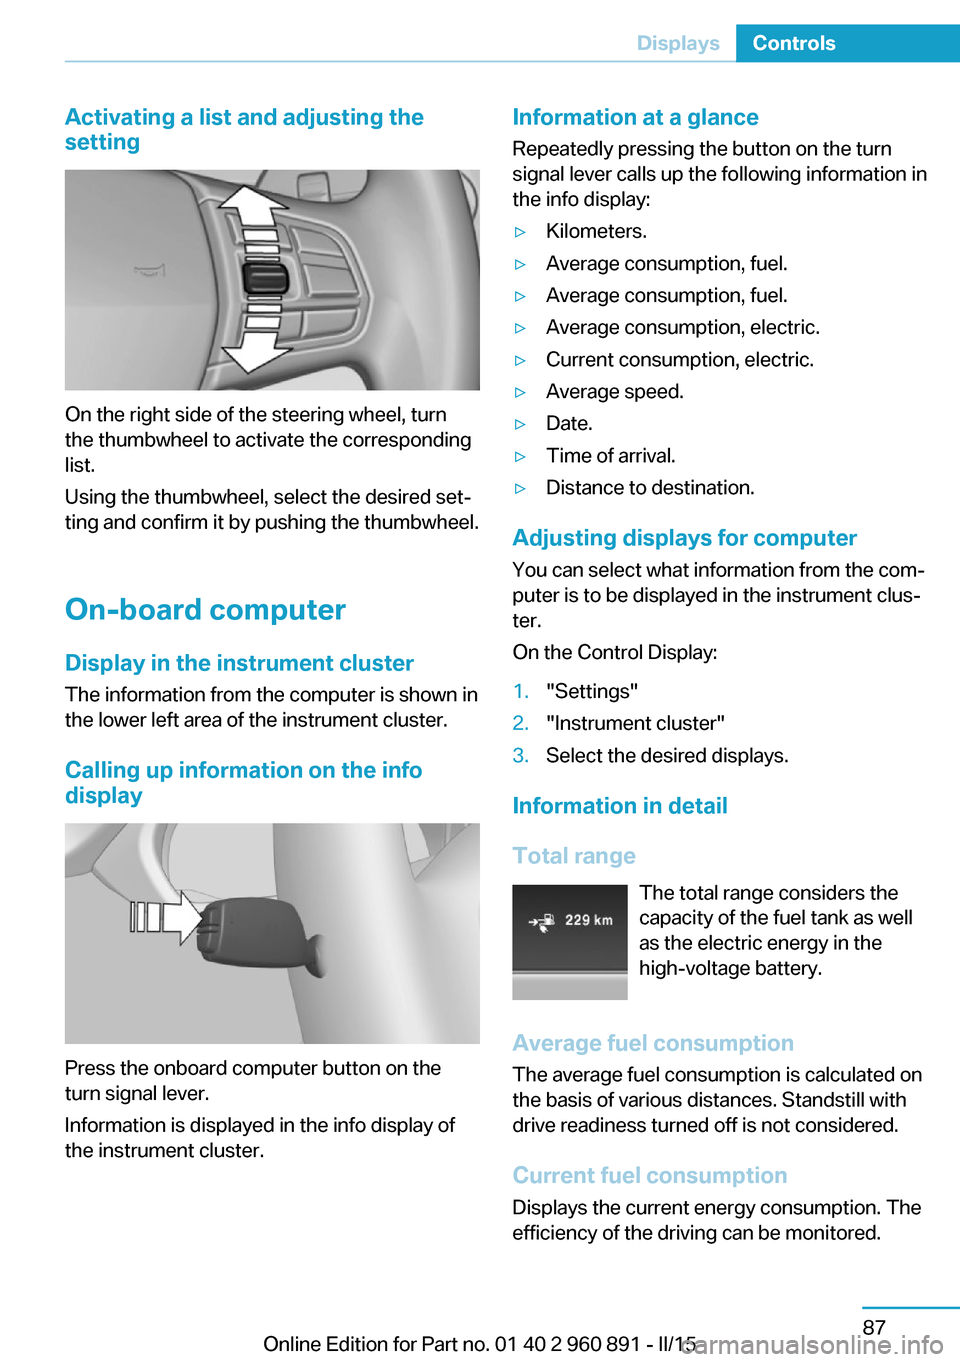
On the right side of the steering wheel, turn
the thumbwheel to activate the corresponding
list.
Using the thumbwheel, select the desired set‐
ting and confirm it by pushing the thumbwheel.
On-board computer
Display in the instrument cluster The information from the computer is shown in
the lower left area of the instrument cluster.
Calling up information on the info display
Press the onboard computer button on the
turn signal lever.
Information is displayed in the info display of
the instrument cluster.
Information at a glance
Repeatedly pressing the button on the turn
signal lever calls up the following information in
the info display:▷Kilometers.▷Average consumption, fuel.▷Average consumption, fuel.▷Average consumption, electric.▷Current consumption, electric.▷Average speed.▷Date.▷Time of arrival.▷Distance to destination.
Adjusting displays for computer
You can select what information from the com‐
puter is to be displayed in the instrument clus‐
ter.
On the Control Display:
1."Settings"2."Instrument cluster"3.Select the desired displays.
Information in detail
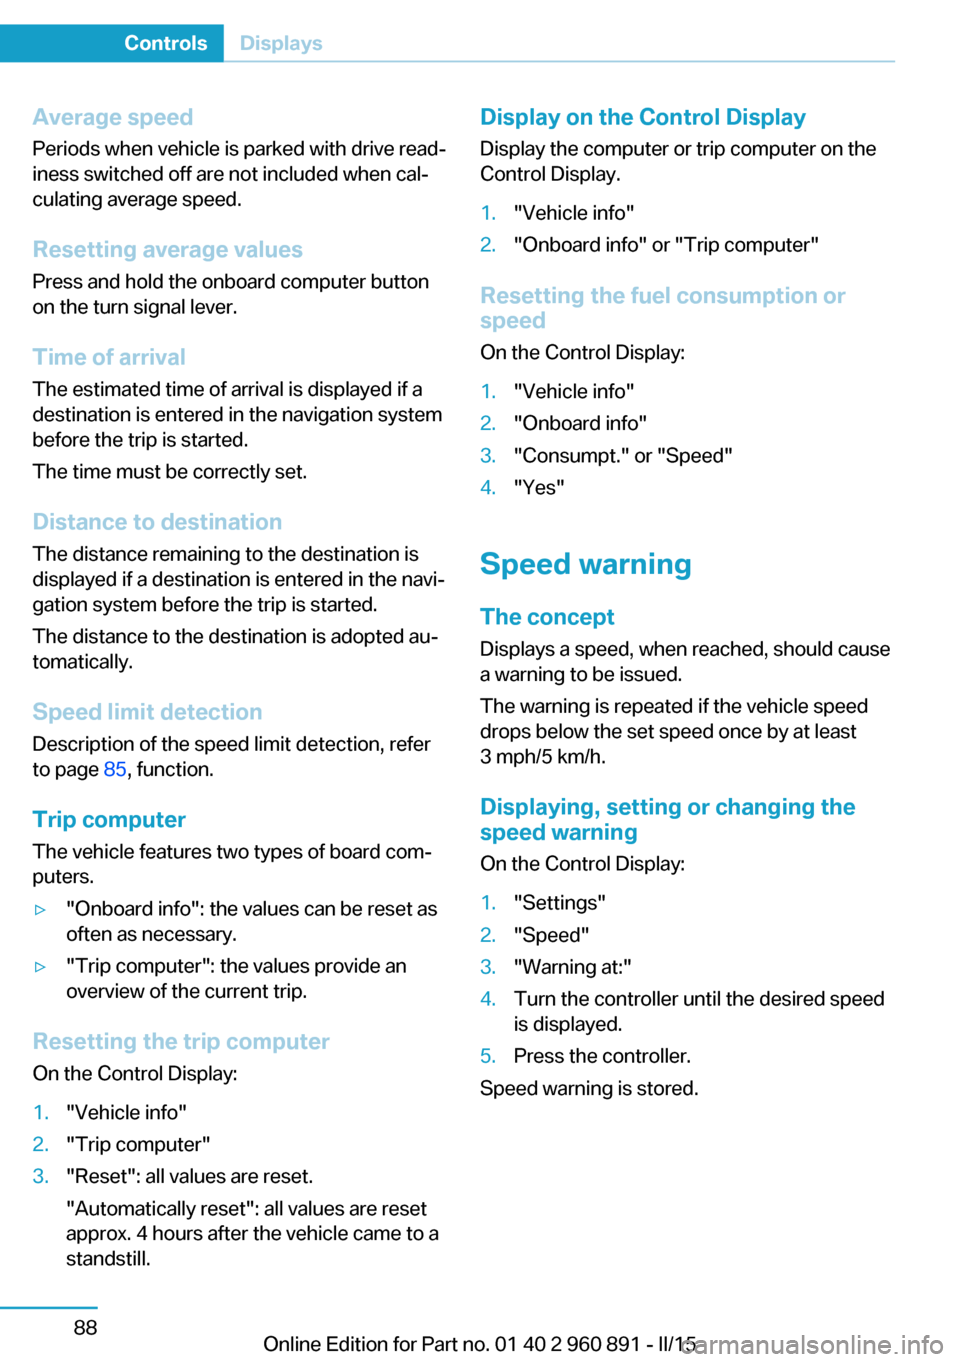
Total range The total range considers the
capacity of the fuel tank as well
as the electric energy in the
high-voltage battery.
Average fuel consumption
The average fuel consumption is calculated on
the basis of various distances. Standstill with
drive readiness turned off is not considered.
Current fuel consumption Displays the current energy consumption. The
efficiency of the driving can be monitored.
Seite 87DisplaysControls87
Online Edition for Part no. 01 40 2 960 891 - II/15
Page 104 of 224

Average speed
Periods when vehicle is parked with drive read‐
iness switched off are not included when cal‐
culating average speed.
Resetting average values Press and hold the onboard computer button
on the turn signal lever.
Time of arrival
The estimated time of arrival is displayed if a
destination is entered in the navigation system
before the trip is started.
The time must be correctly set.
Distance to destination
The distance remaining to the destination is
displayed if a destination is entered in the navi‐
gation system before the trip is started.
The distance to the destination is adopted au‐
tomatically.
Speed limit detection
Description of the speed limit detection, refer
to page 85, function.
Trip computer The vehicle features two types of board com‐
puters.▷"Onboard info": the values can be reset as
often as necessary.▷"Trip computer": the values provide an
overview of the current trip.
Resetting the trip computer
On the Control Display:
1."Vehicle info"2."Trip computer"3."Reset": all values are reset.
"Automatically reset": all values are reset
approx. 4 hours after the vehicle came to a
standstill.Display on the Control Display
Display the computer or trip computer on the
Control Display.1."Vehicle info"2."Onboard info" or "Trip computer"
Resetting the fuel consumption or
speed
On the Control Display:
1."Vehicle info"2."Onboard info"3."Consumpt." or "Speed"4."Yes"
Speed warning
The concept Displays a speed, when reached, should cause
a warning to be issued.
The warning is repeated if the vehicle speed
drops below the set speed once by at least
3 mph/5 km/h.
Displaying, setting or changing the
speed warning
On the Control Display:
1."Settings"2."Speed"3."Warning at:"4.Turn the controller until the desired speed
is displayed.5.Press the controller.
Speed warning is stored.
Seite 88ControlsDisplays88
Online Edition for Part no. 01 40 2 960 891 - II/15
Page 110 of 224

Malfunction
A Check Control message is displayed.
Variable light distribution is disrupted or failed.
Have the system checked as soon as possible.
High-beam Assistant
The concept When the low beams are activated, this system
automatically switches the high beams on and
off. The procedure is controlled by a camera
on the front of the interior rearview mirror. The assistant ensures that the high beams are acti‐
vated whenever the traffic situation allows. The
driver can intervene at any time and switch the
high beams non and off as usual.
Note Personal responsibility
The High-beam Assistant cannot serve
as a substitute for the driver's personal judg‐
ment of when to use the high beams. There‐
fore, manually reel off the high beams in situa‐
tions where required to avoid a safety risk.◀
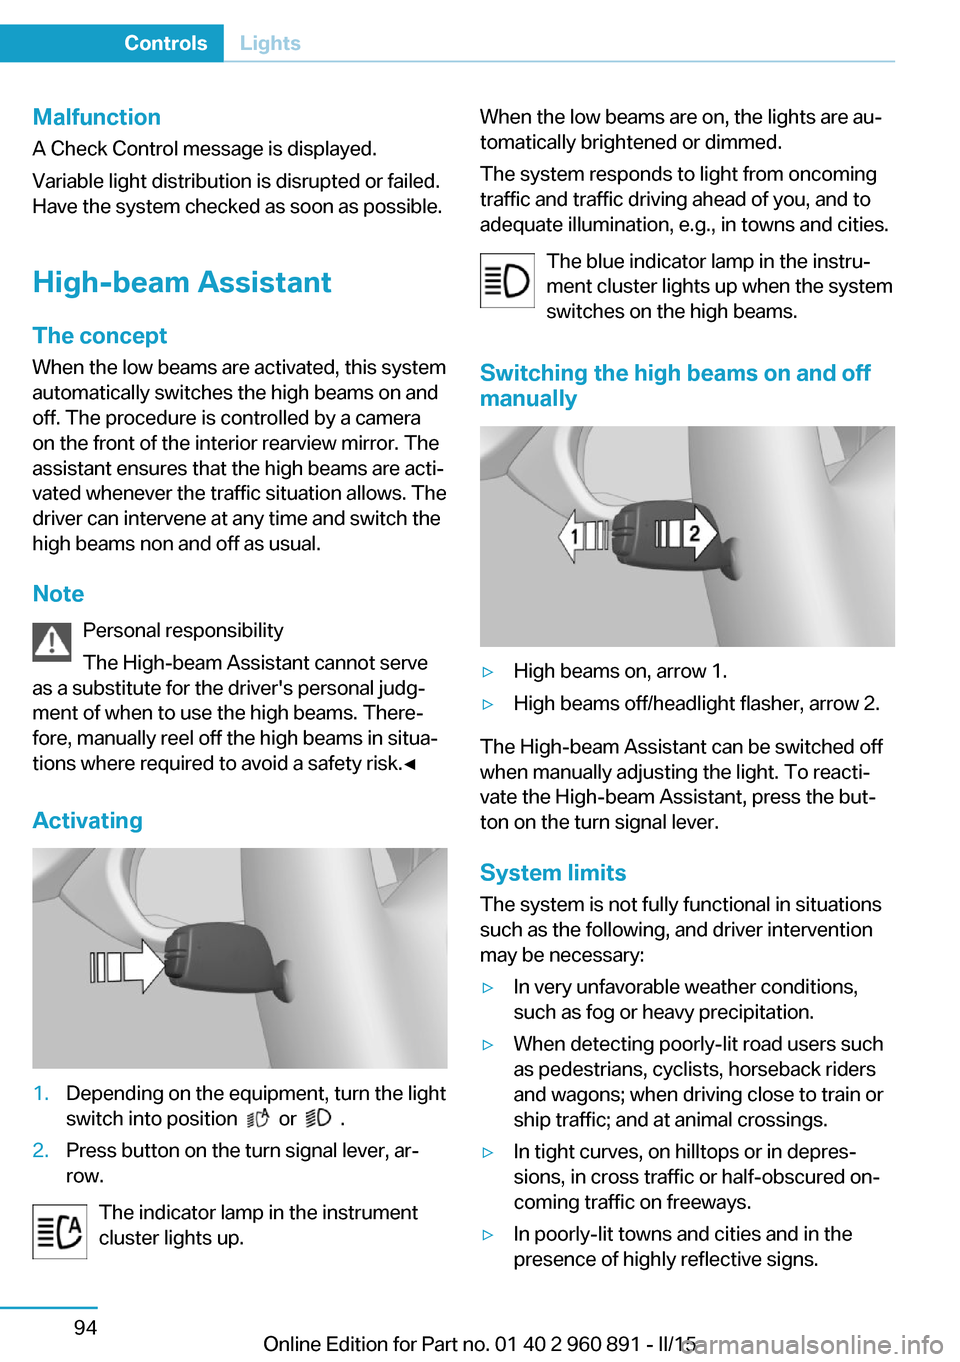
Activating1.Depending on the equipment, turn the light
switch into position
or .
2.Press button on the turn signal lever, ar‐
row.
The indicator lamp in the instrument
cluster lights up.
When the low beams are on, the lights are au‐
tomatically brightened or dimmed.
The system responds to light from oncoming
traffic and traffic driving ahead of you, and to
adequate illumination, e.g., in towns and cities.
The blue indicator lamp in the instru‐
ment cluster lights up when the system
switches on the high beams.
Switching the high beams on and off manually▷High beams on, arrow 1.▷High beams off/headlight flasher, arrow 2.
The High-beam Assistant can be switched off
when manually adjusting the light. To reacti‐
vate the High-beam Assistant, press the but‐
ton on the turn signal lever.
System limits
The system is not fully functional in situations such as the following, and driver intervention
may be necessary:
▷In very unfavorable weather conditions,
such as fog or heavy precipitation.▷When detecting poorly-lit road users such
as pedestrians, cyclists, horseback riders
and wagons; when driving close to train or
ship traffic; and at animal crossings.▷In tight curves, on hilltops or in depres‐
sions, in cross traffic or half-obscured on‐
coming traffic on freeways.▷In poorly-lit towns and cities and in the
presence of highly reflective signs.Seite 94ControlsLights94
Online Edition for Part no. 01 40 2 960 891 - II/15
Page 120 of 224

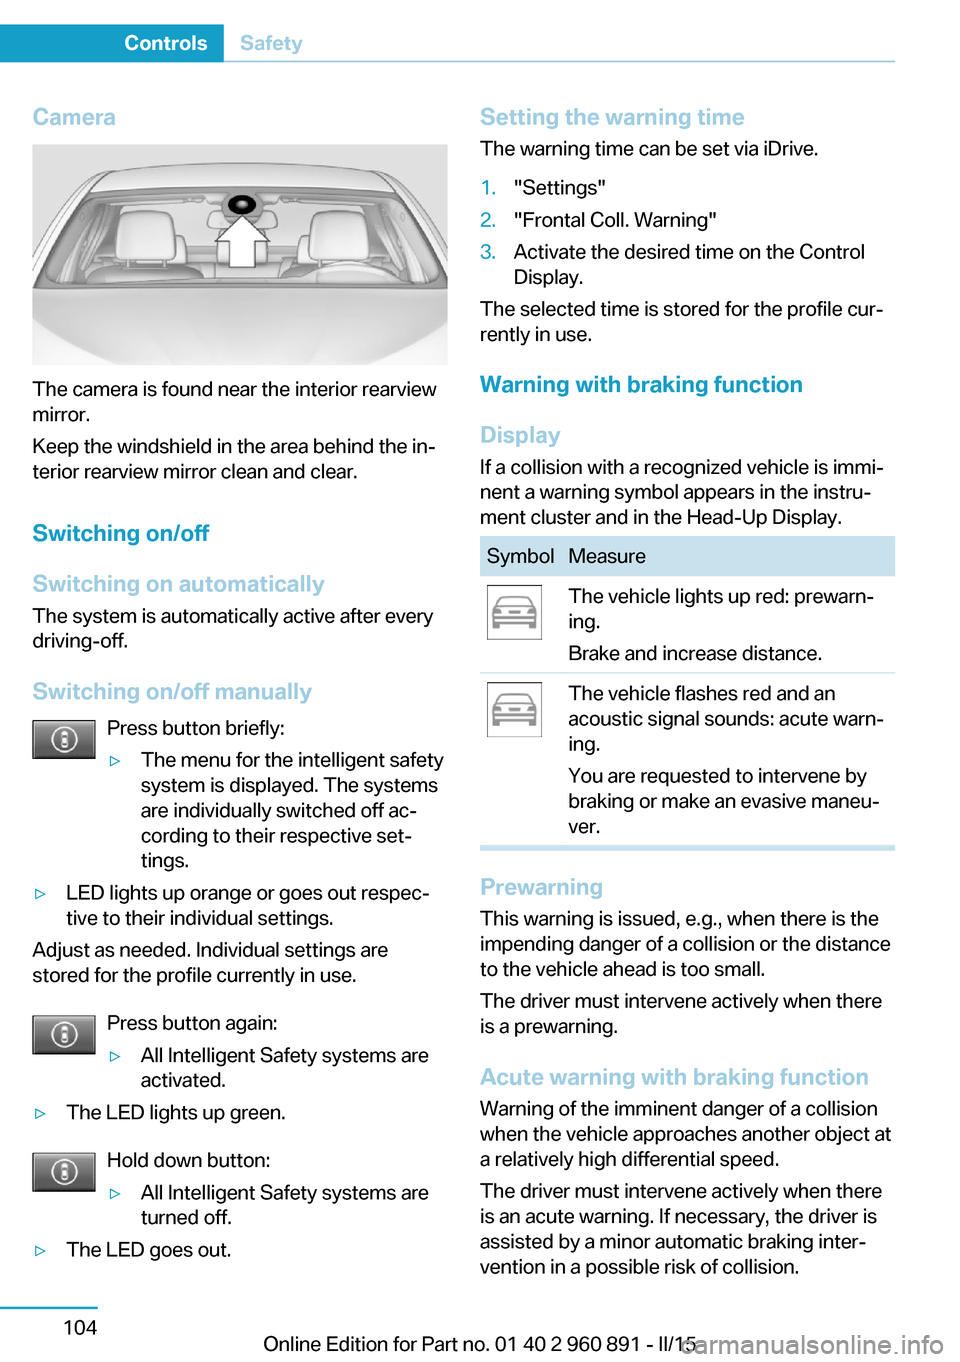
Camera
The camera is found near the interior rearview
mirror.
Keep the windshield in the area behind the in‐
terior rearview mirror clean and clear.
Switching on/off
Switching on automatically The system is automatically active after every
driving-off.
Switching on/off manually Press button briefly:
▷The menu for the intelligent safety
system is displayed. The systems
are individually switched off ac‐
cording to their respective set‐
tings.▷LED lights up orange or goes out respec‐
tive to their individual settings.
Adjust as needed. Individual settings are
stored for the profile currently in use.
Press button again:
▷All Intelligent Safety systems are
activated.▷The LED lights up green.
Hold down button:
▷All Intelligent Safety systems are
turned off.▷The LED goes out.Setting the warning time
The warning time can be set via iDrive.1."Settings"2."Frontal Coll. Warning"3.Activate the desired time on the Control
Display.
The selected time is stored for the profile cur‐
rently in use.
Warning with braking function
Display If a collision with a recognized vehicle is immi‐
nent a warning symbol appears in the instru‐
ment cluster and in the Head-Up Display.
SymbolMeasureThe vehicle lights up red: prewarn‐
ing.
Brake and increase distance.The vehicle flashes red and an
acoustic signal sounds: acute warn‐
ing.
You are requested to intervene by
braking or make an evasive maneu‐
ver.
Prewarning
This warning is issued, e.g., when there is the
impending danger of a collision or the distance
to the vehicle ahead is too small.
The driver must intervene actively when there
is a prewarning.
Acute warning with braking function
Warning of the imminent danger of a collision
when the vehicle approaches another object at
a relatively high differential speed.
The driver must intervene actively when there
is an acute warning. If necessary, the driver is
assisted by a minor automatic braking inter‐
vention in a possible risk of collision.
Seite 104ControlsSafety104
Online Edition for Part no. 01 40 2 960 891 - II/15
Page 132 of 224

Switching on/off
Switching on automatically PDC switches on automatically in the following
situations:▷If selector lever position R is engaged while
the engine is running or in electric mode.
The rearview camera also switches on.▷If equipped with front PDC: when obsta‐
cles are detected behind or in front of the
vehicle by PDC and the speed is slower
than approx. 2.5 mph/4 km/h.
You may turn off automatic activation:
1."Settings"2."Parking"3.Select setting.
Settings are stored for the profile currently
in use.
Automatic deactivation during forward
travel
The system switches off when a certain driving
distance or speed is exceeded.
Switch the system back on if needed.
With front PDC: switching on/off
manually
Press button.
▷On: the LED lights up.▷Off: the LED goes out.
The rearview camera image is displayed when
the reverse gear is engaged by pressing the
button.
Display
Signal tones When approaching an object, an intermittent
sound indicates the position of the object. E. g.
if an object is detected to the left rear of the
vehicle, a signal tone sounds from the left rear
speaker.
The shorter the distance to the object, the
shorter the intervals.
If the distance to a detected object in the front
is less than approx. 12 in/30 cm and in the rear
less than approx. 20 in/50 cm, a continuous
tone is sounded.
With front PDC: if objects are located both in
front of and behind the vehicle, an alternating
continuous signal is sounded.
The signal tone is switched off, when selector
lever position P is engaged on vehicles with
Steptronic transmission.
Volume
The volume of the PDC signal tone can be ad‐
justed similar to the sound and volume set‐
tings of the radio.
Settings are stored for the profile currently in
use.
Visual warning
The approach of the vehicle to an object can
be shown on the Control Display. Objects that
are farther away are already displayed on the
Control Display before a signal sounds.
A display appears as soon as Park Distance
Control (PDC) is activated.
The range of the sensors is represented in the
colors green, yellow and red.
When the image of the rearview camera is dis‐
played, the reel can be made to PDC:
"Rear view camera"
System limits
Limits of ultrasonic measurement
Ultrasonic measuring might not function under
the following circumstances:
▷For small children and animals.Seite 116ControlsDriving comfort116
Online Edition for Part no. 01 40 2 960 891 - II/15
Page 215 of 224

Braking, hints 140
Breakdown assistance 183
Break-in 138
Brightness of Control Dis‐ play 90
Bulb replacement 180
Bulbs and lamps 180
Button, Start/Stop 61
Bypassing, refer to Jump- starting 184
C
California Proposition 65 Warning 8
Camera lenses, care 190
Camera, rearview cam‐ era 118
Camera, Side View 122
Camera, Top View 121
Car battery 181
Car care products 188
Care, displays 190
Care, vehicle 188
Cargo 142
Cargo area 132
Cargo cover 132
Car key, refer to Remote con‐ trol 38
Carpet, care 189
Car wash 187
Catalytic converter, refer to Hot exhaust system 140
CBS Condition Based Serv‐ ice 178
Center armrest 134
Center console 16
Central locking system 44
Central screen, refer to Con‐ trol Display 18
Changes, technical, refer to Safety 7
Changing wheels 181
Changing wheels/tires 167
CHARGE, energy recov‐ ery 66 Charging battery, see Vehicle
charging 150
Charging, refer to Charging vehicle 150
Charging, refer to Vehicle charging 150
Charging screen 76
Charging state indicator, high-voltage battery 77
Charging status, see display of the charging status 154
Charging vehicle 150
Charging vehicle, refer to Ve‐ hicle charging 150
Chassis number, see vehicle identification number 10
Check Control 79
Checking the engine oil level electronically 173
Checking the oil level elec‐ tronically 173
Children, seating position 57
Children, transporting safely 57
Child restraint fixing sys‐ tem 57
Child restraint fixing system LATCH 58
Child restraint fixing systems, mounting 57
Child seat, mounting 57
Child seats 57
Chrome parts, care 189
Cleaning displays 190
Climate control 124
Clock 83
Closing/opening via door lock 43
Closing/opening with remote control 41
Combination reel, refer to Turn signals 67
Combination switch, refer to Wiper system 68
Combustion engine, start‐ ing 63 Comfort Access 45
COMFORT program, Dy‐ namic Driving Control 111
Compressor 168
Computer, refer to On-board computer 87
Condensation on win‐ dows 127
Condensation under the vehi‐ cle 141
Condition Based Service CBS 178
Confirmation signal 47
ConnectedDrive 6
ConnectedDrive Services 6
Connecting electrical devi‐ ces 131
Contact with water, high-volt‐ age system 34
Control Display 18
Control Display, settings 89
Controller 18
Control systems, driving sta‐ bility 109
Convenient opening with the remote control 42
Coolant 177
Coolant temperature 83
Cooling function 125
Cooling, maximum 125
Cooling system 177
Corrosion on brake discs 141
Cosmetic mirror 131
Courtesy lamps during un‐ locking 41
Courtesy lamps with the vehi‐ cle locked 42
Cruise control 113
Cruising range 83
Current fuel consumption 87
D
Damage, tires 166
Data, technical 194
Date 83 Seite 199Everything from A to ZReference199
Online Edition for Part no. 01 40 2 960 891 - II/15
Page 216 of 224

Daytime running lights 93
Deactivating drive readi‐ ness 63
Defrosting, refer to Windows, defrosting 127
Dehumidifying, air 125
Deleting personal data 24
Deletion of personal data 24
Departure times, stationary climate control 128
Destination distance 88
Digital clock 83
Dimensions 194
Dimmable exterior mirrors 55
Dimmable interior rearview mirror 55
Direction indicator, refer to Turn signals 67
Display in windshield 90
Display lighting, refer to In‐ strument lighting 95
Displays 75
Displays, cleaning 190
Displays, hybrid system 77
Disposal, vehicle battery 182
Distance control, refer to PDC 115
Distance to destination 88
Divided screen view, split screen 23
Door lock 43
Door lock, refer to Remote control 38
Drive-off assistant 112
Drive-off assistant, refer to DSC 109
Driver's door, LED 41
Drive readiness 61
Drive readiness in detail 62
Drive readuness, deacti‐ vate 63
Driving Dynamics Con‐ trol 111
Driving instructions, break- in 138 Driving instructions, eDRIVE
drive system 138
Driving mode 111
Driving notes, general 139
Driving stability control sys‐ tems 109
Driving tips 139
Driving with combustion en‐ gine, POWER 65
DSC Dynamic Stability Con‐ trol 109
DTC Dynamic Traction Con‐ trol 110
Dynamic Stability Control DSC 109
Dynamic Traction Control DTC 110
E
eBOOST 65
ECO PRO 145
ECO PRO display 145
ECO PRO driving mode 145
ECO PRO mode 145
ECO PRO Tip - driving in‐ struction 146
eDRIVE drive system, driving instructions 138
eDRIVE, electric driving, see BMW eDRIVE 32
eDrive system, at a glance 31
EfficientDynamics 146
Electric drive readiness, Si‐ lent Start 63
Electric driving, ePOWER 64
Electric driving, max eDRIVE 64
Electric driving, see BMW eDRIVE 32
Electronic oil measure‐ ment 173
Electronic Stability Program ESP, refer to DSC 109
Emergency charging, refer to Backup charging 156 Emergency detection, remote
control 39
Emergency release, fuel filler flap 159
Emergency Request 183
Emergency start function, en‐ gine start 39
Emergency unlocking, tail‐ gate 45
Emergency unlocking, trans‐ mission lock 73
Energy Control 87
Energy recovery, CHARGE 66
Engine coolant 177
Engine noise, artificial 65
Engine oil 173
Engine oil, adding 175
Engine oil additives 175
Engine oil change 176
Engine oil filler neck 175
Engine oil temperature 83
Engine oil types, alterna‐ tive 176
Engine oil types, ap‐ proved 175
Engine start during malfunc‐ tion 39
Engine start, jump-start‐ ing 184
Engine temperature 83
Entering a car wash 187
ePOWER, electric driving 64
Equipment, interior 129
Error displays, see Check Control 79
ESP Electronic Stability Pro‐ gram, refer to DSC 109
Exchanging wheels/tires 167
Exhaust system 140
Exterior mirror, automatic dimming feature 55
Exterior mirrors 54
External start 184
External temperature dis‐ play 83 Seite 200ReferenceEverything from A to Z200
Online Edition for Part no. 01 40 2 960 891 - II/15
Page 220 of 224

QQuick charging cable, see Level 2 charging cable 152
R Radiator fluid 177
Radio 6
Radio-operated key, refer to Remote control 38
Radio ready state 61
Rain sensor 69
Rear beverage holder, rear cup holder 135
Rear bottle holder, refer to Rear cup holder 135
Rear can holder, refer to Rear Cup holder 135
Rear cup holder 135
Rear holder for bever‐ ages 135
Rearview camera 117
Rearview mirror 54
Rear window defroster 127
Recirculated-air filter 127
Recirculated-air mode 125
Recommended fuel grade 161
Recommended tire brands 167
Refueling 158
Remaining range 83
Remote control/key 38
Remote control, malfunc‐ tion 43
Remote control, univer‐ sal 129
Replacement fuse 182
Replacing wheels/tires 167
Reporting safety defects 10
RES button, see Cruise con‐ trol 113
Reserve warning, refer to Range 83 Reset, Tire Pressure Monitor
TPM 100
Retreaded tires 167
Roadside parking lights 93
RON recommended fuel grade 161
Roofliner 17
Rubber components, care 189
S
Safe braking 140
Safety 7
Safety belt reminder for driv‐ er's seat and front passen‐
ger seat 53
Safety belts 53
Safety belts, care 189
Safety of the high-voltage system 34
Safety systems, airbags 96
SAVE Battery, maintaining charging state 64
Screen, refer to Control Dis‐ play 18
Screw thread, see screw thread for tow fitting, screw
thread for tow fitting 186
Sealant 168
Seat belts, refer to Safety belts 53
Seat heating, front 52
Seating position for chil‐ dren 57
Seats 51
Selection list in instrument cluster 86
Selector lever, Steptronic Sport transmission 71
Sensors, care 190
Service and warranty 8
Service requirements, Condi‐ tion Based Service
CBS 178 Service requirements, dis‐
play 84
Services, ConnectedDrive 6
SET button, see Cruise con‐ trol 113
Settings, locking/unlock‐ ing 46
Settings, mirrors 54
Settings on Control Dis‐ play 89
Shift paddles on the steering wheel 73
Side airbags 96
Side View 122
Signaling, horn 14
Signals when unlocking 47
Silent Start, electric drive readiness 63
Sitting safely 51
Size 194
Smallest turning radius 194
Snow chains 171
Socket 131
Socket, OBD Onboard Diag‐ nostics 179
SOS button 183
Spare fuse 182
Specified engine oil types 175
Speed, average 88
Speed limit detection, on- board computer 88
Speed limiter, display 85
Speed Limit Information 85
Speed warning 88
Split screen 23
Sport program, transmis‐ sion 72
Stability control systems 109
Standard charging cable, see Level 1 charging cable 152
Standard charging, see Level 1 Charging 155
Standing air conditioning, re‐ mote control 47
Start/Stop button 61 Seite 204ReferenceEverything from A to Z204
Online Edition for Part no. 01 40 2 960 891 - II/15