Page 137 of 224

Cameras
Front camera
The lenses of the Top View cameras are lo‐
cated at the bottom of the exterior mirror hous‐
ings. The image quality may be impaired by
dirt.
Clean the camera lenses, refer to page 190.
Functional requirements
Top View can be used only to a limited extent
in the following situations:
▷With a door open.▷With the trunk lid open.▷With an exterior mirror folded in.▷In poor light.
The unavailable camera range is depicted by
shading.
Switching on/off
Switching on automatically With the engine running, engage lever in posi‐
tion P R.
The rearview camera image is displayed. To
switch to the Top View:
"Rear view camera"
Automatic deactivation during forward
travel
The system switches off when a certain driving
distance or speed is exceeded.
Switch the system back on if needed.
Switching on/off manually Press button.
▷On: the LED lights up.▷Off: the LED goes out.
Top View is displayed.
The rearview camera image is displayed when
the reverse gear is engaged by pressing the
button.
Display
Display on the Control Display The area surrounding the vehicle can be dis‐
played on the Control Display.
The display appears as soon as Top View is
activated.
When the image of the rearview camera is dis‐
played, it is possible to reel to top view:
"Rear view camera"
Brightness
With Top View switched on:
1. Select the symbol.2.Turn the controller until the desired setting
is reached, and press the controller.
Contrast
With Top View switched on:
1. Select the symbol.Seite 121Driving comfortControls121
Online Edition for Part no. 01 40 2 960 891 - II/15
Page 138 of 224

2.Turn the controller until the desired setting
is reached, and press the controller.
Displaying the turning radius and
pathway lines
▷The static, red turning radius line shows
the space needed to the side of the vehicle
when the steering wheel is turned all the
way.▷The variable, green pathway line assists
you in assessing the amount of space ac‐
tually needed to the side of the vehicle.
The lane line depends on the engaged
gear and the current steering angle. The
track line is continuously adjusted for the
steering wheel movement.
"Parking aid lines"
Turning circle and pathway lines are displayed.
System limits
A Check Control message is displayed when a
camera is defective.
Side ViewThe concept
Side View provides an early look at cross traffic
at blind driveways and intersections. Road
users concealed by obstacles to the left and
right of the vehicle can only be detected rela‐
tively late from the driver's seat. To improve
the viewing, each camera, front and rear on the
vehicle, detects the traffic area on the side.
Which camera is active is shown on the top
edge of the screen.
Hints The images of the cameras are displayed, de‐
pending on the gear selected, on the Control
Display.
Check the traffic situation as well
Check the traffic situation around the ve‐
hicle on blind driveways and intersections with
your own eyes. Otherwise, an accident could
result from road users or objects located out‐
side the picture areas of the Side View cam‐
eras.◀
At a glance
Button in the vehicle
Side View
Cameras
Front camera
Seite 122ControlsDriving comfort122
Online Edition for Part no. 01 40 2 960 891 - II/15
Page 139 of 224

Rear camera
Two cameras are used for the detection.
The image quality may be impaired by dirt.
Clean the camera lenses, refer to page 190.
Switching on/off
Switching on/off manually Press button.
Depending on the transmission position, the
picture of the front or rear camera is displayed.
Switching off automatically By switching into a different function or when
changing gears.
Front Side View: when a certain driving dis‐
tance or speed is exceeded.
Display
General information
The traffic area in front of or behind the vehicle
is displayed on the Control Display.
Brightness With the Side View switched on:
1. Select the symbol.2.Turn the controller until the desired setting
is reached, and press the controller.Contrast
With the Side View switched on:1. Select the symbol.2.Turn the controller until the desired setting
is reached, and press the controller.
Warning of crossing traffic
The concept When an object approaching from the side is
detected by the front or rear camera, this is de‐
picted by a symbol in the Side View display.
Requirements
▷Side View switched on.▷Your vehicle moves no faster than walking
speed.▷To detect approaching objects, sufficient
brightness, e.g., daylight is necessary.
Display
The yellow symbol is displayed if anapproaching vehicle is detected by the
camera.
A gray symbol is displayed if crossing
traffic cannot be detected.
System limits
In the following situations, the warning about
crossing traffic may be limited:
▷In poor lighting or visibility conditions.▷If the camera is soiled or covered.
System limits
The objects displayed on the Control Display
under certain circumstances are closer than
they appear. Therefore, do not estimate the
distance from the objects on the display.
The viewing angle is approx. 180°.
Seite 123Driving comfortControls123
Online Edition for Part no. 01 40 2 960 891 - II/15
Page 140 of 224
Climate controlVehicle features and options
This chapter describes all standard, country-
specific and optional features offered with the
series. It also describes features that are not
necessarily available in your car, e. g., due tothe selected options or country versions. This
also applies to safety-related functions and
systems. The respectively applicable country
provisions must be observed when using the
respective features and systems.
Automatic climate control
1Seat heating, left 522Temperature, left3SYNC program4Display5Maximum cooling6Temperature, right7Seat heating, right 528Cooling function9Automatic recirculated-air control/recircu‐
lated-air mode10AUTO program11Air flow, AUTO intensity12Manual air distribution13Defrosts windows and removes condensa‐
tion14Interior temperature sensor — always keep
clear15Rear window defrosterSeite 124ControlsClimate control124
Online Edition for Part no. 01 40 2 960 891 - II/15
Page 141 of 224

HintsSufficient ventilation
When remaining in the vehicle for an ex‐
tended period of time, ensure sufficient exter‐
nal ventilation. Do not continuously use recir‐
culated-air mode; otherwise the air quality in
the interior continuously deteriorates and win‐
dow condensation increases.◀
Climate control functions in detail
Temperature Turn the ring to set the desired
temperature.
The selected temperature is shown on the dis‐
play of the automatic climate control.
The automatic climate control reaches this
temperature as quickly as possible, if needed
by increasing the cooling or heating output,
and then keeps it constant.
Do not rapidly switch between different tem‐
perature settings. Otherwise, the automatic cli‐
mate control will not have sufficient time to ad‐
just the set temperature.
To reduce the energy consumption, the cool‐
ing or heating output is reduced in ECO-PRO
mode, refer to page 145. ECO PRO is shown
on the display of the automatic climate control.
SYNC program Press button.
The current setting of the temperature
on the driver's side is transferred to the front
passenger side.
The program is switched off if the setting on
the front passenger side is changed.Maximum cooling
Press button.
The system is set to the lowest tem‐
perature, optimum air flow and air circulation
mode.
Air flows out of the vents to the upper body re‐
gion. The vents need to be open for this.
The function is available above an external
temperature of approx. 32 ℉/0 ℃ and with the
engine running or when electrical drive readi‐
ness is indicated is indicated.
Adjust air flow with the program active.
Cooling function The car's interior can be cooled with the sta‐
tionary climate control or via the A/C button
with the engine running and/or with drive readi‐
ness activated.
Press button.
The air will be cooled and dehumidi‐
fied and, depending on the temperature set‐ ting, warmed again.
Depending on the weather, the windshield and
side windows may fog up briefly when the en‐
gine is started or drive readiness is activated.
The cooling function is switched on automati‐
cally with the AUTO program.
When using the automatic climate control,
condensation water, refer to page 141, devel‐
ops that exits underneath the vehicle.
Automatic recirculated-air control/
recirculated-air mode
You may respond to unpleasant odors or pollu‐tants in the immediate environment by tempo‐
rarily suspending the supply of outside air. The
system then recirculates the air currently
within the vehicle.
Press button repeatedly to select an
operating mode:Seite 125Climate controlControls125
Online Edition for Part no. 01 40 2 960 891 - II/15
Page 142 of 224

▷LEDs off: outside air flows in continuously.▷Left LED on, automatic recirculated-air
control: a sensor detects pollutants in the
outside air and shuts off automatically.▷Right LED on, recirculated-air mode: the
supply of outside air into the vehicle is per‐
manently blocked.
Recirculated air mode switches off automati‐
cally at low external temperatures after a cer‐
tain amount of time in order to avoid window
fogging.
To prevent window fogging, recirculated air
mode switches off automatically after a certain
amount of time, depending on the environ‐
mental conditions.
If the windows are fogged over, switch off the
recirculated-air mode and press the AUTO
button to utilize the condensation sensor.
Make sure that air can flow to the windshield.
Sufficient ventilation
When remaining in the vehicle for an ex‐
tended period of time, ensure sufficient exter‐
nal ventilation. Do not continuously use recir‐
culated-air mode; otherwise the air quality in
the interior continuously deteriorates and win‐
dow condensation increases.◀
AUTO program Press button.
Air flow, air distribution and tempera‐
ture are controlled automatically.
Depending on the selected temperature,
AUTO intensity program and outside influen‐
ces, the air is directed to the windshield, side
windows, upper body, and into the footwell.
The cooling function, refer to page 125, is
switched on automatically with the AUTO pro‐
gram.
At the same time, a condensation sensor con‐
trols the program so as to prevent window
condensation as much as possible.
To switch off the program: press the button
again or manually adjust the air distribution.
Intensity of the AUTO program
With the AUTO program activated, the auto‐
matic intensity control can be changed.
Press the left or right side of the but‐
ton: decrease or increase the inten‐
sity.
The selected intensity is shown on the display
of the automatic climate control.
Air flow, manual To manually adjust air flow turn off AUTO pro‐
gram first.
Press the left or right side of the but‐
ton: decrease or increase air flow.
The selected air flow is shown on the display of
the automatic climate control.
The air flow of the automatic climate control
may be reduced automatically to save battery
power.
Manual air distribution Press button repeatedly to select a
program:▷Windows.▷Upper body region.▷Footwell.▷Windows and upper body region.▷Windows and footwell.▷Upper body region and footwell.▷Windows, upper body region, and footwell.
The selected air distribution is shown on the
display of the automatic climate control.
If the windows are fogged over, press the
AUTO button to utilize the condensation sen‐
sor.
Seite 126ControlsClimate control126
Online Edition for Part no. 01 40 2 960 891 - II/15
Page 143 of 224

Defrosts windows and removes
condensation
Press button.
Ice and condensation are quickly re‐
moved from the windshield and the front side
windows.
For this purpose, point the side vents onto the
side windows as needed.
Adjust air flow with the program active.
If the windows are fogged over, you can also
switch on the cooling function or press the AUTO button to utilize the condensation sen‐
sor.
Rear window defroster Press button.
The rear window defroster switches
off automatically after a certain period of time.
Switching the system on/off
Switch off Press and hold the left button until the
control switches off.
Switching on
Press any button except▷Rear window defroster.▷Seat heating.
Microfilter/activated-charcoal filter
In external and recirculated air mode the mi‐
crofilter/activated charcoal filter filters dust,
pollen, and gaseous pollutants out of the air.
This filter should be replaced during scheduled
maintenance, refer to page 178, of your vehi‐
cle.
Ventilation▷Thumbwheel for continuous opening and
closing of the vent, arrow 1.▷Lever for changing the air flow direction,
arrow 2.
Adjusting the ventilation
▷Ventilation for cooling:
Direct vent in your direction when vehicle's
interior is too hot.▷Draft-free ventilation:
Adjust the vent to let the air flow past you.
Stationary climate control
The concept Stationary climate control cools or heats the
interior prior to departure to a comfortable
temperature.
The interior temperature is lowered with high
cooling output.
The system may heat the interior. Snow and
ice can be removed more easily.
The air automatically exits through the vents to
the windshield, the side windows, the upper
body region and into the footwell.
The stationary climate control can be switched
on and off via the following systems:
▷Direct operation, refer to page 128.▷Preselected departure times, refer to
page 128.Seite 127Climate controlControls127
Online Edition for Part no. 01 40 2 960 891 - II/15
Page 144 of 224

With the BMW i Remote App, refer to
page 128, the standing air conditioning can be
switched on.
The system switches off automatically after a
certain period of time.
If stationary climate control is used during the
charging process, less air conditioning ca‐
pacity will be required while driving. This opti‐
mizes the range.
Functional requirements▷When the departure time is preselected:
depends on internal, external and set tem‐
perature.▷Direct operation via iDrive: any external
temperature.▷Charging cable connected or high-voltage
battery sufficiently charged.▷Motor switched off and/or drive readiness
deactivated.▷The vents are open to allow air to flow out.
Switching on/off directly
On the Control Display:
1."Settings"2."Climate"3."Activate comfort climate control"
The symbol on the automatic climate con‐
trol flashes if the stationary climate control is
switched on.
Activate climate control at departuretime
The reel-on time is automatically determined
based on the temperature. The system
promptly switches on before the selected de‐
parture time.
On the Control Display:
1."Settings"2."Departure time"3."Departure 1:"4."Precondition for departure time"5.Set and activate Desired departure time,
refer to page 156.
The symbol on the automatic climate con‐
trol lights up when the departure time is acti‐
vated.
The symbol on the automatic climate con‐
trol flashes when the stationary climate control
has been switched on.
If drive readiness is switched off, changes can
be made on the Control Display. Departure
time can only be changed once. Scheduled de‐
parture times are not adjusted. Settings for cli‐
mate control and charging operation are also
applied for scheduled departure times.
Activating with BMW i Remote App
Using the BMW i Remote App, the system can
be directly switched on or via a preset depar‐
ture time.
Seite 128ControlsClimate control128
Online Edition for Part no. 01 40 2 960 891 - II/15
 1
1 2
2 3
3 4
4 5
5 6
6 7
7 8
8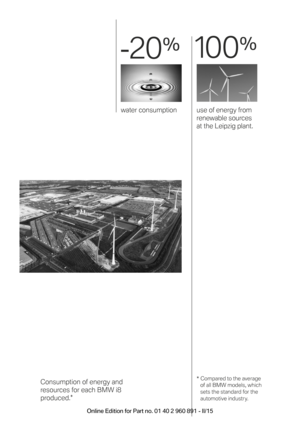 9
9 10
10 11
11 12
12 13
13 14
14 15
15 16
16 17
17 18
18 19
19 20
20 21
21 22
22 23
23 24
24 25
25 26
26 27
27 28
28 29
29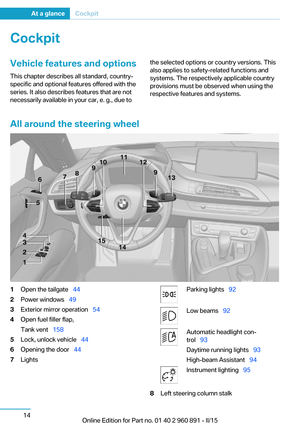 30
30 31
31 32
32 33
33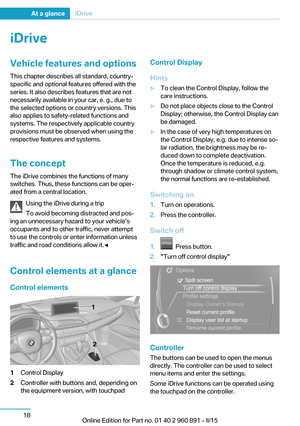 34
34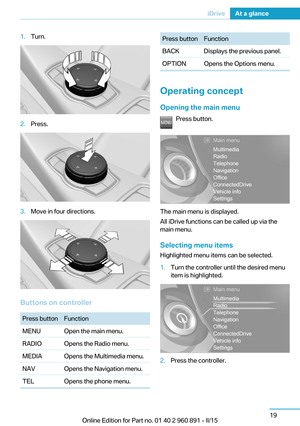 35
35 36
36 37
37 38
38 39
39 40
40 41
41 42
42 43
43 44
44 45
45 46
46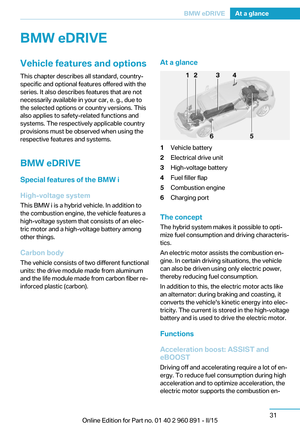 47
47 48
48 49
49 50
50 51
51 52
52 53
53 54
54 55
55 56
56 57
57 58
58 59
59 60
60 61
61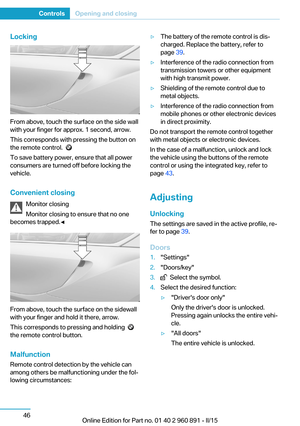 62
62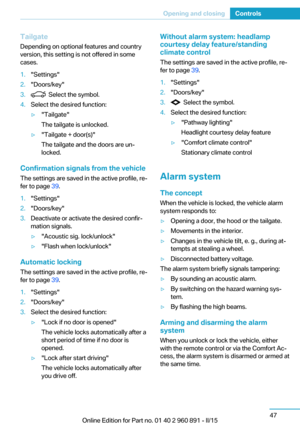 63
63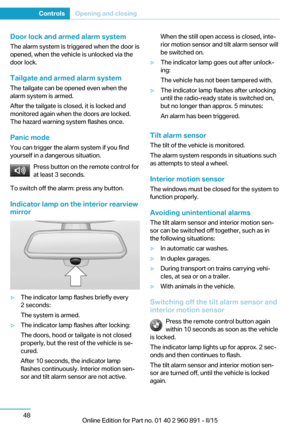 64
64 65
65 66
66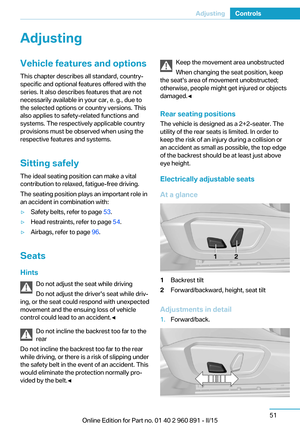 67
67 68
68 69
69 70
70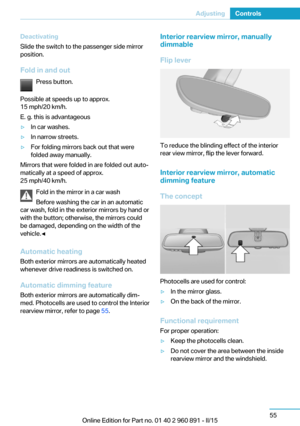 71
71 72
72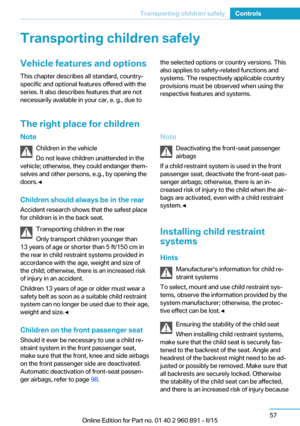 73
73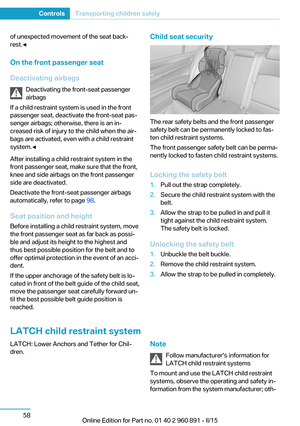 74
74 75
75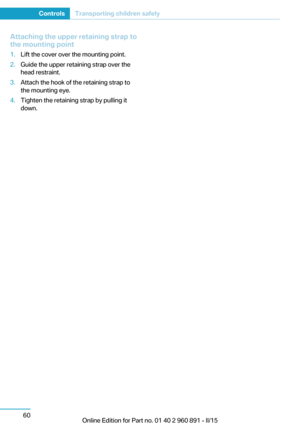 76
76 77
77 78
78 79
79 80
80 81
81 82
82 83
83 84
84 85
85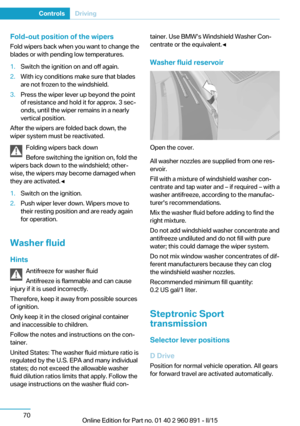 86
86 87
87 88
88 89
89 90
90 91
91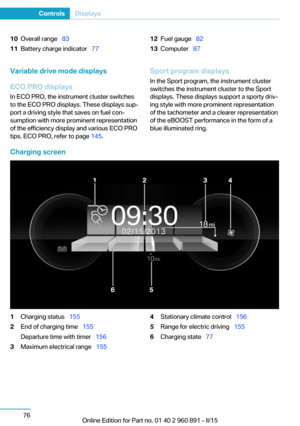 92
92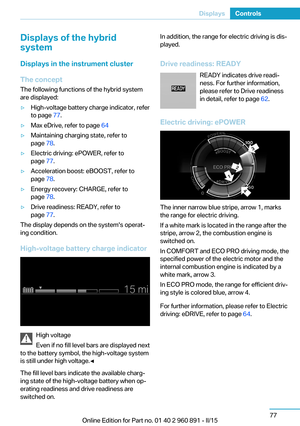 93
93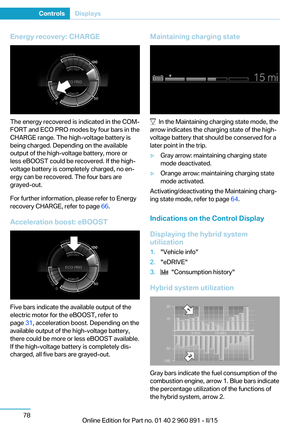 94
94 95
95 96
96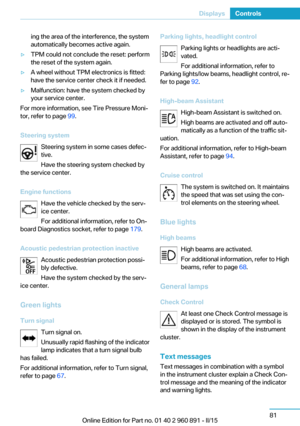 97
97 98
98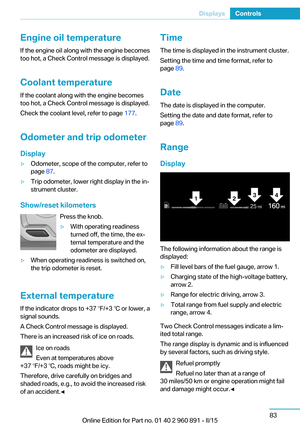 99
99 100
100 101
101 102
102 103
103 104
104 105
105 106
106 107
107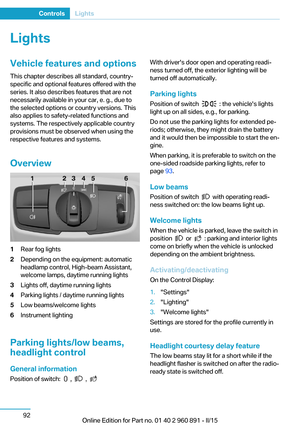 108
108 109
109 110
110 111
111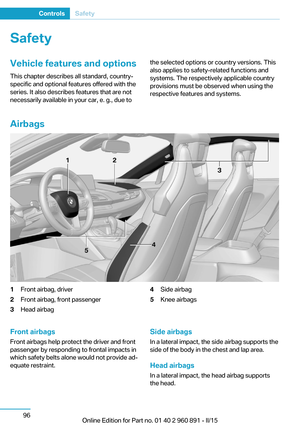 112
112 113
113 114
114 115
115 116
116 117
117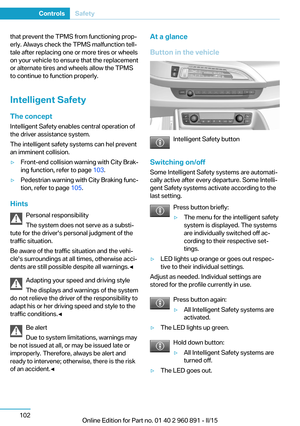 118
118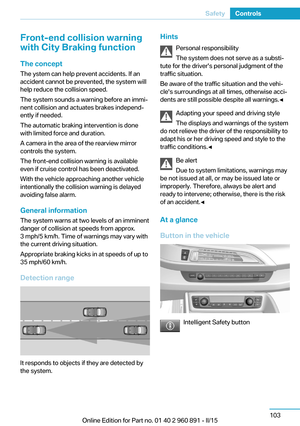 119
119 120
120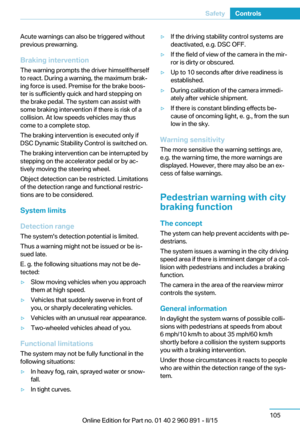 121
121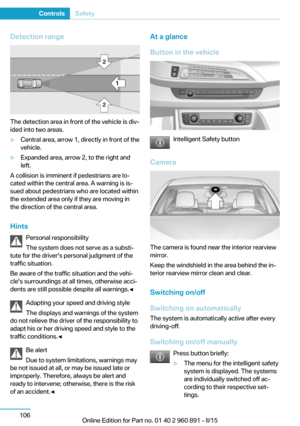 122
122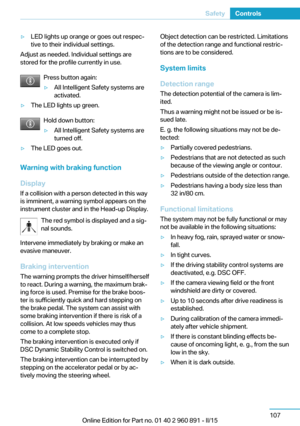 123
123 124
124 125
125 126
126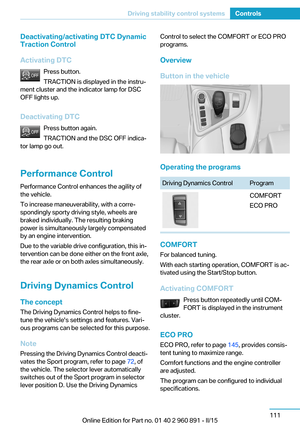 127
127 128
128 129
129 130
130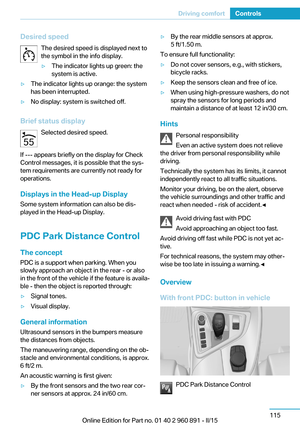 131
131 132
132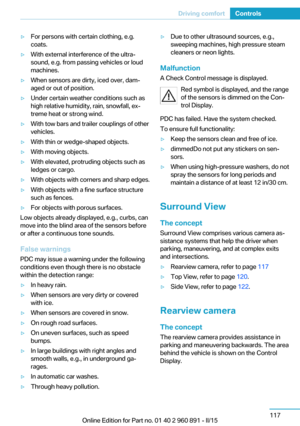 133
133 134
134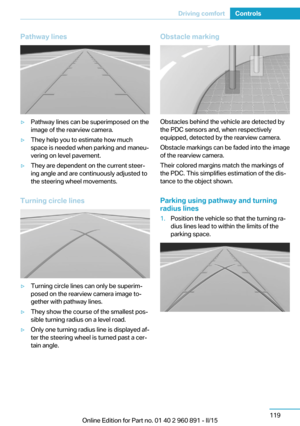 135
135 136
136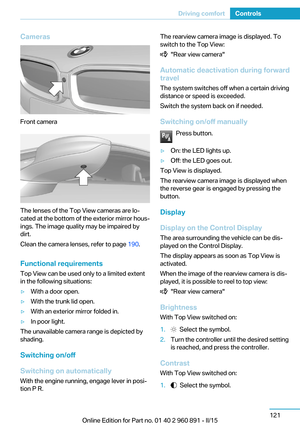 137
137 138
138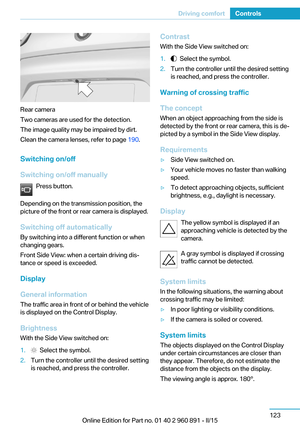 139
139 140
140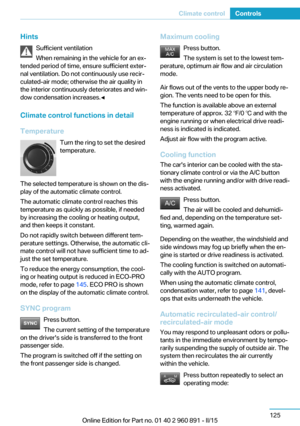 141
141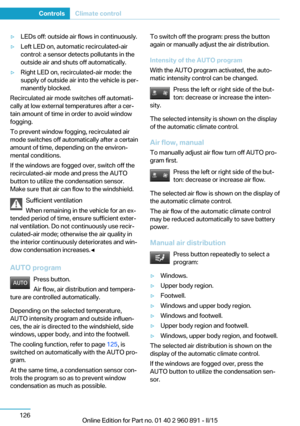 142
142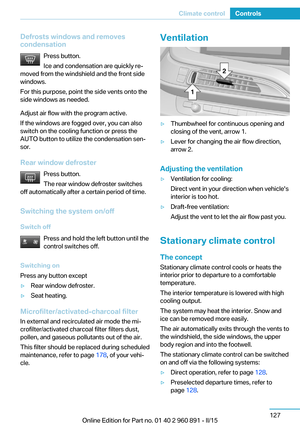 143
143 144
144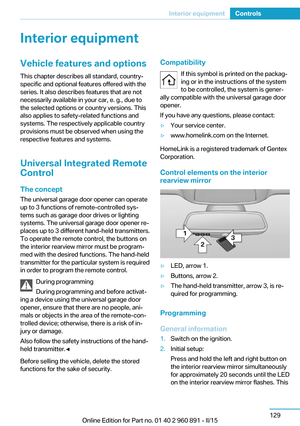 145
145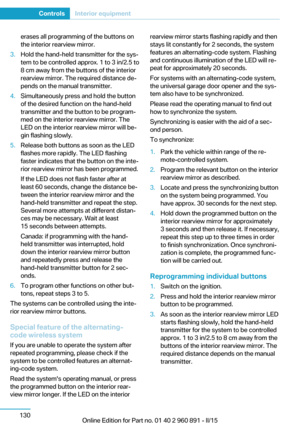 146
146 147
147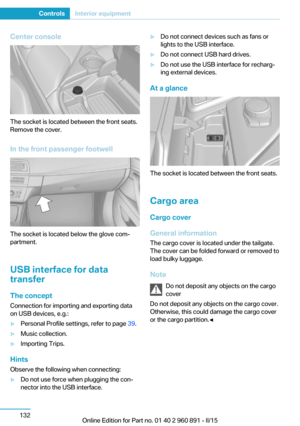 148
148 149
149 150
150 151
151 152
152 153
153 154
154 155
155 156
156 157
157 158
158 159
159 160
160 161
161 162
162 163
163 164
164 165
165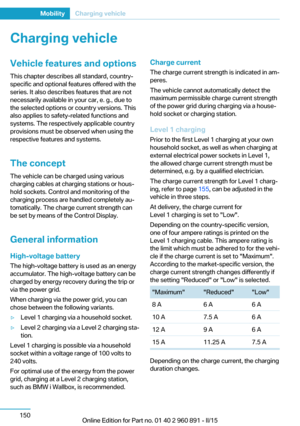 166
166 167
167 168
168 169
169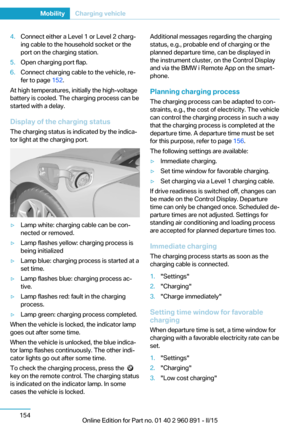 170
170 171
171 172
172 173
173 174
174 175
175 176
176 177
177 178
178 179
179 180
180 181
181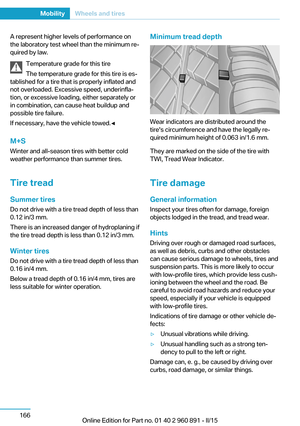 182
182 183
183 184
184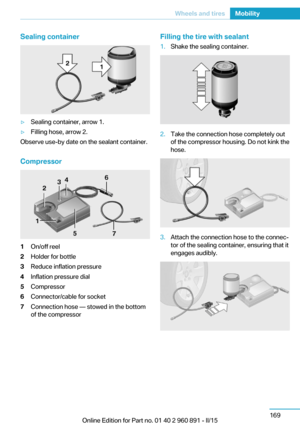 185
185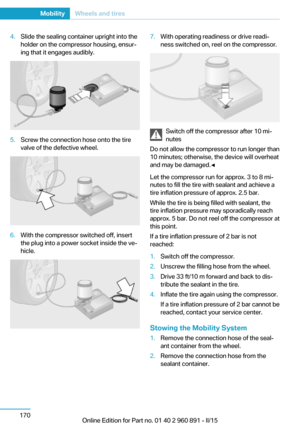 186
186 187
187 188
188 189
189 190
190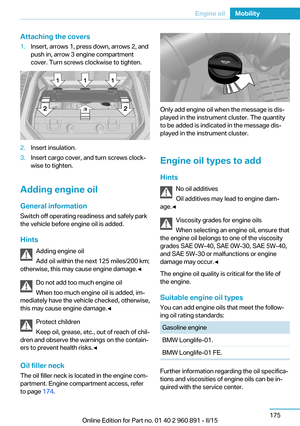 191
191 192
192 193
193 194
194 195
195 196
196 197
197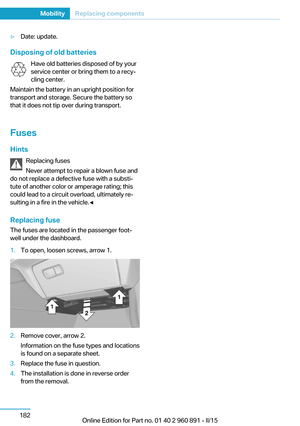 198
198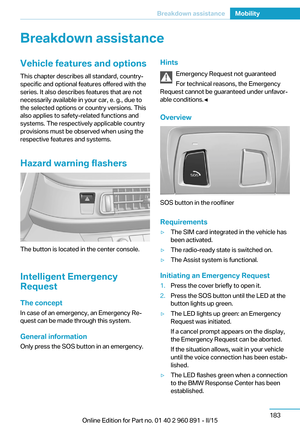 199
199 200
200 201
201 202
202 203
203 204
204 205
205 206
206 207
207 208
208 209
209 210
210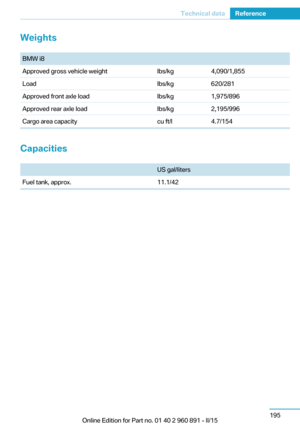 211
211 212
212 213
213 214
214 215
215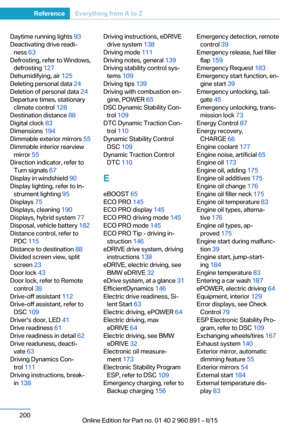 216
216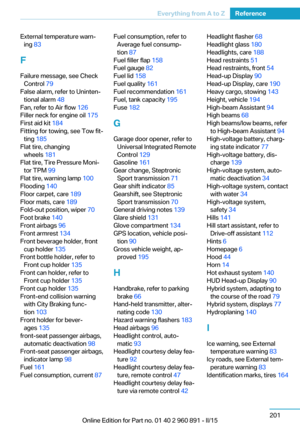 217
217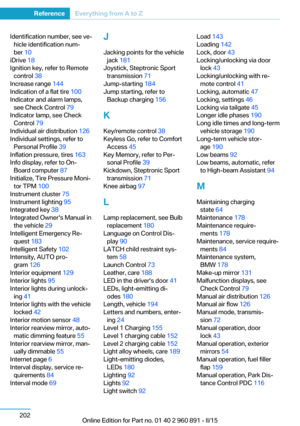 218
218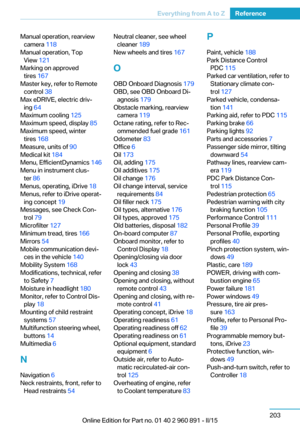 219
219 220
220 221
221 222
222 223
223