2015 AUDI S3 SEDAN lights
[x] Cancel search: lightsPage 47 of 282

....,
N
0 > co
rl I.O
"'
"'
"'
rl
You can indicate a lane change or a turn when the
emergency flashers are switched on by using the
turn signal lever. The emergency flashers stop
temporari ly.
The emergency flashers also work when the igni
tion is turned off.
@ Tips
Yo u should switch the emergency flashers on
if:
- You are the last car in a traffic jam so that
all other vehicles approaching from behind
can see you, or if
- Your vehicle has broken down or you are
having an emergency, or if
- Your vehicle is being towed or if yo u are
towing another vehicle.
Turn signal and high beam lever
The Lever operates the turn signals, the high
beams and the headlight flasher.
Fig. 33 Turn signal a nd high beam leve r
Turn signals ¢i 9
The turn signals activate when you move the lev
er into a turn s ignal position when the ignition is
switched on.
CD -Turn signal
@ -Turn sig nal
The turn s ignal blinks three times if you tap the
l eve r (convenience tu rn signal) .
High beams and headlight flasher ~D
Move the lever to the correspond ing position :
@-high beams on
Light and Vision
@-high beams off or headlight flasher
Th e
El indicator light in the inst rument cl uste r
turns on.
_& WARNING
High beams can cause glare for other drivers,
which increases the risk of an accident . For
this reason, only use the high beams or the
headlight flasher when they will not create
glare for other drivers.
Adjusting the exterior lighting
The settings are adjusted in the MMI.
.. Select: the I MENU I button > Car> Systems*
cont rol button > Vehicle settings > Exterior
lighting.
Automatic headlights
You can adjust the following sett ings in the Auto
matic headlights
menu:
Activation sensitivity -You can adjust if the
headlights switch on
Early, Medium or Late ac
cording to the sens itiv ity of the light sensor .
Audi adaptive light * -you can switch adaptive
light
On and Off .
Coming home, Leaving home*
The coming home function illuminates the area
outside the vehicle when you turn the ignit ion off
and open the driver's door. To turn the function
on, select
Lights when leaving car > On .
The leaving home illuminates the area outside
the vehicle when you un lock the vehicle. To turn
the function on, select
Lights when unlocking
car > On .
The coming home and leaving home functions
on ly operate when it is dark and the light switch
is in the
AUTO position.
Daytime running lights*
USA models:
the daytime running lights can be
switched on or off using the MMI. Select
On or
Off. ...
45
Page 48 of 282
Light and Vision
Canada models: This function can not be switch
ed off . They activate automatically each time the
ignit ion is switched on . Th is menu item is shown
with a "gray background".
Travel mode*
T he headlig ht beam is asymme trical. This p ro
vides stronger illum ination on the s ide of the
road on w hich you are drivi ng . In vehicles with
Xenon headlights* wit h turning light* or LED
headl ights* ,
you must adjust the headlights
when yo u are driving in a cou ntry whe re the traf
f ic direction is opposite from your own country .
Othe rwise, o ncom ing traff ic wi ll be blinded by
t he glare from th e headlights . An adjustm ent is
not needed in veh icles with Xenon he adlig hts
wi thout turni ng lig hts.
To prevent glare:
- Travel mode must be activated in vehicles with
Xenon headlig hts* and turning light* or LED
headlights*. Select: the
I M ENU I button> Car >
Sy stems *
contro l button > V ehicle settings >
Exterior lighting > Light for driving on left ,
for
example.
After you have adjusted the headlights, the fol
low ing message will appear:
II Headlight converter active for driving on
left. Range reduced!
(D Tips
When trave l mode is activated , a display in
the driver information system in dicates this
e ach t ime you switch the ignition on.
46
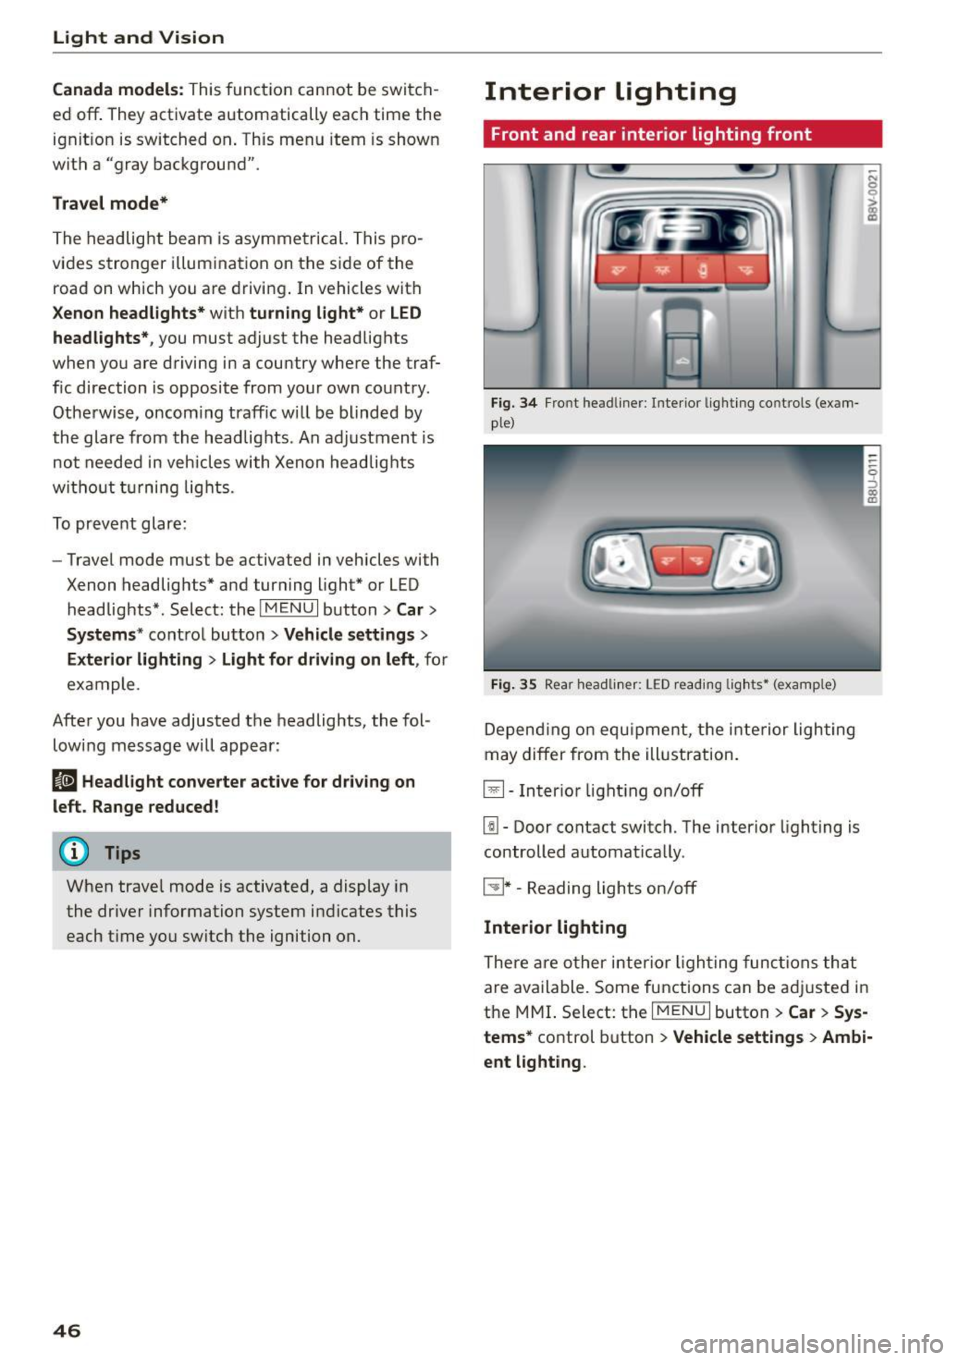
Interior lighting
Front and rear inter ior lighting front
Fi g. 34 Fro nt head liner : In te rior lig htin g co ntrols (exam
p le)
Fig. 35 Rear headli ner: L ED read ing lig hts • (examp le)
De pend ing o n equ ipme nt, th e interior ligh ting
m ay differ from the ill ustration.
El-Inter io r li ght ing on/off
[!I -Door contact switch. The interio r lighting is
controlled automat ica lly.
~ * -Reading lights on/off
Interior lighting
The re a re o ther inter ior ligh ting func tions th at
a re available. Some functions can be adju sted in
the MMI. S elect: th e
I MENU I button > Car > Sys
tems*
co ntrol button > Vehicle settings > Ambi·
ent light ing .
Page 49 of 282
....,
N
0 > co
rl I.O
"'
"'
"'
rl
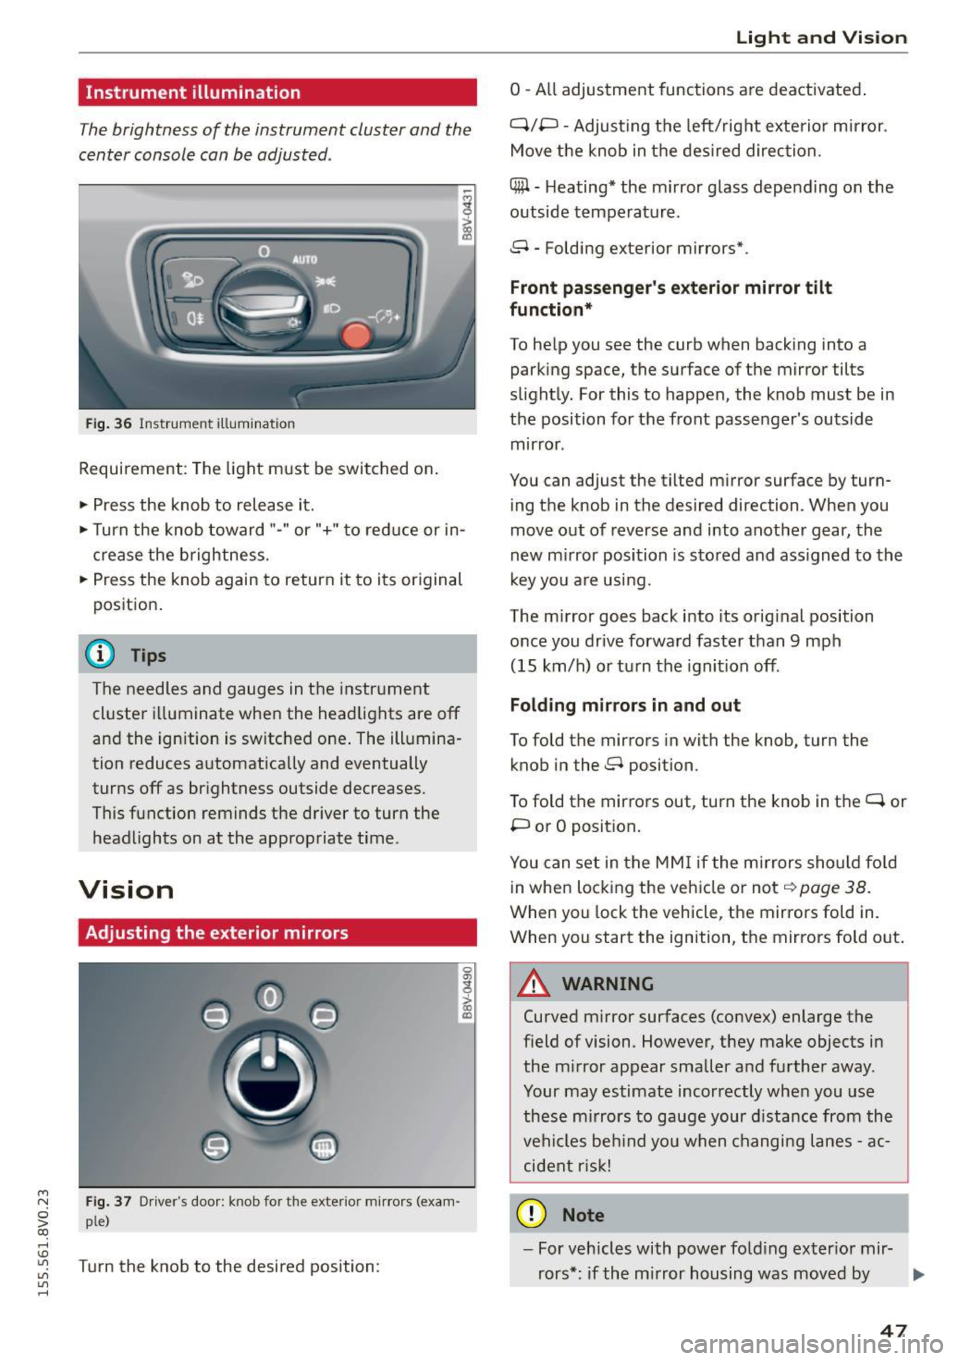
Instrument illumination
The brightness of the instrument cluster and the
center console can be adjusted .
Fig. 36 Instrument illum ination
Requirement: The light must be switched on.
.. Press the knob to release it.
.. Turn the knob toward"-" or"+" to red uce or in
crease the brightness.
.. Press the knob again to return it to its original
posit ion .
@ Tips
The needles and gauges in the instrument
cluster illuminate when the headlights are off
and the ignition is switched one . The illumina·
tion reduces automatically and eventually
turns off as br ightness outside decreases.
This function reminds the driver to turn the
headlights on at the appropriate time .
Vision
Adjusting the exterior mirrors
Fig. 37 Driver's door: knob for the exterior mirrors (exam
ple)
Turn the knob to the desired position:
0
g
> a, (X)
Light and Visio n
0 -A ll adjustment functions are deactivated .
Q/P -Adjusting the left/rig ht exterior mirror.
Move the knob in the des ired direction.
C@ · Heating* the m irror glass depending on the
outside temperature.
8 • Folding exterior mirrors*.
Front pa ss e ng er's ex te rior mirror tilt
functio n*
To help you see the curb when backing into a
parking space, the surface of the mirror tilts
slight ly. For this to happen, the knob must be in
the position for the front passenger's outside
mirror .
You can adjust the tilted mirror surface by turn·
i ng the knob in the desired direction . When you
move out of reverse and into another gear, the
new m irror position is stored and ass igned to the
key yo u are us ing .
The mirror goes back into its orig inal position
once you drive forward faster than 9 mph
(15 km/h) o r turn the ignition off.
Folding m ir rors in and out
To fold the mirrors in with the knob, turn the
knob in the 8 position.
To fold the mirrors out, turn the knob in the
q or
P or O posit ion .
You can set in the MM I if the mirrors sho uld fo ld
in when locking the vehicle or not
q page 38.
When you lock the vehicle, the mirrors fold in.
When you start the ignition, the mirrors fold out.
A WARNING -,.
Curved m irror surfaces (convex) enlarge the
field of vision. However, they make objects in
the m irror appear smaller and further away.
Your may estimate incorrectly when you use
these m irrors to gauge your d istance from the
vehi cles be hind you when changi ng lanes -ac·
cident risk!
@ Note
- For vehicles with power fo ld ing exter ior mir·
rors*: if the mirror housing was moved by
IJI,-
47
Page 50 of 282
Lig ht a nd Vis ion
outside forces (such as an impact when ma
neuvering), you must use the power folding
funct ion to fold the mir ror all the way out.
You will hear a loud noise when the mirrors
are latched back in place. The mirror hous
i ng must not be moved back into place by
hand because th is would impair the func
tion of the mirror mechanism.
-Applies to vehicles without power fold ing
exterior mirrors: if the mirror housing was moved by outside forces (such as in impact
during maneuve ring), you must move the
mirror ho us ing ba ck into p lace by hand.
- If you wash the veh icle in an automatic car
wash, you m ust fold the exterior m irrors in
to reduce the risk of damage to the mirrors .
Never fold power folding exterior mirrors*
by hand. Only fo ld them in and out using
the power controls.
@ Tips
If the power adjustment fails, both mirrors
can be adjusted by hand by pressing on the
edge of the mirror surface.
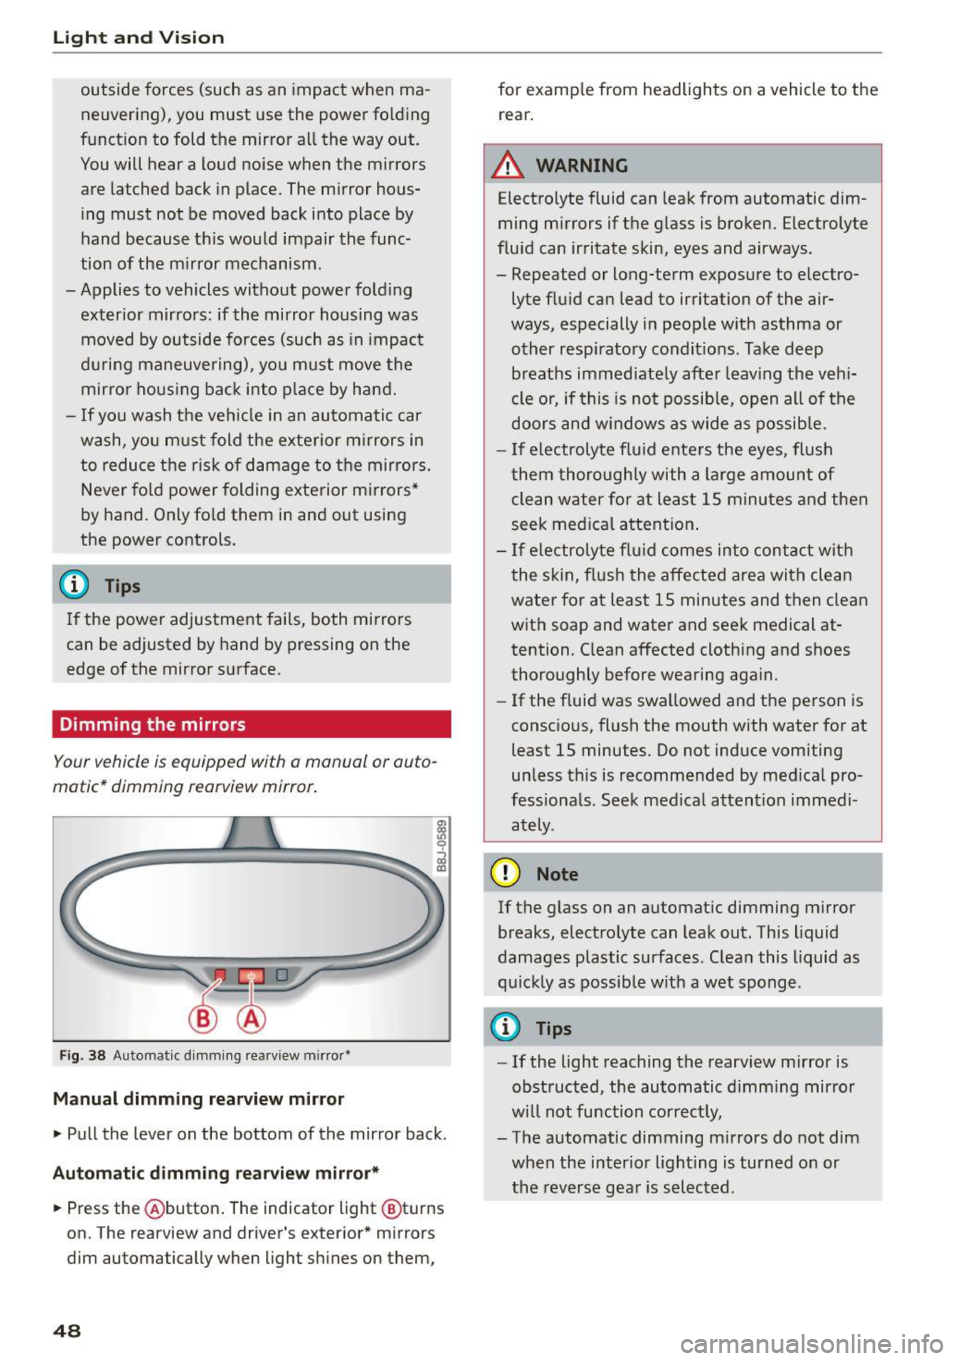
Dimming the mirrors
Your vehicle is equipped with a manual or auto
matic* dimming rearview mirror .
Fig. 38 Automatic d imm ing rearv iew mirro r•
M anual dimming rea rvi ew mirror
• Pull the lever on the bottom of the mirror back.
Autom atic dimm ing r ear view mirr or*
• Press the @button . The indicator light @turns
on. The rearview and driver's exterior * mirrors
dim automatically when light sh ines on them,
48
for examp le from headlights on a vehicle to the
rear.
A WARNING
Electrolyte fluid can leak from automatic dim
ming mirrors if the g lass is broken. Electrolyte
flu id can irritate skin, eyes and airways .
- Repeated or long-term exposure to electro
lyte fluid can lead to irritation of the air
ways, especially in people w ith asthma or
other resp iratory condit ions . Take deep
breaths immed iate ly after leav ing the veh i
cle or, if this is not possib le, open all of the
doors and w indows as wide as possib le.
- If electrolyte flu id ente rs the eyes, flush
them thoroughly with a large amount of
clean water for at least 15 m inutes and then
seek med ica l attention .
- If electroly te f lu id comes into contac t with
the skin, flush the affected area with clean
water for at least 15 minutes and then clean
with soap and water and seek medical at
tention. C lean affected clothing and shoes
thoroughly before wearing aga in.
- If the f luid was swa llowed and the person is
consc io us, fl ush the mouth with water for at
least 15 minutes. Do not induce vomiting
unless th is is recommended by med ica l pro
fessiona ls . Seek med ical attention immedi
ately .
(D Note
If the glass on an automat ic dimming m irror
breaks, electro lyte can leak out. This liquid
damages plastic surfaces. C lean this liquid as
q uick ly as possib le w ith a wet sponge .
{D Tips
- If the light reaching the rearview mirror is
obstructed, the automatic d imm ing mirror
w ill not function correct ly,
- The automatic dimming m irrors do not dim
when the interior lighting is turned on or
the reverse gea r is selected .
Page 51 of 282
....,
N
0 > co
rl I.O
"'
"'
"'
rl
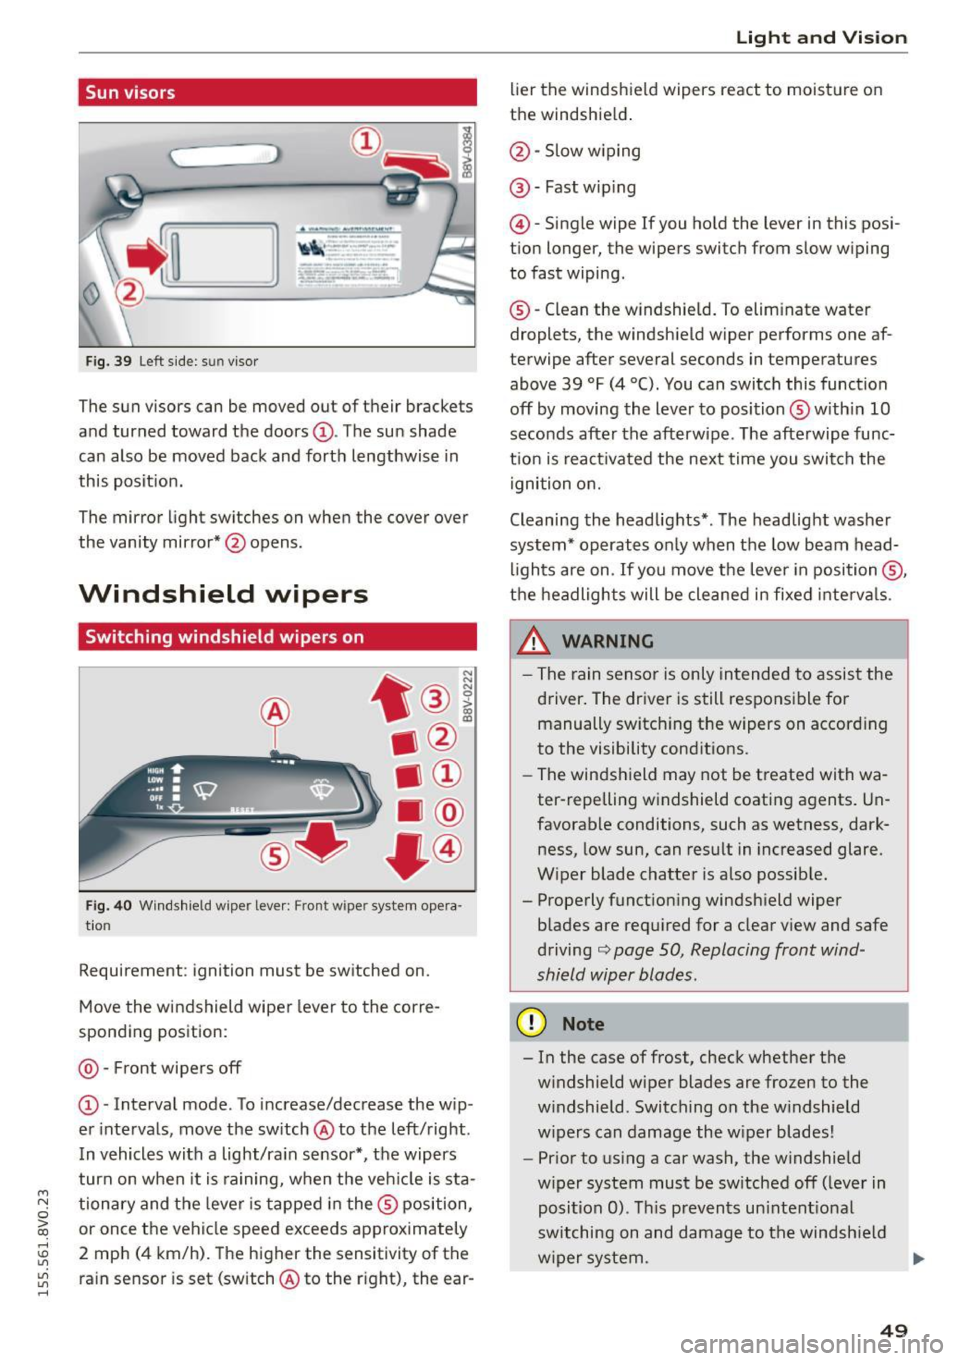
Sun visors
C1o... ___ J
Fig. 39 Left side: su n viso r
The sun visors can be moved out of their brackets
and turned toward the doors@. The sun shade
can also be moved back and forth lengthwise in
this posit ion.
The mirror light switches on when the cover over
the vanity mirror* @opens .
Windshield wipers
Switching windshield wipers on
Fig. 40 Windshield wiper leve r: Front wiper system opera
tion
Requirement : ignition must be switched on.
Move the windshield wiper lever to the corre
sponding position:
@ -Front wipers off
@ -Interval mode. To increase/decrease the w ip
er intervals, move the switch @to the left/right .
I n vehicles with a light/ra in sensor*, the wipers
turn on when it is ra ining, when the veh icle is sta
tionary and the lever is tapped in the ® position,
or once the vehicle speed exceeds approximately
2 mph (4 km/h). The higher the sensitivity of the ra in sensor is set (switch @to the r ight), the ear-
Light and Visio n
lier the windshield wipers react to moisture on
the windshield .
@-Slow w iping
@ -Fast wip ing
@ -Single wipe If you ho ld the lever in this posi
tion longer, the wipers switch from slow wiping
to fast wiping.
® -C lean the w indshield. To elim inate water
droplets, the windsh ield wiper performs one af
terwipe after several seconds in temperatures
above 39 °F (4 °(). You can switch this function
off by moving the lever to position ® with in 10
seconds after the afterwipe. The afterwipe func
t ion is react ivated the nex t time you switch the
ignition on.
Cleaning the headlights*. The headlight washer
system* operates only when the low beam head
li ghts are on . If you move the lever in position @,
t h e headlights will be cleaned in fixed interva ls .
_& WARNING
- The rain sensor is only intended to assist the
driver. The driver is still responsible for manually switch ing the w ipers on according
to the visibility cond itions.
- The windshield may not be treated with wa
ter-repelling w indshield coat ing agents. Un
favorable conditions, such as wetness, dark
ness, low sun, can result in increased glare.
W iper blade chatter is also possib le.
- Properly function ing windsh ield wiper
b lades are req uired for a clear v iew and safe
driving
c::> page 50, Replacing front wind
shield wiper blades .
(D Note
- In the case of frost, check whether the
windshield wiper blades are fr ozen to the
w indshield. Switching on the w indshield
w ipers can damage the w iper blades!
- Prior to using a car wash, the windshield
w iper system must be sw itched off (leve r in
posit ion 0). T his prevents un intent ional
switching on and damage to the windsh ield
w iper system. .,.
49
Page 73 of 282
M N
0 > co ,...., \!) 1.1'1
1.1'1
1.1'1
,....,
If you anticipate w hat you need to do next and
drive economically, you can easily cut your fue l
consumption by 10-15 percent. Th is sect ion will
g ive you some tips on how you can help the envi
ronment and your pocketbook.
The consumpt ion estimates as published by
ENVIRONMENTAL PROTECTION AGENCY (EPA)
and Transport Canada may not correspond to
your actual consumption on the road, which
w ill vary depend ing upon vehicle load and
speed, road and weather conditions, trip
length, e tc.
Drive smoothly and keep a lookout ahead
Vehicles use the most fuel when they are acceler
ating.
.. Avoid unnecessary accelerating and braking.
Vehicles use the most fuel when they are acceler
ating. If you anticipate what is going to happen next, you will need to brake less and, thus, accel
erate less. Let the vehicle coast whenever possi b le -for example when you see that the next traf
fic light is red.
Avoid full throttle
Driving at moderate speeds saves fuel and im
proves your mileage .
.. Try and keep well be low your car's max imum
speed .
Accelerating gently reduces fuel consumpt ion,
engine wear, and does not d isturb the env iron
ment .
Fue l consumption, exha ust emissions and eng ine
noise increase disproportionately at high speeds.
If you drive at approx imately t hree quarters of
top speed, fuel consumpt ion w ill be reduced by
one half . Never dr ive faste r than the posted
speed limit a nd weather conditions perm it.
Dri ving
Reducing unnecessary idling
Even when your car is just idling it burns up fuel .
.. Shut the eng ine off when you are not driving
the vehicle .
.. Do not warm up the vehicle by lett ing the en-
gine run at idle.
It is efficient to switch off the engine when stop
ped at ra ilroad crossings and long red lights.
Turning the engine off for just 30-40 seconds
saves more fuel than is b urned by starti ng the
engine aga in .
It takes a long t ime for the engine to warm up
fully when it is ru nning at idle. However, wear
and noxious emissions are espec ia lly hig h when
t h e engine is warming up. So you should d rive
away as soon as you sta rt the eng ine and avoid
run ning at high rpms w hile the eng ine is s till
warmi ng up .
@ Note
Do no t leave eng ine idl ing una ttended afte r
s ta rtin g.
If war ning lig hts s hou ld come on to
i ndica te imprope r operat ion, they would go
u nheede d. Extended idling also produces
heat, which could result in overheat ing or oth
er damage to the ve hicle or other property.
Regular maintenance
A badly tuned engine unnecessarily wastes a lot
of fuel.
.. Have your ve hicle serviced at reg ular in tervals.
B y havi ng your ve hicle regu la rly se rv iced by an
Audi dealer he lps to ensu re that it ru ns p rope rly
and economically. The condi tion of your veh icle
not only affects its sa fety and ability to ho ld i ts
val ue, it also affects
fuel consumption.
Check your oil each time you fill your tank.
The amou nt of oi l used is re lated to engine load
and speed.
It is normal for the oil consumption of a new en
gine to reach its lowest value after a certai n m ile-
age has been dr iven. ...,
71
Page 78 of 282

Driving
Autom ati c s tar t m alfun cti on
If the lll3 (gasoline engine) or II (diese l eng ine)
indicator light turns on when you start the en
gine, there is an automatic start ma lfunction.
To start the engine, press and ho ld the
I START ENGINE STOP! button un til the engine
runs .
Drive to an autho rized Audi dea ler or authorized
Aud i Service Fac ility immediately to have the
mal funct ion corrected.
_& WARNING
- Never allow the engine to run in confined
spaces -danger of asphyxiation.
- Always take the vehicle key with you when
leaving the vehicle, even for a short period
of time . This applies partic ularly when chil
dren remain in the vehicle. Otherw ise the
children could start the engine or operate
electrical equ ipment such as power win
dows.
- Please note that the brake booster and pow
er steering only work when the engine is
running . When the eng ine off, you must use
more force to steer or brake the ve hicle. Be
cause the usual stee ring and bra king capa
bility is not availab le, the risk of accidents o r
injur ies inc reases.
(D Note
- Avoid high eng ine speed, full thrott le, and
heavy engine load as long as the eng ine has
not reached operating temperature yet. You
could damage the engine.
- The engi ne cannot be sta rted by pushing or
tow ing.
@ For the sake of the environment
Do not let the engine run while par ked to
warm up. Beg in d riving immed iately. This re
duces unnecessary emissions.
l ) Th is fun ctio n is not availabl e in all cou ntri es .
76
-
(D Tips
-After starting a cold engine, there may be a
br ief per iod of increased noise because the
oil pressure must first build up in the hy
draulic valve adjusters. This is normal and
not a cause for concern .
- If the . indicator light blinks in the instru
ment cluster before switching the ignition
off, the ignition will not switch on again.
¢page 126
-If you leave your vehicle w ith the ignition
switched on, the ign ition w ill switch off af
ter a certain amou nt of time . Make sure that
elect rical equipment such as the exterio r
lights a re switched off.
Turning the engine off using the
button
Applies to vehicles: with convenience key
... Bring the vehicle to a full stop.
... Move the se lector lever into the P position.
... Press the
I STAR T ENGINE STOP ! button
¢page 75, fig. 69.
Ste ering lo ck1l
The steering locks when yo u turn the engine off
using the
I STAR T ENGINE ST OP !* button, move
the selector lever into the P position and open
the driver's door.
The locked steering he lps prevent ve hicle theft.
Eme rgency off
If it is absolutely necessa ry, the engine can also
be turned off while driving at speeds lower than
6 mph (10 km/h). To switch the engine off, press
the
I START ENGINE STOP! button twice in a row
briefly or press and hold for longer than two sec
onds.
_& WARNING
- Never turn off the engine before the vehicle
has come to a complete stop. The full func
tion of the brake booster and the powe r
steer ing is not guaranteed. You must use
Page 80 of 282

Driving
This message appea rs and a warn ing tone sounds
if you open the driver's door when the ignit ion is
sw itched on. Switch the ign ition
off so that the
battery will not discharge.
Pressing st a rt /s to p button a gain will swit ch off
engine!
This message appears whe n you press the
I S TART ENGINE STOP !* button while driv ing
q page 76, Emergency off .
Engine start sy ste m malfunc tion . Pl ea se c on
ta ct Ser vice
The engine automatic start system has a mal
function . Drive to a n author ized Audi dealer or
author ized Audi Serv ice Facility immediately to
have the m alfunction correc ted . T o star t the en
g ine, press and hold the
I S TAR T ENGINE ST OP I
button.
DJ Ke y not r ecogniz ed. See owner 's manual
This message appears if there is no convenience
key inside the ve hicle or if the system does not
recogn ize the key . The convenience key may not
be recogn ized, for example , if it is covered by an
object that
disrupts the s ignal (such as a brief
case), or if the key battery is weak . E lectronic de
vices s uch as cell phones can also interfere w ith
the signa l.
To st ill be able to start or stop the eng ine, refer
to "Correcting a ma lfunction"
q page 77.
Ill Key not in vehicle?
The Ill indicator light turns on and this message
appears if the convenience key was removed from
the vehicle whe n the eng ine was runn ing.
If the
convenience key is no longer in the vehicle , you
cannot switch the ig nition on or start the eng ine
once yo u stop it . In add it io n, you ca nnot lock the
ve hicl e from the o utside.
Pr ess brake pedal
This message appears if you do not press the
brake peda l when starting the engine .
Please engage N or P
This message appea rs when starting or s topping
the engine if the selector leve r is not in the Nor P
position. The engine will not start/stop.
78
Shift to P, otherwi se vehicle can roll awa y.
Door s do n ot l ock
if le ver is not in P
This message appears for safety reasons a long
with a warning tone.
It appears if the selec to r
l ever for the a utomat ic transm iss ion is not in the
P position when switching the ignition
off with
the
I S TART ENGINE STOP I* button . Shift these
l ector lever to the P pos ition . Otherw ise, the vehi
cle co uld roll. You also cannot lock the vehicle us
ing the lock ing sensor o n the doo r hand le or us
i ng the conven ience key .
Electromechanical
parking brake
Operating
The electromechanical parking brake replaces
the hand brake.
Fig. 71 C ente r consol e: pa rk in g b rake
.. Pull the sw itch @¢ fig. 71 to set the pa rking
br ake . The - (USA models)/ . (Can ada
mode ls) indica to r li ghts in the button and in
the inst rument cluste r display turn on .
.. To release the pa rking brake, press the brake or
accelerator pedal wh ile the ignition is sw itched
on and press the button @ at the same time.
The - (USA models)
I. (Canada models)
ind icator lights in the button and in the display
turn off .
Your vehicle is equipped with an e lectromechani
ca l park ing brake. The parking brake is designed
to prevent the vehicle from ro lling un intent ional
l y and replaces the hand brake .
In add ition to the normal functions of a tradition-
al hand brake, the electromechanical parking ..,_