2015 AUDI S3 SEDAN warning lights
[x] Cancel search: warning lightsPage 28 of 282

Instruments and indicator lights
Your authorized Audi dealer or a qualified service
station can interpret the code and perform the necessary repa ir .
A WARNING
Do not use the diagnostic connector for per
sonal use. Incorrect usage can cause malfunc
tions, wh ich can increase the risk of a co lli
sion!
26
.
Page 33 of 282

....,
N
0 > co
rl I.O
"'
"'
"'
rl
temperature may be higher if there is heavy en
gin e load and high temperatures outside. This is
not a cause for concern as long as the.
¢page 19 orllll ¢page23 indicator lights in the
display do not blink.
A WARNING
Your focus should always be on driving your
vehicle safely . As the dr iver, you have com
plete responsibility for safety in traffic . Only
use the functions such as the lap timer in such
a way that you a lways maintain complete con
trol over your vehicle in all traffic situations .
(D Tips
You can retr ieve information from the tr ip
computer while the lap timer stopwatch is
r u nning.
Opening the lap timer and measuring time
Applies to vehicles: with lap timer (5 models)
Fig. 15 Multifunction steer ing wheel: controls
Fig. 16 Instrument cluster: lap timer
Opening th e lap timer
-
"'Press the button @ on the multifunction steer
ing wheel and turn the thumbwheel @
¢fig. 15 unt il Lap timer ¢fig. 16 appea rs.
Dr iver inform atio n sy stem
.. Press the thumbwheel @ to confirm the selec
tion.
T im ing laps
"' To sta rt timing, press the thumbwheel @ while
on the menu item
Lap 1 - pre ss OK . The time
measurement is shown in line @
r=:> fig. 16.
.. To measure the lap time, press the thumb
wheel @ again while on the men u item
New
lap -pre ss O K. This also starts timing the next
round. The last time measurement moves up to
the top line
(D . Line ® contains the current lap
time .
If the symbol
ri) is green during the current lap
t ime measurement, the current time is faster
than the previous best time. If the symbol. is
red, the current time is slower @.
Displaying split time and pausing tim ing
.. To display a split time
[~l turn the thumb-
wheel @until
Split time appears in line @.
Press the thumbwheel @ to confirm the selec
tion. The split time appears for approximately 10 seconds in line @. The timing of the current
lap conti nues.
If you would like to insert a pause
m immediate
ly after the split t ime, first press the thumb
wheel @and then the menu item
Pr ess OK to go
back to confirm .
"' To insert a pause, turn the thumbwheel @ until
Pau se appears in the line @. Press the thumb
wheel @ to confirm the se lec tion . Th e pause
symbo l
m appears in line @ .
.. To continue timing, press the thumbwhee l@ .
If timing is paused , you can continue it la ter even
i f you sw itch the ignition off.
Mean ing of the indicators in the center d isp lay
¢ fig . 16:
CD Disp lay of last time measurement
@ Symbols:
-
[O]: Begin ning of time measuremen t
- . : Slowest time
- . : Fastest time
- [~]: Split time
-m : Pause
31
Page 43 of 282

M N
0 > co ,...., \!) 1.1'1
1.1'1
1.1'1
,....,
@ Switch for the window in the right rear door.
® Safety button* .
Child safety lock
When the safety button®~ fig. 29 is pressed,
the@ symbol in the button lights up. The power
window switches in the rear doors are switched
off.
A WARNING
- When you leave your vehicle - even if only
br iefly -always remove the ignition key. This
applies part icularly when children remain in
the vehicle. Otherwise the children could start the engine or operate e lectr ica l equip
ment (e.g. power windows). The power win
dows are functional until the driver 's door o r
passenger's door has been opened .
- Pay caref ul attent ion when closing the win
dows.
It could cause injury by pinching .
- When locking the veh icle from outs ide, the
vehicle must be unoccupied since the win
dows can no longer be opened in an emer
gency.
-
(D Tips
After turning the ignition off you can st ill
open and close the windows for approximate
ly 10 seconds. The power windows are not
switched off unti l the driver's door or pas
senger's door has been opened.
Convenience opening/closing
With the convenience opening/closing funct ion,
you can centrally and easily open the windows and the panorama sunroof* from the outside.
Con veni enc e op en f eatur e
.. Press the open button Iii on the remote control
key until all windows and the panorama sun
roof* have reached the desired position, or
.. Hold the key in the driver's door lock until all
windows and the panorama sunroof* have
reached the desired position.
Op ening and cl osing
Conven ience clo se feature
.. Ho ld the key in the driver's door lock in the lock
position unti l all windows and the panorama
sunroof* are closed.
Con venienc e closing wi th the convenience
key*
.. Touch the sensor * on one of the front door han
dles and contin ue touching it until all of the
windows and the panorama sunroof* are
closed. Do not place your hand in the door han
dle when doing th is .
Adju sting the con venience opening in the
MMI
.. Select: the I MENU I button >Car> Sys tems*
control button > Vehicle se ttings > Cent ral
loc king > Long-pr ess to open w indo ws
To enable convenience opening of the w indows
and the roof*, the
Front windo ws, Rear win
do ws*
and Roo f* functions must be switched On.
A WARNING
- Never close the w indows or panorama sun
roof* care lessly or in an uncontrolled man
ner, because this increases the risk of injury.
- For secur ity reasons, the w indows can only
be opened with the remote control key at a
maximum distance of approximately 6 feet
(2 meters) from the vehicle.
- Pay attention when using the lock cylinder
to close the w indows and the panorama
sunroof* so that no one is pinched. Closing
stops when the key is moved into the start
ing position.
Correcting power window malfunctions
After disconnecting the vehicle battery, the one touch up and down feature must be activated
again .
.,. Pull the power wi ndow switch until the window
is completely ra ised.
.. Release the switch and pull it again for at least
one second.
4 1
Page 45 of 282

....,
N
0 > co
rl I.O
"'
"'
"'
rl
Light and Vision
Exterior Lighting
Switching lights on and off
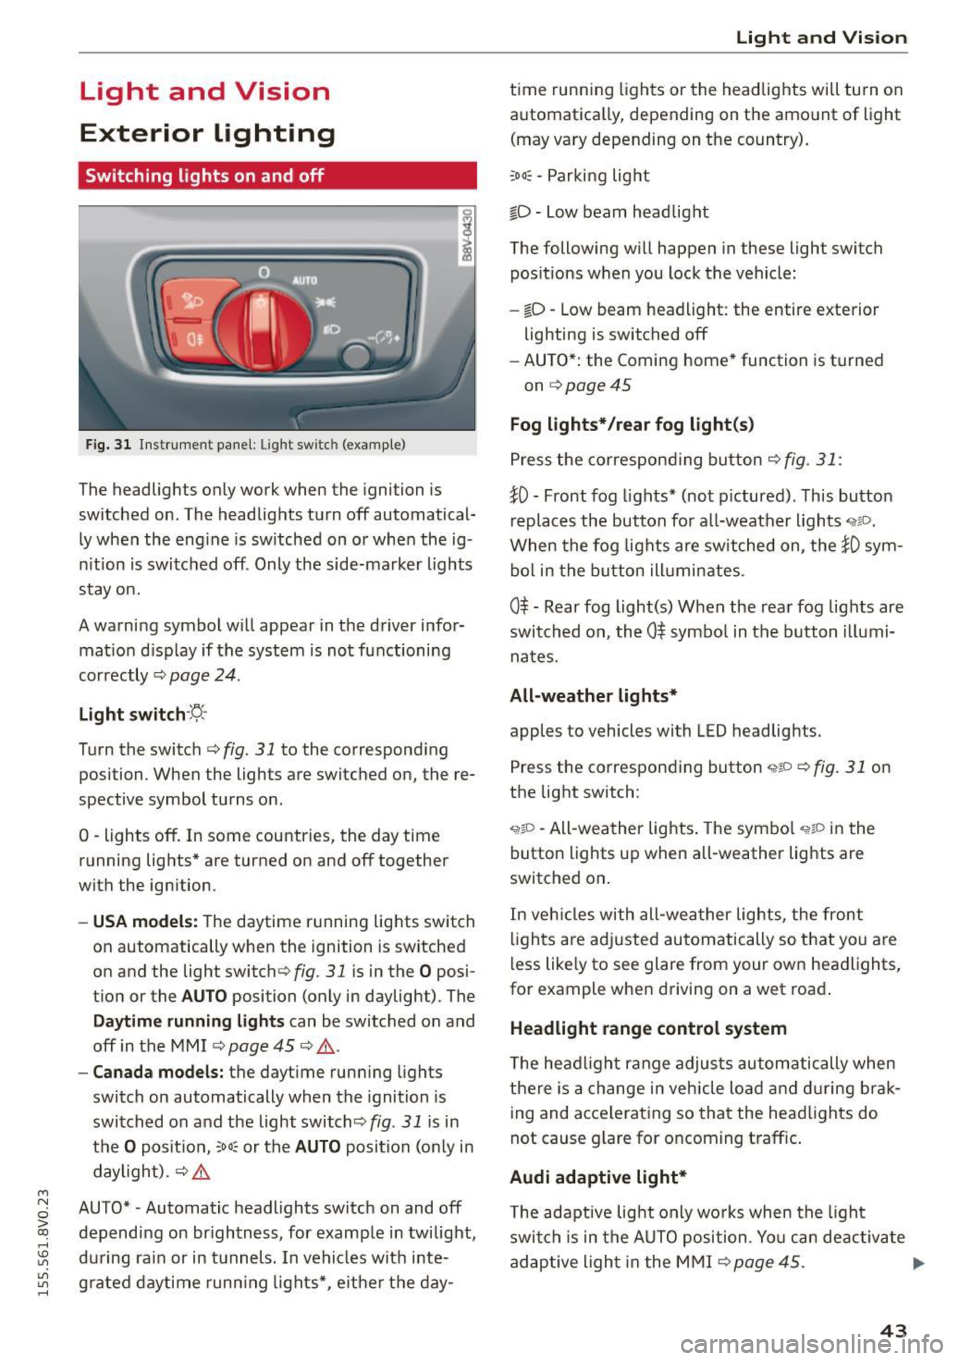
Fig. 31 Instrument panel: Ligh t swi tc h (examp le )
The headlights only work when the ignition is
switched on . The headlights turn off automatical
ly when the eng ine is switched on or when the ig
nition is switched off . Only the side-marker lights
stay on.
A warning symbol w ill appear in the driver infor
mat ion d isp lay if the system is not functioning
correctly ¢
page 24.
Light switch ·~-
Turn the switch c::> fig. 31 to the corresponding
position . When the lights are switched on, the re
spective symbol turns on .
0 -lights off. In some countries, the day time
running lights* are turned on and off together
with the ignition .
-USA models: The daytime running lights switch
on automatically when the ignition is switched
on and the light switch¢
fig. 31 is in the O posi
tion or the
AUTO position (only in daylight) . The
Daytime runn ing lights can be switched on and
off in the MMI
c::> page 45 c::> & .
-Canada models: the daytime running lights
switch on automatically when the ignition is
switched on and the light switch<::>
fig. 31 is in
the
O position, ;ooc or the AUTO position (on ly in
daylight) .
c::> &.
AUTO* -Automatic headlights switch on and off
depending on brightness, for example in twilight,
during rain or in tunnels. In vehicles with inte
grated daytime running lights*, e ither the day-
Light and Vision
time running lights or the headlights will turn on
automatica lly, depend ing on the amount of light
(may vary depending on the country).
;oo~ -Parking light
io -Low beam headlight
The following will happen in these light switch
pos itions when you lock the vehicle:
- iD -Low beam headlight: the entire exterior
lighting is switched off
- AUTO*: the Coming home* function is turned
on
c::> page 45
Fog lights* /rear fog light(s)
Press the correspond ing button c::> fig. 31 :
!0 -Front fog lights* (not pictured) . This button
replaces the button for all-weather lights
'i'liD.
When the fog lights are switched on, the !0 sym
bol in the button illuminates.
0$ -Rear fog light(s) When the rear fog lights are
switched on, the
0$ symbol in the button illumi
nates.
All-weather lights*
apples to vehicles with LED headlights.
Press the corresponding button
<,1gD <=> fig. 31 on
the light switch :
'i'!io -All-weather lights . The symbo l 'i'!io in the
button l ights up when all-weather lights are
switched on .
In veh icles with all-weather lights, the front
lights are adjusted automatically so that yo u are
less likely to see glare from your own headlights,
for example when driving on a wet road .
Headlight range control system
The headlight range adjusts automatically when
there is a change in vehicle load a nd during brak
ing and accelerating so that the headlights do
not cause glare for oncoming traff ic.
Audi adaptive light*
T he adaptive light only wo rks when the light
switch is in the AUTO position . You can deactiva te
adaptive light in the MMI ¢
page 45. ..,.
43
Page 46 of 282

Light and Vision
When switched on, adaptive light adjusts to
curves depending on the vehicle speed and steer·
ing wheel angle . This provides better lighting
through the curve. The system operates in a
speed range from approximately 6 mph (10 km/
h) to 68 mph (110 km/h).
Static cornering light* (vehicles with adaptive
light)· the cornering light switches on automati
cally when the steering wheel is turned at acer
tain ang le at speeds up to approximately 44 mph
(70 km/h) and whe n the turn signal is activated
at speeds up to approximately 25 mph (40 km/
h). The area to the side of the vehicle is illuminat
ed better when tu rning.
Speed depend ent light distribution* -The speed
dependent light distribution adapts the light in
towns and on highways or expressways. In tersec
tions can also be illum inated on veh icles with a
navigat ion system*.
Highway light function*
(Vehicles with adaptive light or LED headlights) -
This function adapts the light ing for highway
driving based on vehicle speed .
..&, WARNING
-Automatic headlights* are only int ended to
assist the driver. They do not relieve the
driver of his responsibility to check the
headlights and to turn them on manually
according to the current light and visibi lity
condit ions. For example, fog cannot be de·
tected by the light sensors . So always switch
on the low beam under these weather con
ditions and when driving in the dark
io.
- Accidents could occur if you can not see the
road ahead of you well and if others on the
road cannot see you . Always switch your
head lightsonsothatyoucanseetheroad
ahead of you and others can see your vehicle
from behind.
- Please observe legal regulations when using
the lighting systems described .
44
(D Note
The rear fog lights shou ld only be turned on in
accordance with traffic regulation, as the lights are bright for following traffic.
@ Tips
-The light sensor for the automatic head
lights * is in the rearview mirror mount.
Therefore, do not place any stickers in this
area on the windshield.
- Some functions of the exterior lighting can
be adjusted
c> page 45.
- If you turn off the ignition whi le the exterior
lights are on and open the door, you will
hear a warning tone.
- In some market-specific versions, the tail
lights do not turn on when switching on the
daytime running lights.
- In cool or damp weather, the inside of the headlights, turn signals and taillights can
fog over due to the temperature difference
between the inside and outside . They will
clear shortly after switching them on. This
does not affect the serv ice life of the light
ing .
- A message will appear in the instrument
cluster if there is a malfunction in the light
sensor
c> page 24.
Emergency flasher
Fig. 32 Ins trumen t panel : em ergenc y flasher bu tton
The emergency flashers makes other dr ivers
aware of your vehicle in dangerous s ituations .
.. Press the~ button to switch the emergency
flashers on or off.
Page 47 of 282

....,
N
0 > co
rl I.O
"'
"'
"'
rl
You can indicate a lane change or a turn when the
emergency flashers are switched on by using the
turn signal lever. The emergency flashers stop
temporari ly.
The emergency flashers also work when the igni
tion is turned off.
@ Tips
Yo u should switch the emergency flashers on
if:
- You are the last car in a traffic jam so that
all other vehicles approaching from behind
can see you, or if
- Your vehicle has broken down or you are
having an emergency, or if
- Your vehicle is being towed or if yo u are
towing another vehicle.
Turn signal and high beam lever
The Lever operates the turn signals, the high
beams and the headlight flasher.
Fig. 33 Turn signal a nd high beam leve r
Turn signals ¢i 9
The turn signals activate when you move the lev
er into a turn s ignal position when the ignition is
switched on.
CD -Turn signal
@ -Turn sig nal
The turn s ignal blinks three times if you tap the
l eve r (convenience tu rn signal) .
High beams and headlight flasher ~D
Move the lever to the correspond ing position :
@-high beams on
Light and Vision
@-high beams off or headlight flasher
Th e
El indicator light in the inst rument cl uste r
turns on.
_& WARNING
High beams can cause glare for other drivers,
which increases the risk of an accident . For
this reason, only use the high beams or the
headlight flasher when they will not create
glare for other drivers.
Adjusting the exterior lighting
The settings are adjusted in the MMI.
.. Select: the I MENU I button > Car> Systems*
cont rol button > Vehicle settings > Exterior
lighting.
Automatic headlights
You can adjust the following sett ings in the Auto
matic headlights
menu:
Activation sensitivity -You can adjust if the
headlights switch on
Early, Medium or Late ac
cording to the sens itiv ity of the light sensor .
Audi adaptive light * -you can switch adaptive
light
On and Off .
Coming home, Leaving home*
The coming home function illuminates the area
outside the vehicle when you turn the ignit ion off
and open the driver's door. To turn the function
on, select
Lights when leaving car > On .
The leaving home illuminates the area outside
the vehicle when you un lock the vehicle. To turn
the function on, select
Lights when unlocking
car > On .
The coming home and leaving home functions
on ly operate when it is dark and the light switch
is in the
AUTO position.
Daytime running lights*
USA models:
the daytime running lights can be
switched on or off using the MMI. Select
On or
Off. ...
45
Page 49 of 282

....,
N
0 > co
rl I.O
"'
"'
"'
rl
Instrument illumination
The brightness of the instrument cluster and the
center console can be adjusted .
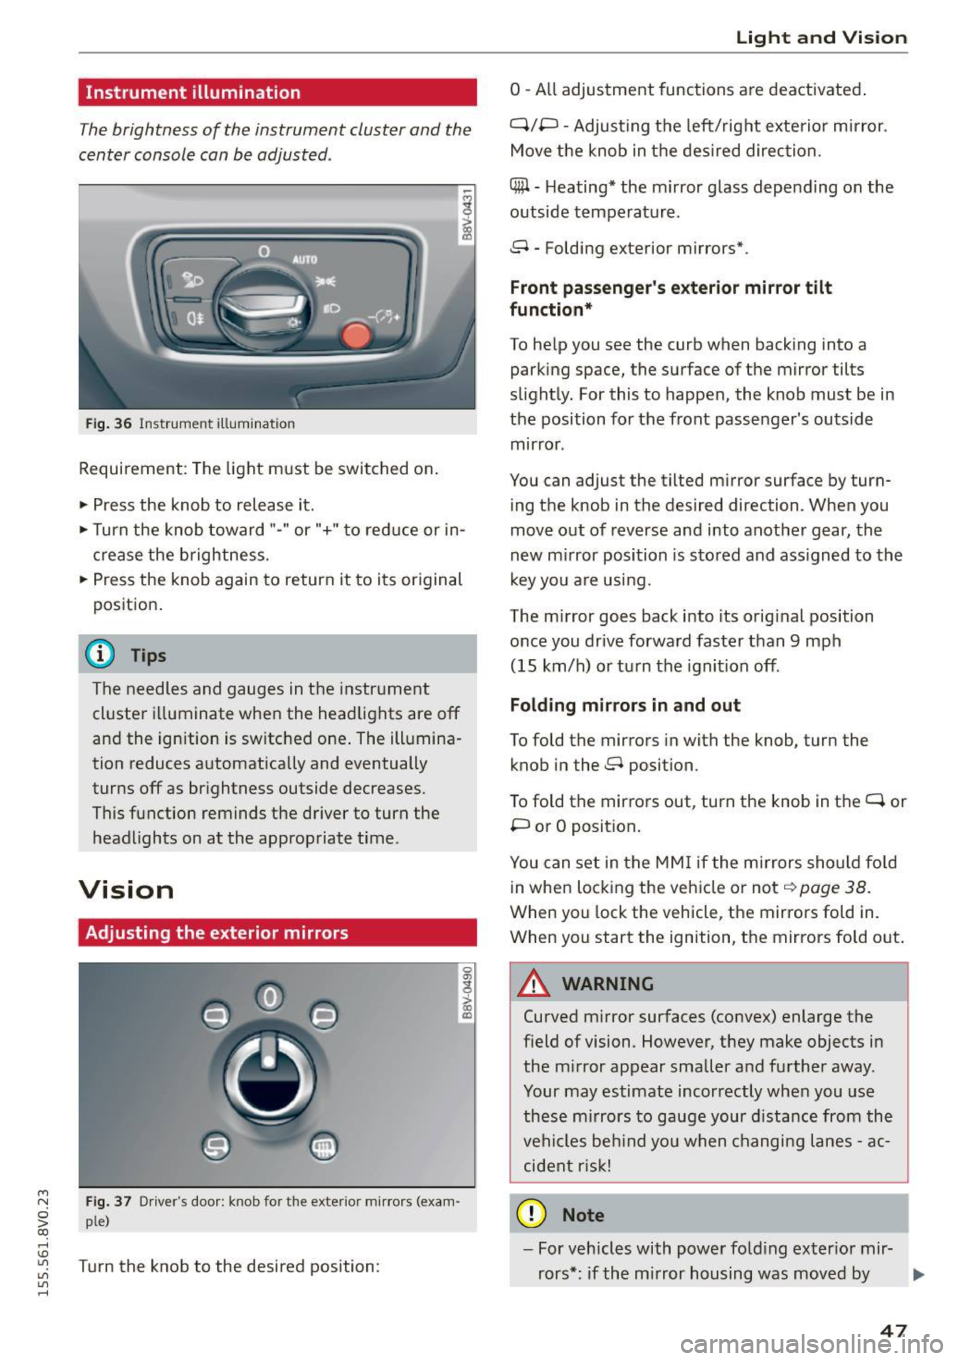
Fig. 36 Instrument illum ination
Requirement: The light must be switched on.
.. Press the knob to release it.
.. Turn the knob toward"-" or"+" to red uce or in
crease the brightness.
.. Press the knob again to return it to its original
posit ion .
@ Tips
The needles and gauges in the instrument
cluster illuminate when the headlights are off
and the ignition is switched one . The illumina·
tion reduces automatically and eventually
turns off as br ightness outside decreases.
This function reminds the driver to turn the
headlights on at the appropriate time .
Vision
Adjusting the exterior mirrors
Fig. 37 Driver's door: knob for the exterior mirrors (exam
ple)
Turn the knob to the desired position:
0
g
> a, (X)
Light and Visio n
0 -A ll adjustment functions are deactivated .
Q/P -Adjusting the left/rig ht exterior mirror.
Move the knob in the des ired direction.
C@ · Heating* the m irror glass depending on the
outside temperature.
8 • Folding exterior mirrors*.
Front pa ss e ng er's ex te rior mirror tilt
functio n*
To help you see the curb when backing into a
parking space, the surface of the mirror tilts
slight ly. For this to happen, the knob must be in
the position for the front passenger's outside
mirror .
You can adjust the tilted mirror surface by turn·
i ng the knob in the desired direction . When you
move out of reverse and into another gear, the
new m irror position is stored and ass igned to the
key yo u are us ing .
The mirror goes back into its orig inal position
once you drive forward faster than 9 mph
(15 km/h) o r turn the ignition off.
Folding m ir rors in and out
To fold the mirrors in with the knob, turn the
knob in the 8 position.
To fold the mirrors out, turn the knob in the
q or
P or O posit ion .
You can set in the MM I if the mirrors sho uld fo ld
in when locking the vehicle or not
q page 38.
When you lock the vehicle, the mirrors fold in.
When you start the ignition, the mirrors fold out.
A WARNING -,.
Curved m irror surfaces (convex) enlarge the
field of vision. However, they make objects in
the m irror appear smaller and further away.
Your may estimate incorrectly when you use
these m irrors to gauge your d istance from the
vehi cles be hind you when changi ng lanes -ac·
cident risk!
@ Note
- For vehicles with power fo ld ing exter ior mir·
rors*: if the mirror housing was moved by
IJI,-
47
Page 50 of 282

Lig ht a nd Vis ion
outside forces (such as an impact when ma
neuvering), you must use the power folding
funct ion to fold the mir ror all the way out.
You will hear a loud noise when the mirrors
are latched back in place. The mirror hous
i ng must not be moved back into place by
hand because th is would impair the func
tion of the mirror mechanism.
-Applies to vehicles without power fold ing
exterior mirrors: if the mirror housing was moved by outside forces (such as in impact
during maneuve ring), you must move the
mirror ho us ing ba ck into p lace by hand.
- If you wash the veh icle in an automatic car
wash, you m ust fold the exterior m irrors in
to reduce the risk of damage to the mirrors .
Never fold power folding exterior mirrors*
by hand. Only fo ld them in and out using
the power controls.
@ Tips
If the power adjustment fails, both mirrors
can be adjusted by hand by pressing on the
edge of the mirror surface.
Dimming the mirrors
Your vehicle is equipped with a manual or auto
matic* dimming rearview mirror .
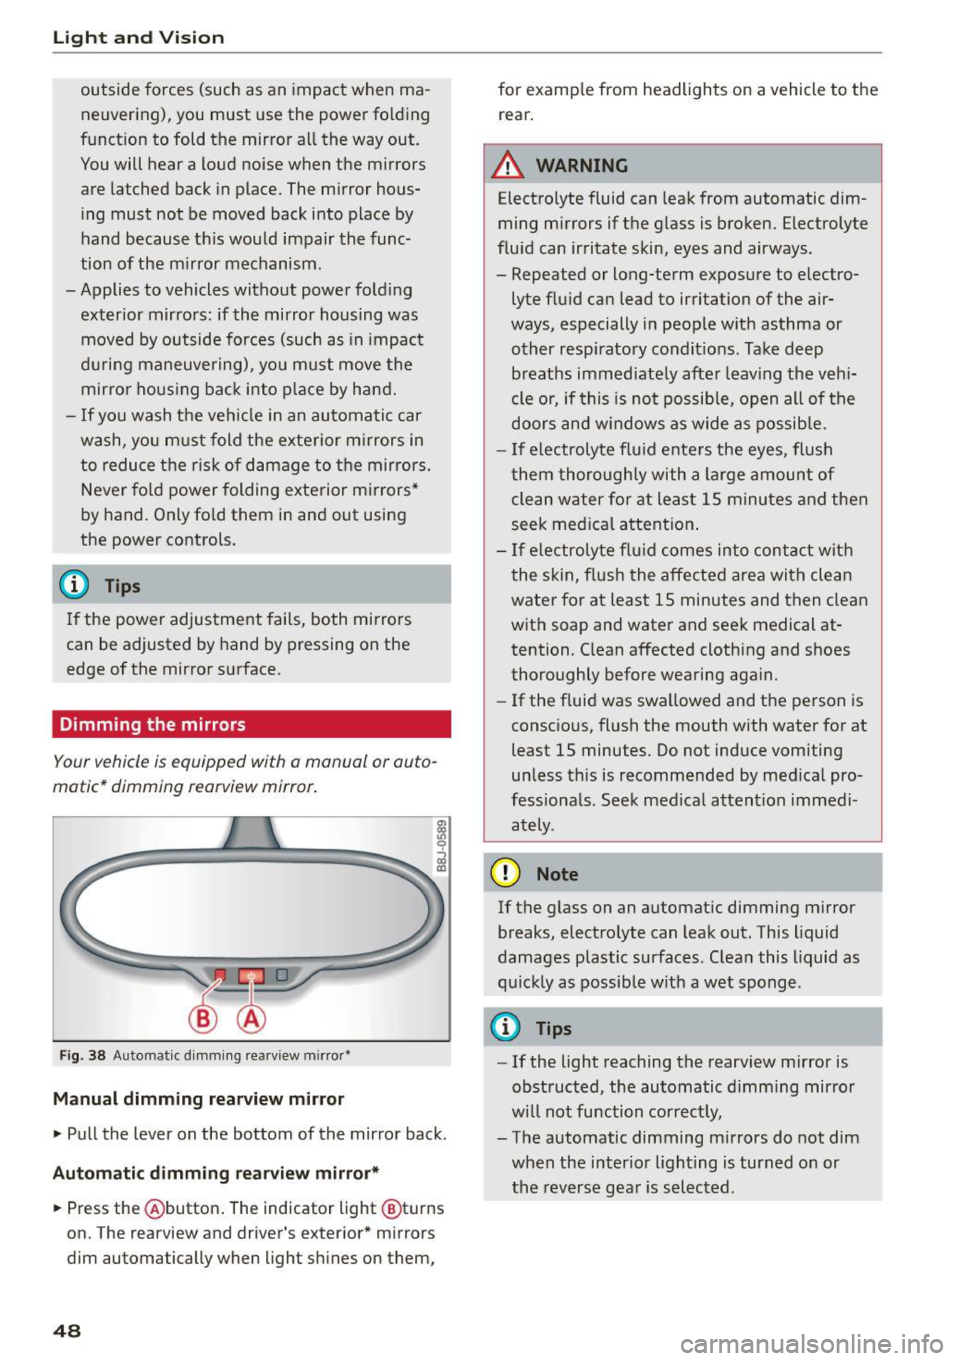
Fig. 38 Automatic d imm ing rearv iew mirro r•
M anual dimming rea rvi ew mirror
• Pull the lever on the bottom of the mirror back.
Autom atic dimm ing r ear view mirr or*
• Press the @button . The indicator light @turns
on. The rearview and driver's exterior * mirrors
dim automatically when light sh ines on them,
48
for examp le from headlights on a vehicle to the
rear.
A WARNING
Electrolyte fluid can leak from automatic dim
ming mirrors if the g lass is broken. Electrolyte
flu id can irritate skin, eyes and airways .
- Repeated or long-term exposure to electro
lyte fluid can lead to irritation of the air
ways, especially in people w ith asthma or
other resp iratory condit ions . Take deep
breaths immed iate ly after leav ing the veh i
cle or, if this is not possib le, open all of the
doors and w indows as wide as possib le.
- If electrolyte flu id ente rs the eyes, flush
them thoroughly with a large amount of
clean water for at least 15 m inutes and then
seek med ica l attention .
- If electroly te f lu id comes into contac t with
the skin, flush the affected area with clean
water for at least 15 minutes and then clean
with soap and water and seek medical at
tention. C lean affected clothing and shoes
thoroughly before wearing aga in.
- If the f luid was swa llowed and the person is
consc io us, fl ush the mouth with water for at
least 15 minutes. Do not induce vomiting
unless th is is recommended by med ica l pro
fessiona ls . Seek med ical attention immedi
ately .
(D Note
If the glass on an automat ic dimming m irror
breaks, electro lyte can leak out. This liquid
damages plastic surfaces. C lean this liquid as
q uick ly as possib le w ith a wet sponge .
{D Tips
- If the light reaching the rearview mirror is
obstructed, the automatic d imm ing mirror
w ill not function correct ly,
- The automatic dimming m irrors do not dim
when the interior lighting is turned on or
the reverse gea r is selected .