2015 AUDI S3 SEDAN fuel
[x] Cancel search: fuelPage 31 of 282
....,
N
0 > co
rl I.O
"'
"'
"'
rl
.. To confirm a selection, press the thum bwheel
@ .
.. To se lect a function programmed to a steer ing
whee l button , press the button @. For addi
tiona l information, see c:>
page 29, Assigning
a function to a programmable steering wheel
button
Opening the Vehicle functions
.. Se lect the f irst tab w ith the button (!) .
.,. Press the button @. The
Veh icle functions
menu is displayed 9 fig. 10.
.. To select a menu item, turn and press the
t hu mbwheel @.
Resetting values to zero
.. In the Vehicle funct ions menu, select On-board
computer or Efficiency program .
.. Se lect a va lue in the desired trip computer or in
t h e efficie ncy prog ram .
.,. To reset t he val ues in a memo ry, press and hold
t h e thu mbw heel @for on e secon d.
Recalling indicator lights and messages
.. Press the button CD repeated ly until the Q tab
appea rs.
The
Q tab is only visibl e when there is a mal
f u nction.
Assigning a function to a programmable
steering wheel button
.. Se lect: the I MENU j button >Car > Systems *
control button > Vehicle settings > Steering
wheel button programming .
The Q tab is only visible when there is at lea st
one ind icat or light or message displayed.
(D Tips
- If the vehicle battery is discon nected , all
memo ry values a re erased.
- In form ation on the e fficiency pr ogra m
c:> pag e 29 .
-There is more inf orm atio n on the m ultifunc
t io n st eering wheel in the MMI* owner 's
manua l.
Driver information system
Boost indicator
Applies to vehicles: with boost pressure indicator
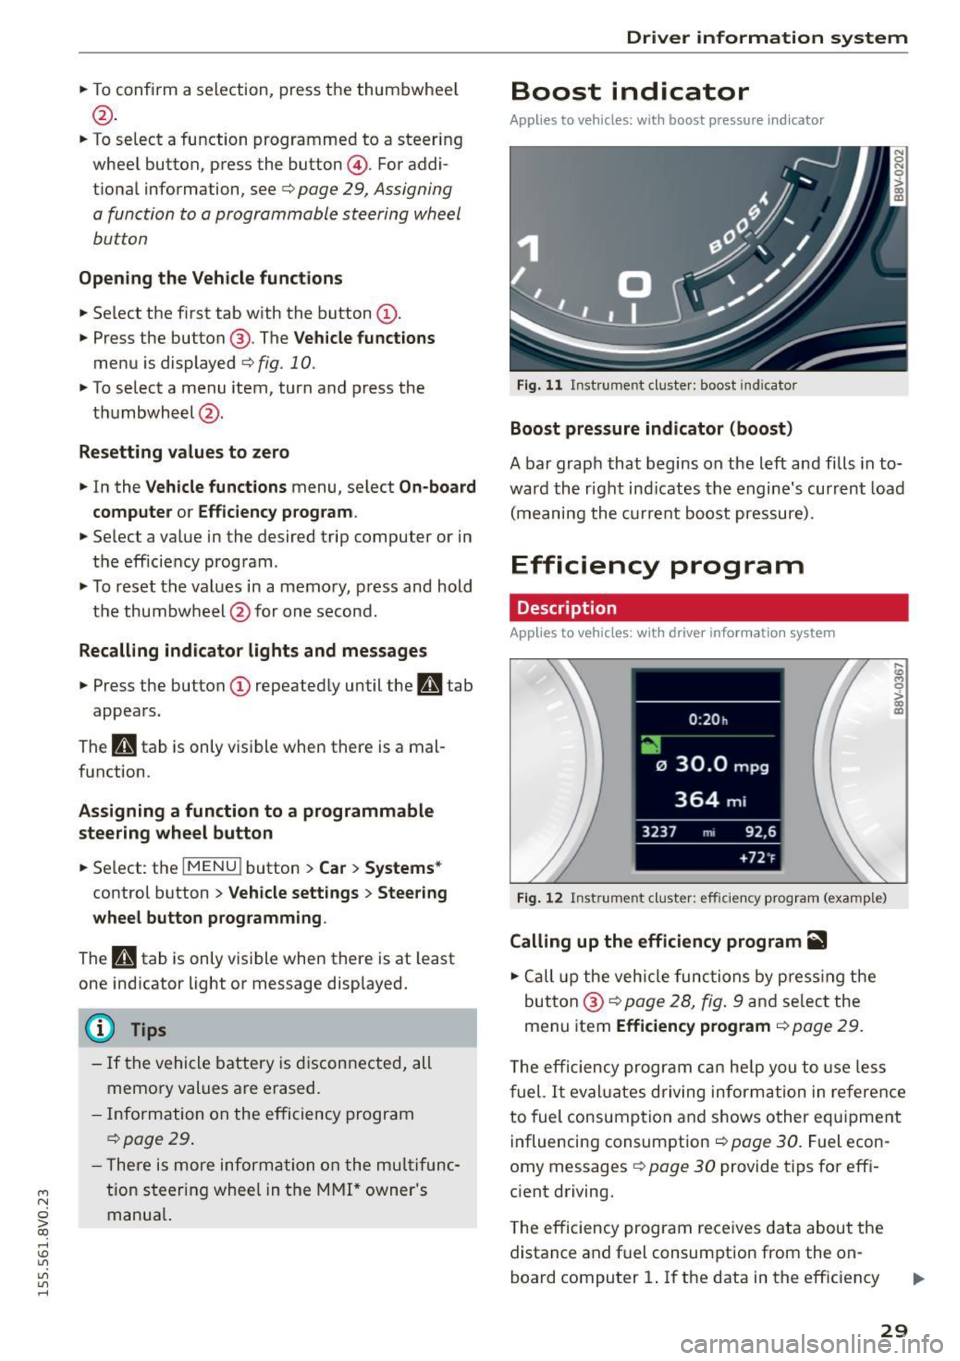
Fig. 11 Instrume nt cl ust e r: boost in dic ato r
Boost pressure indicator (boost)
A bar grap h that begins on the l eft and fills in t o
wa rd the righ t ind icates the engine's cu rrent load
( m eaning the cur rent b oost pressure).
Efficiency program
Description
App lies to vehicles: with driver info rmation system
Fig. 12 Inst rume nt clust er: effici ency p rogram (exa mple)
Calling up the efficiency program ii1
.. Call up the veh icle functio ns by pre ss in g the
but to n @ c:>
page 2 8, fig . 9 and se lec t the
menu item
Efficiency program c:> page 29.
,._
m
T he effi ciency pro gr am can he lp y ou to use le ss
f uel.
It eval uates driving inform ati on in ref ere nce
to fuel consump tion and shows o ther eq uipme nt
i nfluencing consumpt ion c:>
page 30 . Fue l econ
omy messages
c:> page 30 provide t ips for eff i
c ient driving .
T he efficiency program rece ives data abou t the
distance and f uel consumpt ion from the on
board compu ter
1. If the data in t he eff iciency
29
Page 32 of 282
Driver information system
program is deleted ¢page 29, the values in the
on-board computer 1 are also reset.
Other equipment
Applies to vehicles: with driver information system
Fig. 13 Instrument cluster: Other equ ipment (examp le)
"'T urn the menu thumbwheel @ ¢ page 28,
l8 M 0
>
"' a,
fig. 9 until the other equipment affecting con
sumption appears.
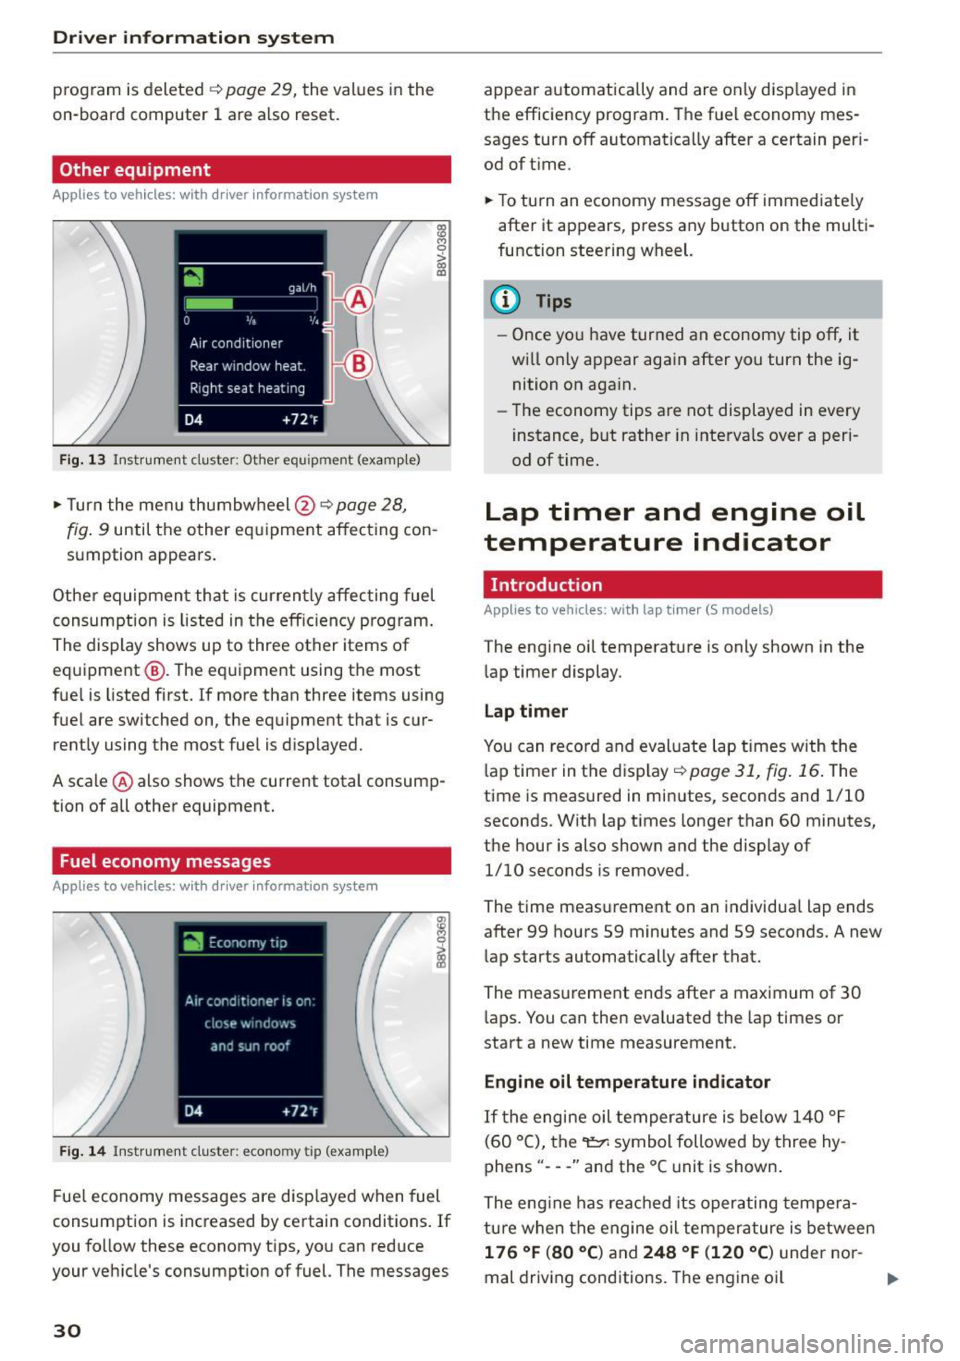
Other equipment that is currently affecting fuel
consumption is listed in the efficiency prog ram.
The display shows up to three other items of
equipment @. The equipment using the most
fue l is listed first. If more than three items using
fuel are switched on, the equ ipment that is cur
rently using the most fuel is displayed.
A scale @ also shows the current total consump
tion of all other equipment.
Fuel economy messages
Applies to vehicles: with driver information system
Fig. 14 Instrument cluster: economy tip (example)
Fuel economy messages are disp layed when fuel
consumption is increased by certain conditions . If
you follow these economy tips, you can reduce
your veh icle's consumption of fuel. The messages
30
appear automatically and are only disp layed in
the efficiency program. The fuel economy mes
sages turn off automatically after a certain per i
od of t ime.
"'T o turn an economy message off immediate ly
after it appears, press any button on the multi
function steering wheel.
(D Tips
- Once you have turned an economy tip off, it
wi ll only appear again after you turn the ig
nition on again.
- The economy tips are not displayed in every
instance, but rather in intervals over a peri
od of time.
Lap timer and engine oil
temperature indicator
Introduction
Applies to veh icles: with lap tim er (S models)
The engine oil temperature is only shown in the
lap timer display.
Lap timer
You can record and evaluate lap times with the
l ap timer in the display¢
poge 31, fig. 16. The
time is measured in minutes, seconds and 1/10
seconds. With lap times longer than 60 minutes,
the hour is also shown and the display of
1/10 seconds is removed.
The time measurement on an individua l lap ends
after 99 hours 59 minutes and 59 seconds. A new
lap starts automatically after that.
The meas urement ends after a maximum of 30
laps. You can then eva luated the lap times or
start a new time measurement.
Engine oil temperature indicator
If the engine oil temperature is below 140 °F
(60 °C), the~ symbol followed by three hy
phens" ---" and the °C unit is shown .
The engine has reached its operating tempera
ture when the engine oil tempera ture is between
176 °F (80 °() and 248 °F (120 °C) under nor-
mal driving conditions. The engine oil
IJI>
Page 37 of 282
....,
N
0 > co
rl I.O
"'
"'
"'
rl
• If you press a button quickly, the LED blinks
once .
• If you press a button longer (convenience open
ing*), the LED blinks several times.
• If the LED does not blink, the remote control
key battery is dead. The message=
Please
ch ange ke y batt ery
can also appear in the in
strument cluster d isplay . Replace the battery .
Replacing the remote cont rol ke y batte ry
"Pry off the cover with a co in c;, fig. 20.
• Insert the new battery w ith the" +" facing up .
• Press the cover back onto the key until it clicks
into place .
We recommend having the battery replaced by
an authorized Audi dealer or authorized Audi
Service Fac ility .
@.) For the sake of the environment
Dead batteries must be disposed of using
methods that will not harm the env ironment.
Do not dispose of them i n household trash .
{!) Tips
The replacement battery must meet the same
specifications as the original battery .
Remote control key synchronization
The remote control key must be synch ron ized if
the vehicle does not lock and unlock with the re
mote cont ro l.
• Press the remote control key button
l@J .
• Insert the key in the dr iver door lock within 30
seconds.
• Press the
[m] button o r Im button.
Opening and clo sing
Unlocking/locking by remote control
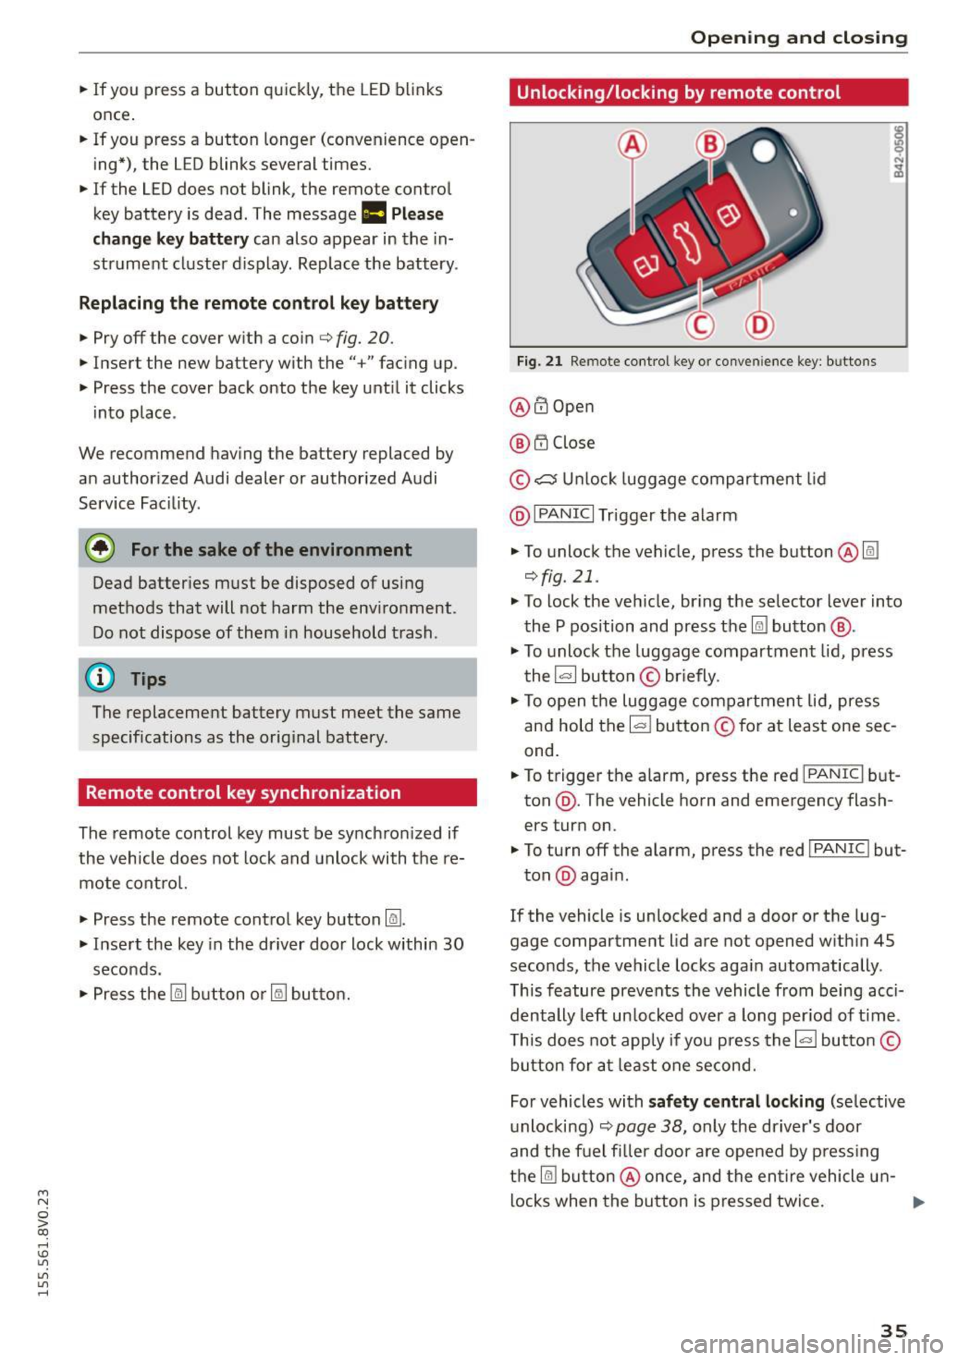
Fig. 2 1 Remote cont rol key o r conven ience key: b uttons
@ @Open
@ t'.D Close
© ,;:::::::, U nlock luggage compartment lid
@ I
PANIC I Trigger the alarm
• To unlock the vehicle, press the button @@:!
¢fig.21 .
• To lock the ve hicle, br ing the selector lever into
the P position and press the
Im button @ .
• To unlock the luggage compartment lid, press
the~ button © briefly .
• To open the luggage compartmen t lid, press
and hold the I= ! button © for at least one sec
ond.
• To trigger the alarm, press the red I
PANIC I but
ton @. The vehicle horn and emergency flash
ers turn on.
• To turn off the alarm, press the red I
PANIC ! but-
ton @again .
If the vehicle is unlocked and a door or the lug
gage compartment lid are not opened w ith in 45
seconds, the vehicle locks aga in automatically .
This feature prevents the vehicle from being acci
dentally left un locked over a long per iod of t ime .
T his does not app ly if you press the~ button©
button for at least one second.
For vehicles with
s af ety ce ntral locking (se lective
u nlocking)
c;, page 38, only the dr iver's door
and the fuel filler door are opened by press ing
the
@I button @once, and the en tire vehicle u n-
locks when the button is pressed twice. ..,.
35
Page 40 of 282

Opening and closing
"'Select: the IMENU ! button> Car> Systems*
control button > Vehicle settings > Central
locking > Door unlocking.
Selecting All and pressing the~ button on the
remote control key unlocks the entire vehicle.
If you select
Driver and then press the~ button
on the remote control key, only the driver's door
will unlock. In vehicles with a convenience key,
only the front door whose handle you pull will
unlock. If you press the~ button twice, the en
tire vehicle will unlock. If you press the~ button,
the entire vehicle will always lock.
Folding* the exterior mirrors
"'Select: the IMENU ! button> Car> Systems*
control button > Vehicle settings > Central
locking > Fold mirrors when locking.
For more
information, refer to
c:> page 47, Adjusting
the exterior mirrors.
If you select On, the outside mirrors will fold in
automatically when you press the~ button on
the remote control key
i:> page 47.
Tone when locking
"'Select : the IMENU ! button> Car> Systems*
control button > Vehicle settings > Central
locking> Tone when locking.
When checked off./, a tone will sound when you
lock the vehicle.
If you press the~ button twice, the entire vehi
cle will lock. There is a locking tone at the same
time
1l .
Electronic immobilizer
The immobilizer prevents unauthorized use of
your vehicle.
A microchip in the key automatically deactivates
the electronic immobilizer when the key is locat
ed in the vehicle.
If you remove the key from the
vehicle, the electronic immobilizer activates
again automatically.
l) Thi s fu nct io n is not availabl e in all cou ntri es .
38
A WARNING ,_ -
Always take the key with you whenever you
leave your vehicle. The electronic immobilizer
can be deactivated with the key, so this could
make it possible for unauthorized persons to
start the engine and operate vehicle systems
such as the power windows or sunroof. This
can increase the risk of serious injury.
(D Tips
-The vehicle cannot be started if an unau
thorized key is used.
It may not be possible
to start the vehicle under certain circum
stances, for example if there is another ra
dio module like the key from another vehicle
or a transponder on the same keychain.
- For an explanation on conformity with the
FCC regulations in the United States and the
Industry Canada regulations, refer to
i:>page 265.
Safety central locking
App lies to vehicles : wi th safe ty cen tral lock ing
Safety central locking provides the possibility, to
only unlock the driver's door and the fuel filler
door. The rest of the vehicle remains locked.
Unlocking the driver's door and the fuel filler
door
"' Press the remote control key or convenience key
Ifill button once or turn the key once in the open
ing direction.
Unlocking all doors, the luggage
compartment lid and the fuel filler door
"' Press the remote control key or convenience key
Ifill button twice within five seconds or turn the
key
twice within five seconds in the opening di
rection.
When unlocking just the driver's door, the anti
theft alarm system* is also immediately deacti
vated.
In vehicles with an MMI, you can directly adjust
the safety central locking
c:> page 3 7.
Page 64 of 282
Seats and storag e
Pass-through
Applies to veh icles: w ith pass-t hro ug h
Fig. 6 1 Back rest : pass -through cover
.,. Fold the rear seat center armrest down.
.,. Fo ld the pass-through cover down ¢
fig. 61 .
A WARNING
0 N
i (D
-
- M ake sure that all objects that you are
transporting in the pass-th rough a re secu re.
T hey co uld slide around during sudden brak
ing mane uvers and cause injuries.
- Sharp edges on objects that are loaded
must be covered for protection.
Roof rack
Description and mounting locations
Additional cargo con be carried with a roof lug
gage rock.
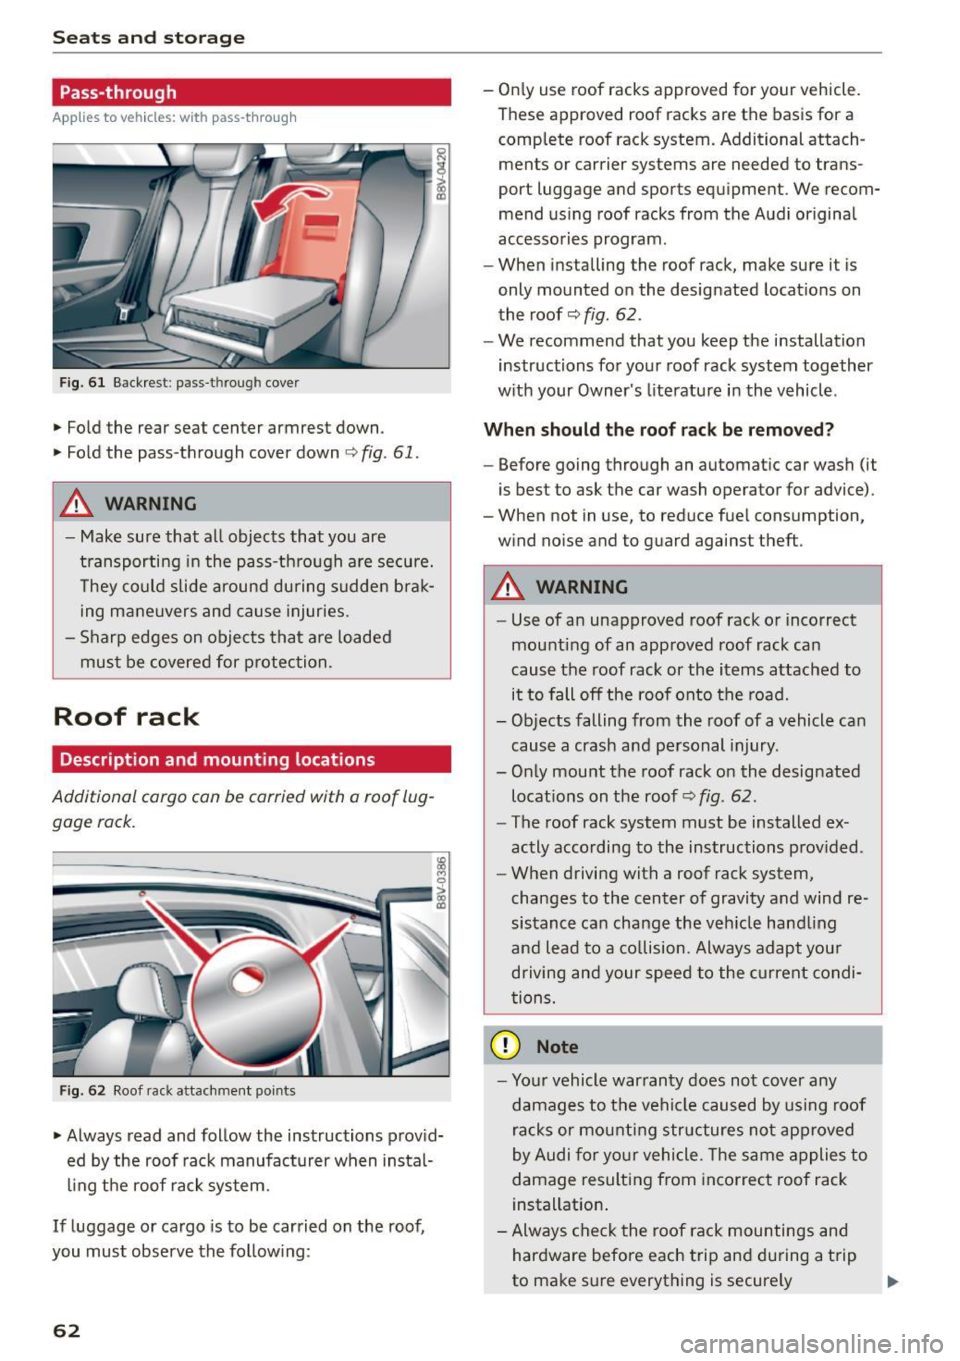
Fig. 62 Roof rack attachment points
.,. Always read and follow the instructions provid
ed by the roof rack manufacturer when instal
ling the roof rack sys tem.
If luggage or cargo is to be carried on the roof,
you must observe the follow ing:
62
- On ly use roof racks approved for your vehicle.
These approved roof racks are the basis for a
complete roof rack system. Additional attach
ments or carrier systems are needed to trans
port luggage and sports equipment. We recom
mend us ing roof racks from the Audi original
accessories program.
- When installing the roof rack, make sure it is
only mounted on the designated locat ions on
the roof¢
fig. 62.
- We recommend that you keep the installation
instructions for yo ur roof rack system together
w ith your Owner's literature in the vehicle .
When should the roof rack be remo ved?
- Before going through an automatic car wash (it
is best to ask the car wash operator for advice).
- When not in use, to reduce fuel consumption,
w ind no ise and to guard against theft .
A WARNING
-Use of an unapproved roof rack o r incorrect
mounting of an approved roof rack can
cause the roof rack or the items attached to
it to fall off the roof onto the road.
- Objects falling from the roof of a vehicle can
cause a crash and personal injury.
- Only mount the roof rack on the designated
locat ions on the roof¢
fig . 62.
- The roof rack system must be installed ex
actly according to the instructions p rov ided.
- When driving with a roof rack system,
changes to the center of gravi ty and wind re
sistance ca n change the veh icle hand ling
and lead to a co llision. Always adapt you r
driving and your speed to the current condi
t ions.
(D Note
- Yo ur vehicle war ranty does not cov er any
damages to t he vehi cle caused by using roof
racks or mounting structures not ap proved
by Audi for yo ur vehicle. The same a pplies to
damage resulting from incorrec t roof rack
installation .
- Always che ck the roof rack mountings and
hardware before each trip and du ring a t rip
to make sure everything is secure ly
Page 65 of 282
M N
0 > co ,...., \!) ..,.,
..,.,
..,., ,....,
tightened. If necessary, retighten the mountings and check the entire system
from t ime to t ime.
- After mounting a roof rack system, or when
you transport objects on the roof of your ve
hicle, the height of the veh icle is naturally
increased. Be careful when driving under
l ow bridges or in parking garages for exam
ple. This could cause damage to the load
and even the vehicle itself.
- Make sure the open rear lid and the sun
roof* do not come into contact with the roof
rac k.
Loading the roof rack
Always distribute loads evenly . Make sure any
thing on the roof rack is securely tied down .
... Always distribute the loads on the roof rack
evenly .
... Always attach items to the roof rack securely
before you d rive off .
The maximum perm iss ible roof weight is
165 lb
( 75 kg ). The roof weight is the total of the
weight of the roof rack, the attachments and the
cargo you a re ca rrying . You must also not exceed
the maximum load weight fo r the roof rack you
a re using.
When using a roof rack system wh ich has a lower
l oad carrying capacity, you must not use up the
tota l maxim um permissible load car ry ing capac i
ty specified above. Inste ad , you shou ld load t he
roof rack system only to the maximum capacity
specified by the manufact urer of the roof rack
system .
A WARNING
Weak, damaged or improper straps used to
secure items to the roof rack can fa il during
hard brak ing or in a collision and cause seri
ous personal injury.
- Make sure the roof rack is insta lled exactly
as spec ified above
¢ page 62.
- Always use suitable mounting straps for se
curing items to the roof rack to help prevent
items from shift ing or f ly ing fo rward.
-
S eat s and stor age
- Items on the roof rac k must always be se
curely mounted.
- The use of a roof rack can negatively affect
the way a vehicle handles. Cargo that is
large, heavy, bulky, long or flat will have a
greater negative inf luence on the vehicle's
ae rodynamics, center of gravity and overall
h a ndling. Always drive slowly, avoid sudden
b rak ing and maneuvers when transpor ting
cargo on the roof of your veh icle.
- Never exceed the maxim um permissible
load carrying capacity of the roof of your ve
h icle, the permiss ible axle weights and the
perm issib le tota l we igh t of your vehicle
¢ page 258, Weights .
@ For the sake of the environment
As a result of the increased wind resistance
created by a roof ra ck , your vehicle is using
fuel unnecessarily. So remove the roof rac k af
ter using it.
63
Page 66 of 282
Warm and cold
Warm and cold Climate control system
Description
Different systems could be installed.
- manual climate control system* or
- automatic climate control system*
The
climate control system* cools and removes
humidity from the air in the vehic le interior. It is
the most effective when the windows and panor
ama sunroof* are closed.
If there is a build-up of
heat inside the vehicle, ventilation can help to
speed up the cooling process . For this reason, the
windows and panorama sunroof can be opened
from the outside .~
page 41, Convenience open
ing/closing
Pollutant filter
The pollutan t filter removes pollutants such as
dust and pollen from the air.
Key recognition
You can store various settings for the manua l and
automatic
climate control system* and assign
them to the key being used .
A WARNING
Poor visibility can lead to acc idents.
- For safer driving, keep all w indows free of
ice, snow and fog.
- Become familiar as quickly as possible with
the correct use and function of the climate
control system, espec ially with the defrost
ing and defogging function .
- When the temperature is below freezing,
only use the windsh ield washer system after
the windsh ield has been warmed by the cli -
64
mate control system. The washer f luid could
freeze on the w indshield and impair visibili
ty.
(D Note
- If you suspect that the climate control sys
tem is damaged, switch the system off to
prevent further damage and have it checked
by an authorized Audi dealer or authorized
Audi Service Facility .
- Repairs to the Audi climate control system
require special technical knowledge and
special tools. See an author ized Audi dealer
or authorized Audi Service Facility .
@ For the sake of the environment
Reducing the amount of fuel used also re
duces the amount of pollutants that enter the
a ir .
@ Tips
- To prevent interference with the heating
and cooling output and to prevent the win
dows from fogg ing over, the air intake in
front of the w indshield must be free of ice,
snow or leaves.
- Condensation from the cooling system* can
dr ip and form a pudd le of water under the
vehicle . This is normal and does not mean
there is a leak .
- Th e energy management system may switch
the seat heating* or rear window defroster
off temporarily. These systems are available
again as soon as the energy balance has
been restored.
- The f lows through the vents under the rear
window. Make sure the openings are not
covered when p lacing clothing on the lug
gage compartment cover.
Page 68 of 282
Warm and col d
vehicle interior . We recommend switching recir
culation mode on when driving through a tunne l
or when s itting in traffic¢.&. .
Recircula tion mode is sw itched off in the defrost
setting ~.
Automatic climate control system controls
Applies to vehicles: with automatic air conditioner
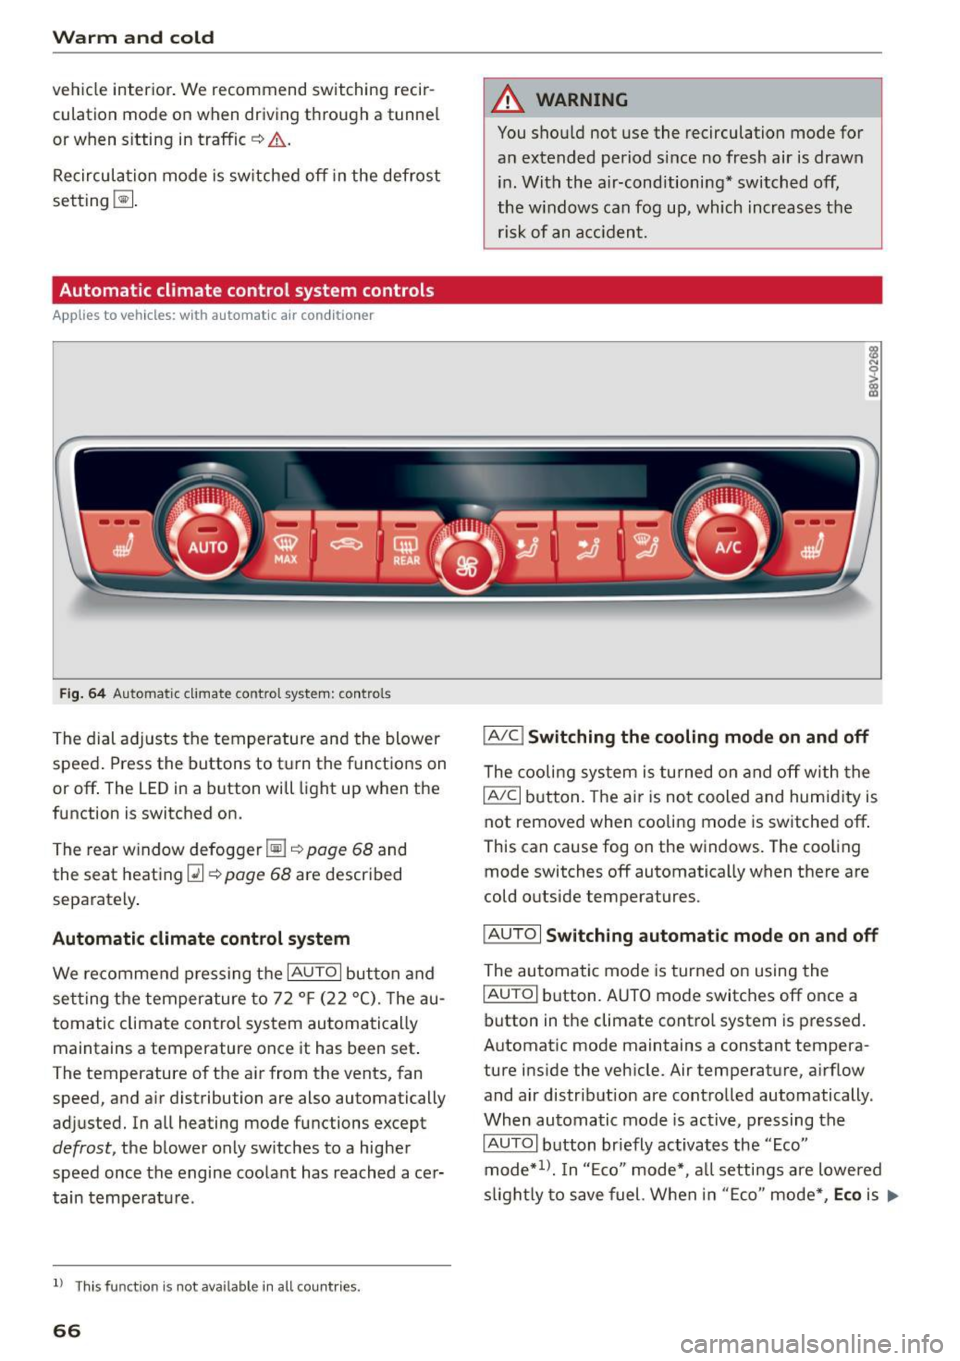
Fig. 6 4 Automa tic climat e co ntro l system : contro ls
The dial ad justs the temperature and the blower
speed . Press the buttons to turn the functions on
or off . The LED in a button will light up when the
function is switched on.
T he rear w indow defogger ~¢
page 68 and
the seat heat ing
Q] ¢ page 68 are described
separately .
Automatic climate cont rol system
We recommend p ress ing t he IAU TOI button and
se tting the temperature to 72
°F (22 °(). T he au
tomatic climate control system au tomatically
maintains a temperature once it has been set .
The temperature of the ai r from the vents, fan
speed, and a ir distribution are also automatically
adjusted. In all heating mode functions except
defrost, the b lower only sw itches to a higher
speed once the engine coo lant has reached ace r
tain tempe rat ure.
ll Thi s fun ctio n is not ava ilable in a ll countries.
66
A WARNING
You shou ld not use the recirculation mode for
an extended period s ince no fresh air is drawn
i n . With the air-conditioning* switched off,
the w indows can fog up, which increases the
risk of an a cciden t.
IA/C l Switching the cooling mode on and off
The cooli ng sys tem is turned on a nd off with the
IAJC I button. The ai r is no t cooled and humid ity is
not removed when cooling mode is switched off .
This can cause fog on the windows. The coo ling
mode switches off automatically when there are
cold o utside temperatures.
IAU TO I Switching automatic mode on and off
The au tomatic mode is turned on using the
IAU TO I button. A UTO mode switches off once a
button in the climate contro l system is pressed.
Automat ic mode maintains a constant tempera
ture i nside the vehicle. Air temperature, a irflow
and air distribut ion are contro lled automatically.
When automatic mode is active, pressing the
IAUTOI b utton briefly activates the "Eco"
mode*
1> . I n "E co" mode*, a ll setti ngs are lowered
s ligh tly to save fuel. Whe n in "E co" mode *,
Eco is .,..