2015.5 Peugeot Boxer reverse
[x] Cancel search: reversePage 38 of 276
36
to change gear easily, always depress the
clutch pedal fully.
to prevent the mat from becoming caught
under the pedal:
-
ensure that the mat is positioned
correctly
,
-
never fit one mat on top of another.
A
void leaving your hand on the gear knob as
the force exerted, even if slight, may wear
the internal components of the gearbox over
time.
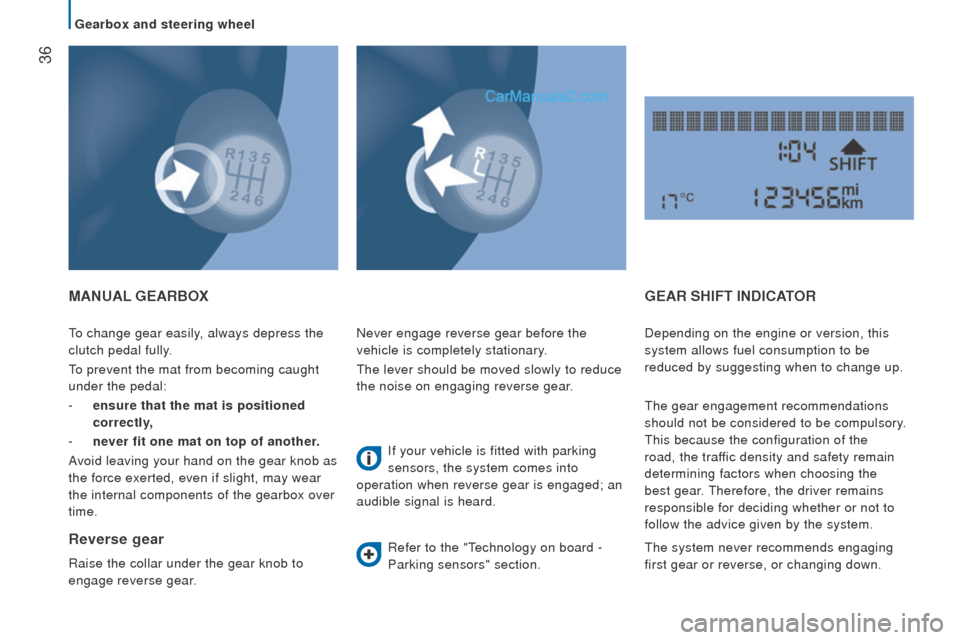
MAnuAL GEArBox
reverse gear
Raise the collar under the gear knob to
engage reverse gear. Never engage reverse gear before the
vehicle is completely stationary.
the lever should be moved slowly to reduce
the noise on engaging reverse gear.
If your vehicle is fitted with parking
sensors, the system comes into
operation when reverse gear is engaged; an
audible signal is heard.
Refer to the "technology on board -
Parking sensors" section.
GEAr SHIFt IndIcAtor
Depending on the engine or version, this
system allows fuel consumption to be
reduced by suggesting when to change up.
the gear engagement recommendations
should not be considered to be compulsory.
this because the configuration of the
road, the traffic density and safety remain
determining factors when choosing the
best gear.
therefore, the driver remains
responsible for deciding whether or not to
follow the advice given by the system.
the system never recommends engaging
first gear or reverse, or changing down.
Gearbox and steering wheel
Page 41 of 276
39
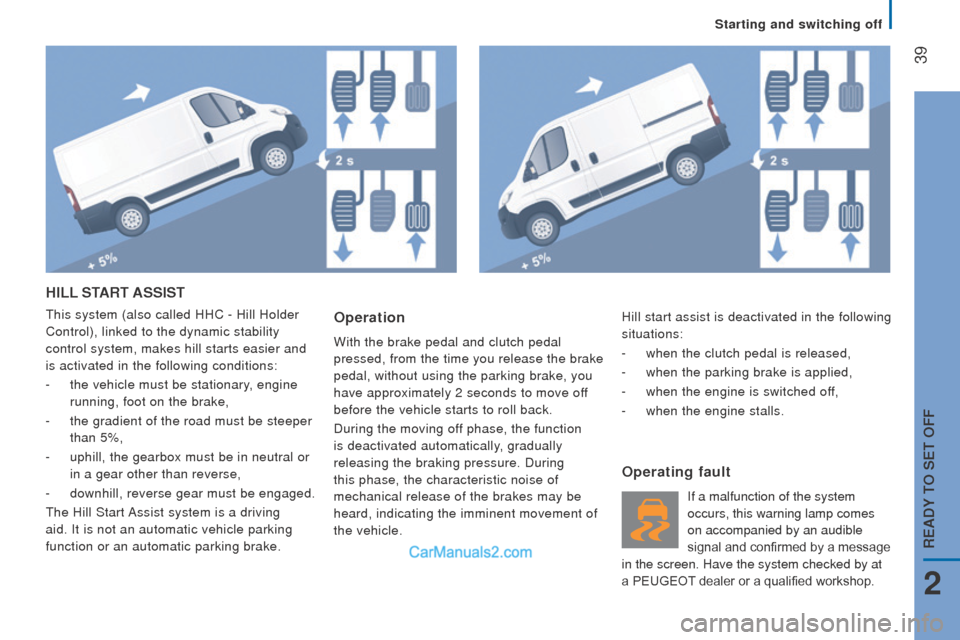
HILL StArt ASSISt
this system (also called HHC - Hill Holder
Control), linked to the dynamic stability
control system, makes hill starts easier and
is activated in the following conditions:
-
the vehicle must be stationary, engine
running, foot on the brake,
-
the gradient of the road must be steeper
than 5%,
-
uphill, the gearbox must be in neutral or
in a gear other than reverse,
-
downhill, reverse gear must be engaged.
the Hill Start
Assist system is a driving
aid. It is not an automatic vehicle parking
function or an automatic parking brake.operation
With the brake pedal and clutch pedal
pressed, from the time you release the brake
pedal, without using the parking brake, you
have approximately 2 seconds to move off
before the vehicle starts to roll back.
During the moving off phase, the function
is deactivated automatically, gradually
releasing the braking pressure. During
this phase, the characteristic noise of
mechanical release of the brakes may be
heard, indicating the imminent movement of
the vehicle.
operating fault
If a malfunction of the system
occurs, this warning lamp comes
on accompanied by an audible
signal and confirmed by a message
in the screen. Have the system checked by at
a PEUGEOT dealer or a qualified workshop. Hill start assist is deactivated in the following
situations:
-
when the clutch pedal is released,
-
when the parking brake is applied,
-
when the engine is switched off,
-
when the engine stalls.
2
rEAdY to SEt oFF
Starting and switching off
Page 42 of 276
40the Stop & Start system puts the engine
temporarily into standby - S
tOP mode -
during stops in the traffic (red lights, traffic
jams, or other...).
the engine restarts
automatically - S
tARt mode - as soon as
you want to move of
f.
the restart takes
place instantly, quickly and silently.
Perfect for urban use, the Stop & Start
system reduces fuel consumption and
exhaust emissions and offers the comfort of
complete silence when stationary.
StoP & StArt
operation
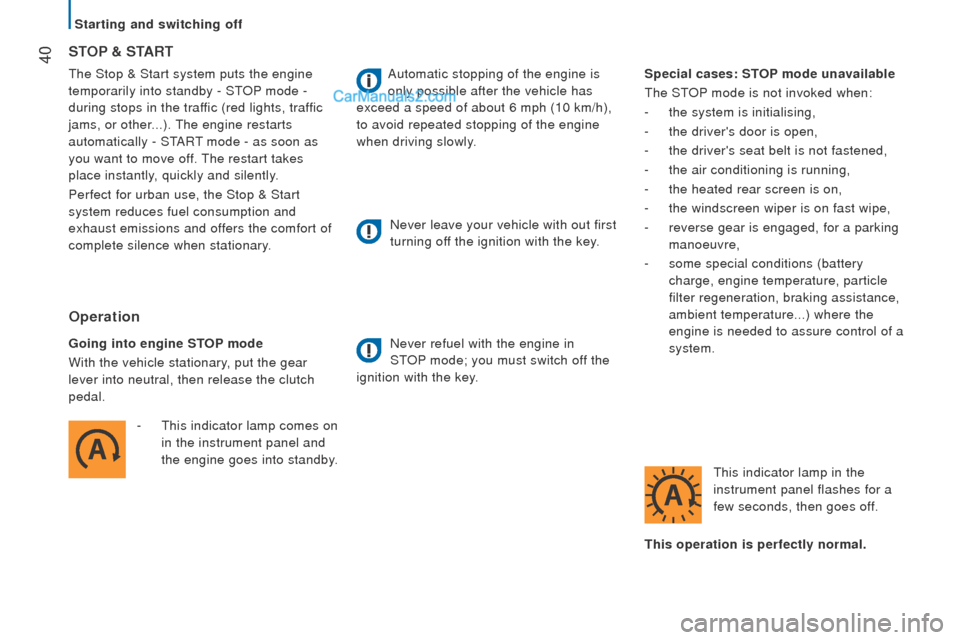
Going into engine StoP mode
With the vehicle stationary, put the gear
lever into neutral, then release the clutch
pedal.
-
t
his indicator lamp comes on
in the instrument panel and
the engine goes into standby. Automatic stopping of the engine is
only possible after the vehicle has
exceed a speed of about 6 mph (10 km/h),
to avoid repeated stopping of the engine
when driving slowly.
Never leave your vehicle with out first
turning off the ignition with the key.
Never refuel with the engine in
S
tOP mode; you must switch of
f the
ignition with the key. Special cases: S
t
o
P
mode unavailable
the StOP mode is not invoked when:
-
the system is initialising,
-
the driver's door is open,
-
the driver's seat belt is not fastened,
-
the air conditioning is running,
-
the heated rear screen is on,
-
the windscreen wiper is on fast wipe,
-
reverse gear is engaged, for a parking
manoeuvre,
-
some special conditions (battery
charge, engine temperature, particle
filter regeneration, braking assistance,
ambient temperature...) where the
engine is needed to assure control of a
system.
this indicator lamp in the
instrument panel flashes for a
few seconds, then goes off.
this operation is perfectly normal.
Starting and switching off
Page 88 of 276
86
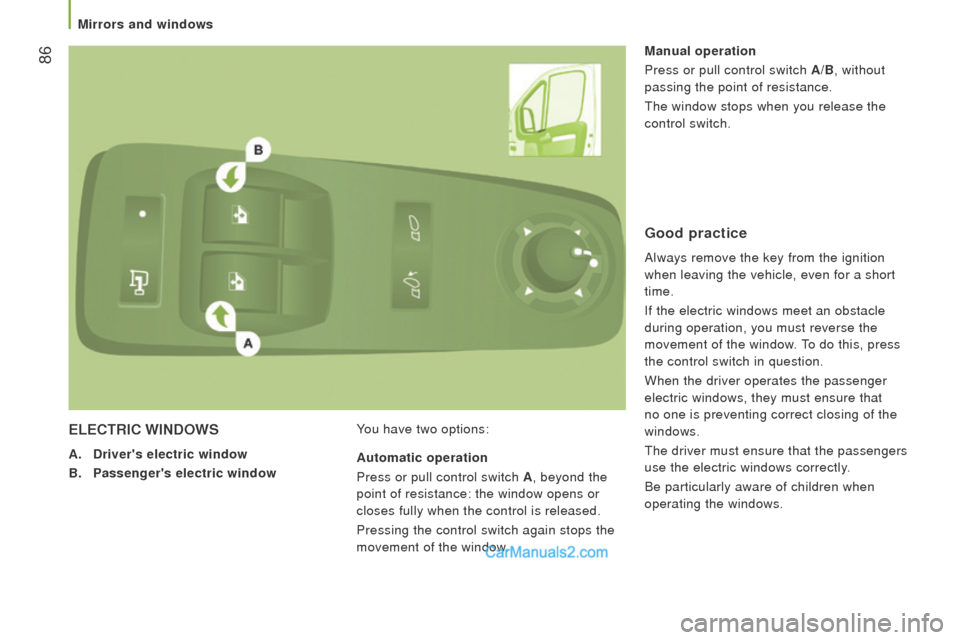
ELEctrIc WIndoWS
A. driver's electric window
B.
Passenger's electric window You have two options: Manual operation
Press or pull control switch
A/B, without
passing the point of resistance.
the window stops when you release the
control switch.
Automatic operation
Press or pull control switch A , beyond the
point of resistance: the window opens or
closes fully when the control is released.
Pressing the control switch again stops the
movement of the window.
Good practice
Always remove the key from the ignition
when leaving the vehicle, even for a short
time.
If the electric windows meet an obstacle
during operation, you must reverse the
movement of the window.
to do this, press
the control switch in question.
When the driver operates the passenger
electric windows, they must ensure that
no one is preventing correct closing of the
windows.
the driver must ensure that the passengers
use the electric windows correctly.
Be particularly aware of children when
operating the windows.
Mirrors and windows
Page 96 of 276
94
AudIBLE rEAr PArKInG SEnSorS
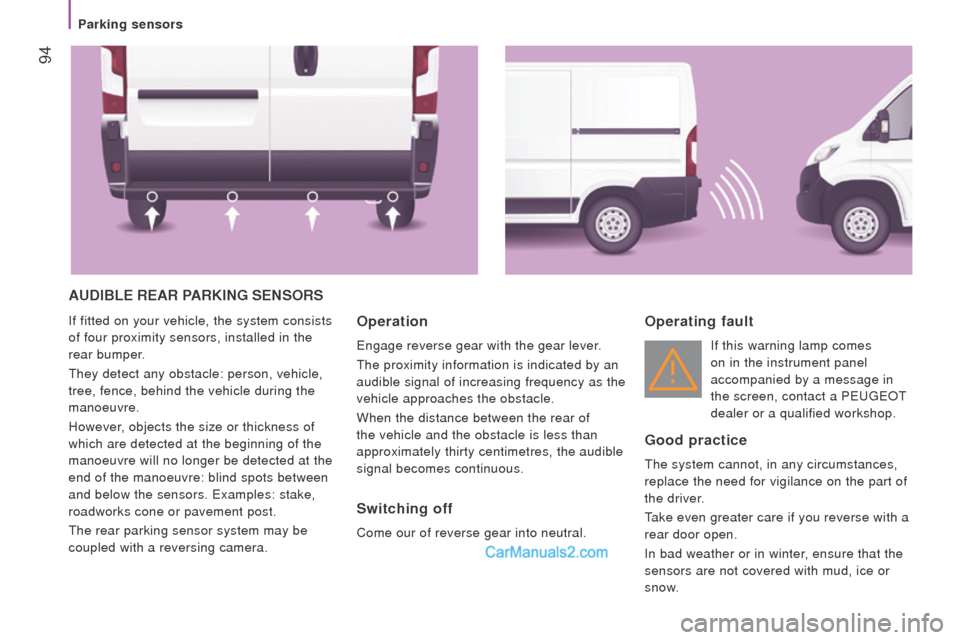
If fitted on your vehicle, the system consists
of four proximity sensors, installed in the
rear bumper.
they detect any obstacle: person, vehicle,
tree, fence, behind the vehicle during the
manoeuvre.
However, objects the size or thickness of
which are detected at the beginning of the
manoeuvre will no longer be detected at the
end of the manoeuvre: blind spots between
and below the sensors.
examples: stake,
roadworks cone or pavement post.
the rear parking sensor system may be
coupled with a reversing camera.operation
engage reverse gear with the gear lever.
the proximity information is indicated by an
audible signal of increasing frequency as the
vehicle approaches the obstacle.
When the distance between the rear of
the vehicle and the obstacle is less than
approximately thirty centimetres, the audible
signal becomes continuous.
Switching off
Come our of reverse gear into neutral.
operating fault
If this warning lamp comes
on in the instrument panel
accompanied by a message in
the screen, contact a P
eugeOt
dealer or a qualified workshop.
Good practice
the system cannot, in any circumstances,
replace the need for vigilance on the part of
the driver
.
take even greater care if you reverse with a
rear door open.
In bad weather or in winter
, ensure that the
sensors are not covered with mud, ice or
snow.
Parking sensors
Page 97 of 276
95
rEVErSInG cAMErA
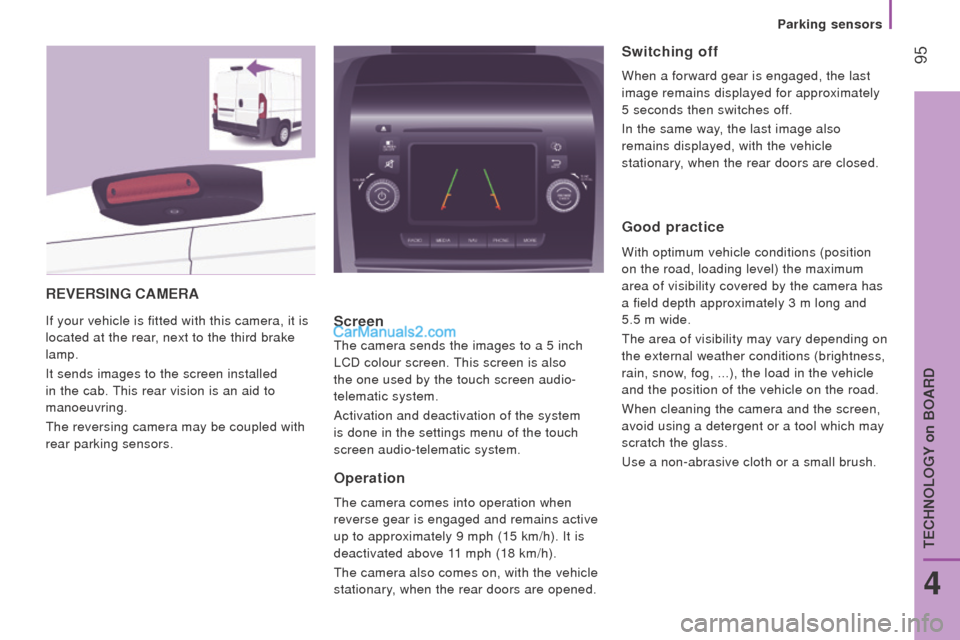
If your vehicle is fitted with this camera, it is
located at the rear, next to the third brake
lamp.
It sends images to the screen installed
in the cab.
this rear vision is an aid to
manoeuvring.
the reversing camera may be coupled with
rear parking sensors.Screen
the camera sends the images to a 5 inch
LCD colour screen.
this screen is also
the one used by the touch screen audio-
telematic system.
Activation and deactivation of the system
is done in the settings menu of the touch
screen audio-telematic system.
operation
the camera comes into operation when
reverse gear is engaged and remains active
up to approximately 9 mph (15 km/h). It is
deactivated above 11 mph (18 km/h).
the camera also comes on, with the vehicle
stationary, when the rear doors are opened.
Switching off
When a forward gear is engaged, the last
image remains displayed for approximately
5
seconds then switches of
f.
In the same way, the last image also
remains displayed, with the vehicle
stationary, when the rear doors are closed.
Good practice
With optimum vehicle conditions (position
on the road, loading level) the maximum
area of visibility covered by the camera has
a field depth approximately 3 m long and
5.5
m wide.
the area of visibility may vary depending on
the external weather conditions (brightness,
rain, snow, fog,
...), the load in the vehicle
and the position of the vehicle on the road.
When cleaning the camera and the screen,
avoid using a detergent or a tool which may
scratch the glass.
use a non-abrasive cloth or a small brush.
4
teCHNOLOgY on BOARD
Parking sensors
Page 99 of 276
97
deactivation
Make a long press on both controls
simultaneously to deactivate the system.
the LeDs remain on.
return to the nominal floor height
Press the same number of times in reverse
as the level of the position displayed.
reactivation
A
second long press on both controls
simultaneously reactivates the system.
the LeDs go of
f.
Automatic correction of loading
floor height
Above 12 mph (20 km/h), the system
automatically returns the rear height to its
nominal value.
operating fault
If a fault occurs with the system,
this warning lamp comes on.
Good practice
Driving with the suspension set too high or
too low risks damaging components under
the body.
the height may be adjusted automatically to
take account of changes of temperature or
loading.
You must avoid using this control in the
following circumstances:
-
when working underneath the vehicle,
-
when changing a wheel,
-
when the vehicle is being transported by
lorry
, train, ferry, boat,
...
to avoid damaging the vehicle or injuring
anyone, check that there is nothing or no
person that might be close to or come into
contact with the vehicle, before raising or
lowering the suspension.
Above 3 mph (5 km/h), the system
reactivates automatically.
Have the system checked by a
P
eugeOt
dealer or a qualified workshop.
4
teCHNOLOgY on BOARD
Loading assistance
Page 151 of 276
149When using a high pressure washer
on stubborn dirt, do not persist on
the headlamps, the lamps and their edges
to avoid damaging their lacquer finish and
seals.
cHAnGInG A BuLB
t
ypes of bulb
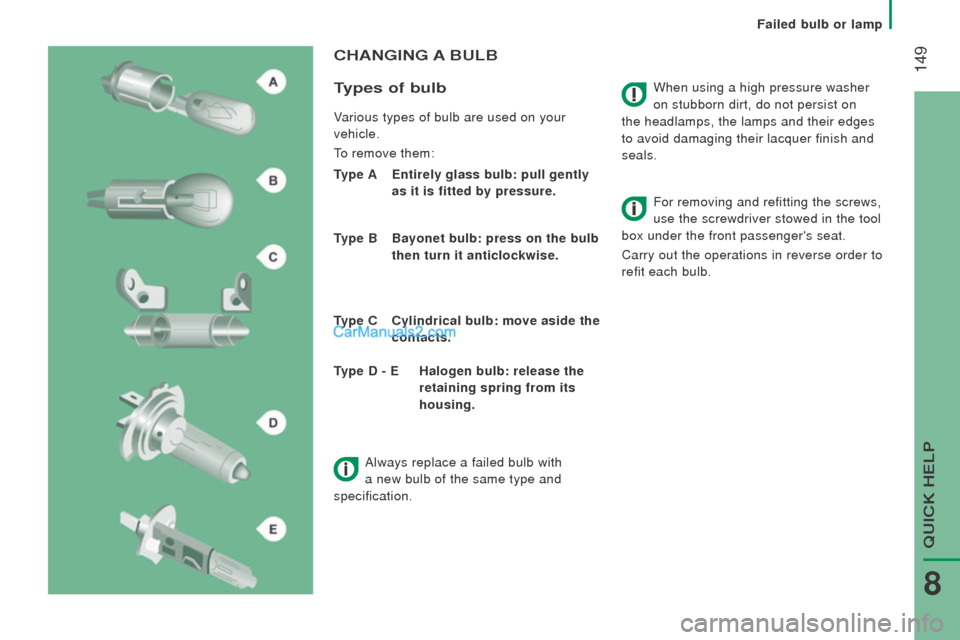
Various types of bulb are used on your
vehicle.
to remove them:
type A Entirely glass bulb: pull gently
as it is fitted by pressure.
type B
Bayonet bulb: press on the bulb
then turn it anticlockwise.
type c
c
ylindrical bulb: move aside the
contacts. For removing and refitting the screws,
use the screwdriver stowed in the tool
box under the front passenger's seat.
Carry out the operations in reverse order to
refit each bulb.
type d - E
Halogen bulb: release the
retaining spring from its
housing.
Always replace a failed bulb with
a new bulb of the same type and
specification.
QuICK HeLP
8
Failed bulb or lamp