Page 181 of 396
179
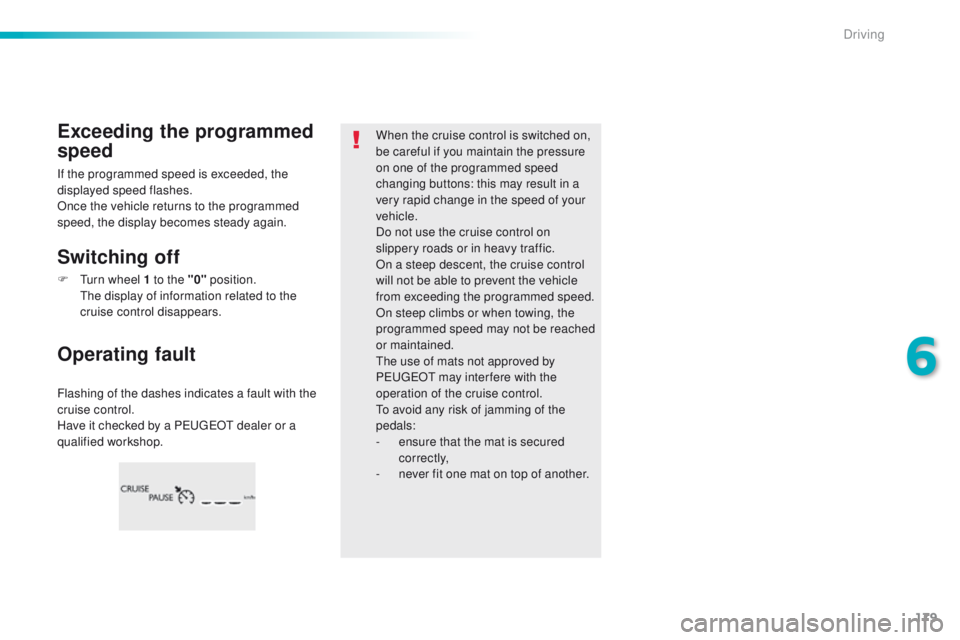
Flashing of the dashes indicates a fault with the
cruise control.
Have it checked by a P
e
uge
Ot
dealer or a
qualified workshop.
Operating fault Exceeding the programmed
speed
Switching off
When the cruise control is switched on,
be careful if you maintain the pressure
on one of the programmed speed
changing buttons: this may result in a
very rapid change in the speed of your
vehicle.
Do not use the cruise control on
slippery roads or in heavy traffic.
On a steep descent, the cruise control
will not be able to prevent the vehicle
from exceeding the programmed speed.
On steep climbs or when towing, the
programmed speed may not be reached
or maintained.
th
e use of mats not approved by
P
e
uge
Ot
may inter fere with the
operation of the cruise control.
to a
void any risk of jamming of the
pedals:
-
e
nsure that the mat is secured
c o r r e c t l y,
-
n
ever fit one mat on top of another.
If the programmed speed is exceeded, the
displayed speed flashes.
Once the vehicle returns to the programmed
speed, the display becomes steady again.
F
t
u
rn wheel 1 to the "0" position.
t
h
e display of information related to the
cruise control disappears.
6
Driving
Page 188 of 396
186
In the event of a fault with the active cruise
control, you are alerted by an audible signal
and display of the message message "Driving
aid functions fault".
Have the system checked by a P
e
uge
Ot
dealer or a qualified workshop. When the cruise control is working, take
care if making a maintained press on
one of the cruise control programmed
speed modification buttons: this can
lead to a very quick change in the
speed of your vehicle.
Do not use the active cruise control on
slippery sur faces or in heavy traffic.
When descending a steep hill, the
cruise control may not be able to
prevent the vehicle from exceeding the
programmed speed.
When ascending a steep hill or when
towing, it might not be possible to attain
or maintain the programmed speed.
Operating fault
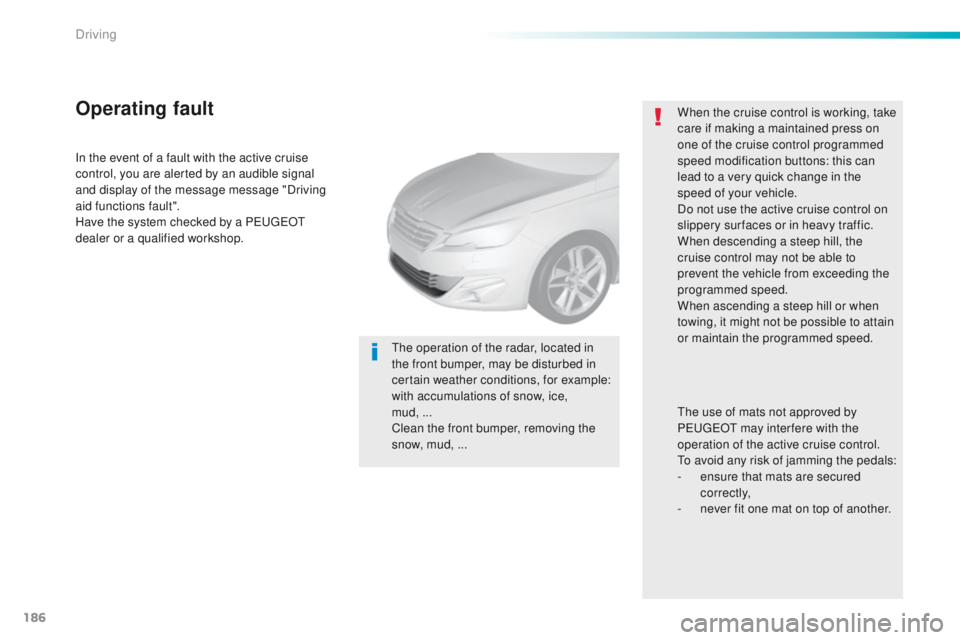
the operation of the radar, located in
the front bumper, may be disturbed in
certain weather conditions, for example:
with accumulations of snow, ice,
mud,
...
Clean the front bumper, removing the
snow, mud, ...
th
e use of mats not approved by
P
e
uge
Ot
may inter fere with the
operation of the active cruise control.
to a
void any risk of jamming the pedals:
-
e
nsure that mats are secured
c o r r e c t l y,
-
n
ever fit one mat on top of another.
Driving
Page 222 of 396
220
"Multimedia"
Multimedia support, hands-free kit, DVD player,
driving aids, vehicle tracking system, ...
Accessories
A wide range of accessories and genuine parts is available from the Pe ugeOt dealer network.th
ese accessories and parts are all suitable for your vehicle and benefit from Pe ugeOt' s recommendation and warranty.
"Transport solutions"
Boot liners, roof bars, bicycle carrier on roof
bars, ski carrier, roof box, towbar harness, ...
to
w bar, which mst be fitted by P
e
uge
Ot
dealer or a qualified workshop.
Conversion kits
You can obtain an "en terprise" kit to convert a
trade vehicle to a private car and vice-versa.
"Styling"
alloy wheels from 15 inch to 18 inch, finishers
for wheels, door sills, gear lever knobs, ...
"Ligne S": 16 and 17 inch alloy wheels, body
kit, stickers, interior and exterior mirror shells,
gear lever knob, door sills, mats*, …
"Comfort"
Door deflectors, side blinds and rear blind,
cigarette lighter, boot dividers, coat hanger
fixed to head restraint, front centre armrest,
under shelf storage, front and rear parking
sensors, styling mudflaps, window film, boot
management system,
...
*
t
o a
void any risk of jamming of the pedals:
-
e
nsure that the mat is positioned and
secured correctly,
-
n
ever fit one mat on top of another.
"Security and safety"
Anti-theft alarm, window engraving, wheel
security bolts, child seats and booster
cushions, breathalyzer, first aid kit, warning
triangle, high visibility jacket, stolen vehicle
tracking system, temporary puncture repair kit,
snow chains, non-slip covers, front foglamps
kit, dog guard, ...
"Protection"
Mats*, seat covers compatible with lateral
airbags, mud flaps, side protection rubbing
strips, bumper protection rubbing strips,
bumper protectors, boot sill finishers, boot
mat,
...
Practical information
Page 225 of 396
223
Fitting roof bars
Do not exceed the maximum authorised
load, shown in the instructions for the
roof bars.
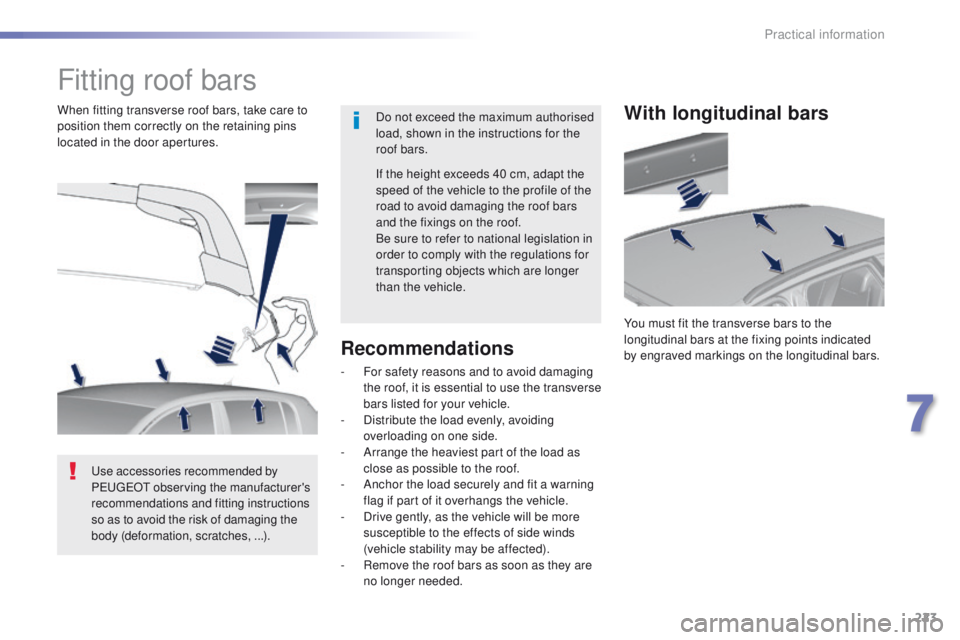
When fitting transverse roof bars, take care to
position them correctly on the retaining pins
located in the door apertures.
us
e accessories recommended by
P
e
uge
Ot
observing the manufacturer's
recommendations and fitting instructions
so as to avoid the risk of damaging the
body (deformation, scratches,
...). If the height exceeds 40 cm, adapt the
speed of the vehicle to the profile of the
road to avoid damaging the roof bars
and the fixings on the roof.
Be sure to refer to national legislation in
order to comply with the regulations for
transporting objects which are longer
than the vehicle.With longitudinal bars
You must fit the transverse bars to the
longitudinal bars at the fixing points indicated
by engraved markings on the longitudinal bars.
Recommendations
- For safety reasons and to avoid damaging
the roof, it is essential to use the transverse
bars listed for your vehicle.
-
D
istribute the load evenly, avoiding
overloading on one side.
-
A
rrange the heaviest part of the load as
close as possible to the roof.
-
A
nchor the load securely and fit a warning
flag if part of it overhangs the vehicle.
-
D
rive gently, as the vehicle will be more
susceptible to the effects of side winds
(vehicle stability may be affected).
-
R
emove the roof bars as soon as they are
no longer needed.
7
Practical information
Page 252 of 396
250
Changing a wheel
the tools are installed in the boot under the
f l o o r.
Access to the tooling
List of tools
these tools are specific to your vehicle and can
vary according to the level of equipment. Do
not use them for other purposes.
1.
Wheelbrace.
F
or removing the wheel trim and removing
the wheel bolts.
2.
J
ack with integral handle.
F
or raising the vehicle. 3.
"
Bolt cover" tool.
F
or removing the bolt protectors (covers)
on alloy wheels.
4.
S
ocket for the security bolts (located in the
glove box).
F
or adapting the wheelbrace to the special
"security" bolts.
5.
t
o
wing eye.
Procedure for changing a wheel with a damaged or punctured tyre for the spare wheel using the tools provided with the vehicle.
For more information on towing, refer to
the corresponding section.
Wheel with trim
When refitting the wheel, refit the trim
starting by placing its notch facing the
valve and press around its edge with
the palm of your hand.
In the event of a breakdown
Page 254 of 396
252
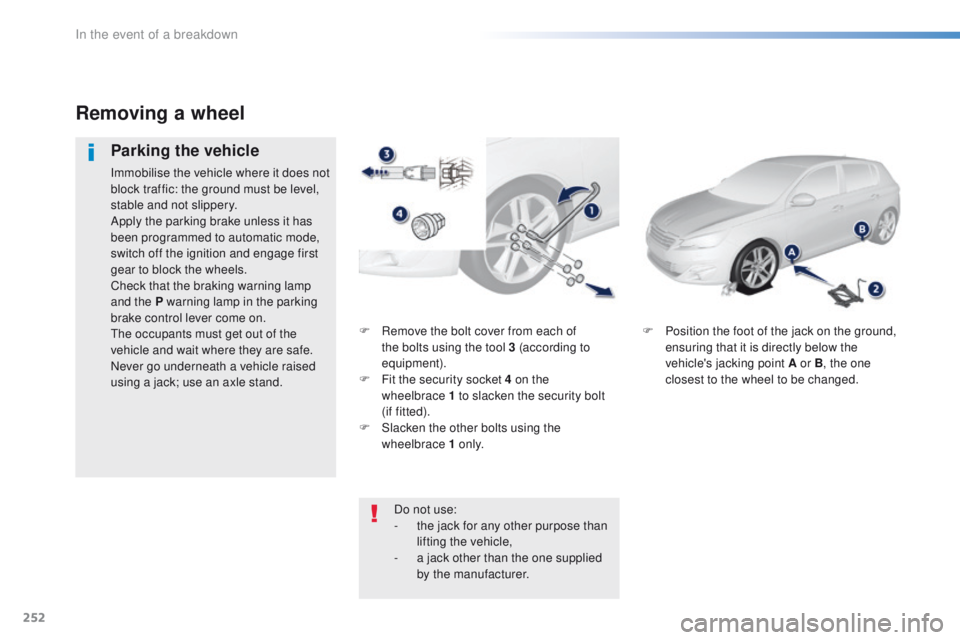
F Remove the bolt cover from each of the bolts using the tool 3 (according to
equipment).
F
F
it the security socket 4 on the
wheelbrace
1 to slacken the security bolt
(if
fitted).
F
S
lacken the other bolts using the
wheelbrace 1 o n l y. F
P osition the foot of the jack on the ground,
ensuring that it is directly below the
vehicle's jacking point A or B , the one
closest to the wheel to be changed.
Removing a wheel
Parking the vehicle
Immobilise the vehicle where it does not
block traffic: the ground must be level,
stable and not slippery.
Apply the parking brake unless it has
been programmed to automatic mode,
switch off the ignition and engage first
gear to block the wheels.
Check that the braking warning lamp
and the P warning lamp in the parking
brake control lever come on.
th
e occupants must get out of the
vehicle and wait where they are safe.
Never go underneath a vehicle raised
using a jack; use an axle stand.
Do not use:
-
t
he jack for any other purpose than
lifting the vehicle,
-
a j
ack other than the one supplied
by the manufacturer.
In the event of a breakdown
Page 256 of 396
254
Fitting a wheel
Fitting the "space-saver"
spare wheel
If your vehicle is fitted with alloy wheels,
when tightening the bolts on fitting, it
is normal to notice that the washers
do not come into contact with the
"space-saver" spare wheel. t
h
e wheel
is secured by the conical sur face of
each bolt. F
P
ut the wheel in place on the hub.
F
S
crew in the bolts fully by hand.
F P re-tighten the security bolt using the
wheelbrace 1 fitted with the security
socket 4 (according to equipment).
F
P
re-tighten the other bolts using the
wheelbrace 1 o n l y. F
L
ower the vehicle fully.
F
F
old the jack 2 and detach it.
In the event of a breakdown
Page 257 of 396
255
F tighten the security bolt using the wheelbrace 1 fitted with the security
socket
4 (according to equipment).
F
t
i
ghten the other bolts using the
wheelbrace 1 o n l y.
F
R
efit the bolt covers on each of the bolts
(according to equipment).
F
S
tore the tools in the box.
th
e tyre inflation pressures are given on
this
label.
After changing a wheel
to store the punctured wheel in the boot
correctly, first remove the central cover.
When using the "space-saver" type
spare wheel, do not exceed 50 mph
(80
km/h).
Have the tightening of the bolts and the
pressure of the spare wheel checked
by a P
e
uge
Ot
dealer or a qualified
workshop without delay.
Have the punctured wheel repaired
and refitted to the vehicle as soon as
possible.
If your vehicle has tyre under-inflation
detection, check the tyre pressures then
refer to the corresponding section.
8
In the event of a breakdown