Page 35 of 180

4-3
1
2
34
5
6
7
8
9
10
11
12
13
14
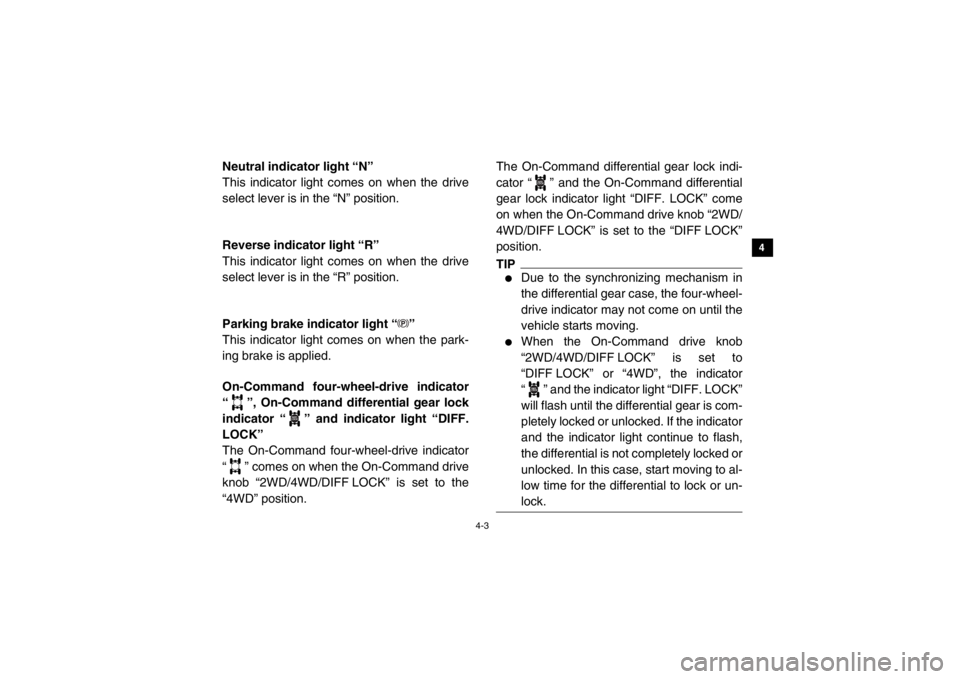
EVU00170Neutral indicator light “N”
This indicator light comes on when the drive
select lever is in the “N” position.5B410001Reverse indicator light “R”
This indicator light comes on when the drive
select lever is in the “R” position.EVU00210Parking brake indicator light “ ”
This indicator light comes on when the park-
ing brake is applied.EBU29621On-Command four-wheel-drive indicator
“ ”, On-Command differential gear lock
indicator “ ” and indicator light “DIFF.
LOCK”
The On-Command four-wheel-drive indicator
“ ” comes on when the On-Command drive
knob “2WD/4WD/DIFF LOCK” is set to the
“4WD” position.The On-Command differential gear lock indi-
cator “ ” and the On-Command differential
gear lock indicator light “DIFF. LOCK” come
on when the On-Command drive knob “2WD/
4WD/DIFF LOCK” is set to the “DIFF LOCK”
position.
TIP●
Due to the synchronizing mechanism in
the differential gear case, the four-wheel-
drive indicator may not come on until the
vehicle starts moving.
●
When the On-Command drive knob
“2WD/4WD/DIFF LOCK” is set to
“DIFF LOCK” or “4WD”, the indicator
“ ” and the indicator light “DIFF. LOCK”
will flash until the differential gear is com-
pletely locked or unlocked. If the indicator
and the indicator light continue to flash,
the differential is not completely locked or
unlocked. In this case, start moving to al-
low time for the differential to lock or un-
lock.
DIFF.
LOCK
DIFF.
LOCKDIFF.
LOCK
1XP7B_EE.book Page 3 Tuesday, February 4, 2014 3:40 PM
Page 36 of 180
4-4
4
5
6
7
8
9
10
11
12
13
14
5B410002Coolant temperature warning light “ ”
If the coolant temperature reaches a specific
level, this light comes on to warn that the cool-
ant temperature is too hot. If the light comes
on during operation, stop the engine as soon
as it is safe to do so and allow the engine to
cool down for about 10 minutes.
(See page 8-57.)
The electrical circuit of the warning light can
be checked by turning the key to “ ” (on). If
the warning light does not come on initially
when the key is turned to “ ” (on), or if the
warning light remains on, have a Yamaha
dealer check the electrical circuit.
NOTICE●
The engine may overheat if the vehicle
is overloaded. If this happens, reduce
the load to specification.
●
After restarting, make sure that the
warning light is out. Continuous use
while this warning light is on may
cause damage to the engine.
1XP7B_EE.book Page 4 Tuesday, February 4, 2014 3:40 PM
Page 37 of 180

4-5
1
2
34
5
6
7
8
9
10
11
12
13
14
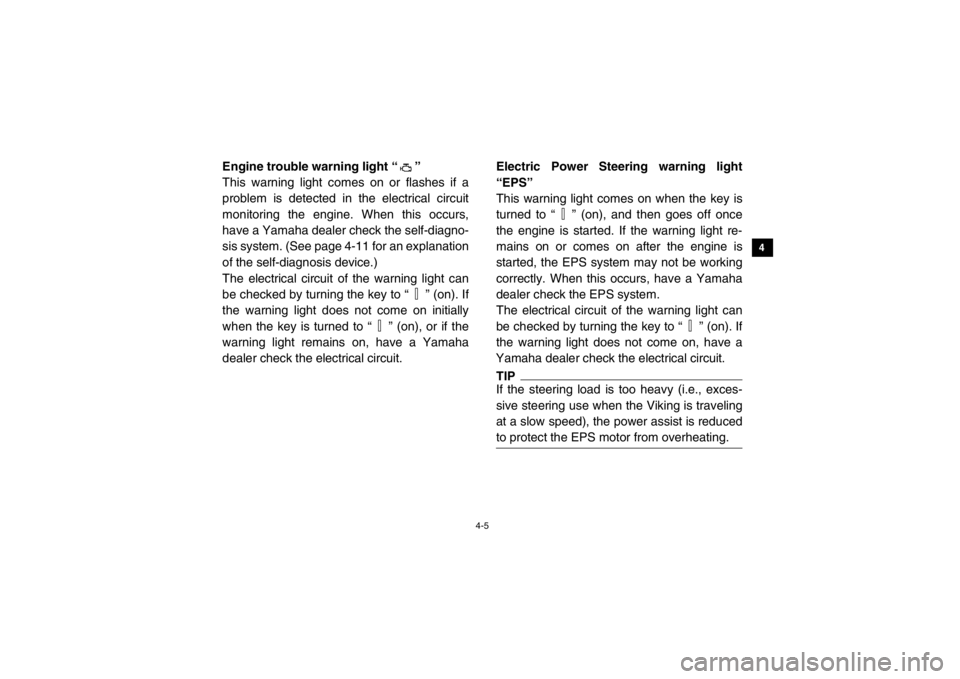
5B410003Engine trouble warning light “ ”
This warning light comes on or flashes if a
problem is detected in the electrical circuit
monitoring the engine. When this occurs,
have a Yamaha dealer check the self-diagno-
sis system. (See page 4-11 for an explanation
of the self-diagnosis device.)
The electrical circuit of the warning light can
be checked by turning the key to “ ” (on). If
the warning light does not come on initially
when the key is turned to “ ” (on), or if the
warning light remains on, have a Yamaha
dealer check the electrical circuit.Electric Power Steering warning light
“EPS”
This warning light comes on when the key is
turned to “ ” (on), and then goes off once
the engine is started. If the warning light re-
mains on or comes on after the engine is
started, the EPS system may not be working
correctly. When this occurs, have a Yamaha
dealer check the EPS system.
The electrical circuit of the warning light can
be checked by turning the key to “ ” (on). If
the warning light does not come on, have a
Yamaha dealer check the electrical circuit.
TIPIf the steering load is too heavy (i.e., exces-
sive steering use when the Viking is traveling
at a slow speed), the power assist is reduced
to protect the EPS motor from overheating.
1XP7B_EE.book Page 5 Tuesday, February 4, 2014 3:40 PM
Page 38 of 180

4-6
4
5
6
7
8
9
10
11
12
13
14
Helmet indicator light “ ”
The indicator light comes on and stays on
while the key is turned to “ ” (on) to remind
the occupants to always wear a helmet. If the
indicator light does not come on when the key
is turned to “ ” (on), have a Yamaha dealer
check the electrical circuit.
Seat belt indicator light “ ”
The indicator light comes on when the key is
turned to “ ” (on) to remind the occupants to
fasten their seat belt. The indicator light stays
on until the driver seat belt is properly latched.
If the indicator light does not come on when
the key is turned to “ ” (on), or if the indica-
tor light remains on after the driver seat belt is
properly latched, have a Yamaha dealer
check the electrical circuit.
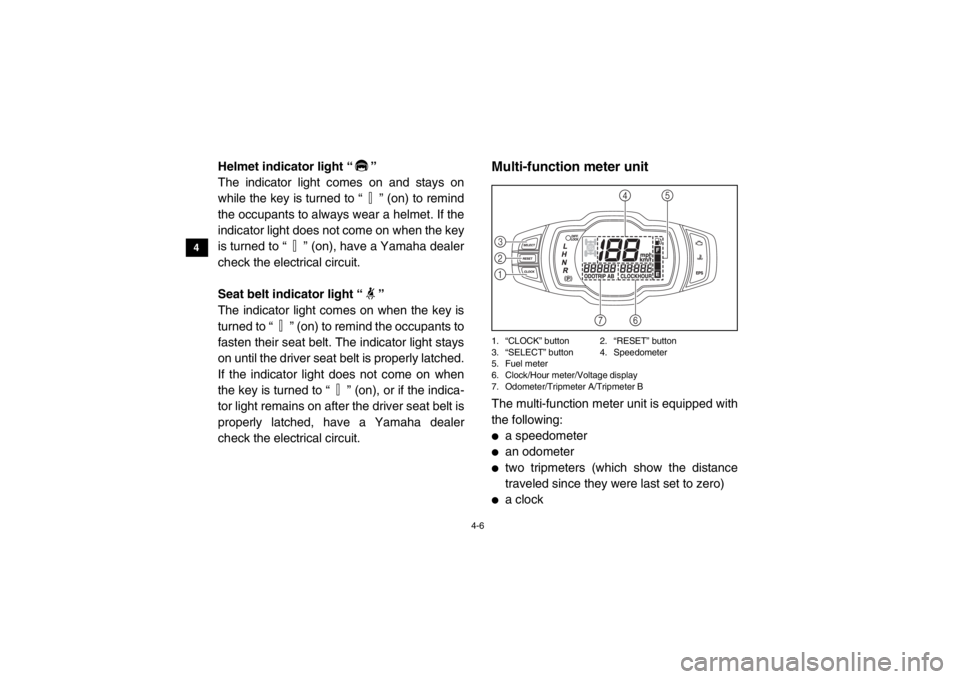
5B410004Multi-function meter unit1. “CLOCK” button 2. “RESET” button
3. “SELECT” button 4. Speedometer
5. Fuel meter
6. Clock/Hour meter/Voltage display
7. Odometer/Tripmeter A/Tripmeter BThe multi-function meter unit is equipped with
the following:●
a speedometer
●
an odometer
●
two tripmeters (which show the distance
traveled since they were last set to zero)
●
a clock321
4
5
6
7
1XP7B_EE.book Page 6 Tuesday, February 4, 2014 3:40 PM
Page 43 of 180
4-11
1
2
34
5
6
7
8
9
10
11
12
13
14
TIPThis fuel meter is equipped with a self-diagno-
sis system. If a problem is detected in an elec-
trical circuit, all the display segments and fuel
level warning indicator start flashing. If this oc-
curs, have a Yamaha dealer check the electri-
cal circuit.
Self-diagnosis device1. Error code display
2. Engine trouble warning light “ ”This model is equipped with a self-diagnosis
device for various electrical circuits.
If a problem is detected in any of those cir-
cuits, the engine trouble warning light comes
on or flashes, and the multi-function display
indicates an error code.
If the multi-function display indicates an error
code, note the code number, and then have a
Yamaha dealer check the vehicle.
2
1
1XP7B_EE.book Page 11 Tuesday, February 4, 2014 3:40 PM
Page 44 of 180
4-12
4
5
6
7
8
9
10
11
12
13
14
NOTICEIf the multi-function display indicates an
error code, the vehicle should be checked
as soon as possible in order to avoid en-
gine damage.
EVU00240Light switch “ / / ”1. Light switch “ / / ”Set the switch to “ ” to turn on the low beam
and the taillights.
Set the switch to “ ” to turn on the high
beam and the taillights.
Set the switch to “ ” to turn off the head-
lights and taillights.
L
H
1
L
HL
H
1XP7B_EE.book Page 12 Tuesday, February 4, 2014 3:40 PM
Page 45 of 180
4-13
1
2
34
5
6
7
8
9
10
11
12
13
14
NOTICEDo not use the headlights with the engine
turned off for an extended period of time.
The battery may discharge to the point
that the starter motor will not operate
properly. If this should happen, remove
the battery and recharge it.
EVU01183On-Command drive knob “2WD/4WD/
DIFF LOCK”1. On-Command drive knob “2WD/4WD/DIFF LOCK”This vehicle is equipped with an On-Com-
mand drive knob to select the drive mode.
The knob has three positions: “2WD”, “4WD”,
and “DIFF LOCK”. Select the appropriate
drive according to terrain and conditions.●
“2WD” (two-wheel drive): Power is supplied
to the rear wheels only.1
1XP7B_EE.book Page 13 Tuesday, February 4, 2014 3:40 PM
Page 60 of 180
4-28
4
5
6
7
8
9
10
11
12
13
14
EVU00370Trailer hitch brac ket and receiverThis vehicle is equipped with a trailer hitch
bracket and a 5 cm (2 in) receiver for a stan-
dard trailer hitch. Trailer towing equipment
can be obtained at a Yamaha dealer. (See
page 6-8 for precaution information.)1. Trailer hitch bracket 2. Receiver
EVU00380Auxiliary DC jackThe auxiliary DC jack is located at the right
side of the storage compartment under the
multi-function meter. The auxiliary DC jack
can be used for suitable work lights, radios,
etc. The auxiliary DC jack should only be used
when the engine is running and the headlights
are turned off.
1. Set the light switch to “ ”.
2. Turn the accessory off.
3. Start the engine. (See page 6-2.)
2
1
1XP7B_EE.book Page 28 Tuesday, February 4, 2014 3:40 PM