Page 200 of 650
200
2-1. Driving procedures
Engine (ignition) switch (vehicles with smart entr y & start system)
Performing the following operations when carrying the electronic
key on your person starts the engine or changes “ENGINE START
STOP” modes.
Starting the engine
Multidrive or automatic transmission
Check that the parking brake is set.
Check that the shift lever is set in “P”.
Sit in the driver’s seat and firmly depress the brake pedal.
The “ENGINE START STOP” switch indicator turns green.
Press the “ENGINE START
STOP” switch.
The engine can be started
from any “ENGINE START
STOP” switch mode.
Continue depressing the brake
pedal until the engine is com-
pletely started. The engine will
crank until it starts or for up to
30 seconds, whichever is less.
Diesel engine only: indi-
cator turns on. The engine
begins starting after the indica-
tor light goes out.
VERSO_WE.book Page 200 Thursday, June 19, 2014 11:31 AM
Page 201 of 650
201 2-1. Driving procedures
2
When driving
Manual transmission
Check that the parking brake is set.
Check that the shift lever is set in “N”.
Sit in the driver’s seat and firmly depress the clutch pedal.
The “ENGINE START STOP” switch indicator turns green.
Press the “ENGINE START
STOP” switch.
The engine can be started
from any “ENGINE START
STOP” switch mode.
Continue depressing the brake
pedal until the engine is com-
pletely started. The engine will
crank until it starts or for up to
30 seconds, whichever is less.
Diesel engine only: indi-
cator turns on. The engine
begins starting after the indica-
tor light goes out.
VERSO_WE.book Page 201 Thursday, June 19, 2014 11:31 AM
Page 225 of 650
225
2-1. Driving procedures
2
When driving
Parking brake
Set the parking brake
Fully set the parking brake
while depressing the brake
pedal.
At this time, the indicator will
come on.
Release the parking brake
Slightly raise the lever
Press the button
Lower it completely
VERSO_WE.book Page 225 Thursday, June 19, 2014 11:31 AM
Page 226 of 650
226 2-1. Driving procedures
Usage in winter time
P. 298
NOTICE
Before driving
Fully release the parking brake.
Driving the vehicle with the parking brake set will lead to brake components
overheating, which may affect braking performance and increase brake
wear.
VERSO_WE.book Page 226 Thursday, June 19, 2014 11:31 AM
Page 254 of 650

254 2-3. Operating the lights and wipers
Daytime running light system (if equipped)
To make your vehicle more visible to other drivers, the daytime run-
ning lights turn on automatically whenever the engine is started and
then the parking brake is released. (However, the daytime running
light system will be canceled when the headlight switch is operated
manually or the automatic headlight system turns on the tail lights.)
Daytime running lights are not designed for use at night.
Deactivating/reactivating the daytime running light system
Follow the procedure below.
Vehicles without smart entry & start system: Turn the engine
switch to the “ON” position. Turn off the headlights, tail lights
and automatic headlights system, and set the parking brake.
Vehicles with smart entry & start system: Turn the “ENGINE
START STOP” switch to IGNITION ON mode. Turn off the
headlights, tail lights and automatic headlights system, and
set the parking brake.
Start the engine.
You must perform step 3 within 5 seconds of starting the engine.
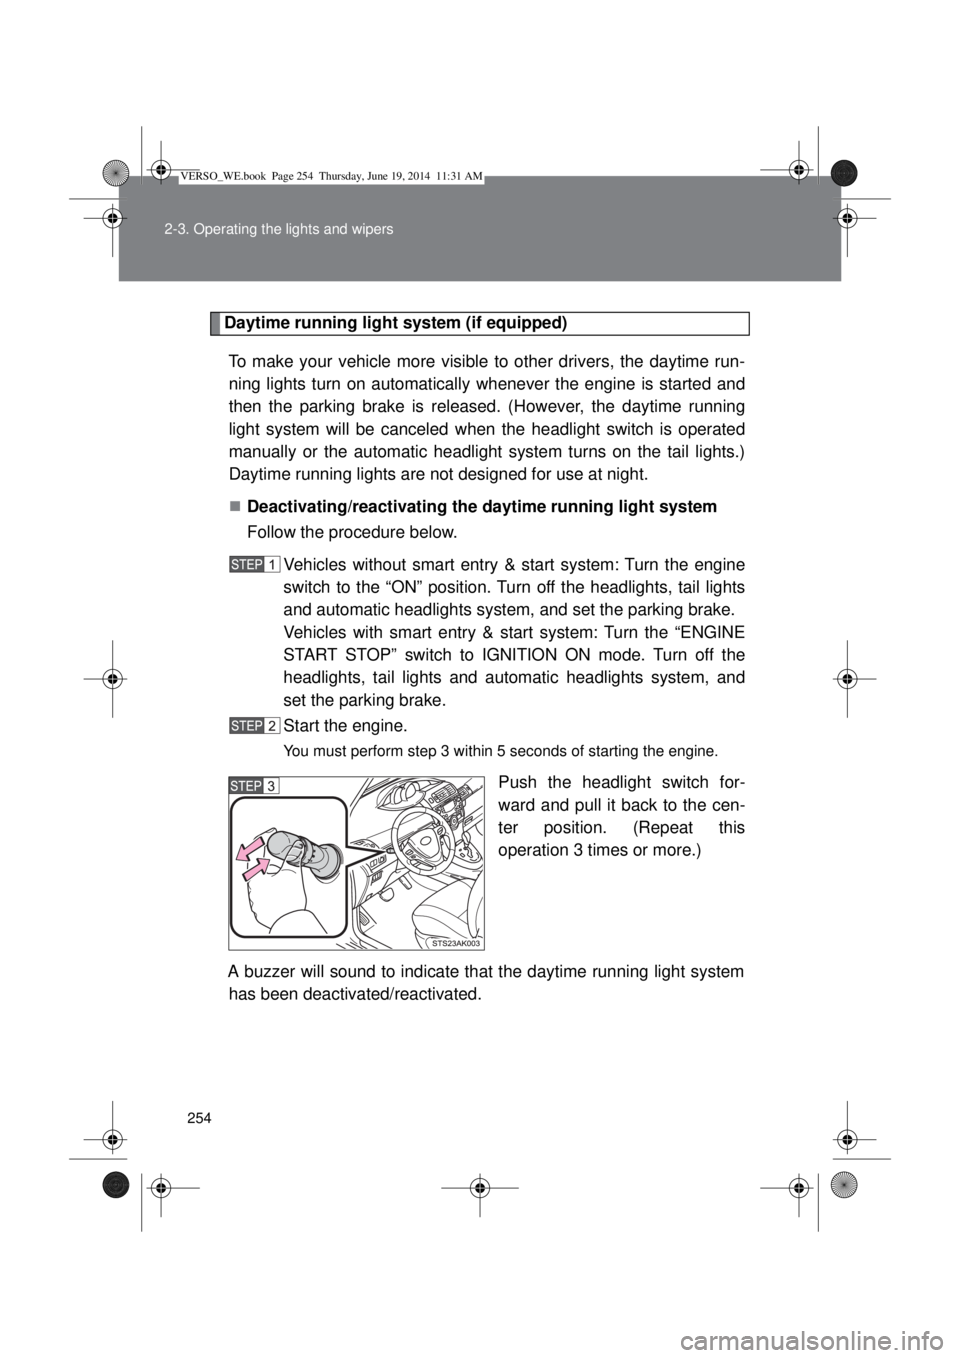
Push the headlight switch for-
ward and pull it back to the cen-
ter position. (Repeat this
operation 3 times or more.)
A buzzer will sound to indicate that the daytime running light system
has been deactivated/reactivated.
VERSO_WE.book Page 254 Thursday, June 19, 2014 11:31 AM
Page 255 of 650
255 2-3. Operating the lights and wipers
2
When driving
If any of the following occurs during the deactivation/reactivation opera-
tion, the deactivation/reactivation operation will be canceled:
• The engine is turned off.
• The parking brake is released.
• The vehicle is moving.
• The headlights are turned on.
• The tail lights are turned on.
• The automatic headlight system is turned on.
Headlight control sensor (if equipped)
The sensor may not function properly if
anything that blocks the sensor is affixed
to the windshield.
Doing so interferes with the sensor
detecting the level of ambient light and
may cause the automatic headlight sys-
tem to malfunction.
VERSO_WE.book Page 255 Thursday, June 19, 2014 11:31 AM
Page 277 of 650

277 2-4. Using other driving systems
2
When driving
Rear corner and rear center sensors:
• The shift lever is in “R”.
Sensor detection information
Certain vehicle conditions and the surrounding environment may affect
the ability of a sensor to correctly detect an obstacle. Particular instances
where this may occur are listed below.
• There is dirt, snow or ice on a sensor.
• A sensor is frozen.
• A sensor is covered in any way.
• The vehicle is leaning considerably to one side.
• On an extremely bumpy road, on an incline, on gravel, or on grass.
• The vicinity of the vehicle is noisy due to vehicle horns, motorcycle
engines, air brakes of large vehicles, or other loud noises producing
ultrasonic waves.
• There is another vehicle equipped with parking assist sensors in the
vicinity.
• A sensor is coated with a sheet of spray or heavy rain.
• The vehicle is equipped with a fender pole or radio antenna.
• Towing eyelet is installed.
• A bumper or sensor receives a strong impact.
• The vehicle is approaching a tall or right-angled curb.
• In harsh sunlight or intense cold weather.
• A non-genuine Toyota suspension (lowered suspension etc.) is
installed.
In addition to the examples above, there are instances in which, because of
their shape, signs and other objects may be judged by a sensor to be closer
than they are.
The shape of the obstacle may prevent a sensor from detecting it. Pay
particular attention to the following obstacles:
• Wires, fences, ropes, etc.
• Cotton, snow and other materials that absorb sound waves
• Sharply-angles objects
• Low obstacles
• Tall obstacles with upper sections projecting outwards in the direction
of your vehicle
VERSO_WE.book Page 277 Thursday, June 19, 2014 11:31 AM
Page 285 of 650

285 2-4. Using other driving systems
2
When driving
The Stop & Start system operation time and Stop & Start system total
operation time display
P. 230
Replacing battery
The installed battery is specific to the Stop & Start system. It should only be
replaced with a battery of identical type and rating.
Ask any authorized Toyota dealer or repairer, or another duly qualified and
equipped professional for further details.
CAUTION
When the Stop & Start system is operating
Keep the shift lever in “N” and apply the brake pedal or parking brake for
safety while the engine is stopped due to the Stop & Start system (while
Stop & Start indicator is on).
Unexpected accidents may occur due to the automatic engine start func-
tion.
Do not leave the vehicle while the engine is stopped due to the Stop &
Start system (while Stop & Start indicator is on).
Unexpected accidents may occur due to the automatic engine start func-
tion.
Ensure that the engine is not stopped by the Stop & Start system while the
vehicle is in a poorly ventilated area. The engine may restart due to the
automatic engine start function, causing exhaust gases to collect and
enter the vehicle and resulting in death or a serious health hazard.
VERSO_WE.book Page 285 Thursday, June 19, 2014 11:31 AM