Page 169 of 346

169
2. SETUP
4
TELEPHONE
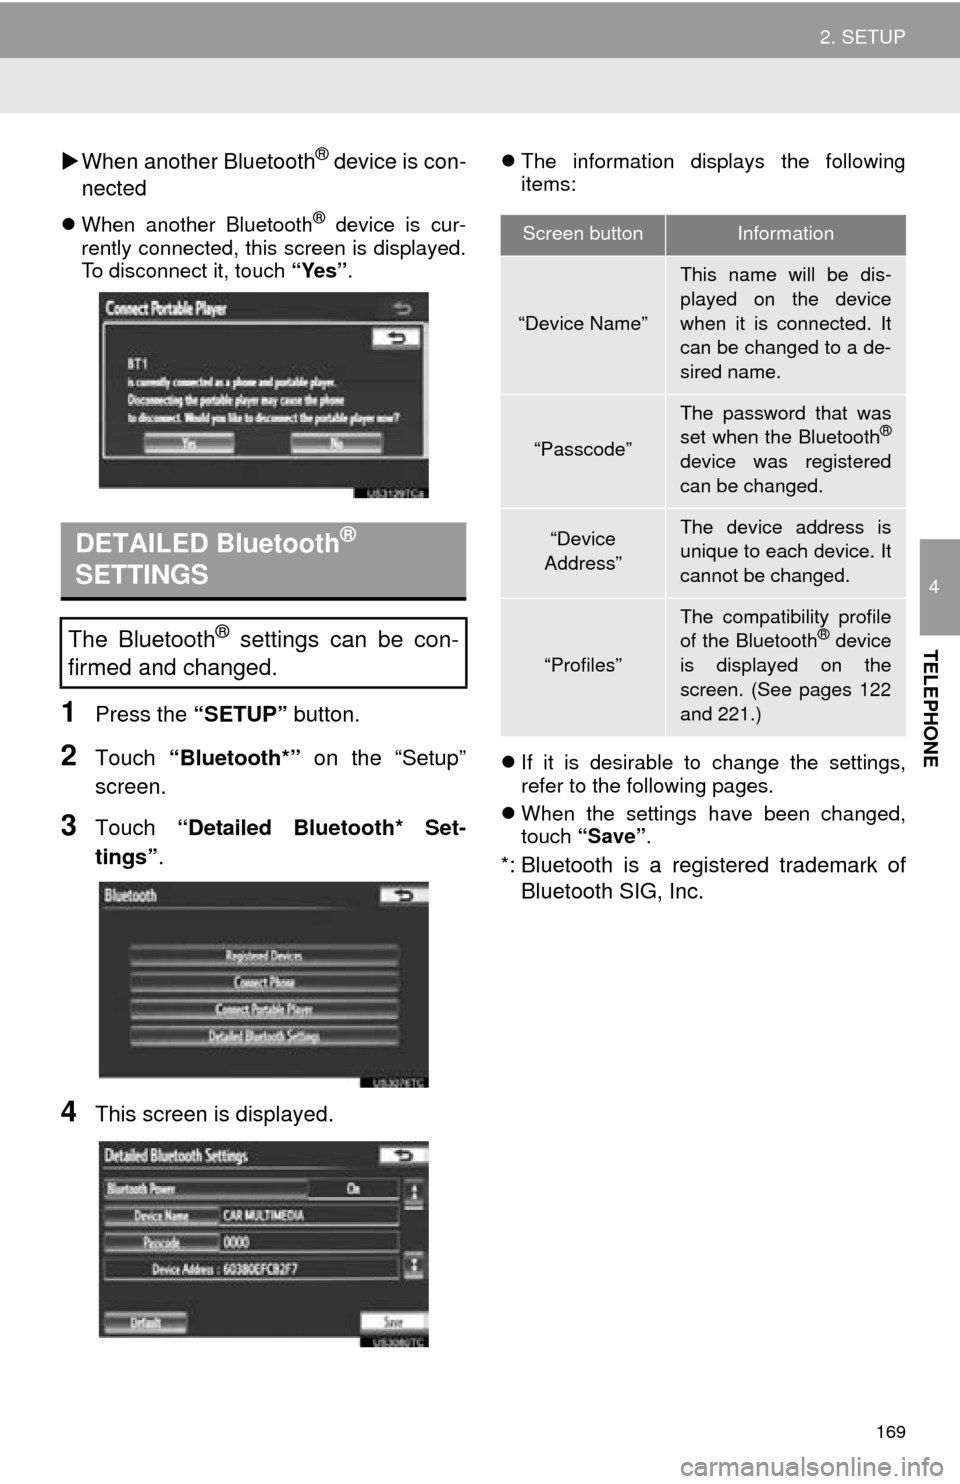
When another Bluetooth® device is con-
nected
When another Bluetooth® device is cur-
rently connected, this screen is displayed.
To disconnect it, touch “Yes”.
1Press the “SETUP” button.
2Touch “Bluetooth*” on the “Setup”
screen.
3Touch “Detailed Bluetooth* Set-
tings” .
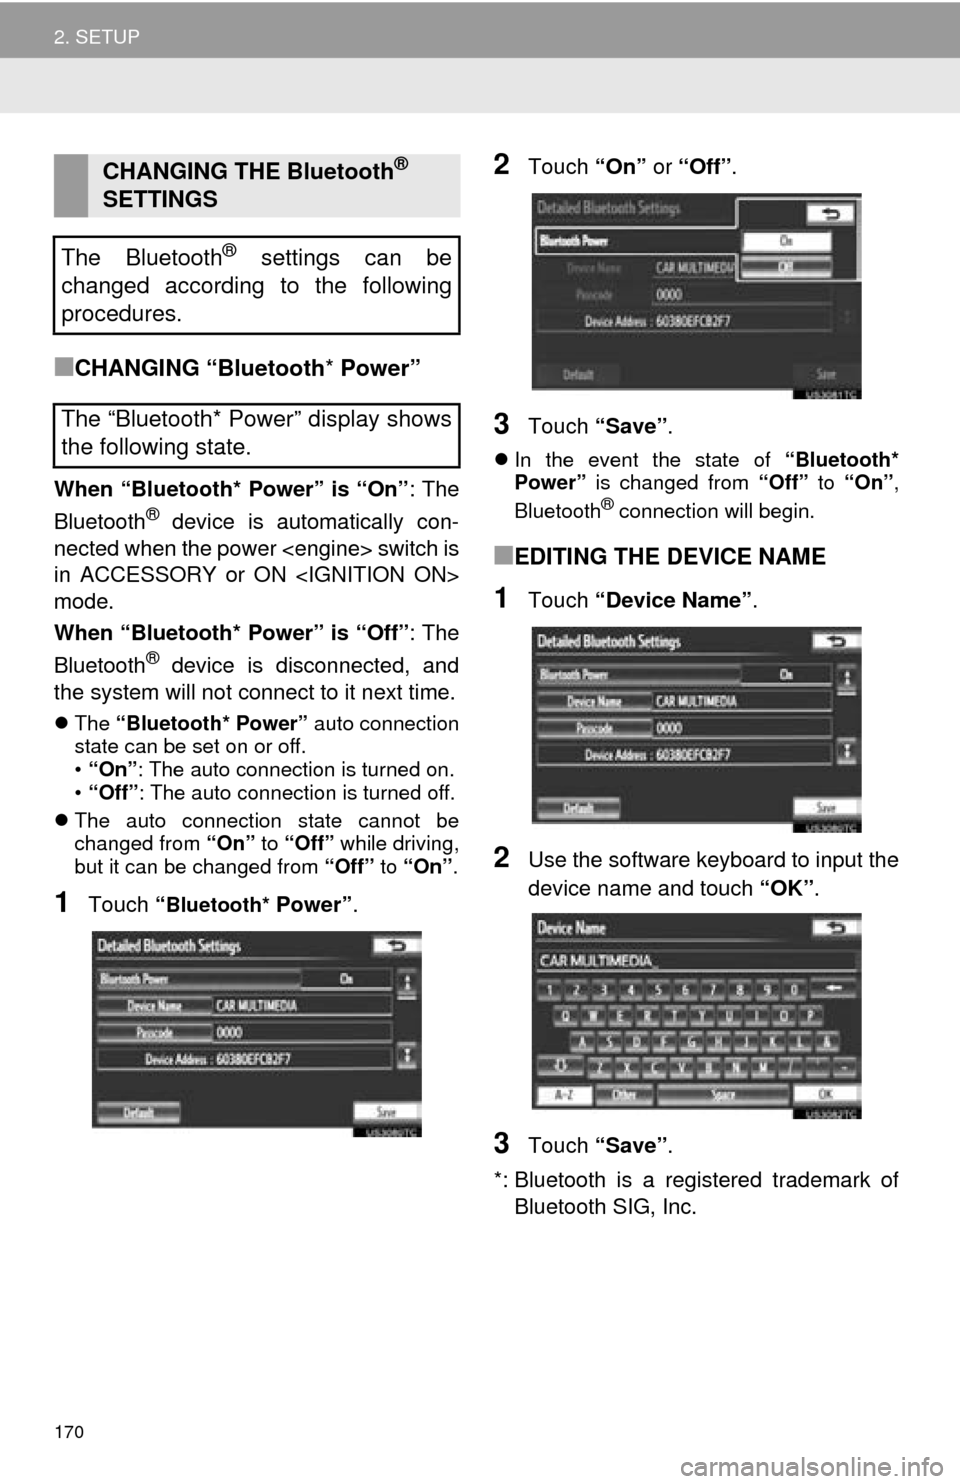
4This screen is displayed.
The information displays the following
items:
If it is desirable to change the settings,
refer to the following pages.
When the settings have been changed,
touch “Save”.
*: Bluetooth is a regi stered trademark of
Bluetooth SIG, Inc.
DETAILED Bluetooth®
SETTINGS
The Bluetooth® settings can be con-
firmed and changed.
Screen buttonInformation
“Device Name”
This name will be dis-
played on the device
when it is connected. It
can be changed to a de-
sired name.
“Passcode”
The password that was
set when the Bluetooth®
device was registered
can be changed.
“Device
Address”The device address is
unique to each device. It
cannot be changed.
“Profiles”
The compatibility profile
of the Bluetooth® device
is displayed on the
screen. (See pages 122
and 221.)
Page 170 of 346

170
2. SETUP
■CHANGING “Bluetooth* Power”
When “Bluetooth* Power” is “On” : The
Bluetooth® device is automatically con-
nected when the power switch is
in ACCESSORY or ON
mode.
When “Bluetooth* Power” is “Off” : The
Bluetooth
® device is disconnected, and
the system will not connect to it next time.
The “Bluetooth* Power” auto connection
state can be set on or off.
• “On” : The auto connection is turned on.
• “Off” : The auto connection is turned off.
The auto connection state cannot be
changed from “On” to “Off” while driving,
but it can be changed from “Off” to “On” .
1Touch “Bluetooth* Power” .
2Touch “On” or “Off” .
3Touch “Save” .
In the event the state of “Bluetooth*
Power” is changed from “Off” to “On” ,
Bluetooth
® connection will begin.
■EDITING THE DEVICE NAME
1Touch “Device Name” .
2Use the software keyboard to input the
device name and touch “OK” .
3Touch “Save” .
*: Bluetooth is a registered trademark of Bluetooth SIG, Inc.
CHANGING THE Bluetooth®
SETTINGS
The Bluetooth
® settings can be
changed according to the following
procedures.
The “Bluetooth* Power” display shows
the following state.
Page 171 of 346
171
2. SETUP
4
TELEPHONE
■EDITING THE PASSCODE
1Touch “Passcode” .
2Input a passcode and touch “OK”.
3Touch “Save” .
■Bluetooth® DEVICE CONNECTION
STATUS DISPLAY SETTINGS
1Touch “Display Phone Status” or
“Display Portable Player Status” .
2Touch “On”.
3Touch “Save” .
1Touch “Default” .
2Touch “Yes”.
If the state of “Bluetooth* Power” is
changed from “Off” into “On” , Bluetooth®
connection will begin.
*: Bluetooth is a regi stered trademark of
Bluetooth SIG, Inc.
When “Bluetooth* Power” is “On”
and the power switch is in
ACCESSORY or ON
mode, the Bluetooth
® phone and
portable player’s connection status
can be displayed. (See “CHANGING
‘Bluetooth
* Power’” on page 170.)
INITIALIZING THE Bluetooth®
SETTINGS
The settings can be initialized.
Page 172 of 346

172
1. QUICK REFERENCE .................. 174
2. SOME BASICS ............................ 176
VOICE COMMAND SYSTEM .............. 176
AUDIO SPLIT SCREEN DISPLAY ....... 176
TURNING THE SYSTEM ON AND OFF..................................... 177
SWITCHING BETWEEN FUNCTIONS ...................................... 177
DSP CONTROL ................................... 177
TONE AND BALANCE ......................... 178
SELECTING SCREEN SIZE ................ 179
DVD PLAYER....................................... 179
AUX PORT ........................................... 180
USB PORT ........................................... 180
3. RADIO OPERATION ... ................ 181
LISTENING TO THE RADIO ................ 181
PRESETTING A STATION .................. 181
SELECTING A STATION ..................... 182
RADIO BROADCAST DATA
SYSTEM ............................................ 182
TRAFFIC ANNOUNCEMENT .............. 183
4. HD Radio™ TECHNOLOGY INFORMATION ......................... 184
USING HD Radio™ TECHNOLOGY.... 184
AVAILABLE HD Radio™
TECHNOLOGY.................................. 185
TROUBLESHOOTING GUIDE ............. 186
1AUDIO/VIDEO SYSTEM
OPERATION
5
AUDIO/VIDEO SYSTEM
Page 173 of 346

5
173
1
2
3
4
5
6
7
8
9
5. RADIO OPERATION(XM Satellite Radio
BROADCAST) ........... ................ 188
HOW TO SUBSCRIBE TO
AN XM Satellite Radio....................... 188
DISPLAYING THE RADIO ID .............. 188
LISTENING TO SATELLITE RADIO ... 189
CHANNEL CATEGORY ...................... 189
PRESETTING A CHANNEL ................ 189
SELECTING A CHANNEL ................... 190
DISPLAYING THE TITLE AND NAME ................................................ 190
IF THE SATELLITE RADIO TUNER MALFUNCTIONS .............................. 191
6. RADIO OPERATION (INTERNET RADIO
BROADCAST) ........... ................ 193
LISTENING TO INTERNET RADIO .... 193
7. DVD PLAYER OPERATION ........ 194
INSERTING A DISC ............................ 194
EJECTING A DISC .............................. 194
PLAYING A DISC ................................ 195
PLAYING AN AUDIO DISC ................. 195
PLAYING AN MP3/WMA DISC ........... 197
OPERATING A DVD DISC .................. 200
PLAYING A DVD DISC ....................... 201
DVD OPTIONS .................................... 202
IF THE PLAYER MALFUNCTIONS..... 209
DVD PLAYER AND DVD VIDEO
DISC INFORMATION ....................... 210
8. USB MEMORY OPERATION ...... 212
CONNECTING A USB MEMORY ........ 212
PLAYING A USB MEMORY ................ 213
9. iPod OPERATION ....................... 217
CONNECTING iPod............................. 217
PLAYING iPod ..................................... 218
10. Bluetooth® AUDIO
OPERATION ............................. 221
CONNECTING A Bluetooth®
AUDIO PLAYER ................................ 224
PLAYING Bluetooth
® AUDIO ............... 225
11. AUDIO/VIDEO REMOTE CONTROLS
(STEERING SWITCHES) .......... 229
12. AUDIO/VIDEO SYSTEM OPERATING HINTS.................. 230
RADIO RECEPTION............................ 230
iPod ...................................................... 231
USB MEMORY .................................... 231
CARING FOR YOUR DVD PLAYER
AND DISC ......................................... 231
MP3/WMA FILES ................................. 234
CD-R AND CD-RW DISCS .................. 235
TERMS ................................................ 236
1. AUDIO SETTINGS ...................... 239
HD Radio™ SYSTEM SETTINGS ....... 239
iPod SETTINGS ................................... 240
2SETUP
AUDIO/VIDEO SYSTEM
Page 174 of 346
174
1. AUDIO/VIDEO SYSTEM OPERATION
1. QUICK REFERENCE
Operations such as selecting a preset station and adjusting the sound balance are
carried out on the screen. Press the “RADIO” or “MEDIA” button to display the
audio screen.
No.NameFunctionPage
Function menu tabTouch the screen tabs to select the desired radio
or media mode.177
Function menu dis-
play screenUse this screen to control the selected radio or
media mode.177
“ ” buttonPress to insert or eject a disc.179, 194
“SETUP” buttonPress to display the “Setup” screen.239
“TUNE SCROLL”
knob
Turn to step up and step down the station band,
change to the next or previous satellite radio
channel, or skip to the next or previous track,
DVD chapter, etc. Also, the knob can be used to
enter selections on the track/file and album/folder
screens by pressing it.
181, 189,
201
Page 175 of 346
175
1. AUDIO/VIDEO SYSTEM OPERATION
5
AUDIO/VIDEO SYSTEM
“SEEK/TRACK”
buttonPress the “” or “” button to seek up or down
for a station, or to access a desired track, file or
chapter.
182
“PWR VOL” knobPress to turn the audio system on and off, and
turn to adjust the volume.177
“RADIO” buttonPress to display the radio control screen.177
“MEDIA” buttonPress to display the media control screen.177
No.NameFunctionPage
Page 176 of 346

176
1. AUDIO/VIDEO SYSTEM OPERATION
2. SOME BASICS
This section describes some of the ba-
sic features of the audio/video system.
Some information may not pertain to
your system.
Your audio/video system works when
the power switch is turned to
ACCESSORY or ON
mode.
CAUTION
●For vehicles sold in U.S.A. and Canada:
Part 15 of the FCC Rules
FCC Warning: Changes or modifications
in construction not expressly approved
by the party responsible for compliance
could void the user’s authority to operate
the equipment. Radio frequency expo-
sure. This device is approved for Mobile
Application only and, to comply with
applicable FCC radio frequency expo-
sure regulations, must be used with a
distance of at least 7.9 in. (20 cm)
between the antenna and the body of
any person at all time during use.
● Laser products
• Do not take this unit apart or attempt to
make any changes yourself. This is an
intricate unit that uses a laser pickup to
retrieve information from the surface of
compact discs. The laser is carefully
shielded so that its rays remain inside
the cabinet. Therefore, never try to dis-
assemble the player or alter any of its
parts since you may be exposed to
laser rays and dangerous voltages.
• This product utilizes a laser. Use of controls or adjustments or perfor-
mance of procedures other than those
specified herein may result in hazard-
ous radiation exposure.
NOTICE
● To prevent the 12-volt battery from being
discharged, do not leave the audio/video
system on longer than necessary when
the hybrid system is off
not running>.
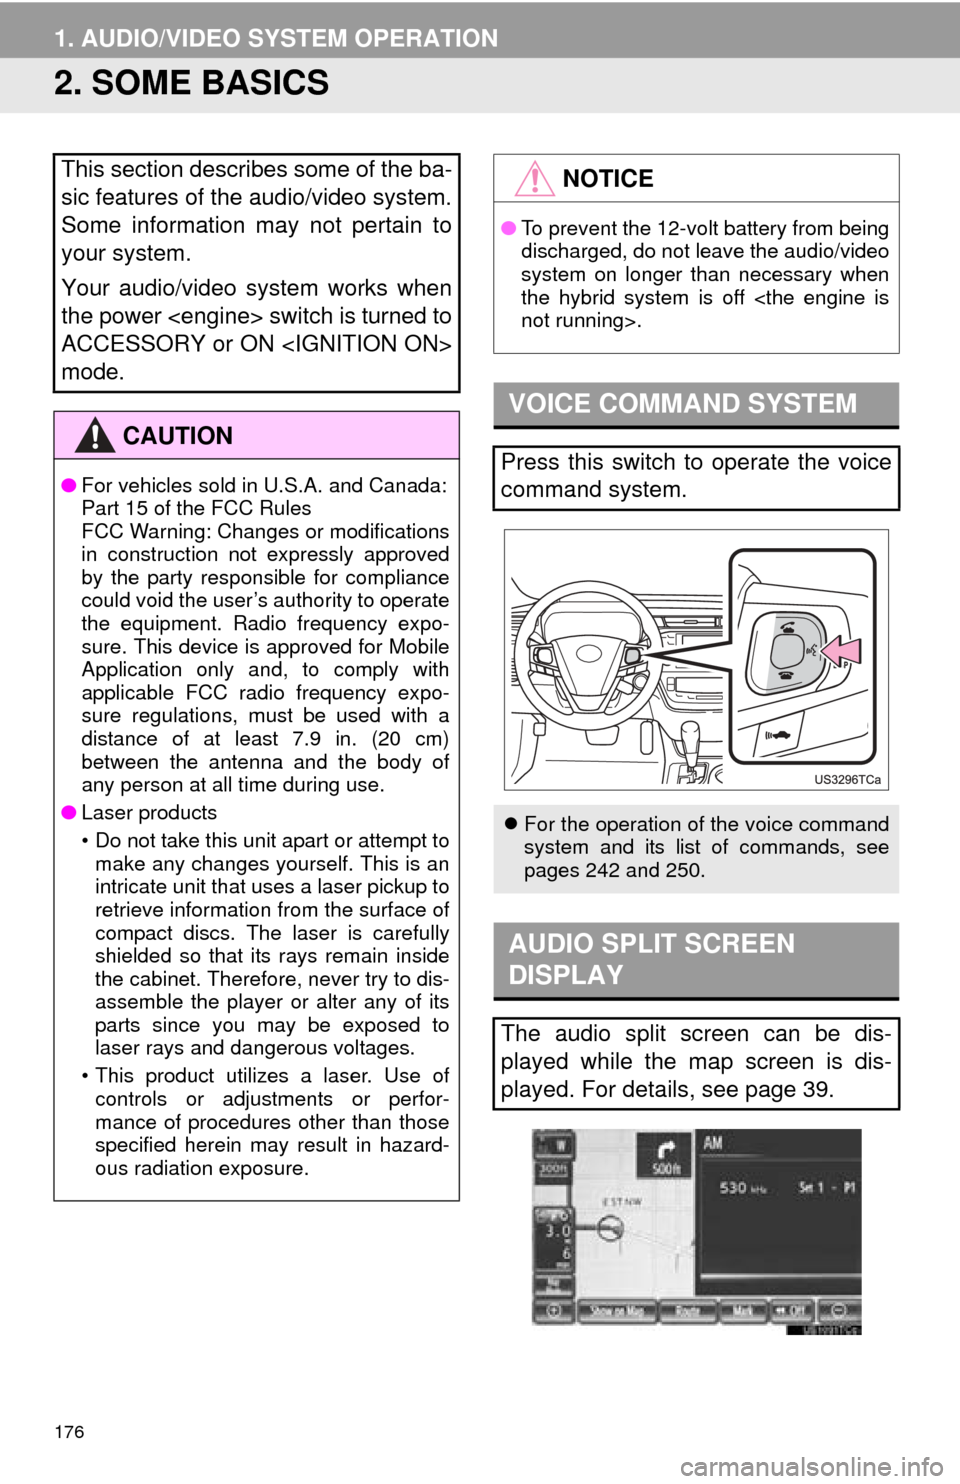
VOICE COMMAND SYSTEM
Press this switch to operate the voice
command system.
For the operation of the voice command
system and its list of commands, see
pages 242 and 250.
AUDIO SPLIT SCREEN
DISPLAY
The audio split screen can be dis-
played while the map screen is dis-
played. For details, see page 39.