2014 SUBARU TRIBECA roof
[x] Cancel search: roofPage 122 of 426
&If you have accidentally trig-
gered the alarm system
!To stop the alarm
Do any of the following operations.
.Press any button on the remote trans-mitter.
.Turn the ignition switch to the“ON”position.
&Arming the system
!To arm the system using remotetransmitter
1. Close all windows and the moonroof.
2. Remove the key from the ignitionswitch.
3. Open the doors and get out of thevehicle.
4. Make sure that the engine hood islocked.
5. Close all doors and the rear gate.
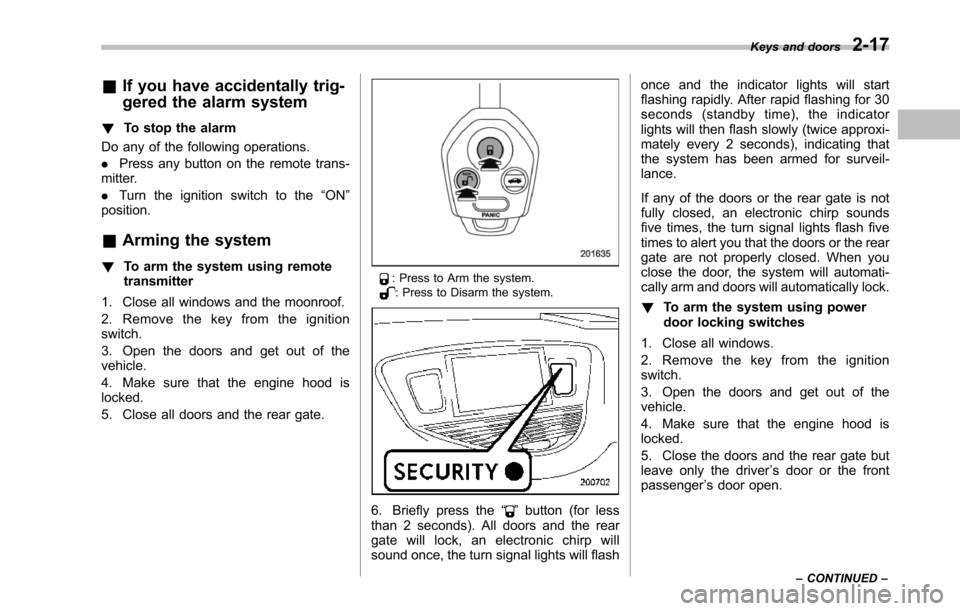
: Press to Arm the system.: Press to Disarm the system.
6. Briefly press the“”button (for lessthan 2 seconds). All doors and the reargate will lock, an electronic chirp willsound once, the turn signal lights will flash
once and the indicator lights will startflashing rapidly. After rapid flashing for 30seconds (standby time), the indicatorlights will then flash slowly (twice approxi-mately every 2 seconds), indicating thatthe system has been armed for surveil-lance.
If any of the doors or the rear gate is notfully closed, an electronic chirp soundsfive times, the turn signal lights flash fivetimes to alert you that the doors or the reargate are not properly closed. When youclose the door, the system will automati-cally arm and doors will automatically lock.
!To arm the system using powerdoor locking switches
1. Close all windows.
2. Remove the key from the ignitionswitch.
3. Open the doors and get out of thevehicle.
4. Make sure that the engine hood islocked.
5. Close the doors and the rear gate butleave only the driver’s door or the frontpassenger’s door open.
Keys and doors2-17
–CONTINUED–
Page 123 of 426
2-18Keys and doors
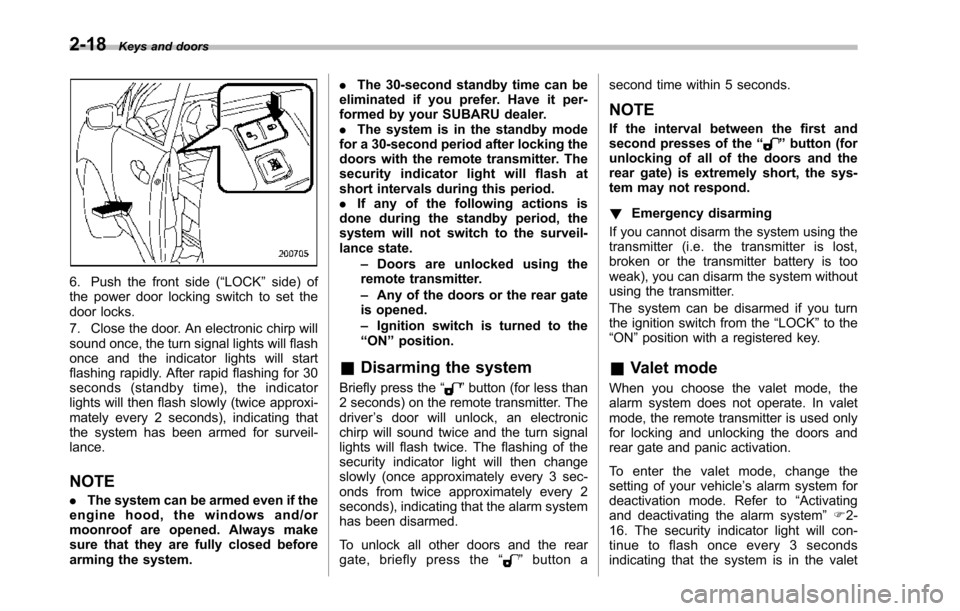
6. Push the front side (“LOCK”side) ofthe power door locking switch to set thedoor locks.
7. Close the door. An electronic chirp willsound once,the turn signal lights will flashonce and the indicator lights will startflashing rapidly. After rapid flashing for 30seconds (standby time), the indicatorlights will then flash slowly (twice approxi-mately every 2 seconds), indicating thatthe system has been armed for surveil-lance.
NOTE
.The system can be armed even if theengine hood, the windows and/ormoonroof are opened. Always makesure that they are fully closed beforearming the system.
.The 30-second standby time can beeliminated if you prefer. Have it per-formed by your SUBARU dealer..The system is in the standby modefor a 30-second period after locking thedoors with the remote transmitter. Thesecurity indicator light will flash atshort intervals during this period..If any of the following actions isdoneduring the standby period, thesystem will not switch to the surveil-lance state.–Doors are unlocked using theremote transmitter.–Any of the doors or the rear gateis opened.–Ignition switch is turned to the“ON”position.
&Disarming the system
Briefly press the“”button (for less than2 seconds) on the remote transmitter. Thedriver’s door will unlock, an electronicchirp will sound twice and the turn signallights willflash twice. The flashing of thesecurity indicator light will then changeslowly (once approximately every 3 sec-onds from twice approximately every 2seconds), indicating that the alarm systemhas been disarmed.
To unlock all other doors and the reargate, briefly press the“”button a
second time within 5 seconds.
NOTE
If the interval between the first andsecond presses of the“”button (forunlocking of all of the doors and therear gate) is extremely short, the sys-tem may not respond.
!Emergency disarming
If you cannot disarm the system using thetransmitter (i.e. the transmitter is lost,broken or the transmitter battery is tooweak), you can disarm the system withoutusing the transmitter.
The system can be disarmed if you turnthe ignition switch from the“LOCK”to the“ON”position with a registered key.
&Valet mode
When you choose the valet mode, thealarm system does not operate. In valetmode, the remote transmitter is used onlyfor locking and unlocking the doors andrear gate and panic activation.
To enter the valet mode, change thesetting of your vehicle’s alarm system fordeactivation mode. Refer to“Activatingand deactivatingthe alarm system”F2-16. The security indicator light will con-tinue to flash once every 3 secondsindicating that the system is in the valet
Page 130 of 426
NOTE
If the rear gate cannot be unlocked dueto a discharged vehicle battery, amalfunction in the door locking/unlock-ing system or other causes, you canunlock it by manually operating therear gate lock release lever. For theprocedure, refer to“Rear gate–if therear gate cannot be unlocked”F9-18.
Moonroof (if equipped)
WARNING
Never let anyone’shands,arms,head or any objects protrude fromthe moonroof. A person could beseriously injured if the vehicle stopssuddenly or turns sharply or if thevehicle is involved in an accident.
To a v o i d s e r i o u s p e r s o n a l i n j u r ycaused by entrapment, always con-form to the following instructionswithoutexception.
.Before closing the moonroof,make sure that no one’s hands,arms, head or other objects willbe accidentally caught in themoonroof.
.Before leaving the vehicle, al-ways remove the key from theignition switch for safety andnever allow an unattended childto remain in the vehicle. Failureto follow this procedure couldresult in injury to a child operat-ingthe moonroof.
.Never try to check the anti-en-trapment function by deliberatelyplacing part of your body in themoonroof.
CAUTION
.Do not sit on the edge of the openmoonroof.
.Do not operate the moonroof iffalling snow or extremely coldconditions have caused it tofreeze shut.
.The anti-entrapment functiondoes not operate when the moon-roof is being tilted down. Be sureto confirm that it is safe to do sobeforetilting the moonroof down.
The moonroofhas both tilting and slidingfunctions.
The moonroof operates only when theignition switch is in the“ON”position.
Keys and doors2-25
–CONTINUED–
Page 131 of 426
2-26Keys and doors
&Tilt function
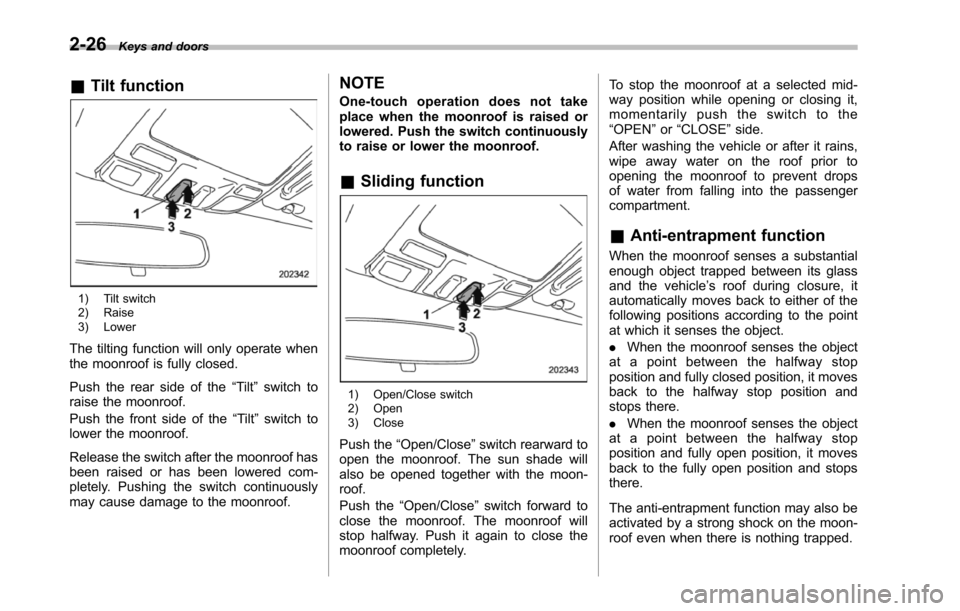
1) Tilt switch2) Raise3) Lower
The tilting function will only operate whenthe moonroof is fully closed.
Push the rear side of the“Tilt”switch toraise the moonroof.
Push the front side of the“Tilt”switchtolower the moonroof.
Release the switch after the moonroof hasbeen raised or has been lowered com-pletely. Pushing the switch continuouslymay cause damage to the moonroof.
NOTE
One-touch operation does not takeplace when the moonroof is raised orlowered. Push the switch continuouslyto raise or lower the moonroof.
&Sliding function
1) Open/Close switch2) Open3) Close
Push the“Open/Close”switch rearward toopen the moonroof. The sun shade willalso be opened together with the moon-roof.
Push the“Open/Close”switch forward toclose the moonroof. The moonroof willstop halfway. Push it again to close themoonroof completely.
To stop the moonroof at a selected mid-way position while opening or closing it,momentarily push the switch to the“OPEN”or“CLOSE”side.
After washing the vehicle or after it rains,wipe away water on the roof prior toopeningthe moonroof to prevent dropsof water from falling into the passengercompartment.
&Anti-entrapment function
When the moonroof senses a substantialenough object trapped between its glassand the vehicle’s roof during closure, itautomatically moves back to either of thefollowing positions according to the pointat which it senses the object.
.When the moonroof senses the objectat a point between the halfway stopposition and fully closed position, it movesback to the halfway stop position andstops there.
.When the moonroof senses the objectat a point between the halfway stopposition and fully open position, it movesback to the fully open position and stopsthere.
The anti-entrapment function may also beactivated by a strong shock on the moon-roof even when there is nothing trapped.
Page 132 of 426
CAUTION
Never attempt to test this functionusing fingers, hands or other partsof your body.
NOTE
For the sake of safety, it is recom-mended that you avoid driving with themoonroof fully opened.
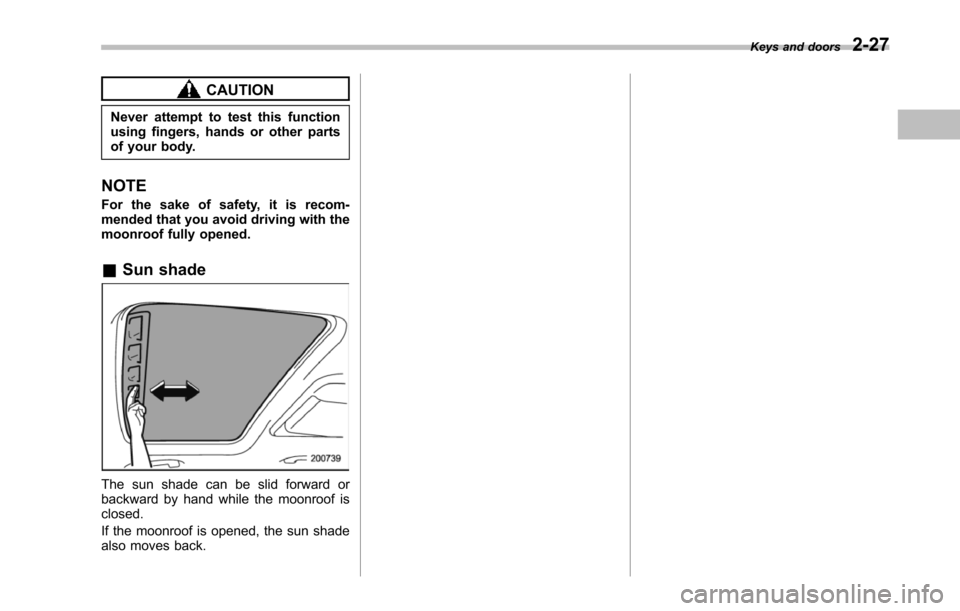
&Sun shade
The sun shade can be slid forward orbackward by hand while the moonroof isclosed.
If the moonroof is opened, the sun shadealso moves back.
Keys and doors2-27
Page 136 of 426
Ignition switch
WARNING
.Never turn the ignition switch to“LOCK”while the vehicle isbeing driven or towed becausethat will lock the steering wheel,preventing steering control. Andwhen the engine is turned off, ittakes a much greater effort thanusual to steer.
.Before leaving the vehicle, al-ways removethe key from theignition switch for safety andnever allow an unattended childto remain in the vehicle. Failureto follow this procedure couldresult in injury to a child orothers. Children could operatethe power windows, the moon-roof or other controls or evenmake the vehicle move.
CAUTION
Do not attach a large key holder orkey case to either key. If it bangedagainst your knees or hands whileyou were driving, it could turn theignition switch from the“ON”posi-
tion to the“Acc”or“LOCK”posi-tion, thereby stopping the engine.Also, if the key is attached to akeyholder or to a large bunch ofother keys, centrifugal force may acton it as the vehicle moves, resultingin unwanted turning of the ignitionswitch.
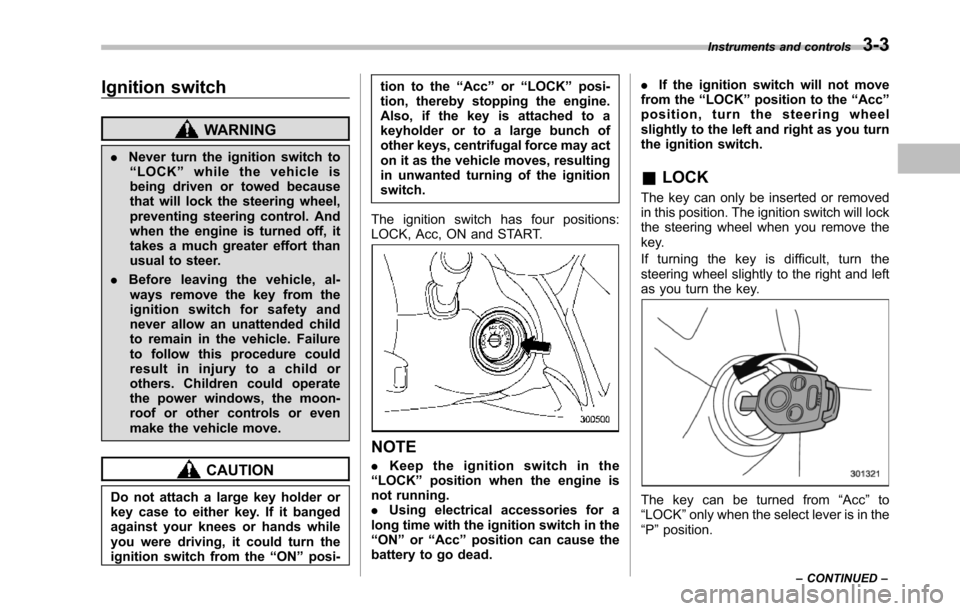
The ignition switch has four positions:LOCK, Acc, ON and START.
NOTE
.Keep the ignition switch in the“LOCK”position when the engine isnot running..Using electrical accessories for along time with the ignition switch in the“ON”or“Acc”position can cause thebattery to go dead.
.If the ignition switch will not movefrom the“LOCK”position to the“Acc”position, turn the steering wheelslightly to the left and right as you turnthe ignition switch.
&LOCK
The key can only be inserted or removedin this position. The ignition switch will lockthe steering wheel when you remove thekey.
If turning the key is difficult, turn thesteering wheel slightly to the right and leftas you turn the key.
The key can be turned from“Acc”to“LOCK”only when the select lever is in the“P”position.
Instruments and controls3-3
–CONTINUED–
Page 238 of 426
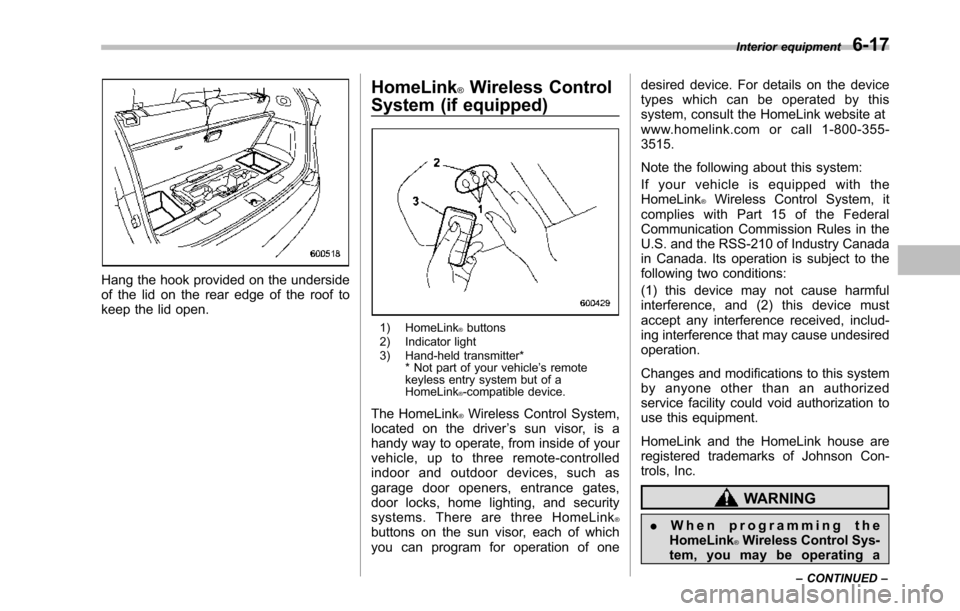
Hang the hook provided on the undersideof the lid on the rear edge of the roof tokeepthe lid open.
HomeLink®Wireless Control
System (if equipped)
1) HomeLink®buttons2) Indicator light3) Hand-held transmitter** Not part of your vehicle’s remotekeyless entry system but of aHomeLink®-compatible device.
The HomeLink®Wireless Control System,located on the driver’s sun visor, is ahandy way to operate, from inside of yourvehicle, up to three remote-controlledindoor and outdoor devices, such asgarage door openers, entrance gates,door locks, home lighting, and securitysystems. There are three HomeLink®buttons on the sun visor, each of whichyou can program for operation of one
desired device. For details on the devicetypes which can be operated by thissystem, consult the HomeLink website atwww.homelink.com or call 1-800-355-3515.
Note the following about this system:
If your vehicle is equipped with theHomeLink®Wireless Control System, itcomplies with Part 15 of the FederalCommunication Commission Rules in theU.S. and the RSS-210 of Industry Canadain Canada. Its operation is subject to thefollowing two conditions:
(1) this device may not cause harmfulinterference, and (2) this device mustaccept any interference received, includ-ing interference that may cause undesiredoperation.
Changes and modifications to this systemby anyone other than an authorizedservice facility could void authorization touse this equipment.
HomeLink and the HomeLink house areregistered trademarks of Johnson Con-trols, Inc.
WARNING
.When programming theHomeLink®Wireless Control Sys-tem, you may be operating a
Interior equipment6-17
–CONTINUED–
Page 280 of 426
New vehicle break-in driving–the first1,000 miles (1,600 km)..................................... 8-2
Fuel economy hints............................................ 8-2
Engine exhaust gas (carbon monoxide)............ 8-2
Catalytic converter.............................................. 8-3
Periodic inspections........................................... 8-4
Driving in foreign countries............................... 8-4
Driving tips for AWD models.............................. 8-4
On-road and off-road driving.............................. 8-6
Winter driving...................................................... 8-8Operation during cold weather............................. 8-8Driving on snowy and icy roads.......................... 8-9Corrosion protection.......................................... 8-10Snow tires......................................................... 8-10Tire chains......................................................... 8-11Rockingthe vehicle............................................ 8-11
Loading your vehicle......................................... 8-12Vehicle capacity weight...................................... 8-12GVWR and GAWR (Gross Vehicle Weight Ratingand Gross Axle Weight Rating)........................ 8-13Roof rails and crossbar (if equipped).................. 8-14Roof molding and crossbar (if equipped)............ 8-17
Trailer hitch (if equipped).................................. 8-18Connecting a trailer........................................... 8-19When you do not tow a trailer ............................ 8-20
Trailer towing..................................................... 8-21Warranties and maintenance.............................. 8-21Maximum load limits.......................................... 8-21Trailer hitches.................................................... 8-24Connecting a trailer........................................... 8-25Trailer towing tips.............................................. 8-26
Driving tips
8