2014 SUBARU TRIBECA AUX
[x] Cancel search: AUXPage 192 of 426
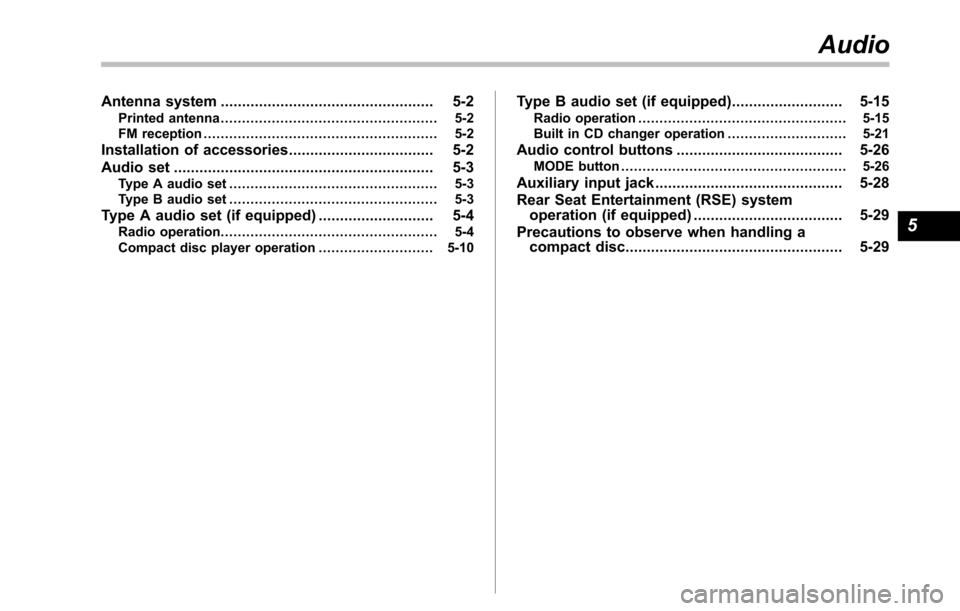
Antenna system.................................................. 5-2Printed antenna................................................... 5-2FM reception....................................................... 5-2
Installation of accessories.................................. 5-2
Audio set............................................................. 5-3Type A audio set................................................. 5-3Type B audio set................................................. 5-3
Type A audio set (if equipped)........................... 5-4Radio operation................................................... 5-4Compact disc player operation........................... 5-10
Type B audio set (if equipped).......................... 5-15Radio operation................................................. 5-15Built in CD changer operation ............................ 5-21
Audio control buttons....................................... 5-26MODE button..................................................... 5-26
Auxiliary input jack............................................ 5-28
Rear Seat Entertainment (RSE) systemoperation (if equipped)................................... 5-29
Precautions to observe when handling acompact disc................................................... 5-29
Audio
5
Page 195 of 426
5-4Audio
Type A audio set (if equipped)
The audio set will operate only when the ignition switch is in the“Acc”or“ON”position.
&Radio operation
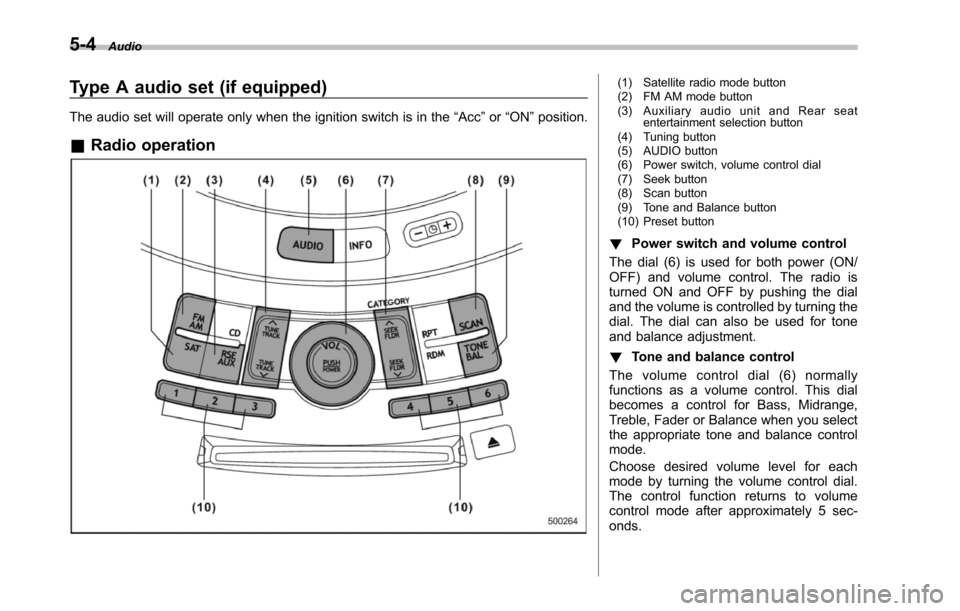
(1) Satellite radio mode button(2) FM AM mode button(3) Auxiliary audio unit and Rear seatentertainment selection button(4) Tuning button(5) AUDIO button(6) Power switch, volume control dial(7) Seek button(8) Scan button(9) Tone and Balance button(10) Preset button
!Power switch and volume control
The dial (6) is used for both power (ON/OFF) and volume control. The radio isturned ON and OFF by pushing the dialand the volume is controlled by turning thedial. The dial can also be used for toneand balance adjustment.
!Tone and balance control
The volume control dial (6) normallyfunctions as a volume control. This dialbecomes a control for Bass, Midrange,Treble, Fader or Balance when you selectthe appropriate tone and balance controlmode.
Choose desired volume level for eachmode by turning the volume control dial.The control function returns to volumecontrol mode after approximately 5 sec-onds.
Page 197 of 426

5-6Audio
Control mode (range of le-vels)
Turn counterclockwise Turn clockwise
Bass control (!6 to +6) For less bass sound For more bass sound
Midrange control(!6 to +6) For less midrange sound For more midrange sound
Treble control (!6 to +6) For less treble sound For more treble sound
Fader control (R9 to F9)To increase rear speaker vo-lume and decrease front speak-er volume
To increase front speaker vo-lume and decrease rear speakervolume
Balance control(L9 to R9)To increase left speaker volumeand decrease right speaker vo-lume
To increase right speaker vo-lume and decrease left speakervolume
Volume control (0 to 40) For less volume For more volume
AUX volume control* (0 to40)For less volumeFor more volume
*: Only when an AUX audio product is connected.
!FM/AM radio
!FM/AM selection button
Push the“FM AM”button (2) when theradio is off to turn on the radio.
Push the“FM AM”button when the radiois on to select FM1, FM2 or AM reception.
!Stereo indicator
The stereo indicator“ST”will illuminatewhen an FM stereo broadcast is received.
!Manual tuning
Press the“”side of the“TUNE TRACK”button(4) to increase the tuning frequencyand press the“”side of the button todecrease it.
Each time the button is pressed, thefrequencyinterval can be changed be-tween 10 kHz in the AM mode and 0.2MHz in the FM mode.
If you hold down the“”side of thebutton, the tuningfrequency will increasecontinuously, and if you hold down the“”side of the button, the tuning frequencywill decrease continuously. Release thebutton when your desired frequency isreached.
Page 200 of 426
buttons (10) to store the channel. If thebutton is pressed briefly, the precedingselection will remain in memory.
NOTE
If the connection between the radio andbattery is broken for any reason suchas vehicle maintenance or radio re-moval, all channels stored in the presetbuttons are cleared. If this occurs, it isnecessary to reset the preset buttons.
!Display selection
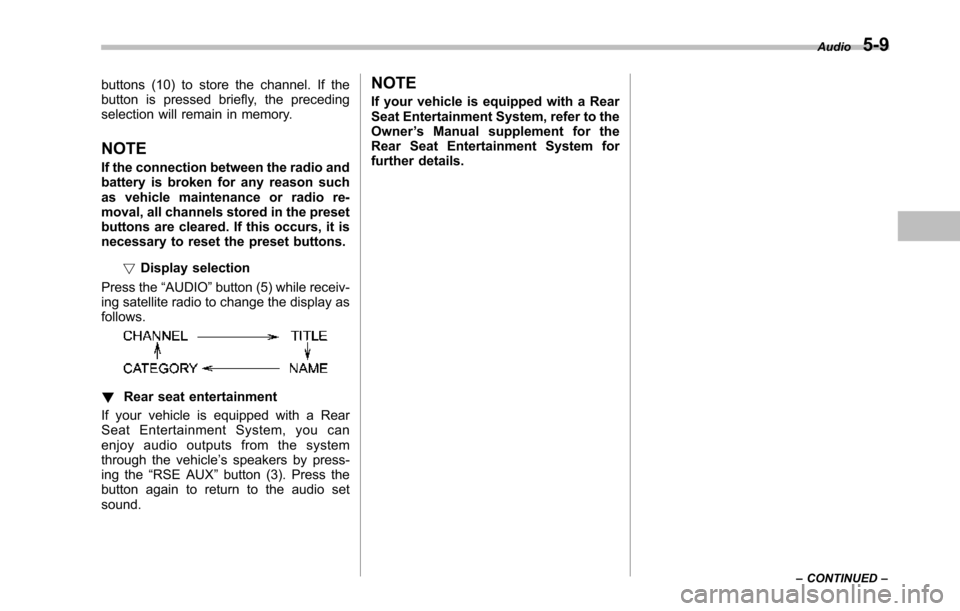
Press the“AUDIO”button (5) while receiv-ing satellite radio to change the display asfollows.
!Rear seat entertainment
If your vehicle is equipped with a RearSeat Entertainment System, you canenjoy audio outputs from the systemthrough the vehicle’s speakers by press-ing the“RSE AUX”button (3). Press thebutton again to return to the audio setsound.
NOTE
If your vehicle is equipped with a RearSeat Entertainment System, refer to theOwner’s Manual supplement for theRear Seat Entertainment System forfurther details.
Audio5-9
–CONTINUED–
Page 203 of 426
5-12Audio
!Repeating
!To repeat the currently playingtrack
To repeat a track, briefly press the“RPT”button (6) while the track is playing. Thedisplay will show“RPT”, and the track willbe repeated.
To cancel the track repeat-play mode:
Press the“RPT”button once (non-MP3disc)
Press the“RPT”button twice (MP3 disc)The“RPT”indication will turn off, and thenormal playback mode will be resumed.
NOTE
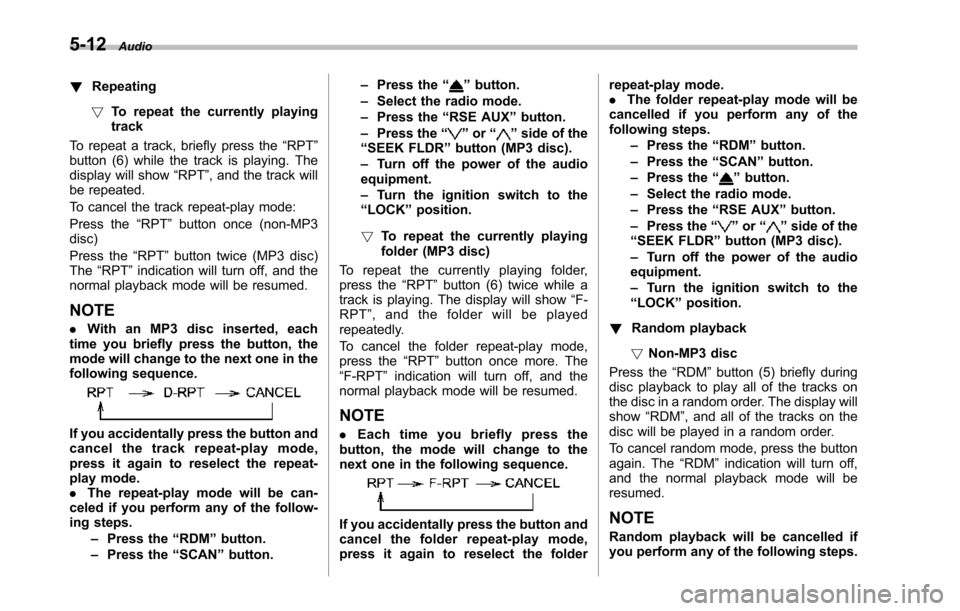
.With an MP3 disc inserted, eachtime you briefly press the button, themode willchange to the next one in thefollowing sequence.
If you accidentally press the button andcancel the track repeat-play mode,press it again to reselect the repeat-play mode..The repeat-play mode will be can-celed if you perform any of the follow-ing steps.–Press the“RDM”button.–Press the“SCAN”button.
–Press the“”button.–Select the radio mode.–Press the“RSE AUX”button.–Press the“”or“”side of the“SEEK FLDR”button (MP3 disc).–Turn off the power of the audioequipment.–Turn the ignition switch to the“LOCK”position.
!To repeat the currently playingfolder (MP3 disc)
To repeat the currently playing folder,press the“RPT”button (6) twice while atrack is playing. The display will show“F-RPT”,andthefolderwillbeplayedrepeatedly.
To cancel the folder repeat-play mode,press the“RPT”button once more. The“F-RPT”indication will turn off, and thenormal playback mode will be resumed.
NOTE
.Each time you briefly press thebutton, the mode will change to thenext one in the following sequence.
If you accidentally press the button andcancel the folder repeat-play mode,press it again to reselect the folder
repeat-play mode..The folder repeat-play mode will becancelled if you perform any of thefollowing steps.–Press the“RDM”button.–Press the“SCAN”button.–Press the“”button.–Select the radio mode.–Press the“RSE AUX”button.–Press the“”or“”side of the“SEEK FLDR”button (MP3 disc).–Turn off the power of the audioequipment.–Turn the ignition switch to the“LOCK”position.
!Random playback
!Non-MP3 disc
Press the“RDM”button (5) briefly duringdiscplayback to play all of the tracks onthe disc in a random order. The display willshow“RDM”, and all of the tracks on thedisc will be played in a random order.
To cancel random mode, press the buttonagain. The“RDM”indication will turn off,and the normal playback mode will beresumed.
NOTE
Random playback will be cancelled ifyou performany of the following steps.
Page 204 of 426

.Press the“RPT”button..Press the“SCAN”button..Press the“”button..Select the radio mode..Press the“RSE AUX”button..Press the“”or“”side of the“SEEK FLDR”button..Tu r n o f f t h e p o w e r o f t h e a u d i oequipment..Tu r n t h e i g n i t i o n s w i t c h t o t h e“LOCK”position.
!MP3 disc
Press the“RDM”button (5) during discplayback to play all of the tracks in thefolder currently being played in randomorder. Press the“RDM”button again toplay all of the tracks on the disc in randomorder. The display will show“RDM”duringthe random mode.
To cancel the random mode, press the“RDM”button during“in-disc”randomplayback. The“RDM”indication will turnoff, and the normal playback mode will beresumed.
NOTE
.Each time you briefly press thebutton, the mode will change to thenext one in the following sequence.
If you accidentally press the button andcancel the random mode, press it againto reselect the random mode..Random playback will be cancelledif you perform any of the followingsteps.–Press the“RPT”button.–Press the“SCAN”button.–Press the“”button.–Select the radiomode.–Press the“RSE AUX”button.–Press the“”or“”side of the“SEEK FLDR”button.–Turn off the power of the audioequipment.–Turn the ignition switch to the“LOCK”position.
!Scan
The scan mode lets you listen to the first10 seconds of each track on the disc/folder in succession. Press the“SCAN”button (7) to start scanning through alltracks upward beginning with the trackfollowing the currently selected one. Afterall tracks on the disc/folder has been
scanned, normal playback mode is re-stored.
To cancel a scan, press the button again.
NOTE
The scan mode will be cancelled if youperform any of the following opera-tions.
.Press the“RPT”button..Press the“RDM”button..Press the“”button..Press the“”or“”side of the“TUNE TRACK”button..Press the“”or“”side of the“SEEK FLDR”button (MP3 disc)..Select the radio mode..Press the“RSE AUX”button..Tu r n o f f t h e p o w e r o f t h e a u d i oequipment..Tu r n t h e i g n i t i o n s w i t c h t o t h e“LOCK”position.
!To eject a disc from the player
Whena disc is being played back or whena disc is in the player, press the“”button(8). The disc will be ejected.
NOTE
.Avoid driving the vehicle with a CDsticking out, because vibration mightmake it fall out..If the disc is left ejected for more
Audio5-13
–CONTINUED–
Page 206 of 426
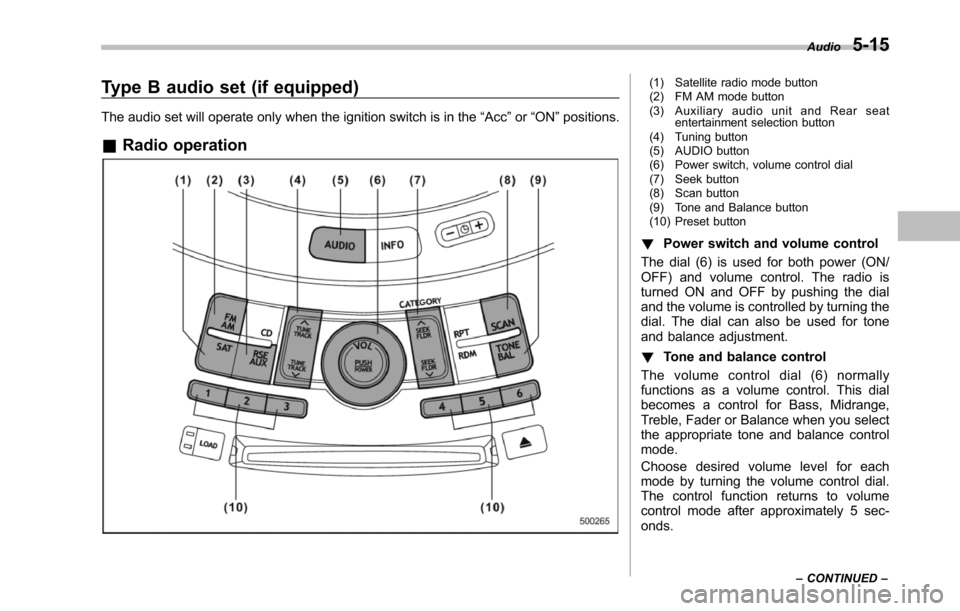
Type B audio set (if equipped)
The audio set will operate only when the ignition switch is in the“Acc”or“ON”positions.
&Radio operation
(1) Satellite radio mode button(2) FM AM mode button(3) Auxiliary audio unit and Rear seatentertainment selection button(4) Tuning button(5) AUDIO button(6) Power switch, volume control dial(7) Seek button(8) Scan button(9) Tone and Balance button(10) Preset button
!Power switch and volume control
The dial (6) is used for both power (ON/OFF) and volume control. The radio isturned ON and OFF by pushing the dialand the volume is controlled by turning thedial. The dial can also be used for toneand balance adjustment.
!Tone and balance control
The volume control dial (6) normallyfunctions as a volume control. This dialbecomes a control for Bass, Midrange,Treble, Fader or Balance when you selectthe appropriate tone and balance controlmode.
Choose desired volume level for eachmode by turning the volume control dial.The control function returns to volumecontrol mode after approximately 5 sec-onds.
Audio5-15
–CONTINUED–
Page 208 of 426
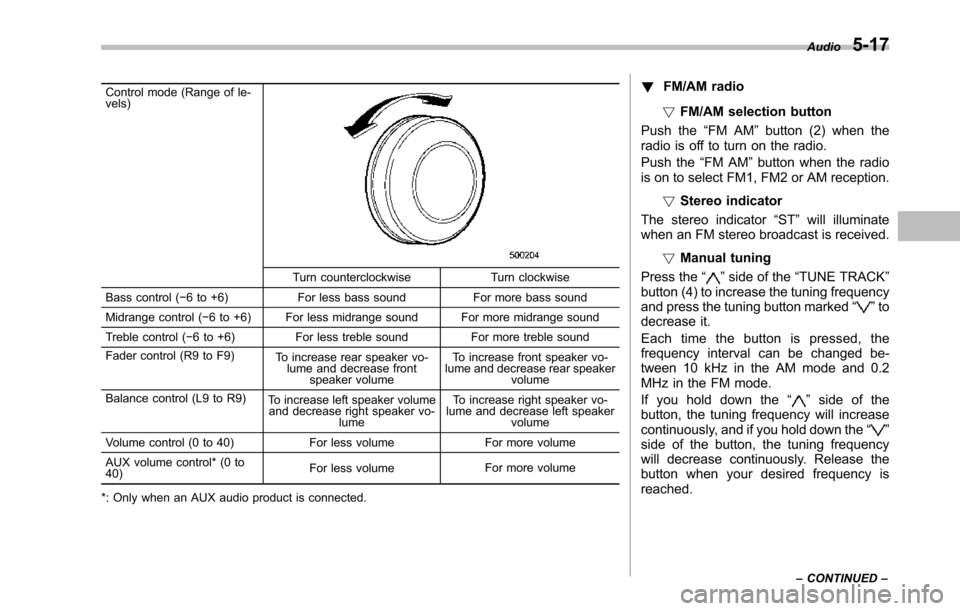
Control mode (Range of le-vels)
Turn counterclockwise Turn clockwise
Bass control (!6 to +6) For less bass sound For more bass sound
Midrange control (!6 to +6) For less midrange sound For more midrange sound
Treble control (!6 to +6) For less treble sound For more treble sound
Fader control (R9 to F9)To increase rear speaker vo-lume and decrease frontspeaker volume
To increase front speaker vo-lume and decrease rear speakervolume
Balance control (L9 to R9)To increase left speaker volumeand decrease right speaker vo-lume
To increase right speaker vo-lume and decrease left speakervolume
Volume control (0 to 40) For less volume For more volume
AUX volumecontrol* (0 to40)For less volumeFor more volume
*: Only when an AUX audio product is connected.
!FM/AM radio
!FM/AM selection button
Push the“FM AM”button (2) when theradio is off to turn on the radio.
Push the“FM AM”button when the radiois on to select FM1, FM2 or AM reception.
!Stereo indicator
The stereo indicator“ST”will illuminatewhen an FM stereo broadcast is received.
!Manual tuning
Press the“”side of the“TUNE TRACK”button (4) to increase the tuning frequencyand pressthe tuning button marked“”todecrease it.
Each time the button is pressed, thefrequency interval can be changed be-tween 10 kHz in the AM mode and 0.2MHz in the FM mode.
If you hold down the“”side of thebutton, the tuning frequency will increasecontinuously, and if you hold down the“”side of the button, the tuning frequencywill decreasecontinuously. Release thebutton when your desired frequency isreached.
Audio5-17
–CONTINUED–