2014 SUBARU TRIBECA wiring
[x] Cancel search: wiringPage 59 of 426

1-28Seat, seatbelt and SRS airbags
viceable parts. For required ser-vicing of front seatbelt retractorsequipped with seatbelt preten-sioners, see your nearestSUBARU dealer.
.When discarding front seatbeltretractor assemblies or scrap-ping the entire vehicle due tocollision damage or for otherreasons, consult your SUBARUdealer.
&System monitors
A diagnostic system continually monitorsthe readiness of the seatbelt pretensionerwhile the vehicle is being driven. Theseatbeltpretensioners share the controlmodule with the airbag system. Therefore,if any malfunction occurs in a seatbeltpretensioner, the SRS airbag systemwarning light will illuminate. For details,refer to“SRS airbag system monitors”F1-71.
&System servicing
WARNING
.When discarding a seatbelt re-tractor assembly or scrappingthe entire vehicle damaged by a
collision, consult your SUBARUdealer.
.Tampering with or disconnectingthe system’s wiring could resultin accidental activation of theseatbelt pretensioner and/or air-bag or could make the systeminoperative, which may result inserious injury. Do not use elec-trical test equipment on anycircuit related to the seatbeltpretensioner and airbag sys-tems. For required servicing ofthe seatbelt pretensioner, seeyour nearest SUBARU dealer.
CAUTION
The front sub sensors are locatedon both sides of the radiator panel,and the airbag control module in-cludingthe impact sensors is lo-cated under the center console. Ifyou need service or repair in thoseareas or near the front seatbeltretractors, we recommend that youhave an authorized SUBARU dealerperform the work.
NOTE
If the front part of the vehicle isdamaged in an accident to the extentthat the seatbelt pretensioner does notoperate, contact your SUBARU dealeras soon as possible.
&Precautions against vehicle
modification
Always consult your SUBARU dealer ifyou want to install any accessory parts toyour vehicle.
CAUTION
Do not perform any of the followingmodifications. Such modificationscan interfere with proper operationof the seatbelt pretensioners.
.Attachment of any equipment(bush bar, winches, snow plow,skid plate, etc.)other than genu-ine SUBARU accessory parts tothe front end.
.Modification of the suspensionsystem or front end structure.
.Installation of a tire of differentsize and construction from thetires specified on the vehicleplacard attached to the doorpillar or specified for individual
Page 79 of 426

1-48Seat, seatbelt and SRS airbags
!Components
1) Airbag control module (including impactand rollover sensors)2) Frontal airbag module (driver’s side)3) Frontal airbag module (front passenger’sside)4) Front sub sensor (left-hand side)
5) Front sub sensor (right-hand side)6) Side airbag module (driver’s side)7) Side airbag module (front passenger’sside)8) Side airbag sensor (center pillar left-handside)
9) Side airbag sensor (center pillar right-hand side)10) Airbag wiring11) Seatbelt pretensioner (driver’s side)12) Seatbelt pretensioner (front passenger’sside)13) Curtain airbag sensor (rear wheel houseright-hand side)14) Curtain airbag sensor (rear wheel houseleft-hand side)15) Curtain airbag module (right-hand side)16) Curtain airbag module (left-hand side)17) Seatbelt buckle switch (front passenger’sside)18) Front passenger’s seatbelt tension sen-sor19) Front passenger’s occupant detectionsystem weight sensor20) Front passenger’s occupant detectioncontrol module21) Front passenger’s frontal airbag ON andOFF indicator22) SRS airbag system warning light23) Satellite safing sensor (under the sec-ond-row center seat)
Page 102 of 426
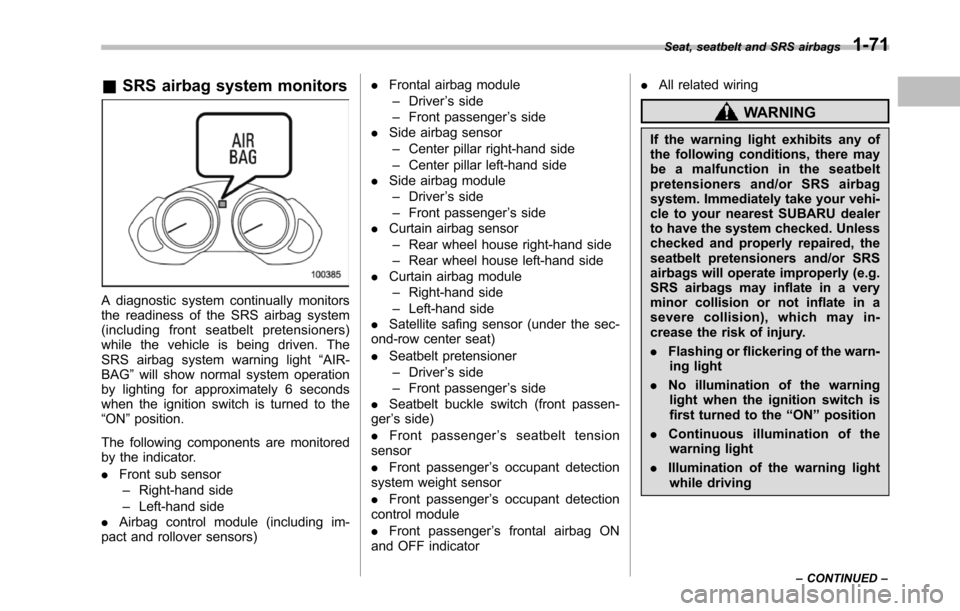
&SRS airbag system monitors
A diagnostic system continually monitorsthe readiness of the SRS airbag system(including front seatbelt pretensioners)while the vehicle is being driven. TheSRS airbag system warning light“AIR-BAG”will show normal system operationby lighting for approximately 6 secondswhen the ignition switch is turned to the“ON”position.
The following components are monitoredby the indicator.
.Front sub sensor–Right-hand side–Left-hand side.Airbag control module (including im-pact and rolloversensors)
.Frontal airbag module–Driver’s side–Front passenger’s side.Side airbag sensor–Center pillar right-hand side–Center pillar left-hand side.Side airbag module–Driver’s side–Front passenger’s side.Curtain airbag sensor–Rear wheel house right-hand side–Rear wheel house left-hand side.Curtain airbag module–Right-hand side–Left-hand side.Satellite safing sensor (under the sec-ond-row center seat)
.Seatbelt pretensioner–Driver’s side–Front passenger’s side.Seatbelt buckleswitch (front passen-ger’s side)
.Front passenger’sseatbelttensionsensor
.Front passenger’s occupant detectionsystem weight sensor
.Front passenger’s occupant detectioncontrolmodule
.Front passenger’s frontal airbag ONand OFF indicator
.All related wiring
WARNING
If the warning light exhibits any ofthe following conditions, there maybe a malfunction in the seatbeltpretensioners and/or SRS airbagsystem. Immediately take your vehi-cle to your nearest SUBARU dealerto have the system checked. Unlesschecked and properly repaired, theseatbelt pretensioners and/or SRSairbags will operate improperly (e.g.SRS airbags may inflate in a veryminor collision or not inflate in asevere collision), which may in-crease the risk of injury.
.Flashing or flickering of the warn-ing light
.No illumination of the warninglight when the ignition switch isfirst turned to the“ON”position
.Continuous illumination of thewarning light
.Illumination of the warning lightwhile driving
Seat, seatbelt and SRS airbags1-71
–CONTINUED–
Page 103 of 426
1-72Seat, seatbelt and SRS airbags
&SRS airbag system servicing
WARNING
.When discarding an airbag mod-ule or scrapping the entire vehi-cle damaged by a collision, con-sult your SUBARU dealer.
.The SRS airbag has no user-serviceable parts. Do not useelectrical test equipment on anycircuit related to the SRS airbagsystem. For required servicing ofthe SRS airbag, consult yournearest SUBARU dealer. Tamper-ing with or disconnecting thesystem’s wiring could result inaccidental inflation of the SRSairbag or could make the systeminoperative, which may result inserious injury.
CAUTION
If you need service or repair in areasindicated in the following list, havethe work performed by an author-ized SUBARU dealer. The SRS air-bag control module, impact sensorsand airbag modules are stored inthese areas.
.Under the center console
.Inside each front fender
.Steering wheel and column andnearby areas
.Top of the dashboard on frontpassenger’ssideandnearbyareas
.Each front seat and nearby area
.Inside each center pillar
.In each roof side (from the frontpillar to a point over the second-row seat)
.Between the second-row seatcushion and rear wheel houseon each side
.Under the second-row centerseat
In the event that the SRS airbag isdeployed, replacement of the systemshould be performed only by an author-ized SUBARU dealer. When the compo-nents of the SRS airbag system arereplaced, use only genuine SUBARUparts.
NOTE
In the following cases, contact yourSUBARU dealer as soon as possible.
.The front part of the vehicle was
involved in an accident in which onlythe driver’s SRS frontal airbag or bothdriver’sandfrontpassenger’sSRSfrontal airbags did not deploy..The pad of the steering wheel, thecover over the front passenger’s SRSfrontal airbag, or either roof side (fromthe front pillar to a point over thesecond-row seat) is scratched,cracked, or otherwise damaged..Center pillar, rear wheel house orrearfloor pan, or an area near theseparts, was involved in an accident inwhich the SRS side airbag and SRScurtain airbag did not deploy..The fabric or leather of either frontseatback is cut, frayed, or otherwisedamaged..The rear part of the vehicle wasinvolved in an accident in which noSRS airbag was deployed.
&Precautions against vehicle
modification
WARNING
To avoid accidental activation of thesystem or rendering the systeminoperative, which may result inserious injury, no modificationsshould be made to any components
Page 104 of 426
or wiring of the SRS airbag system.
This includes following modifica-tions.
.Installation of custom steeringwheels
.Attachment of additional trimmaterials to the dashboard
.Installation of custom seats
.Replacement of seat fabric orleather
.Installation of additional fabric orleather on the front seat
.Attachment of a hands-free mi-crophone or any other accessoryto a front pillar, a center pillar, arear pillar, the windshield, a sidewindow, an assist grip, or anyother cabin surface that would benear a deploying SRS curtainairbag.
.Installation of additional electri-cal/electronic equipment such asa mobile two-way radio on ornear the SRS airbag systemcomponents and/or wiring is notadvisable. This could interferewith proper operation of theSRS airbag system.
CAUTION
Do not perform any of the followingmodifications. Such modificationscan interfere with proper operationof the SRS airbag system.
.Attachment of any equipment(bush bar, winches, snow plow,skid plate, etc.) other than genu-ine SUBARU accessory parts.
.Modificationof the suspensionsystem or front end structure.
.Installation of a tire of differentsize and construction from thetires specified on the vehicleplacardattached to the driver’sdoor pillar or specified for indivi-dual vehicle models in this Own-er’s Manual.
.Attachment of any equipment(side steps or side sill protectors,etc.) other than genuine SUBARUaccessory parts to the side body.
Always consult your SUBARU dealer ifyou want to install any accessory parts onyour vehicle.
Seat, seatbelt and SRS airbags1-73
Page 243 of 426
6-22Interior equipment
the surrounding area with youreyes and mirrors, and movebackward at a slow speed. Mov-ing backward only by checkingthe rear view image from thecamera could cause an accident.
.Do not disassemble or modify thecamera, switch or wiring. Ifsmoke comes out or you smella strange odor, stop using therear view camera immediately.Contact your SUBARU dealerfor an inspection. Continued usemay result in accident, fire orelectric shock.
CAUTION
.If your vehicle is washed with ahigh-pressure washer, do notallow water to contact the cameradirectly. Entry of water in thecamera lens may result in con-densation, malfunction, fire orelectric shock.
.Since the camera is a precisiondevice, do not subject it to strongimpacts. Otherwise, malfunction,fire or electric shock may occur.
.If mud or snow sticks to or isfrozen on the camera, you must
be very careful removing it.Otherwise, damage done to thecamera may cause a fire orelectric shock. Pour water orlukewarm water over the camerato remove mud and ice, and wipeit with a soft, dry cloth.
.Do not put a flame close to thecamera or wiring. Otherwise, da-mage or fire may occur.
.When replacing the fuse, be sureto use a fuse with the specifiedrating. Use of a fuse with adifferent rating may result in amalfunction.
.If the rear view camera is used fora long time while the engine isnot operated, the battery maybecome completely discharged.
NOTE
.Do not wipe the camera with alcohol,benzine or paint thinner. Otherwise,discoloration may occur. To removecontamination, wipe the camera with acloth moistened with a diluted neutraldetergent and then wipe it with a soft,dry cloth..When waxing the vehicle, be carefulnot to apply the wax to the camera. If itcomes in contact with the camera,
moisten a clean cloth with a dilutedneutral detergent to remove the wax..The camera lens has hard coating tohelp prevent scratches. However, whenwashing the vehicle or cleaning thecamera lens, be careful not to scratchthe camera lens. Do not use a washingbrush directly on the camera lens. Themonitorscreen may be adversely af-fected..Strong light shined on the cameralens may develop white light stripesaround the light source. This is not amalfunction..Under the fluorescent light, the dis-play may flicker. However, this is not amalfunction..The image of the rear view cameramay be slightly different from theactual color of the objects.
&How to use the rear view
camera
When the select lever is set to“R”, the rearview camera automatically displays therear view image from the vehicle. Whenthe lever is set to other positions, theimage before setting to“R”is displayed.
1. Set the ignition switch to“ON”.
2. Set the select lever to“R”.
Page 305 of 426
8-26Driving tips
blind spots occur with the vehicle’s stan-dard side mirrors, use towing mirrors thatconform with Federal, state/province and/or other applicable regulations.
!Trailer lights
CAUTION
Direct splicing or other improperconnection of trailer lights maydamage your vehicle’selectricalsystem and cause a malfunction ofyour vehicle’s lighting system.
Connection of trailer lights to your vehi-cle’s electrical system requires modifica-tions to the vehicle’s lighting circuit toincrease its capacity and accommodatewiring changes. To ensure the trailer lightsare connected properly, please consultyour SUBARU dealer. Check for properoperation of the turn signals, stop lightsand parking lights each time you hitch up.
!Tires
WARNING
Never tow a trailer when the tem-porary spare tire is used. The tem-porary spare tire is not designed tosustain the towing load. Use of thetemporary spare tire when towing
can result in failure of the spare tireand/or less stability of the vehicle.
Make sure that all the tires on your vehicleare properly inflated. Refer to“Tires”F12-8.
Trailer tire condition, size, load rating andproper inflation pressure should be inaccordance with the trailer manufacturer’sspecifications.
In the event your vehicle gets a flat tirewhen towing a trailer, ask a commercialroad service to repair the flat tire.
If you carry a regular size spare tire in yourvehicle or trailer as a precaution againstgetting a flat tire, be sure that the sparetire is firmly secured.
&Trailer towing tips
CAUTION
.Never exceed 45 mph (72 km/h)when towing a trailer in hillycountry on hot days.
.When towing a trailer, steering,stability, stopping distance andbraking performance will be dif-ferent from normal operation. Forsafety’s sake, you should employ
extra caution when towing atrailer and you should neverspeed. You should also keep thefollowing tips in mind:
!Before starting out on a trip
.Check that the vehicle and vehicle-to-hitch mounting are in good condition. Ifany problems are apparent, do not tow thetrailer.
.Check that the vehicle sits horizontallywith the trailer attached. If the vehicle istippedsharply up at the front and down atthe rear, check the total trailer weight,GVW, GAWs and tongue load again, thenconfirm that the load and its distributionare acceptable.
.Check that the tire pressures arecorrect.
.Checkthat the vehicle and trailer areconnected properly. Confirm that–the trailer tongue is connectedproperly to the hitch ball.–the trailer lights connector is con-nected properly and trailer’s stop lightsilluminate when the vehicle’s brakepedal is pressed, and that the trailer’sturn signal lights flash when thevehicle’s turn signal lever is operated.–the safety chains are connectedproperly.
Page 337 of 426
11-4Maintenance and service
guard against getting oil or fluidsin your eyes. If something doesget in your eyes, thoroughlywash them out with clean water.
.Do not tamper with the wiring ofthe SRS airbag system or seat-belt pretensioner system, or at-tempt to take its connectorsapart, as that may activate thesystem or it can render it inop-erative. NEVER use a circuittester for these wiring. If yourSRS airbag or seatbelt preten-sioner needs service, consultyour nearest SUBARU dealer.
&Before checking or servicing
in the engine compartment
WARNING
.Always stop the engine and setthe parking brake firmly to pre-vent the vehicle from moving.
.Always let the engine cool down.Engine parts become very hotwhen the engine is running andremain hot for some time afterthe engine is stopped.
.Do not spill engine oil, enginecoolant, brake fluid or any other
fluid on hot engine components.This may cause a fire.
.Always remove the key from theignition switch. When the ignitionswitch is in the“ON”position,the cooling fan may operatesuddenly even when the engineis stopped.
&When you do checking or
servicing in the engine com-
partment while the engine is
running
WARNING
A running engine can be dangerous.Keep your fingers, hands, clothing,hair and tools away from the coolingfan, belts and any other movingengine parts. Removing rings,watches and ties is advisable.
Engine hood
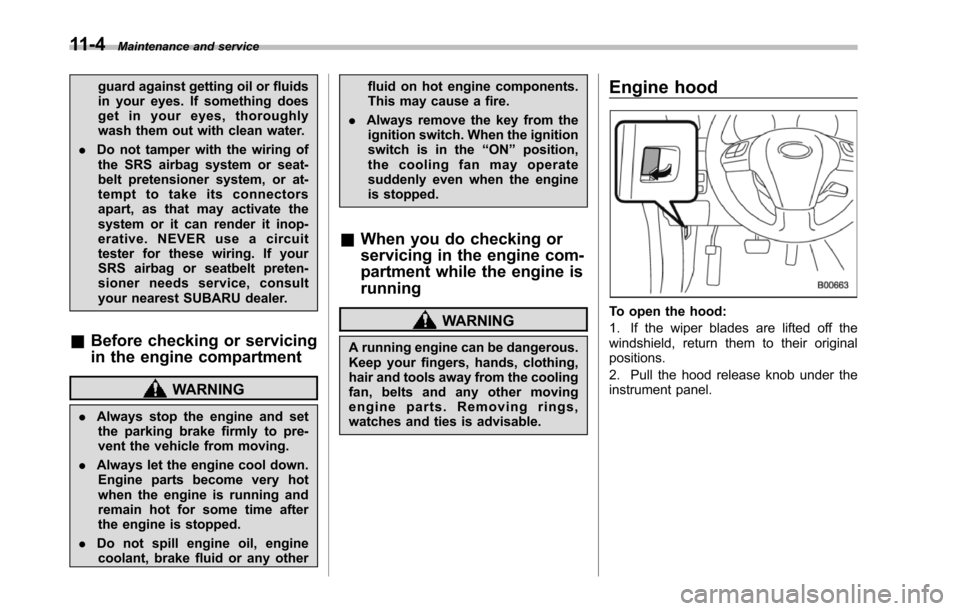
To open the hood:
1. If the wiper blades are lifted off thewindshield, return them to their originalpositions.
2. Pull the hood release knob under theinstrument panel.